Fought At The Gallery Maze: The Passageways
1662 days 8 hours 47 minutes ago
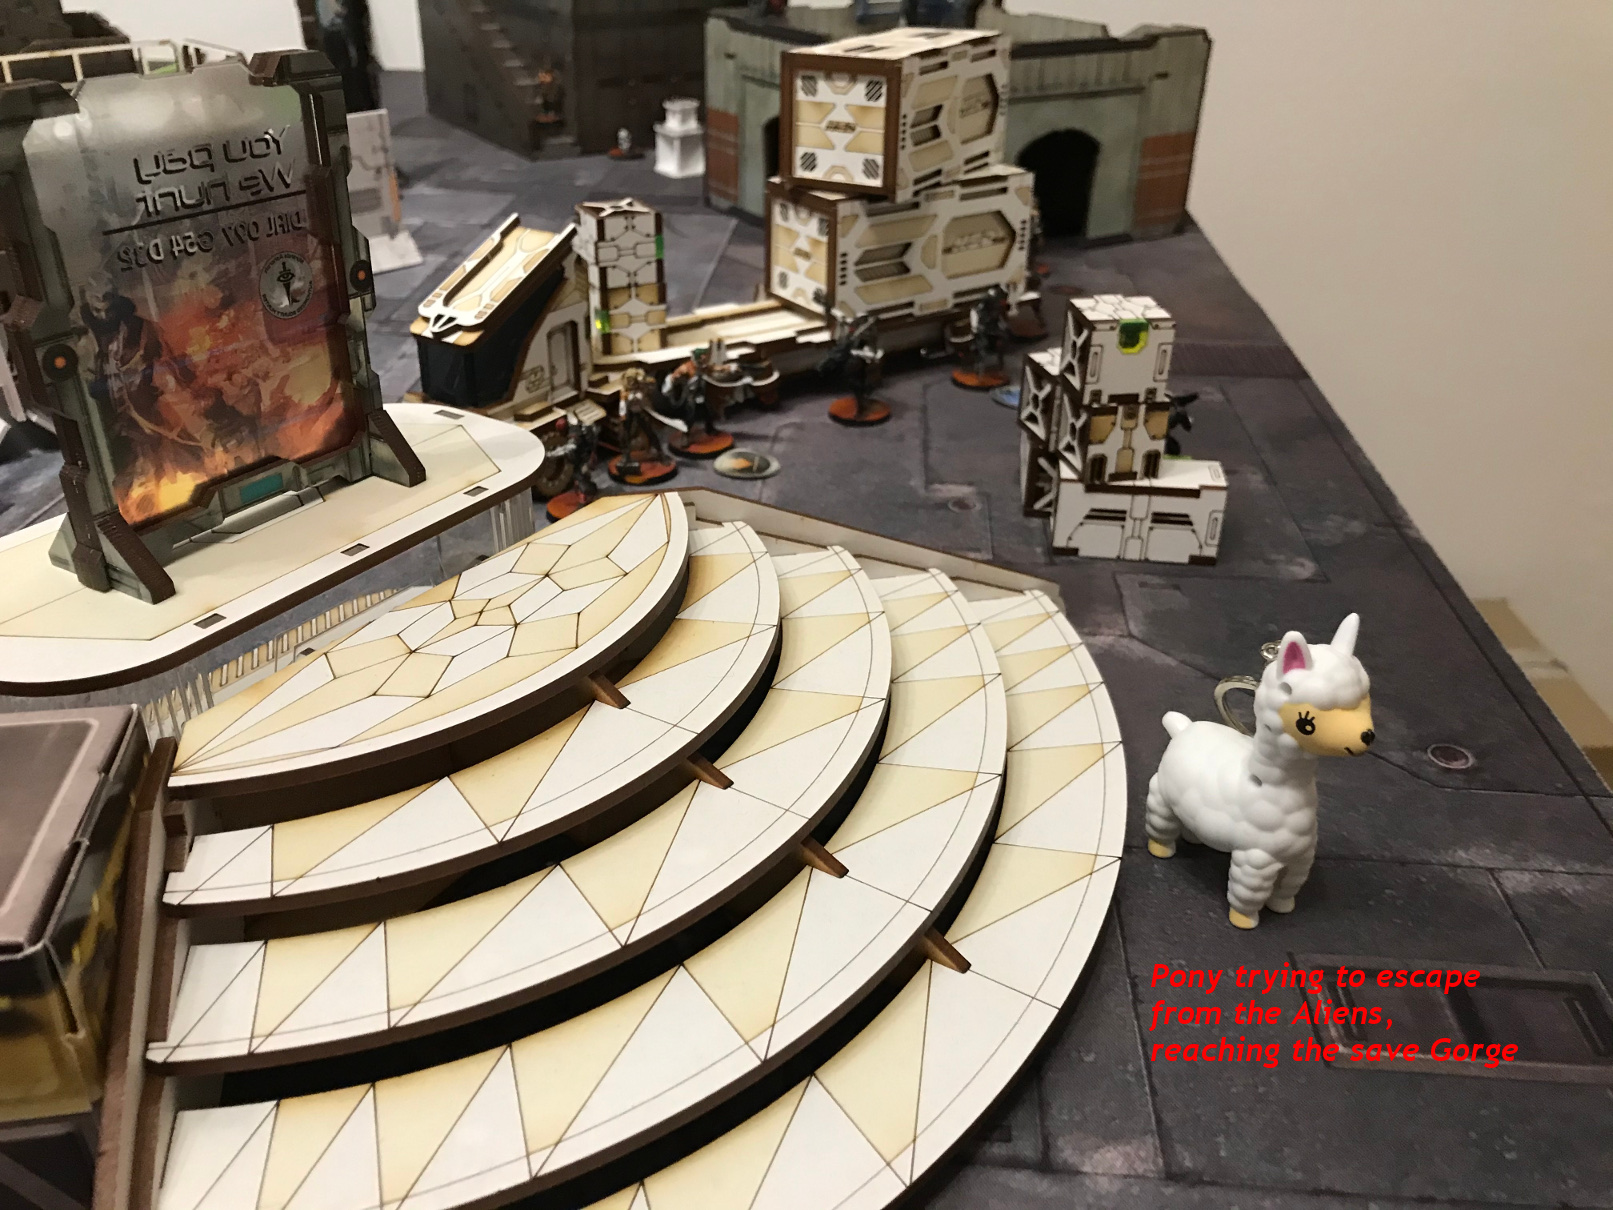
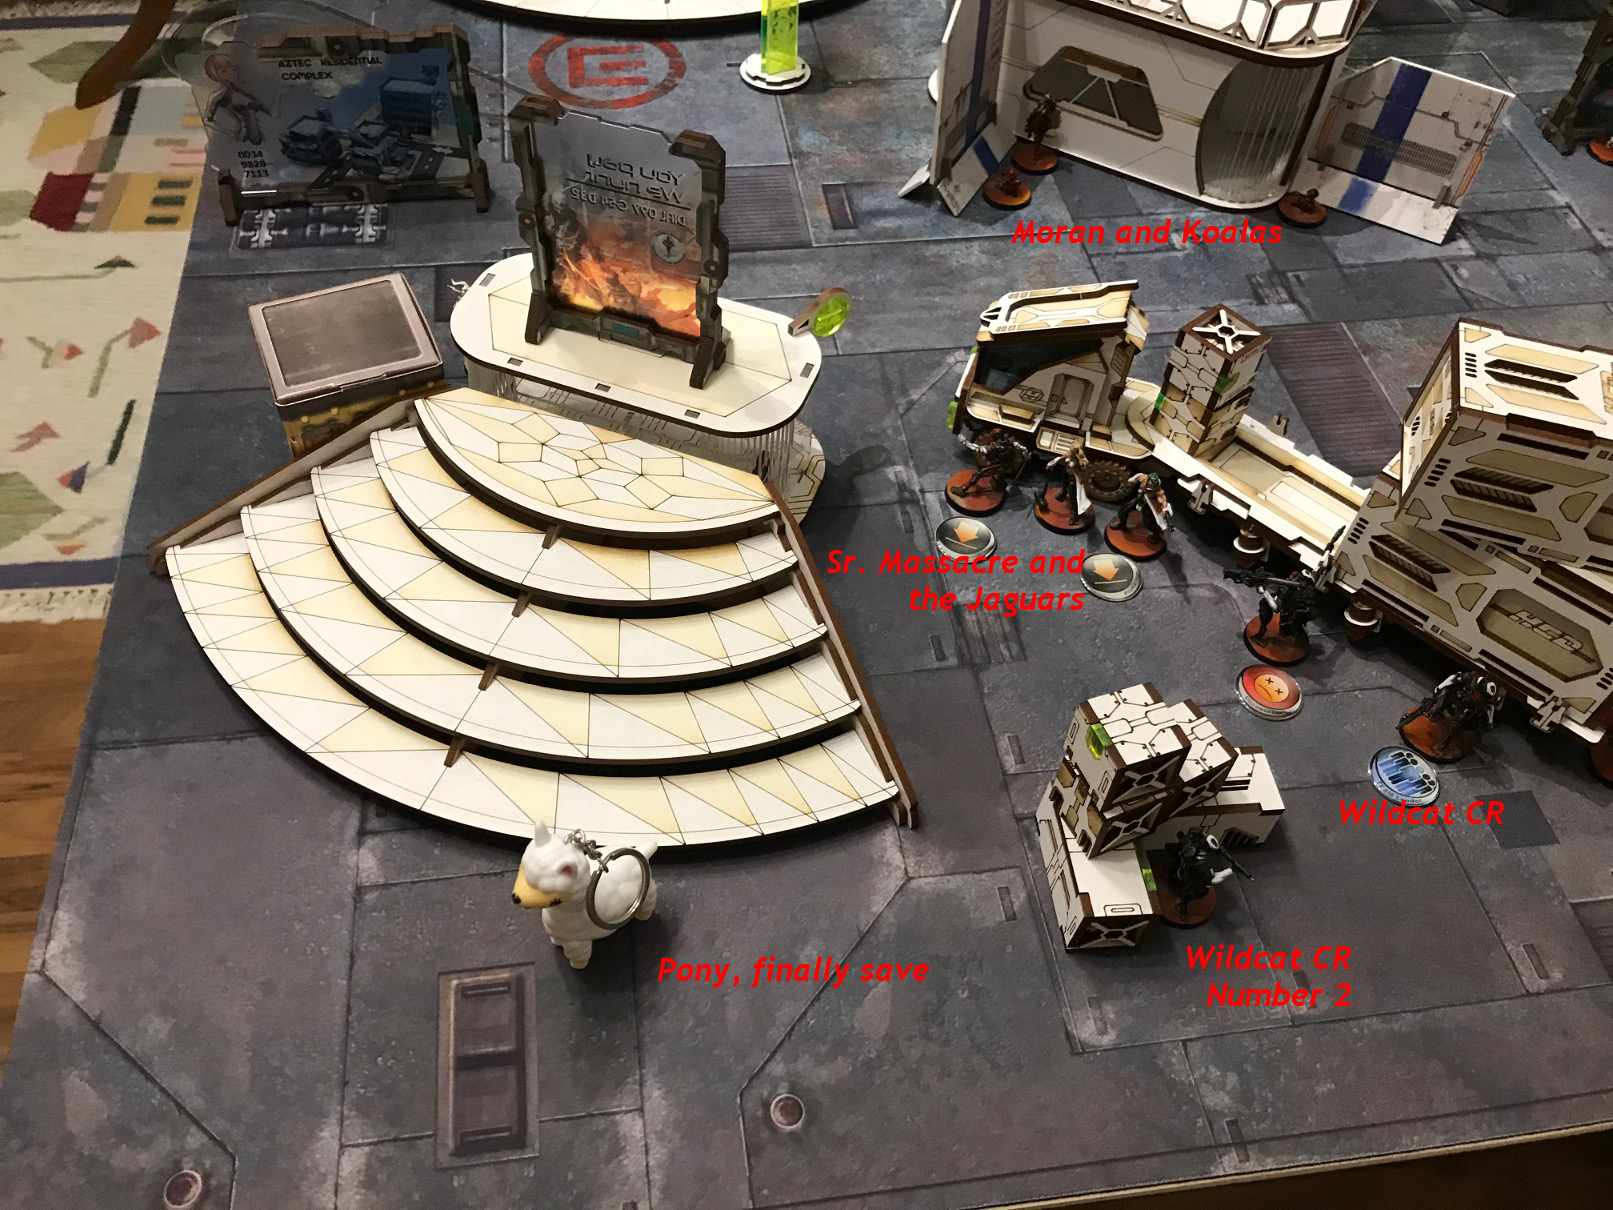
Getting the Pony out of the Maze
300 POINTSHappy that they were able to rescue the Pony from the Shasvastii that are still hiding (more roaming) in the Gallery Maze, the small Nomads Squad was about to go home to the Gorge. But just when they wanted to start, an Onyx Hit Squad appeared and tried to bring the poor Pony back to the Shavastii in the Maze.
So the Nomads Squad, only slightly different from the last one, had to defend the poor Pony against the Onyx assault.
Since they wanted to bring something back, the Onyx were hunting for Supplies …
Onyx won the lieutenant roll and chose 1st turn.
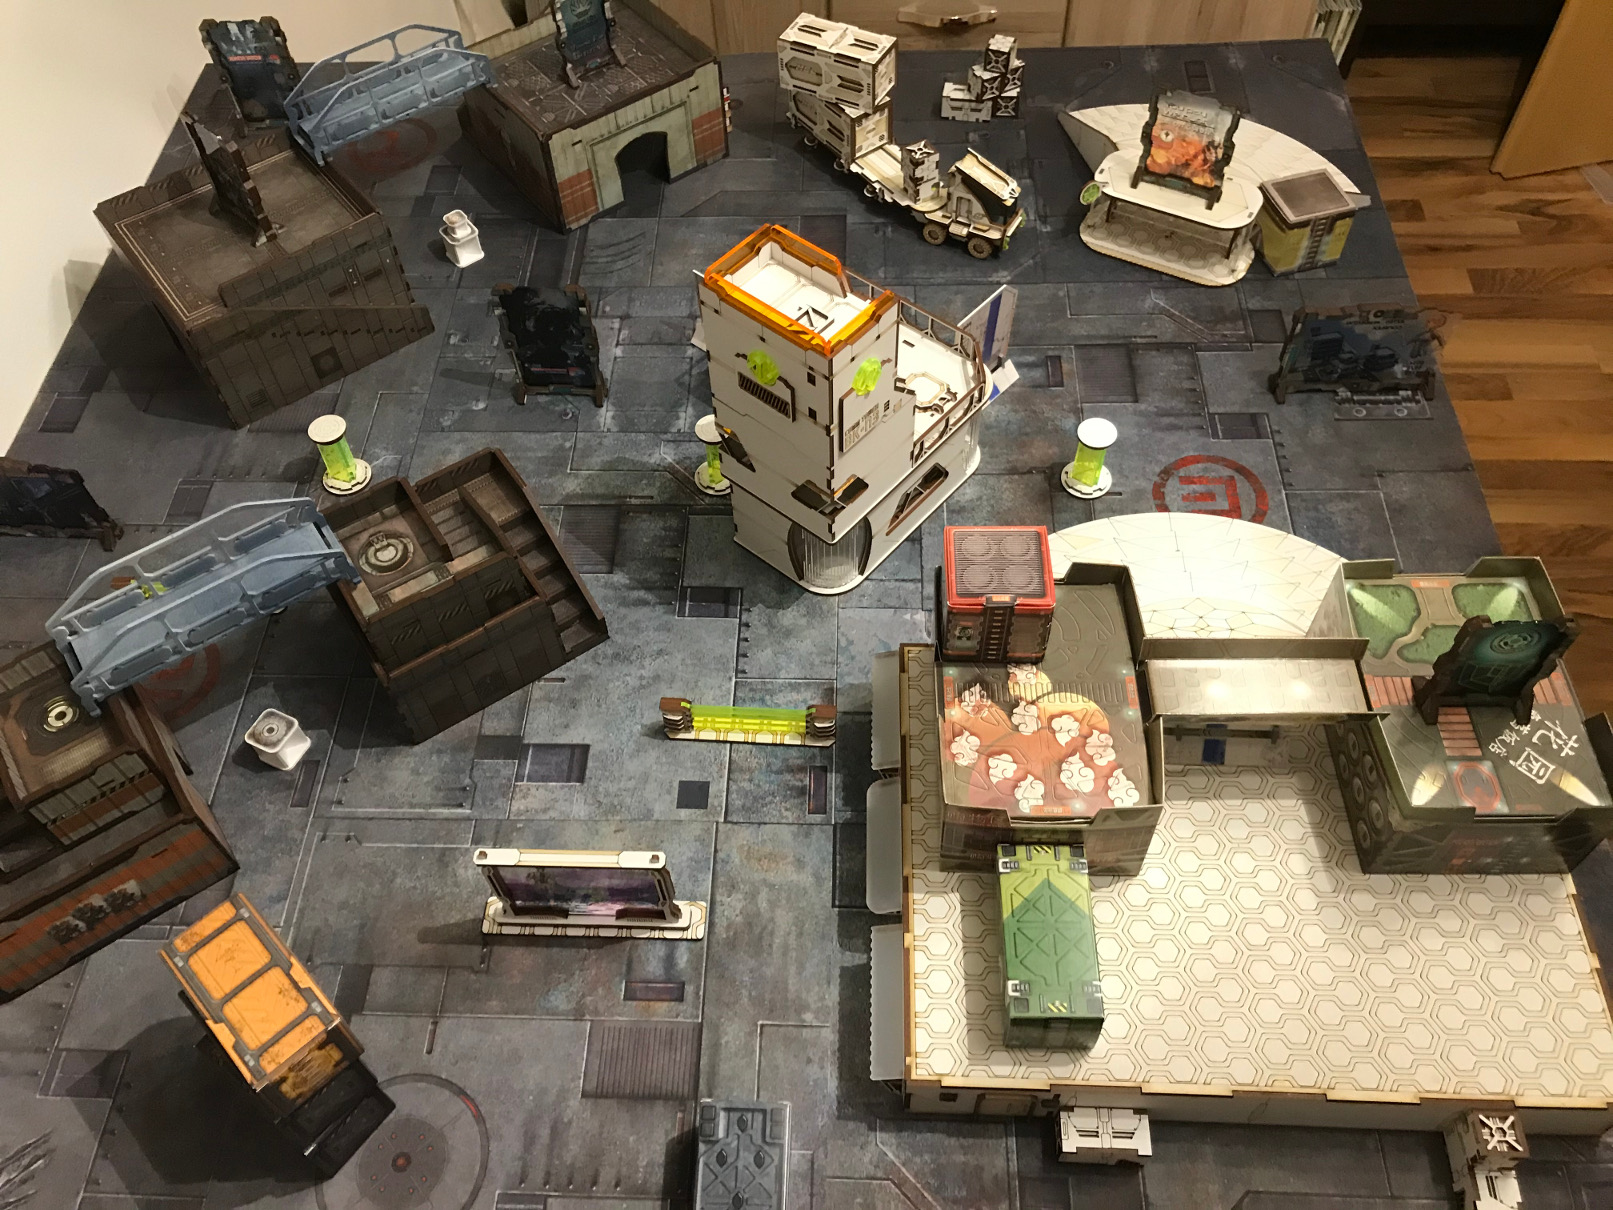
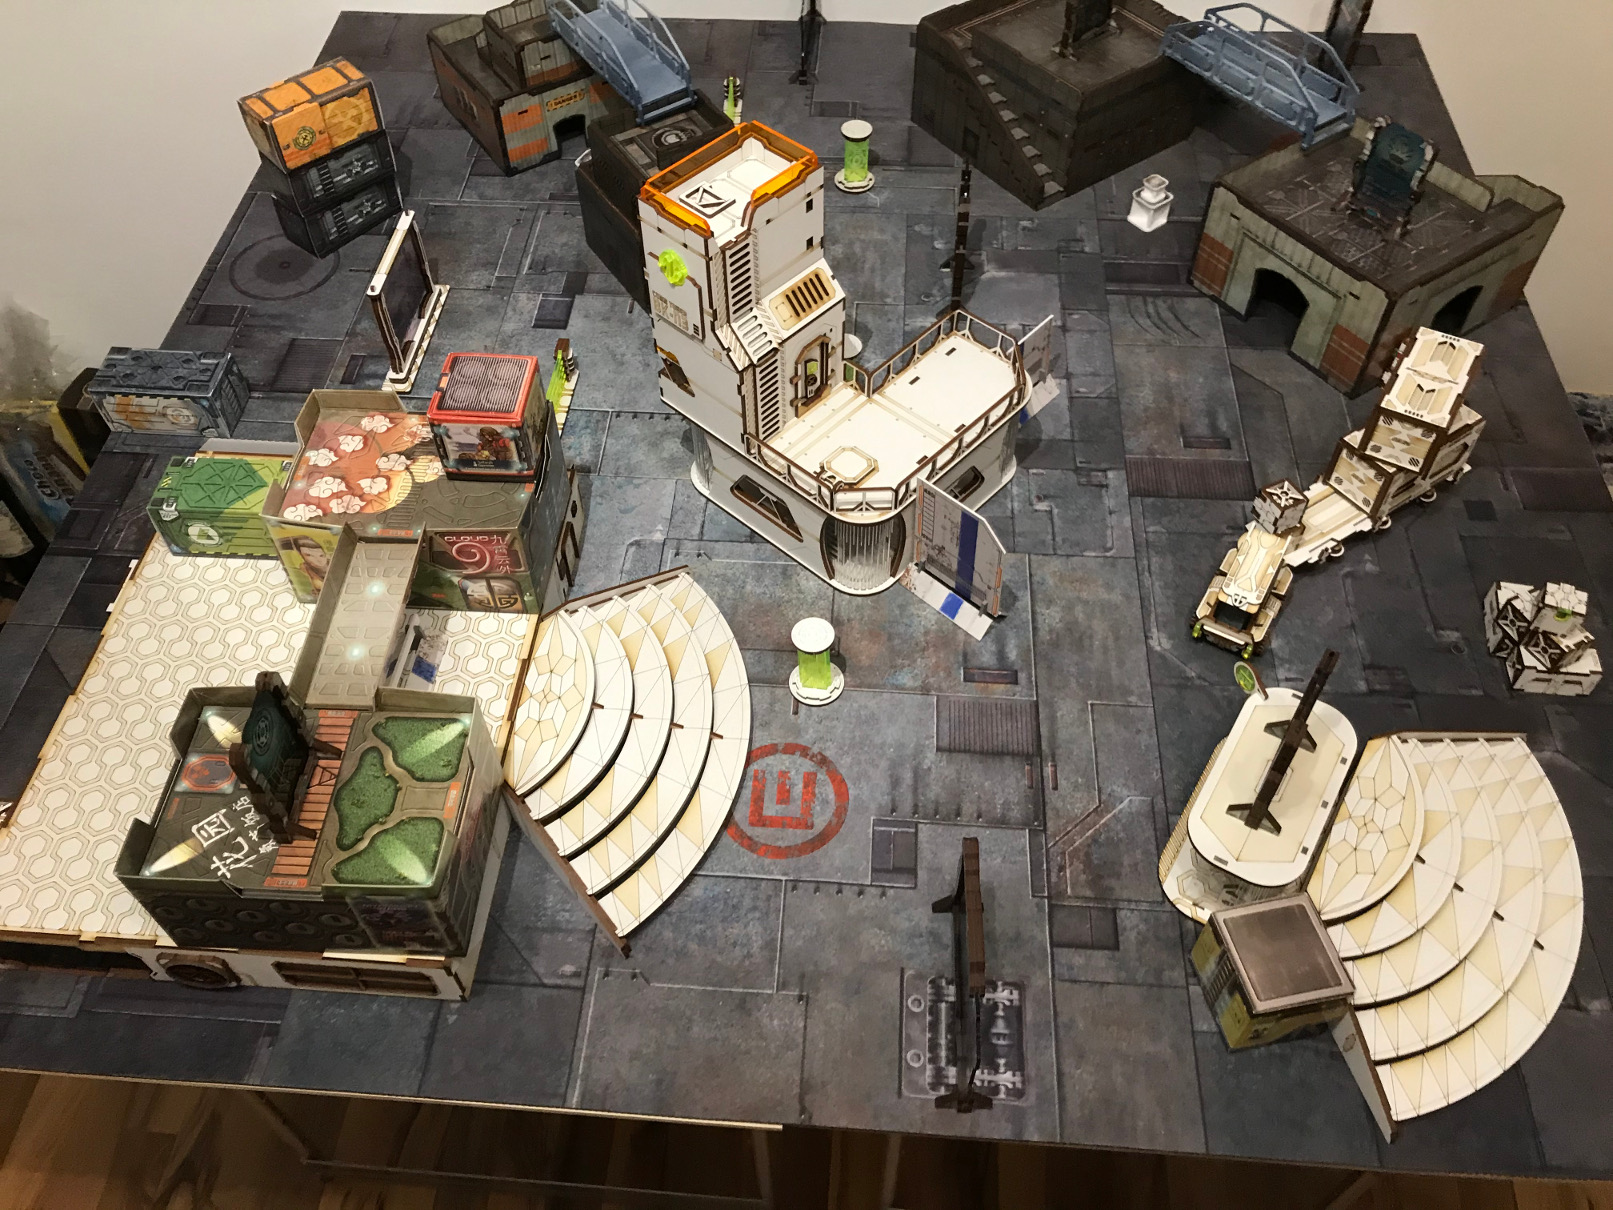
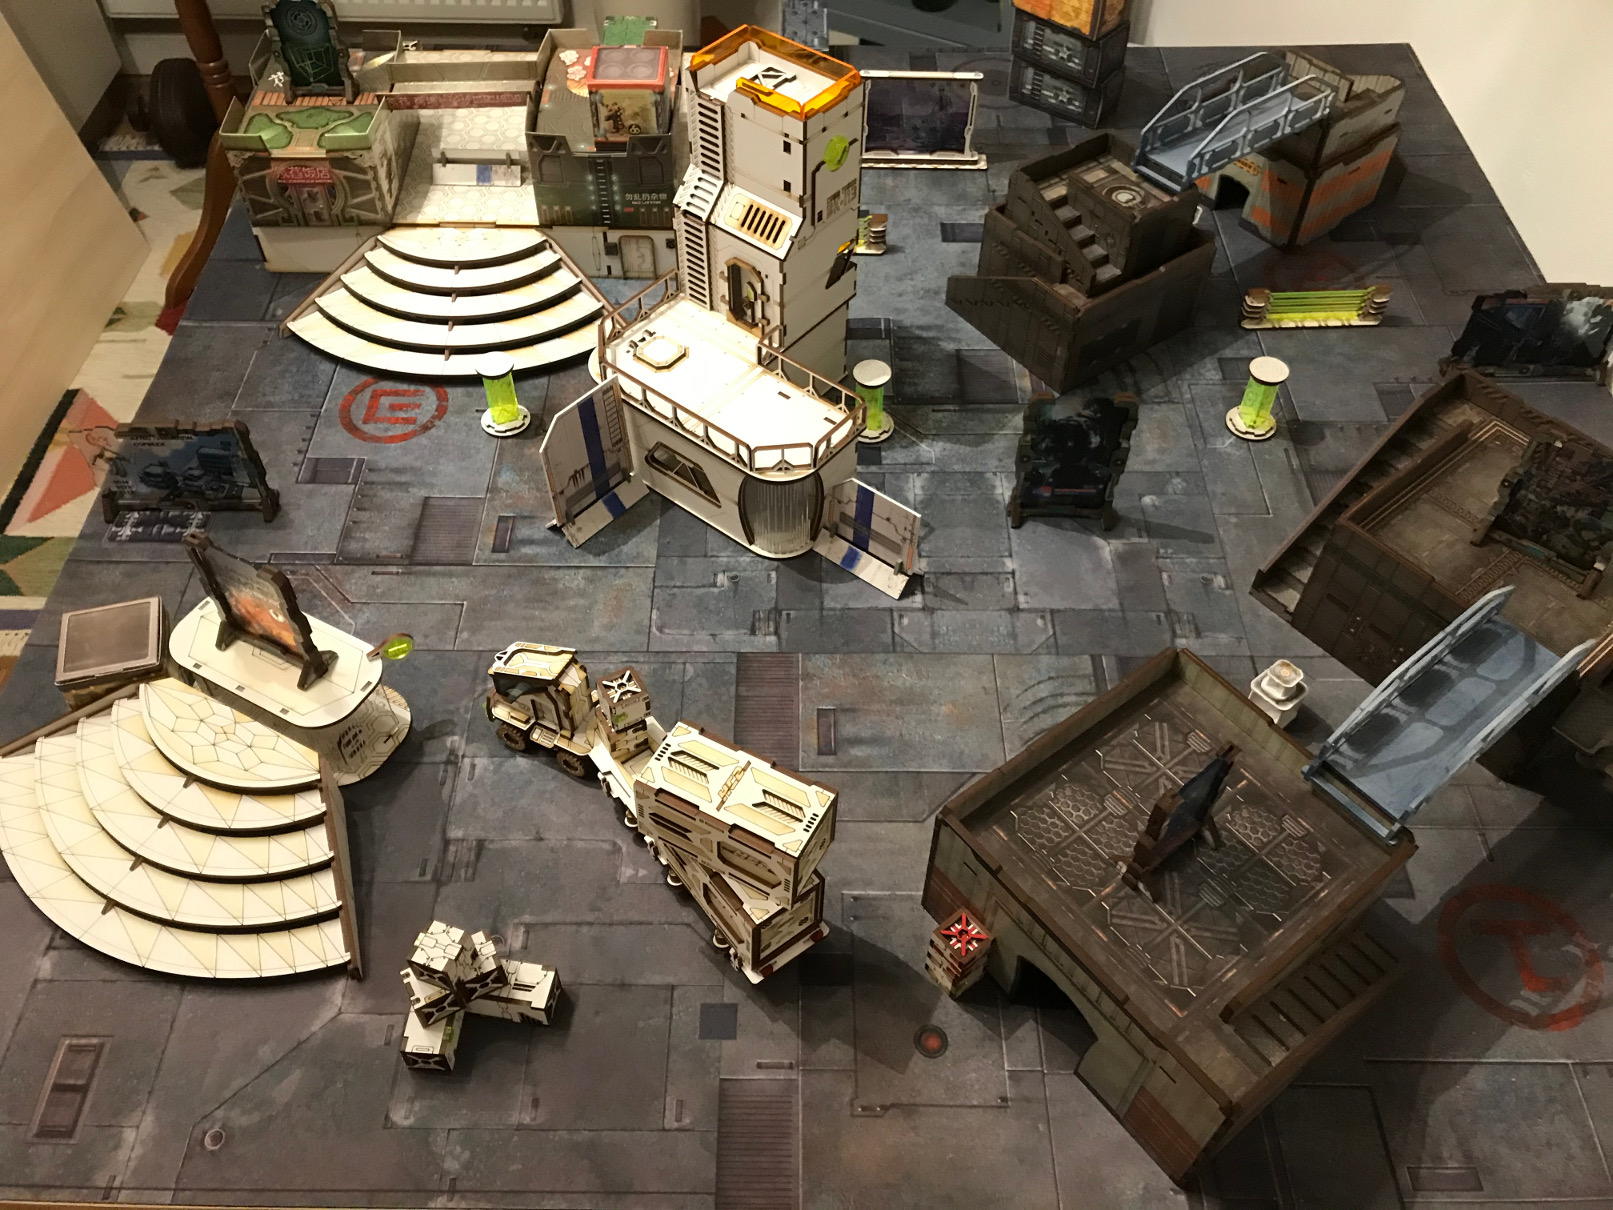
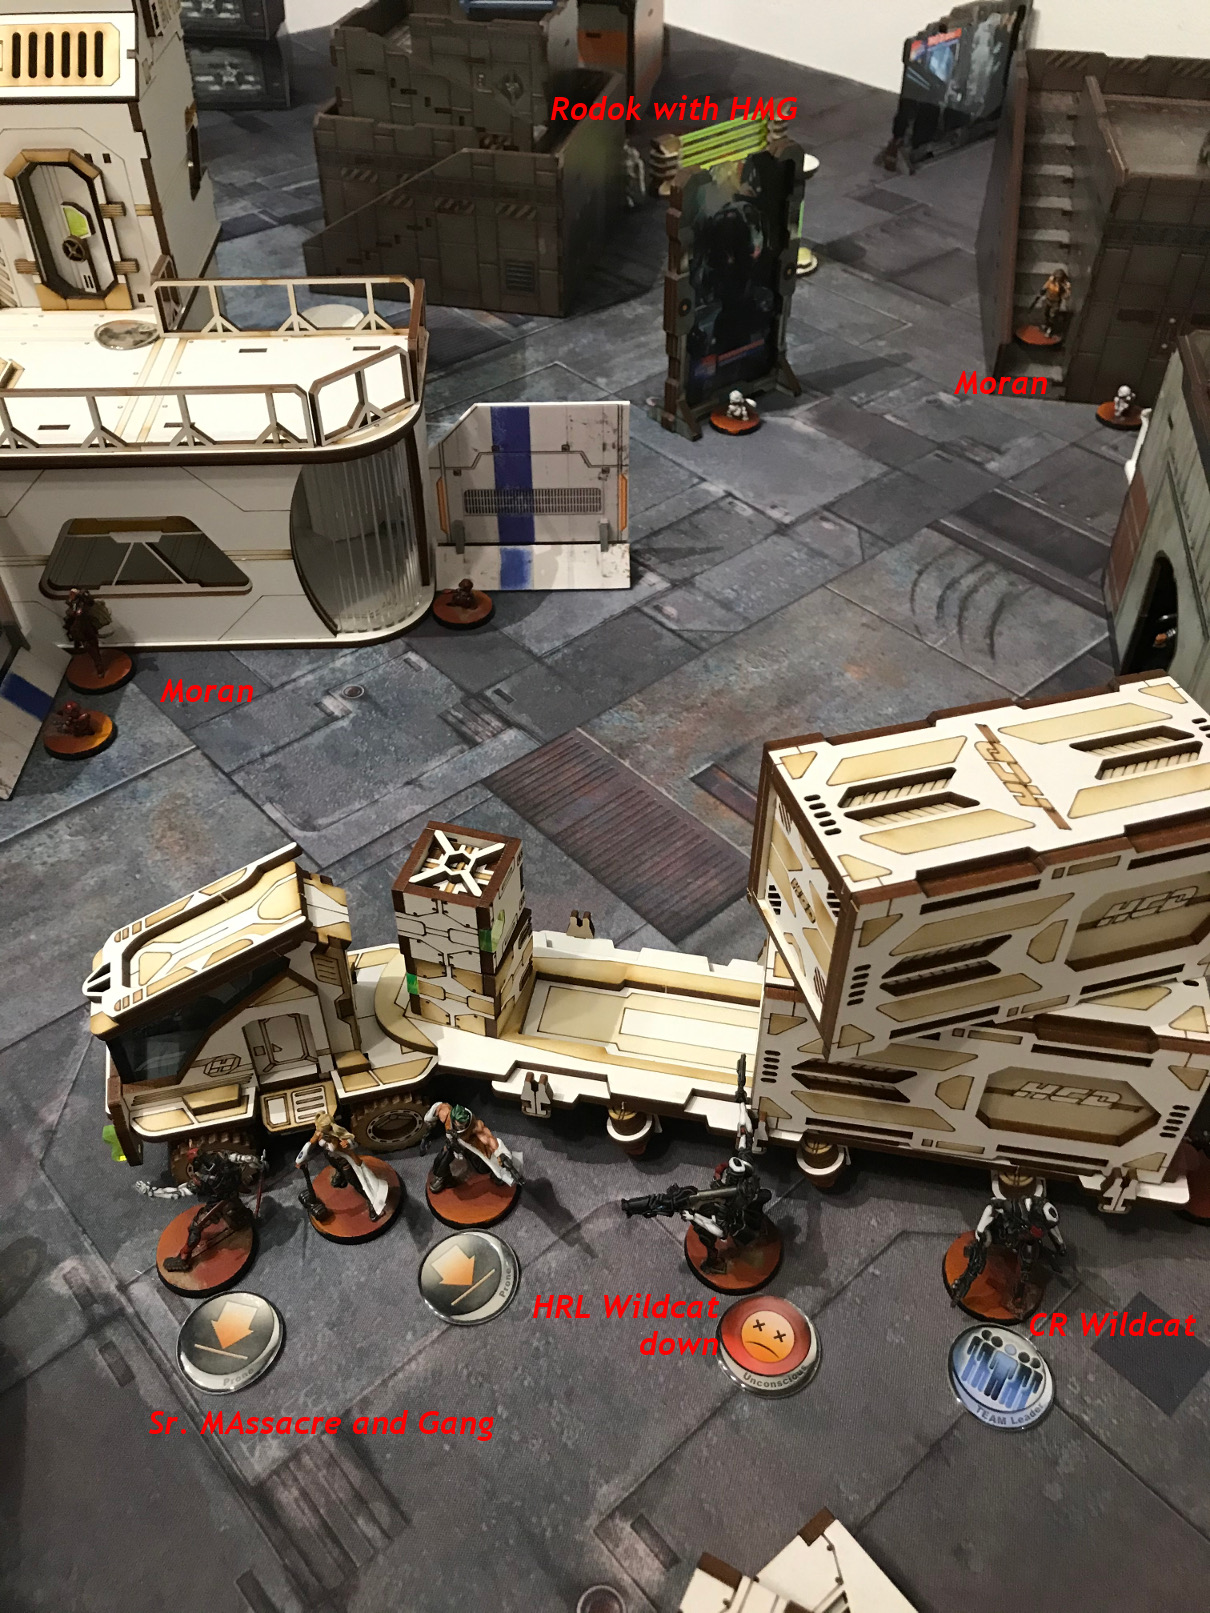
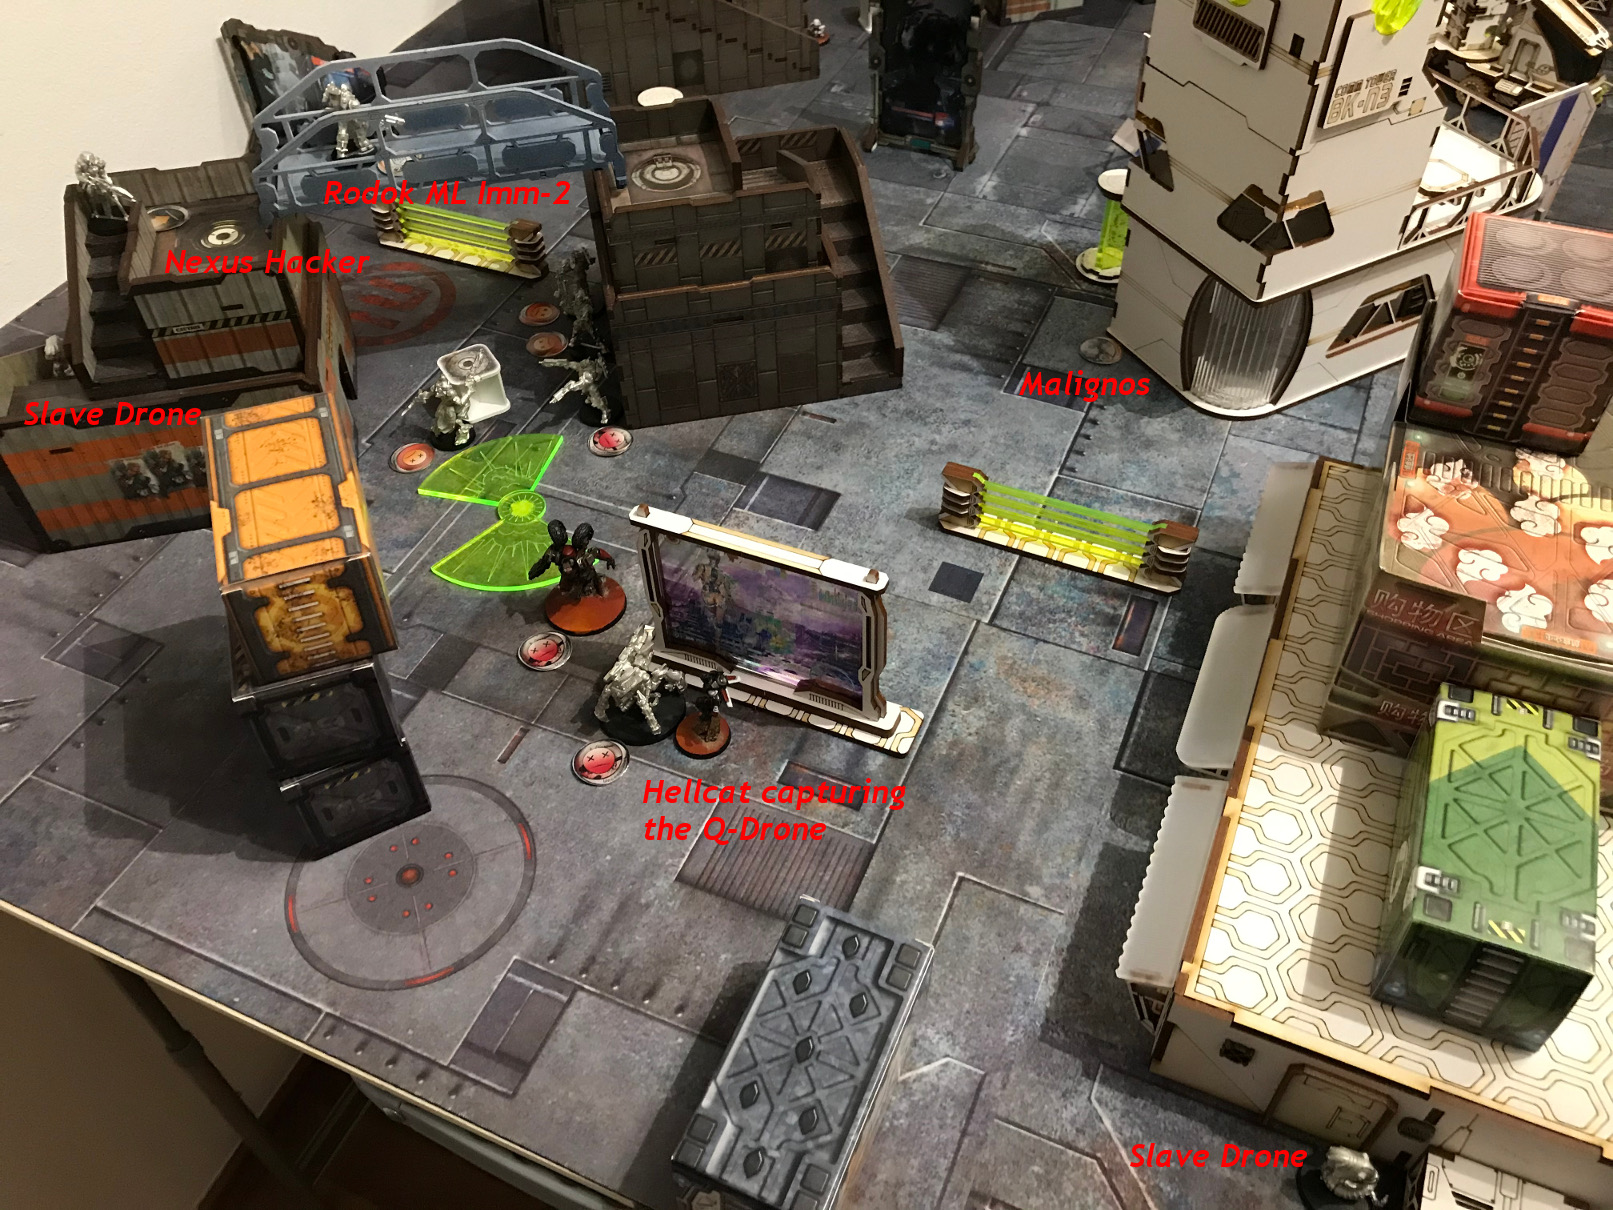
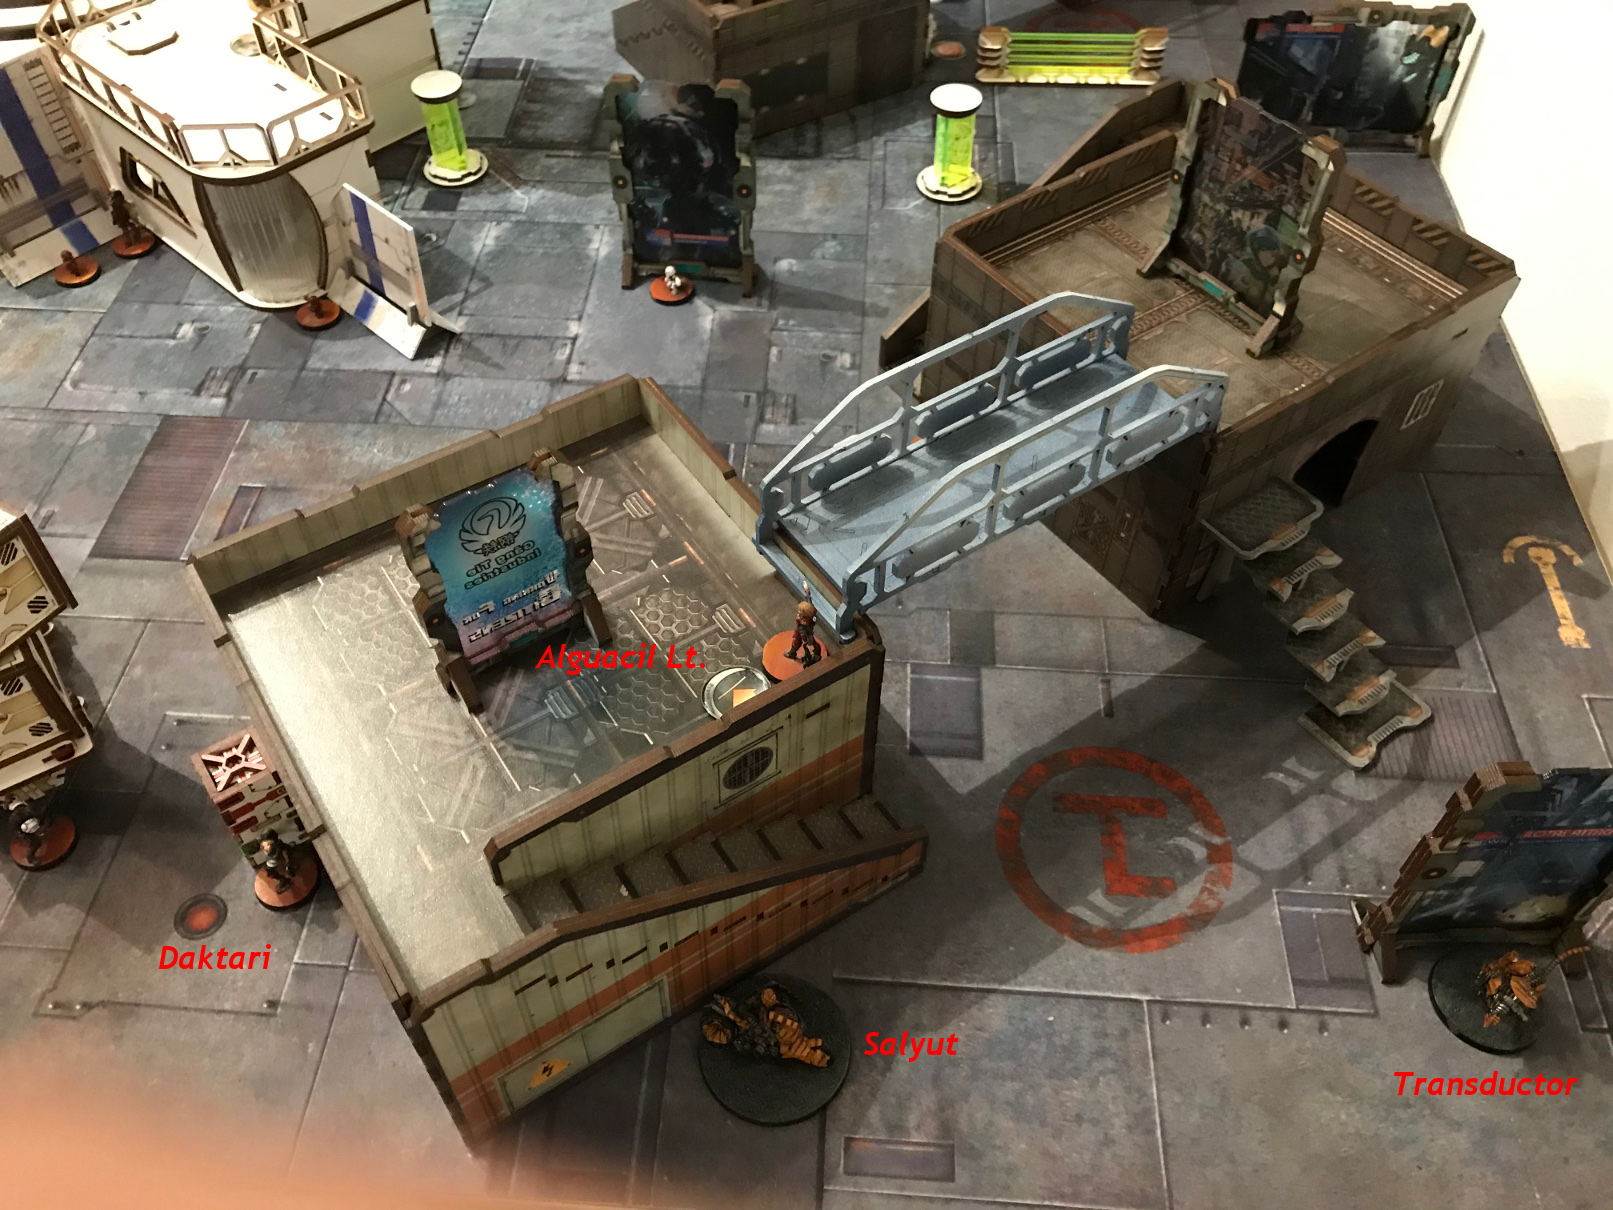
Board
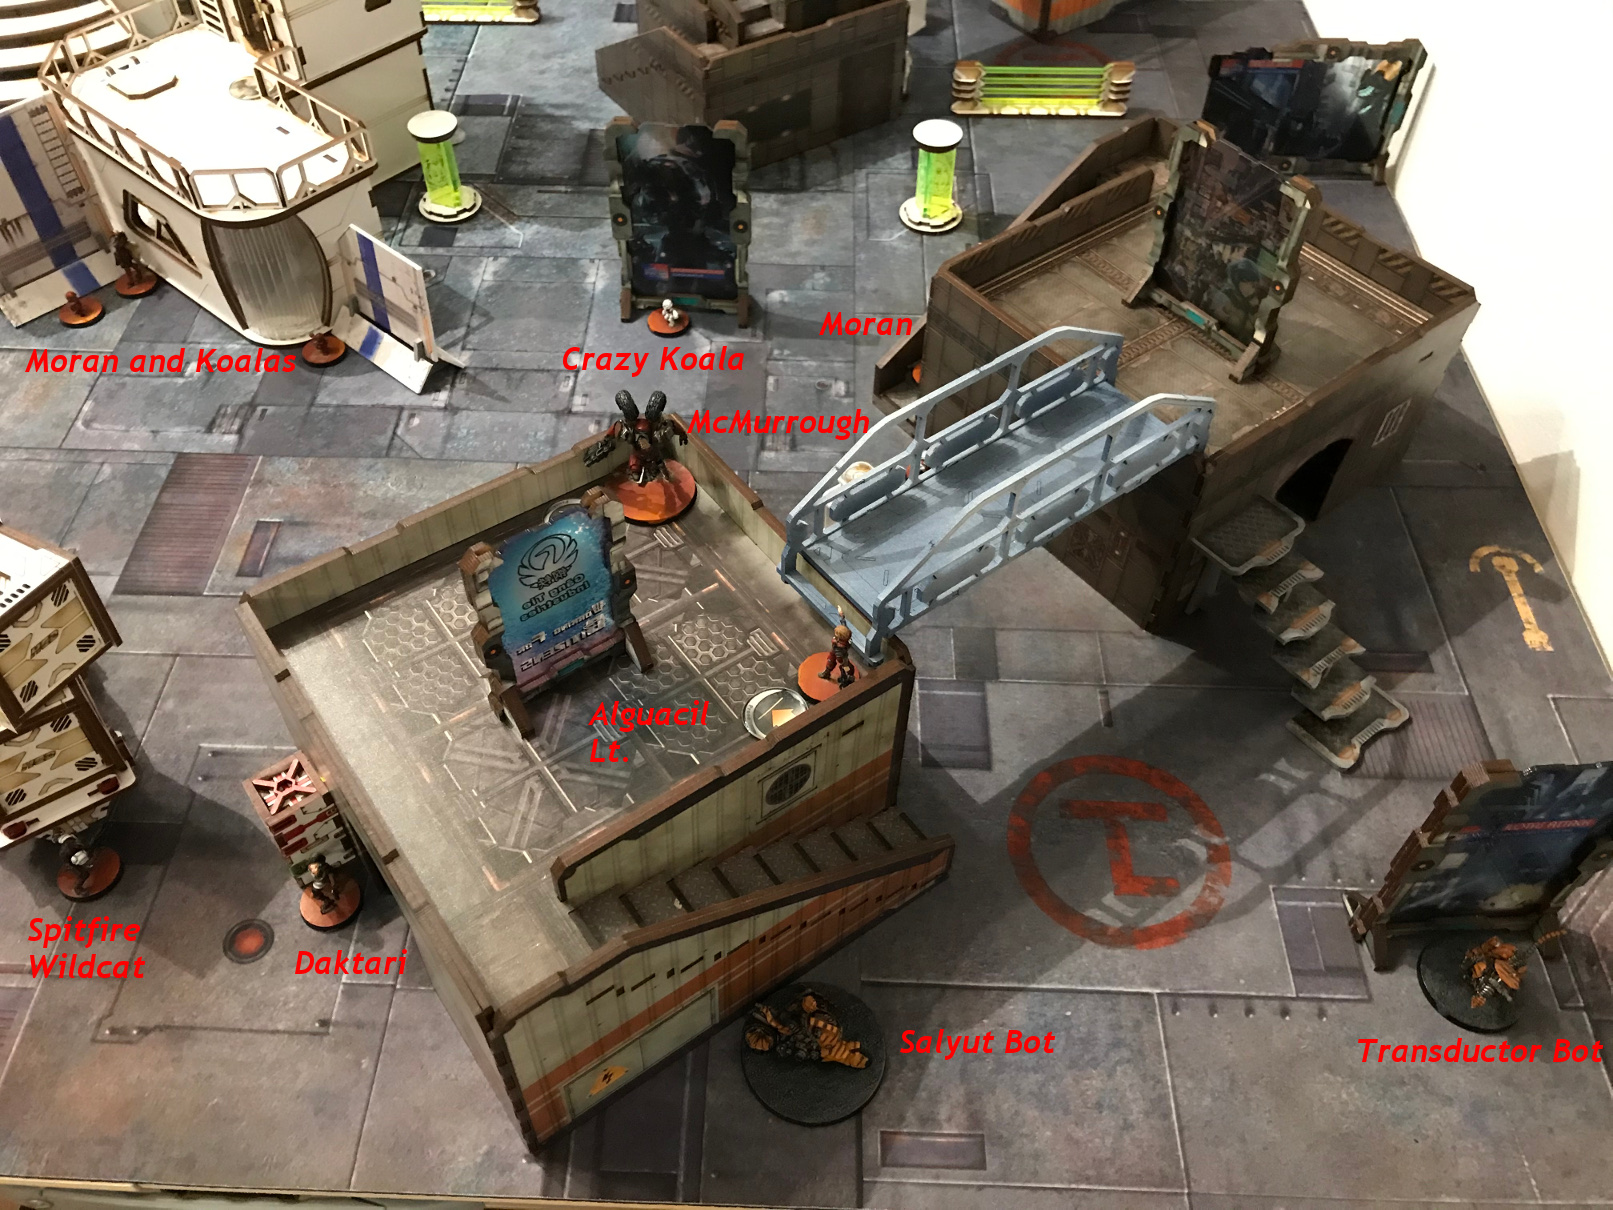
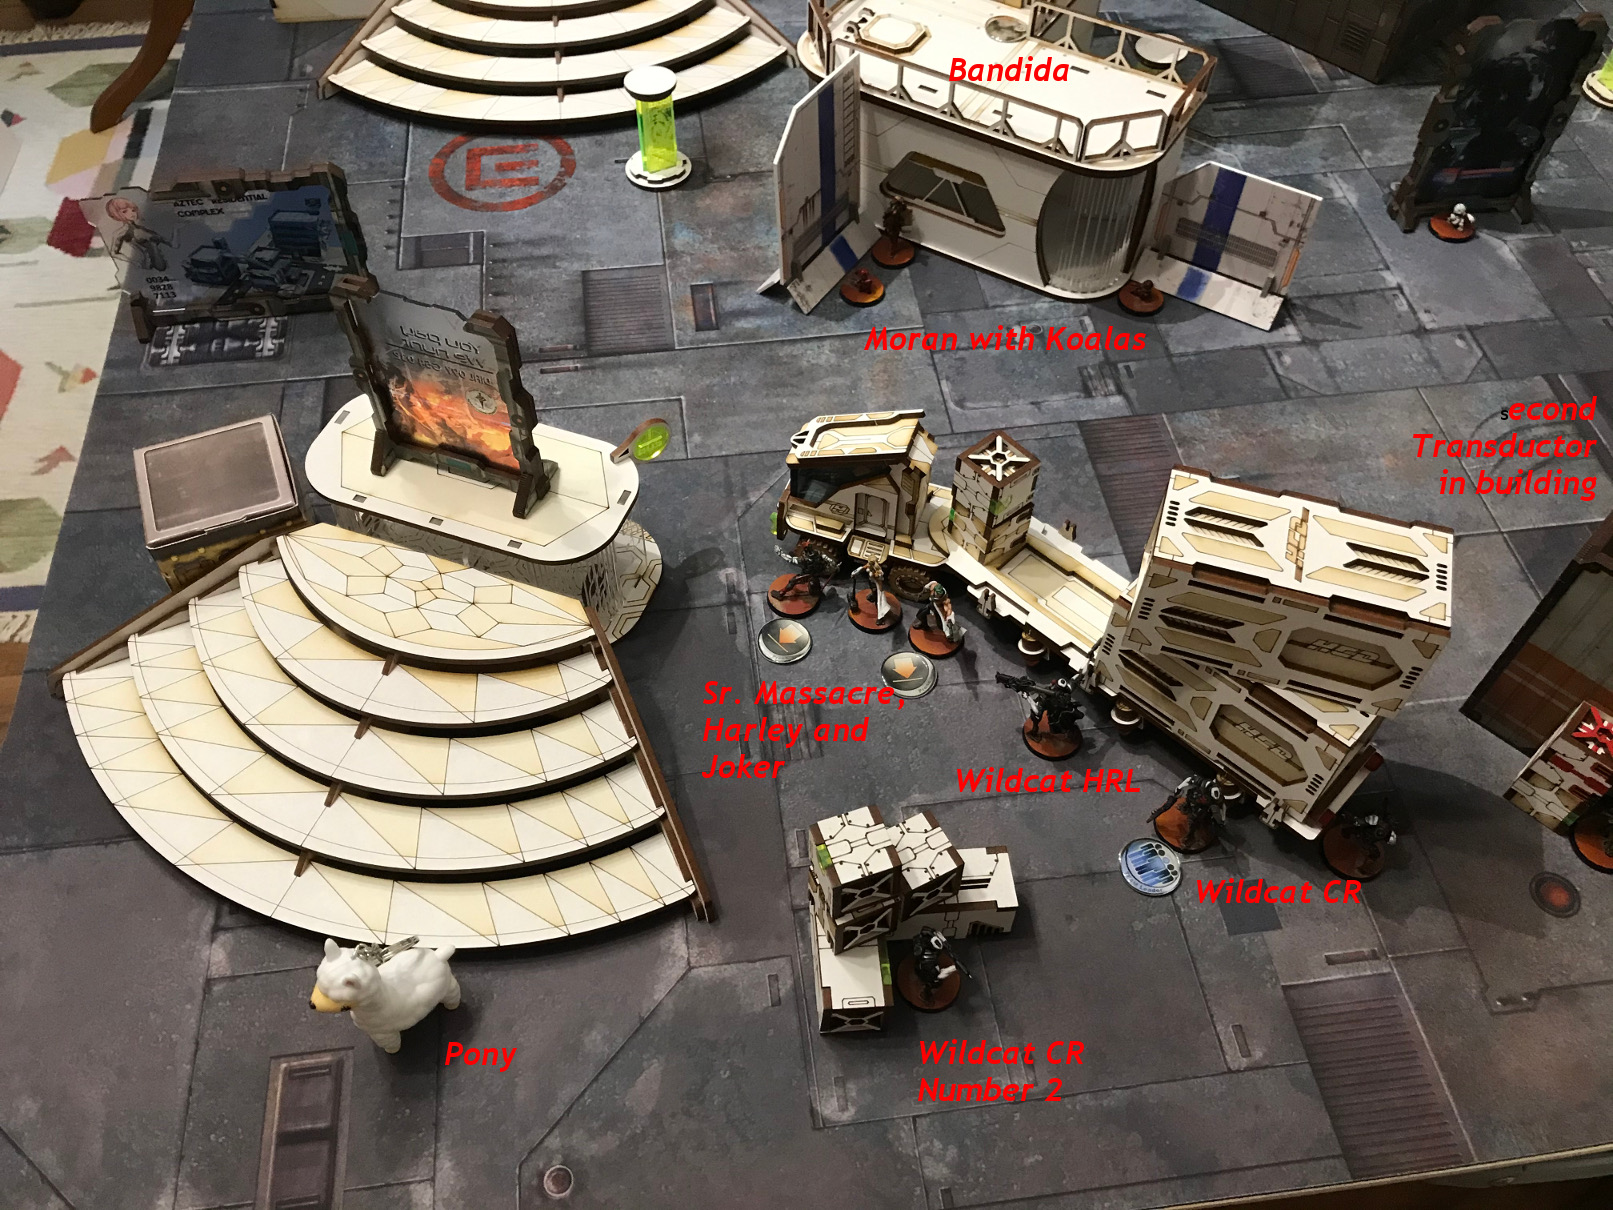
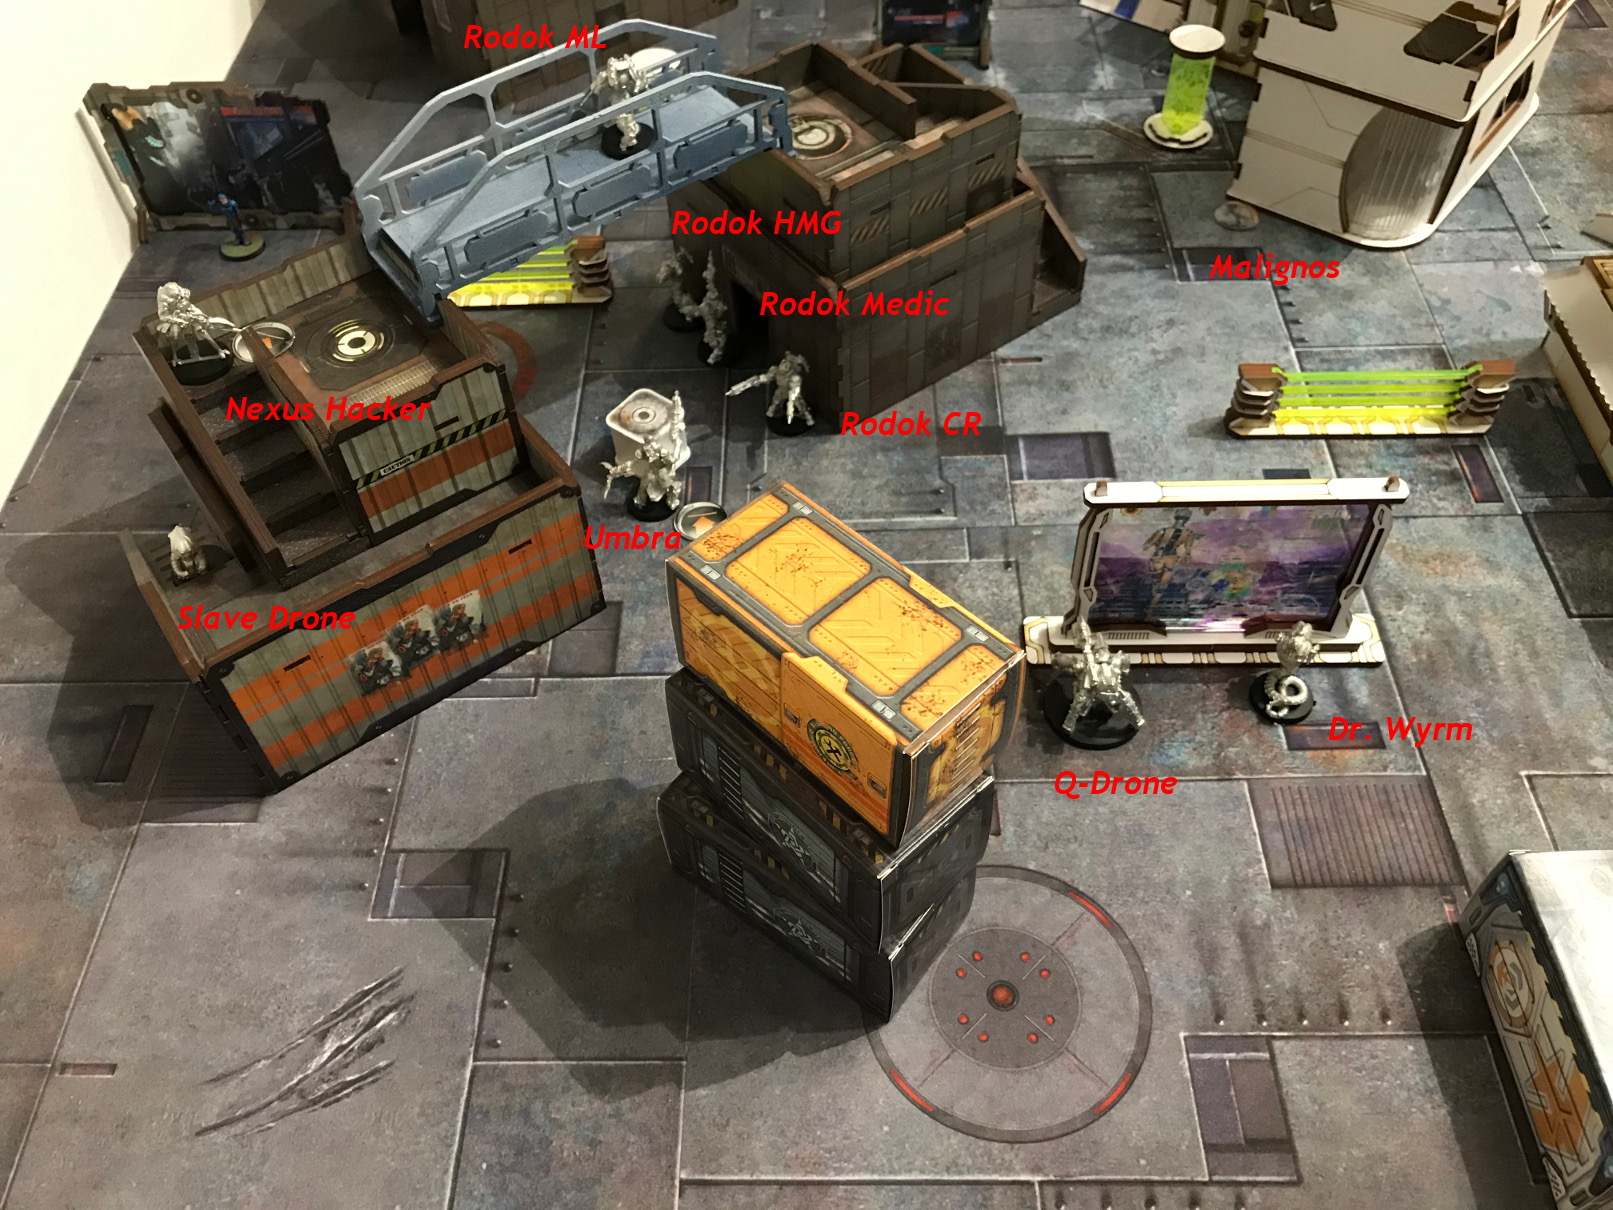
First the Rodok HMG went forward and shot the Wildcat HRL. After two shootouts, the Wildcat went down.
Now the Nexus Hacker started his Controlled Jump Programm so Ko Dali was able to land near the Pony.
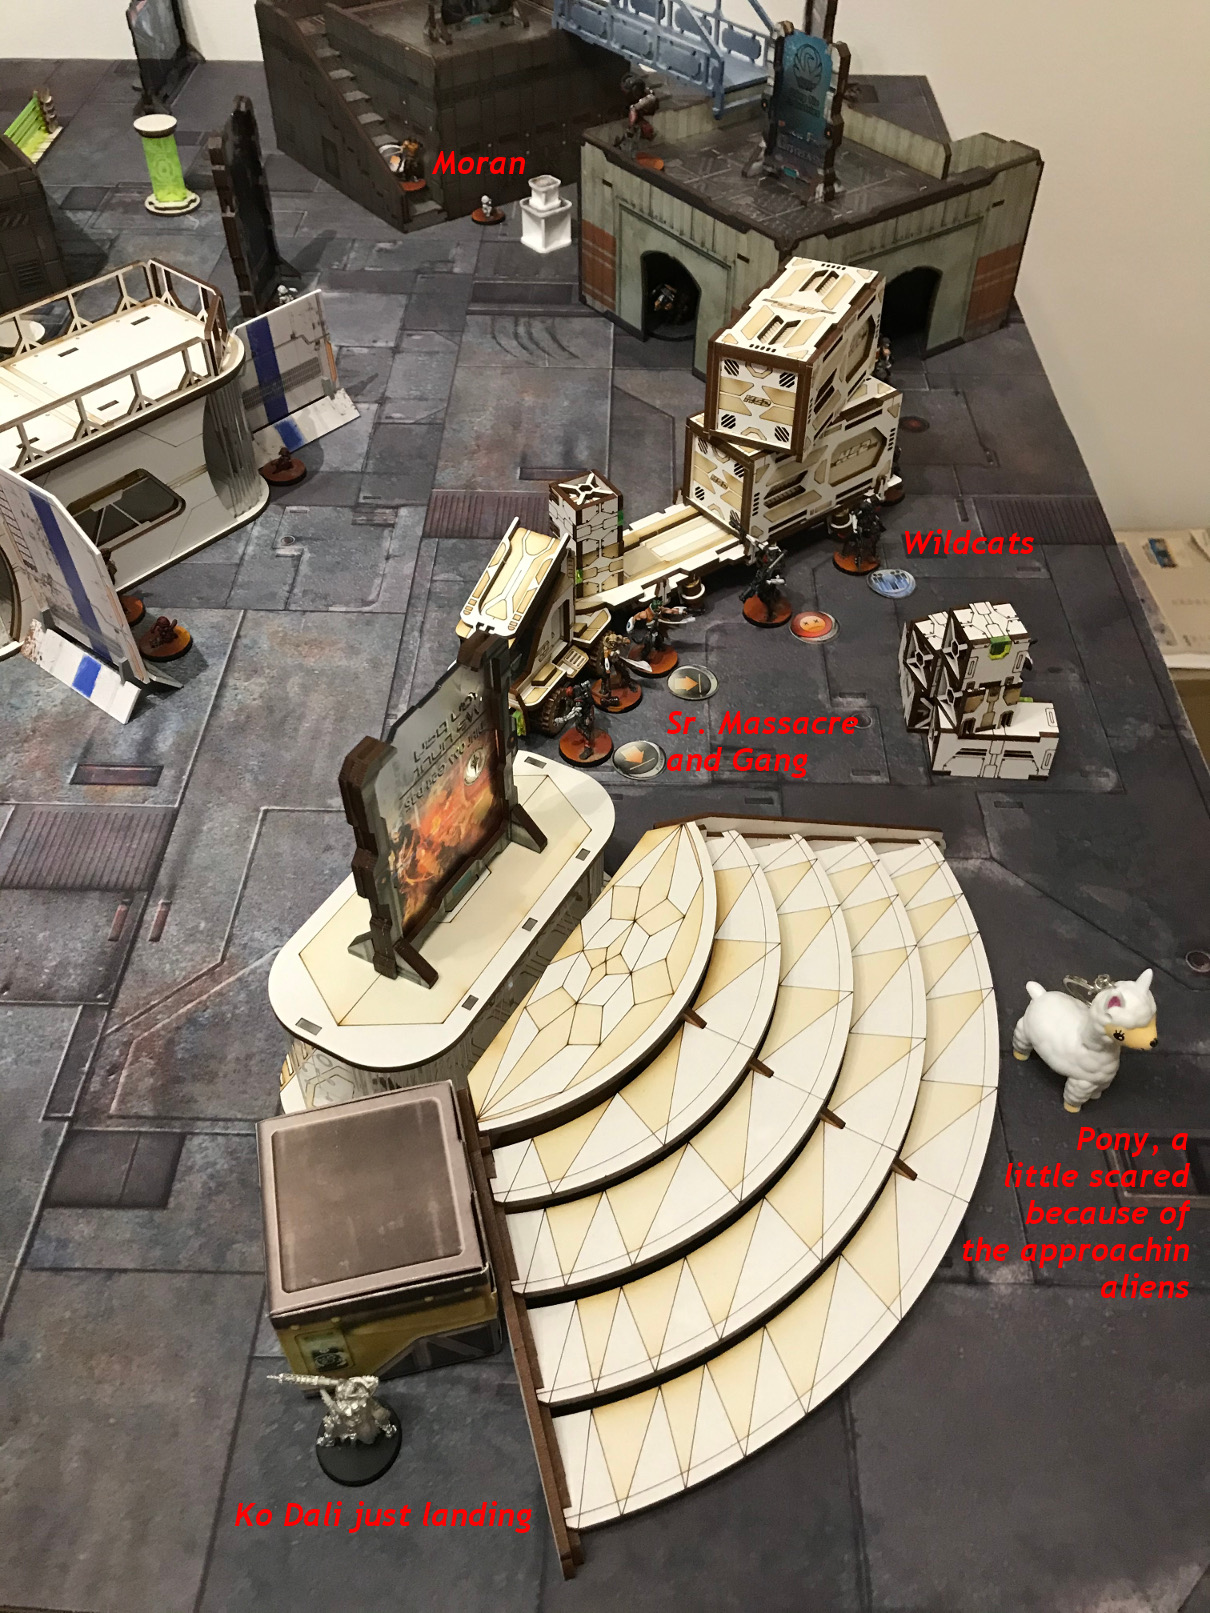
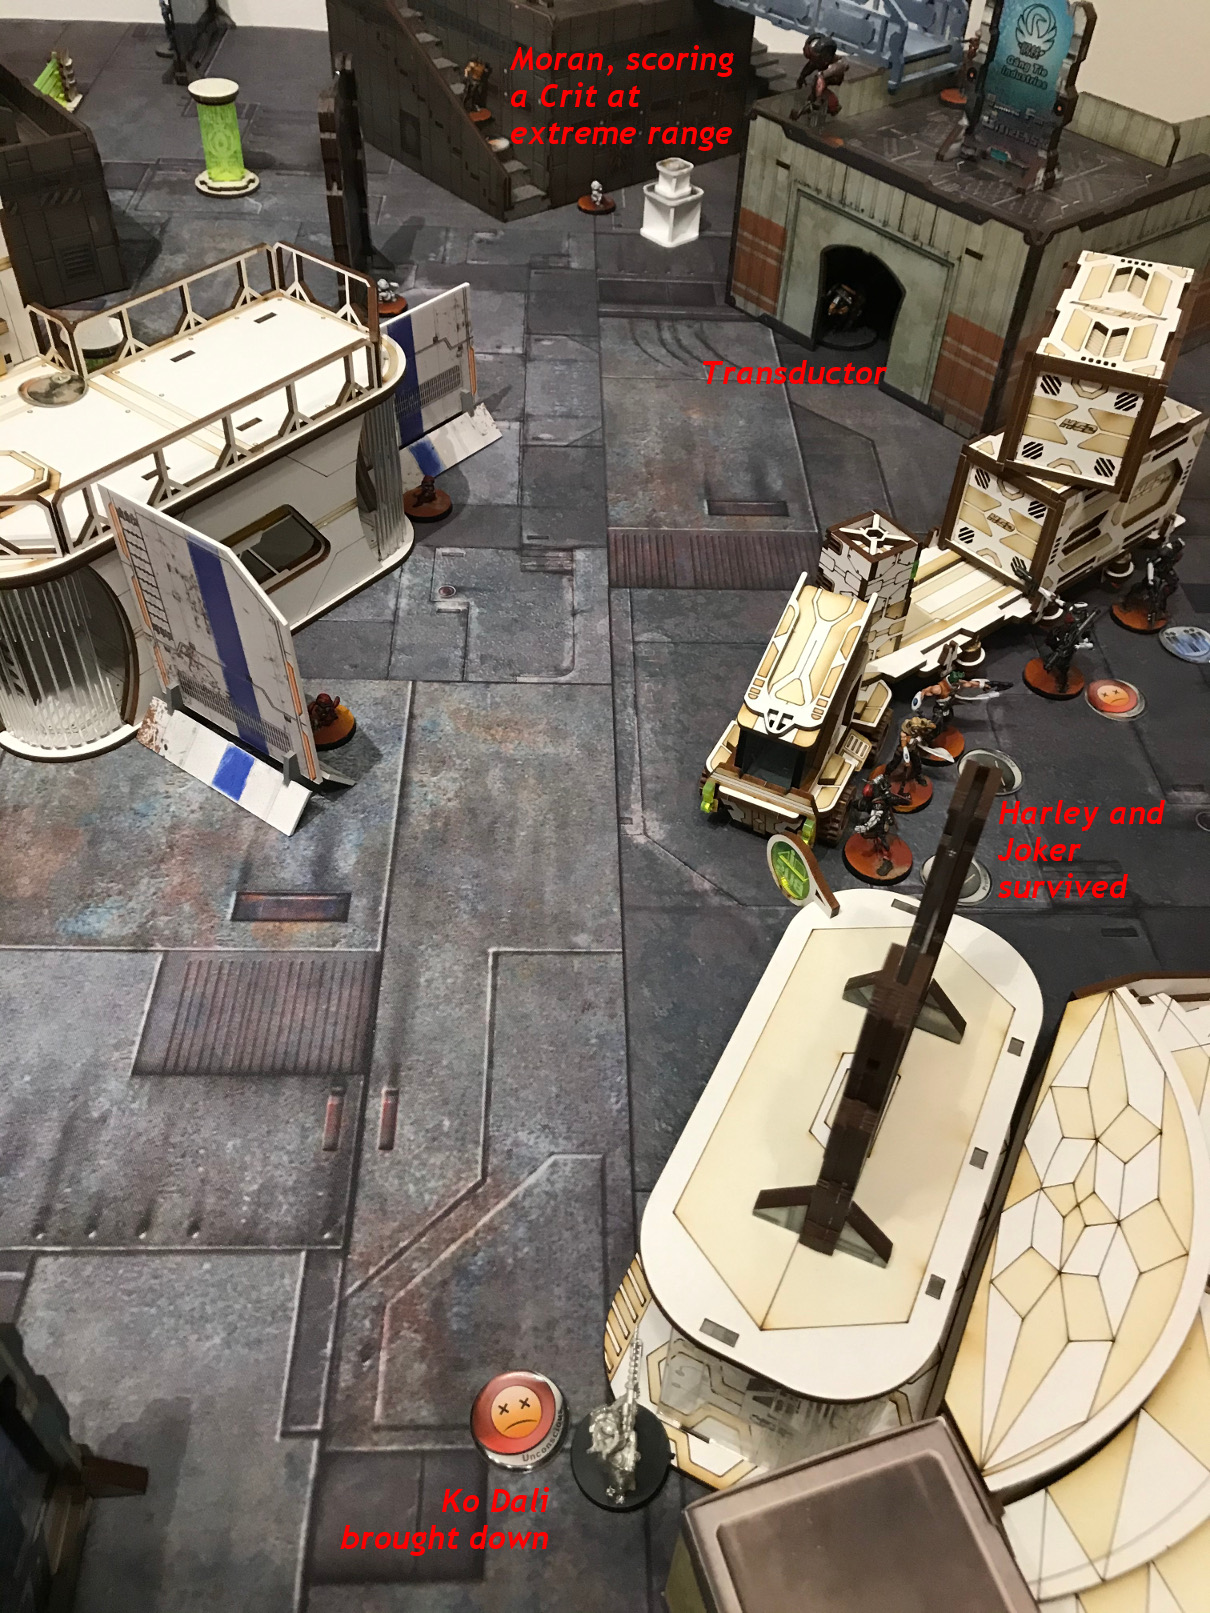
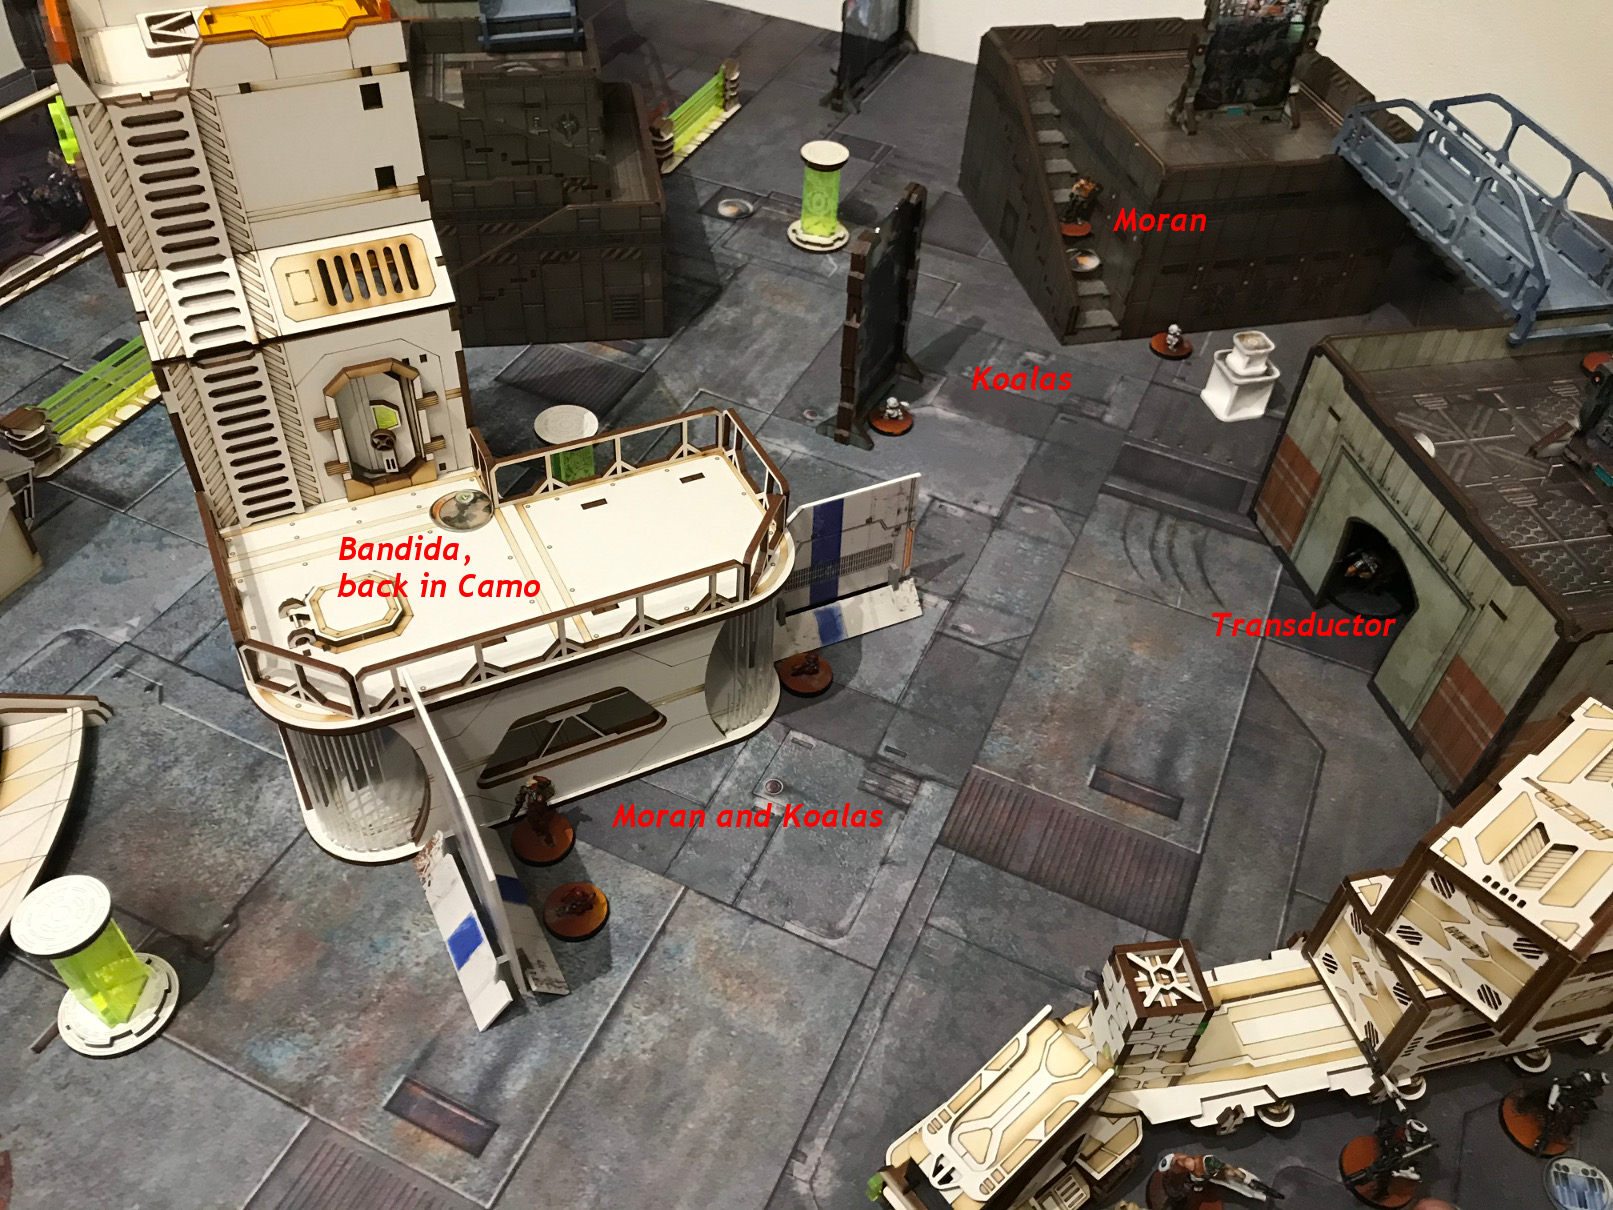
Ko Dali then begann shooting the Ponys defenders, the Moran on the other side of the Board and Sr. Massacre and his Jaguars. The First shootout was with the Moran, who just dodged.
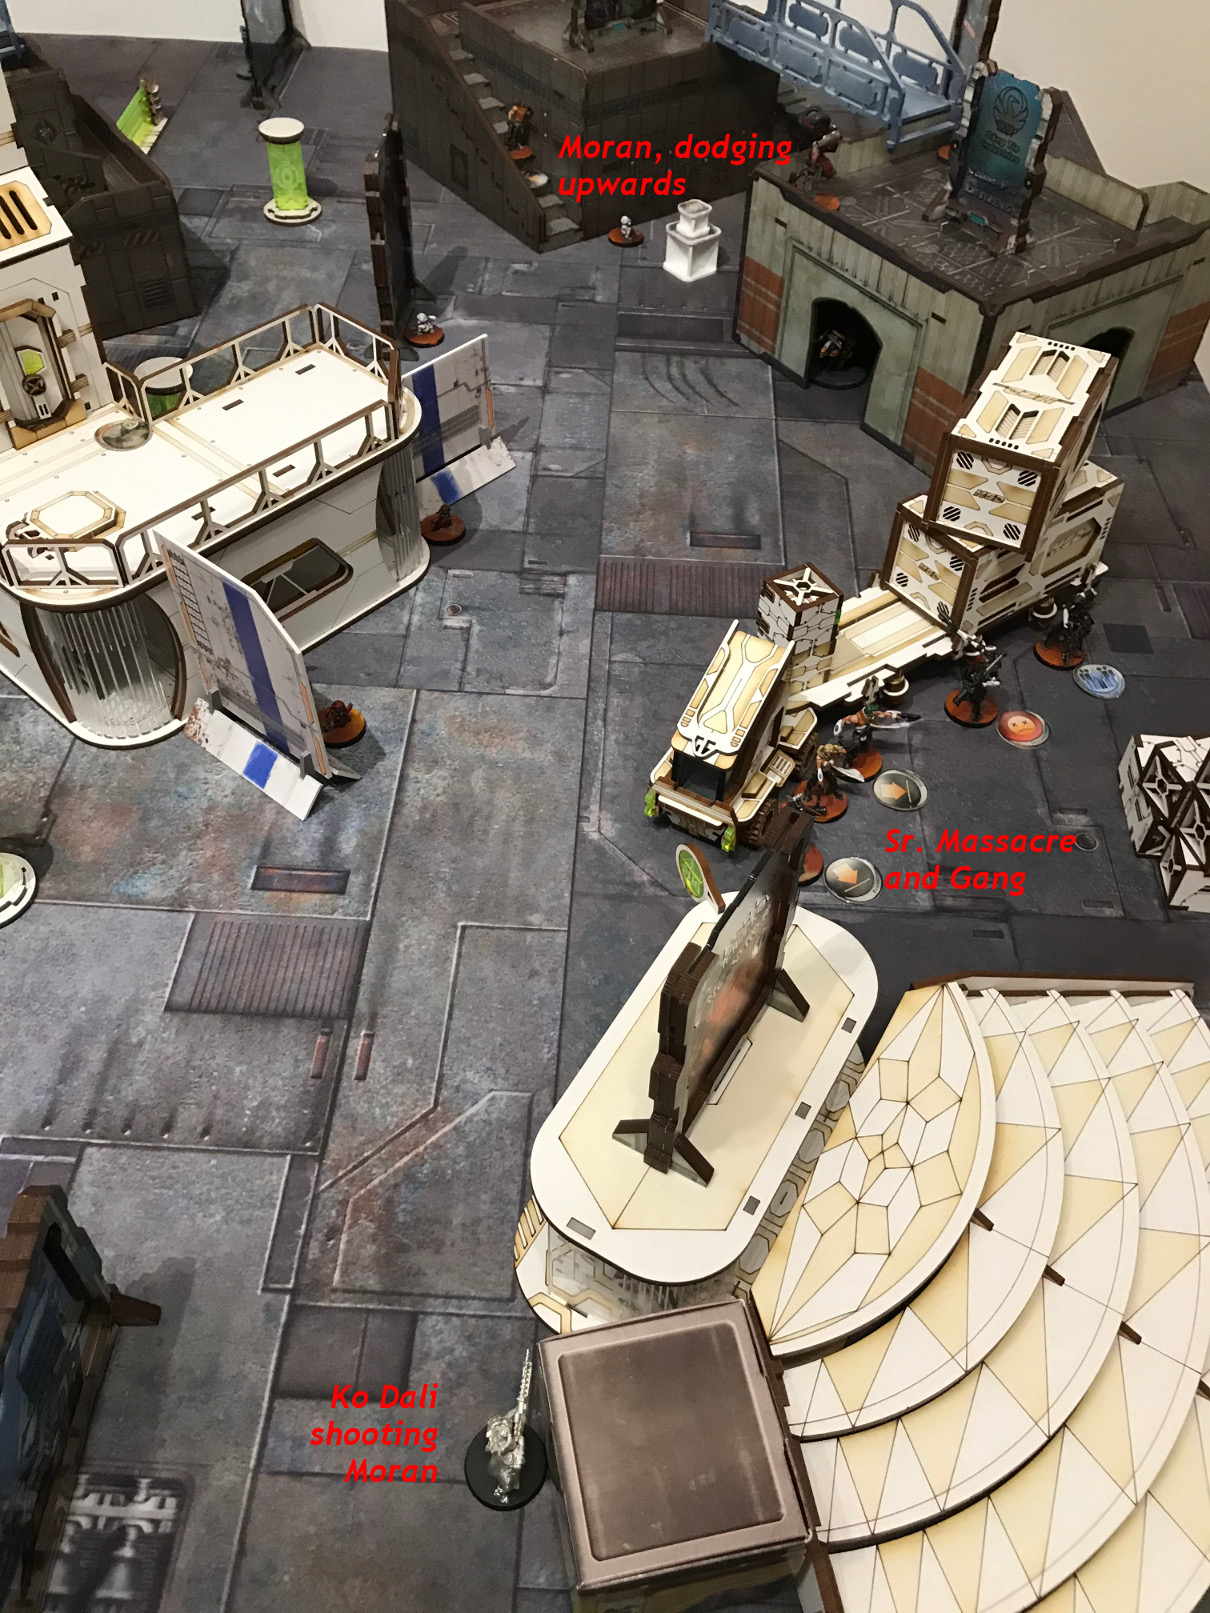
Since Orders were scarce, Ko Dali next tried to go for Sr. Massacre splitting the Burst between him and the Moran. Sr. Massacre went down, the Moran dodged.
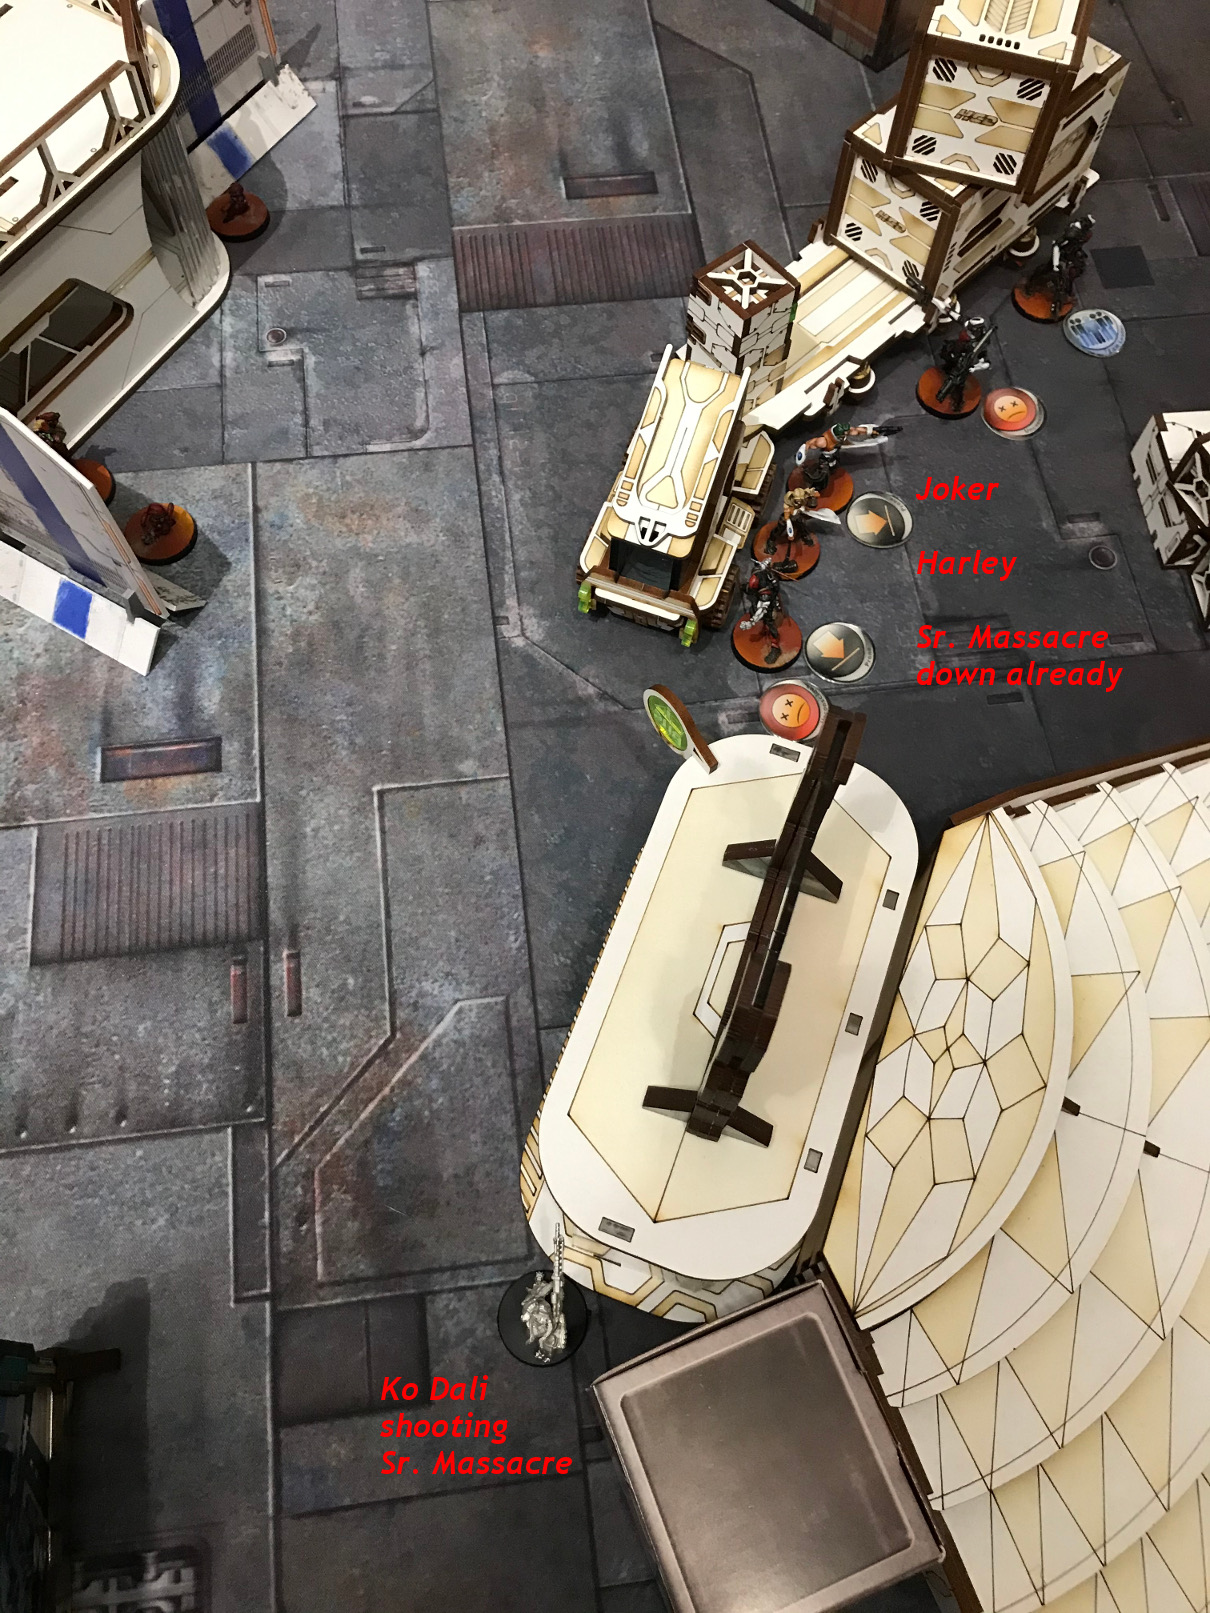
Next Ko Dali went for Harley, again with splitting the Burst, this time Harley inflicted a wound on her and survived herself.
Ko Dali now in NWI tried again, this time only going for Harley, so the Moran got a free shot. Now Ko Dali had bad luck, because the Moran Critted her of the Board from extreme range (rolling a 3) and Harley still survived.
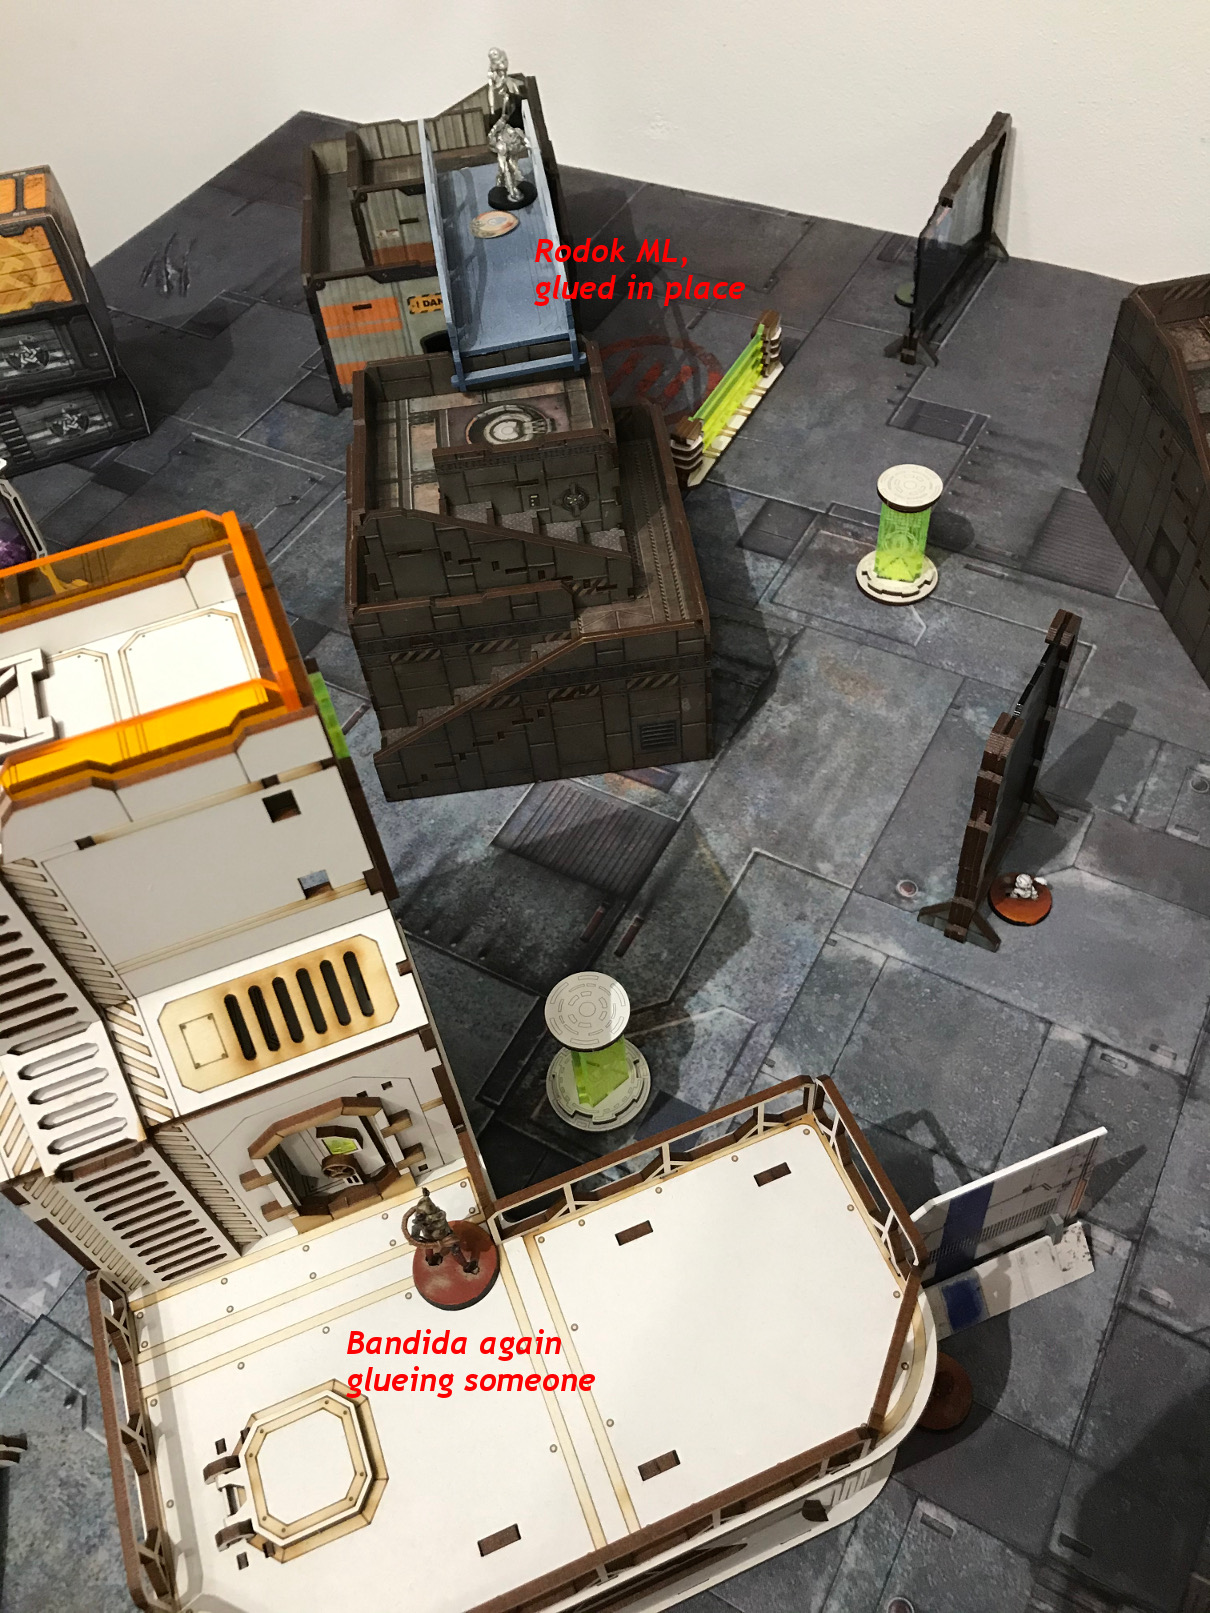
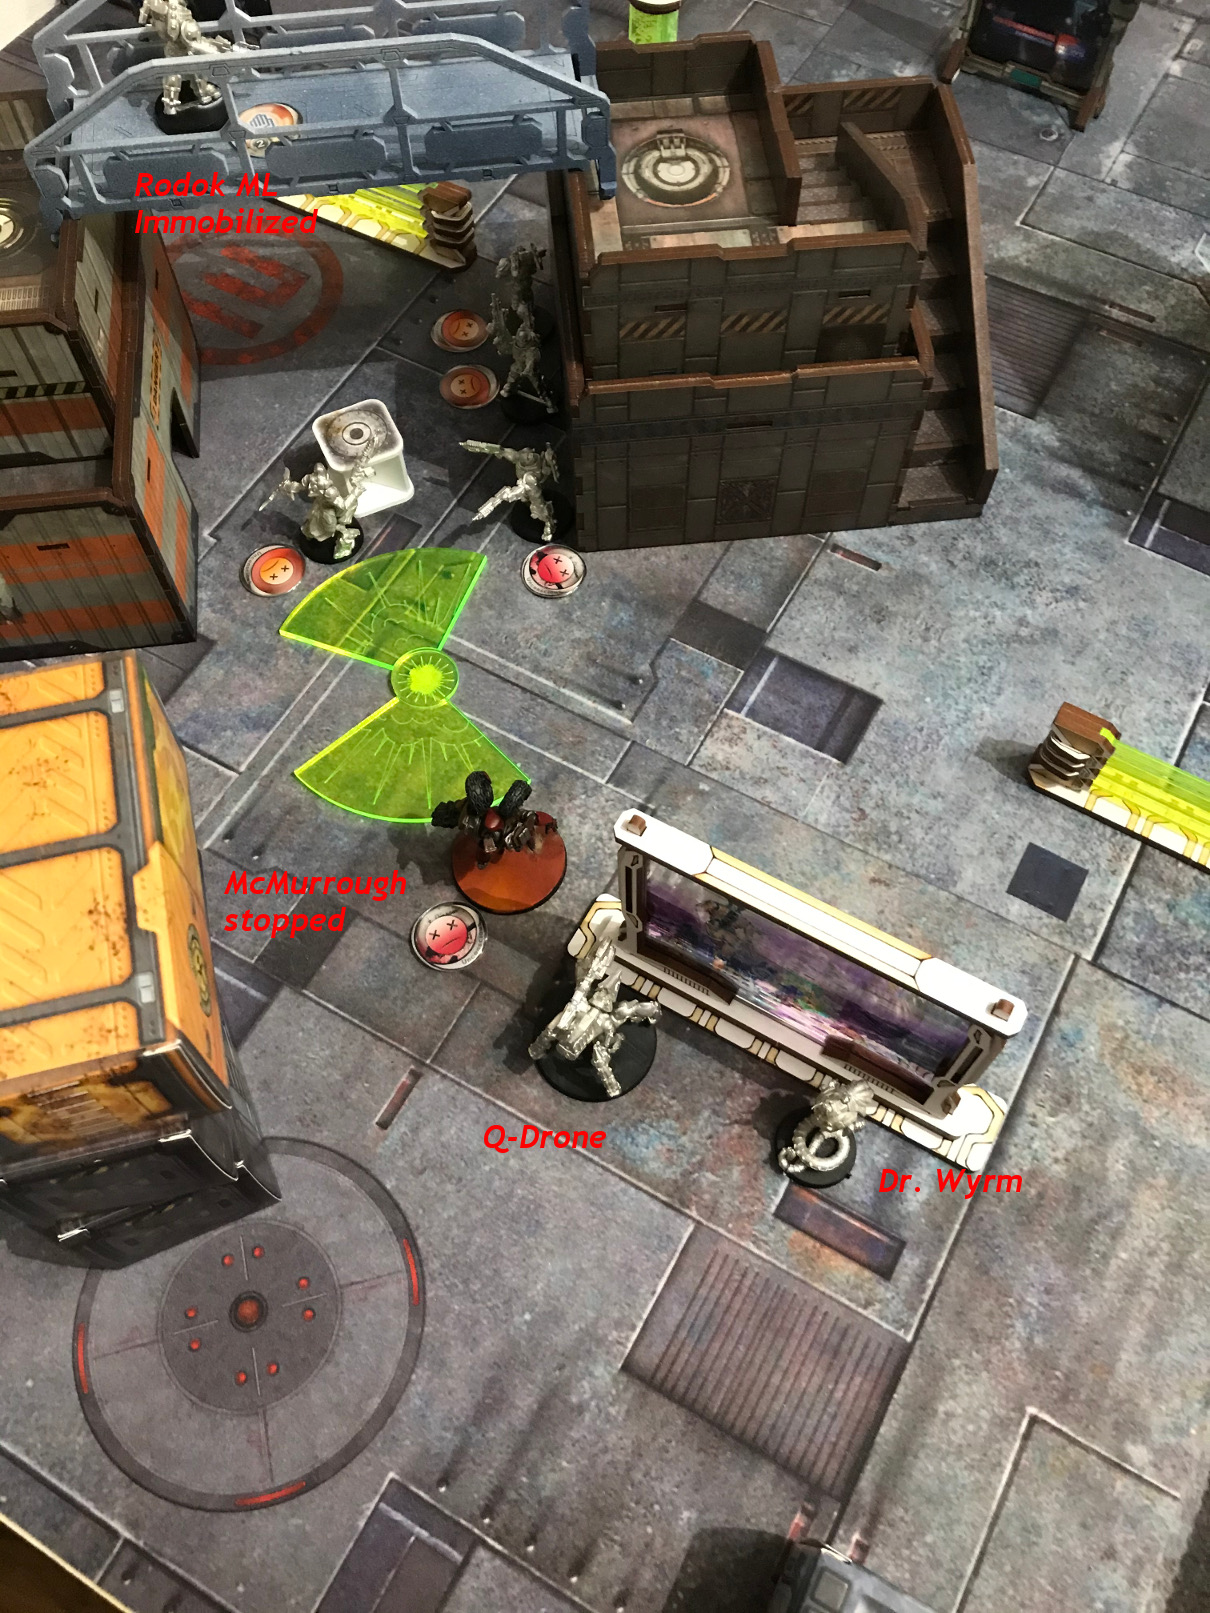
With the last order the Rodok Team rearranged. Since the Missile Launcher Rodok was not the Team Leader the Bandida took the free shot at the ML Rodok using her ADHL, hit and glued him into place.
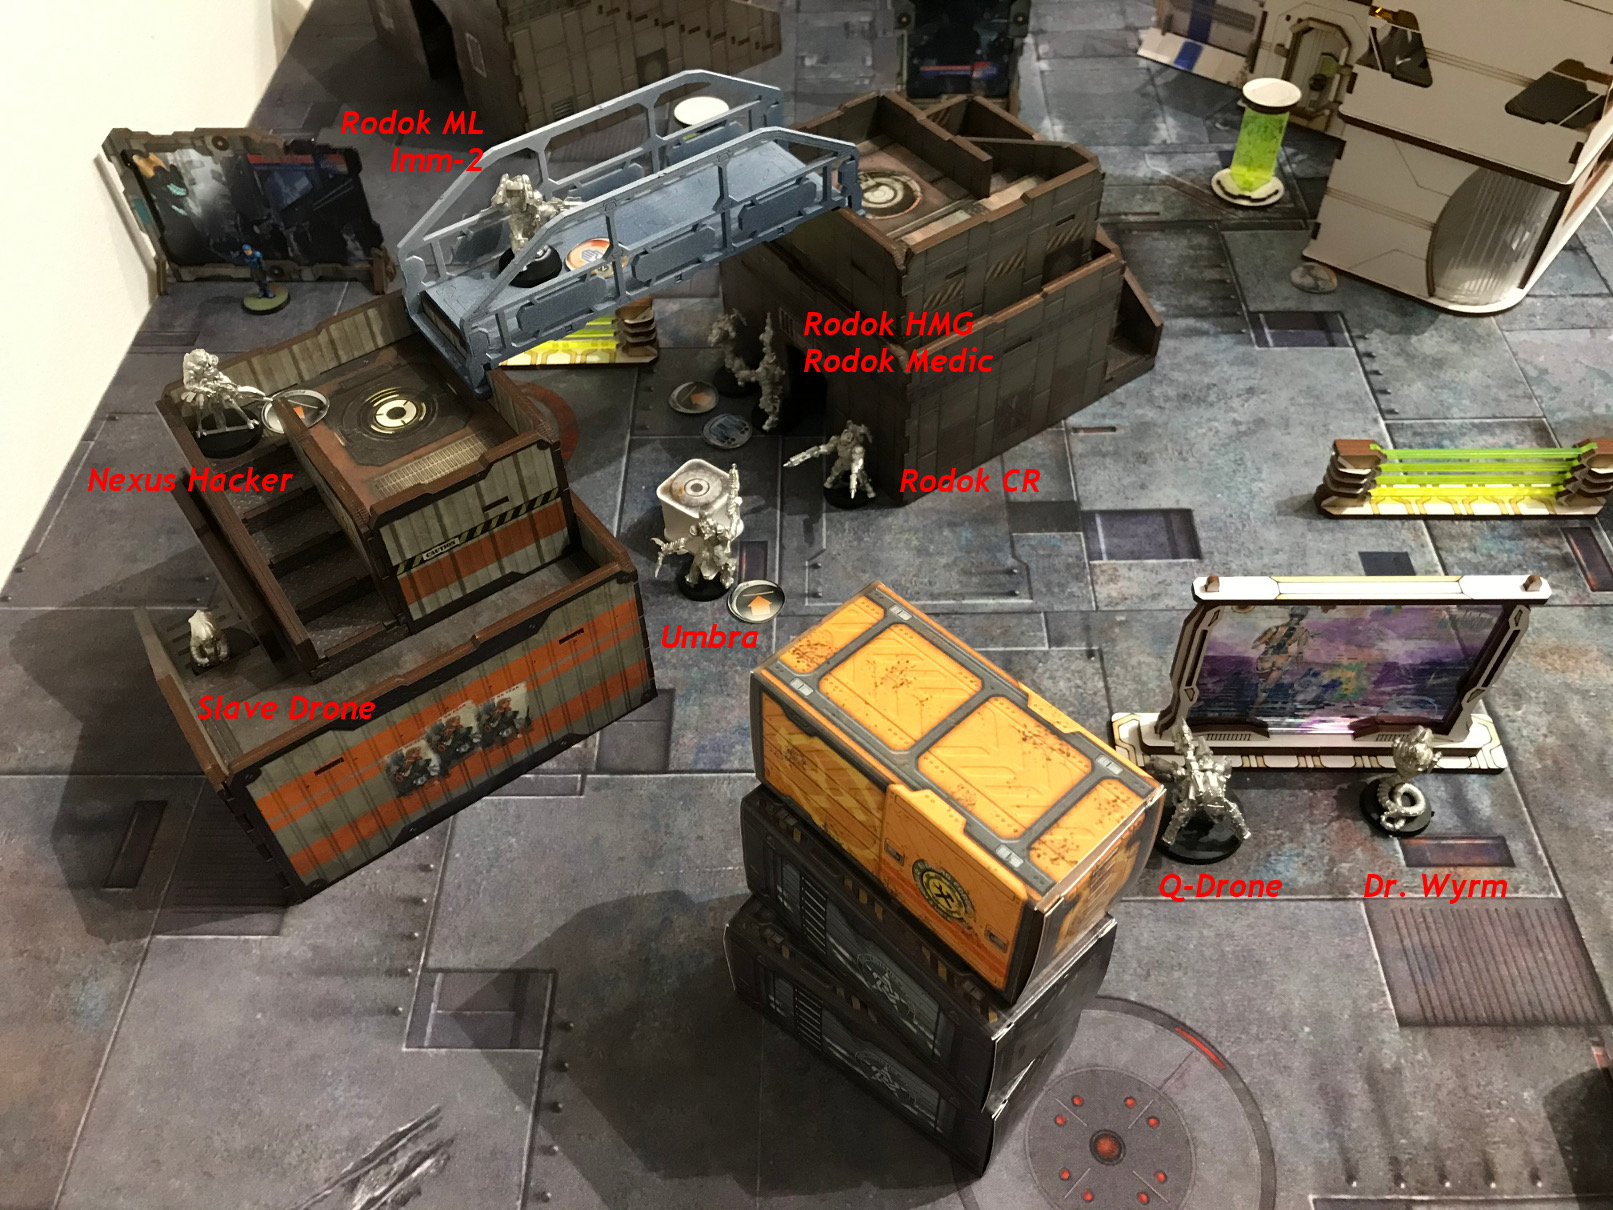
After McMurrough was switched to Group 1 he got last Instructions from his Lieutenant, took his Impeteous Order and moved forward as far as he could. The Alien Camo Token didn't react. Another Movement and he was at the building with the Rodoks.
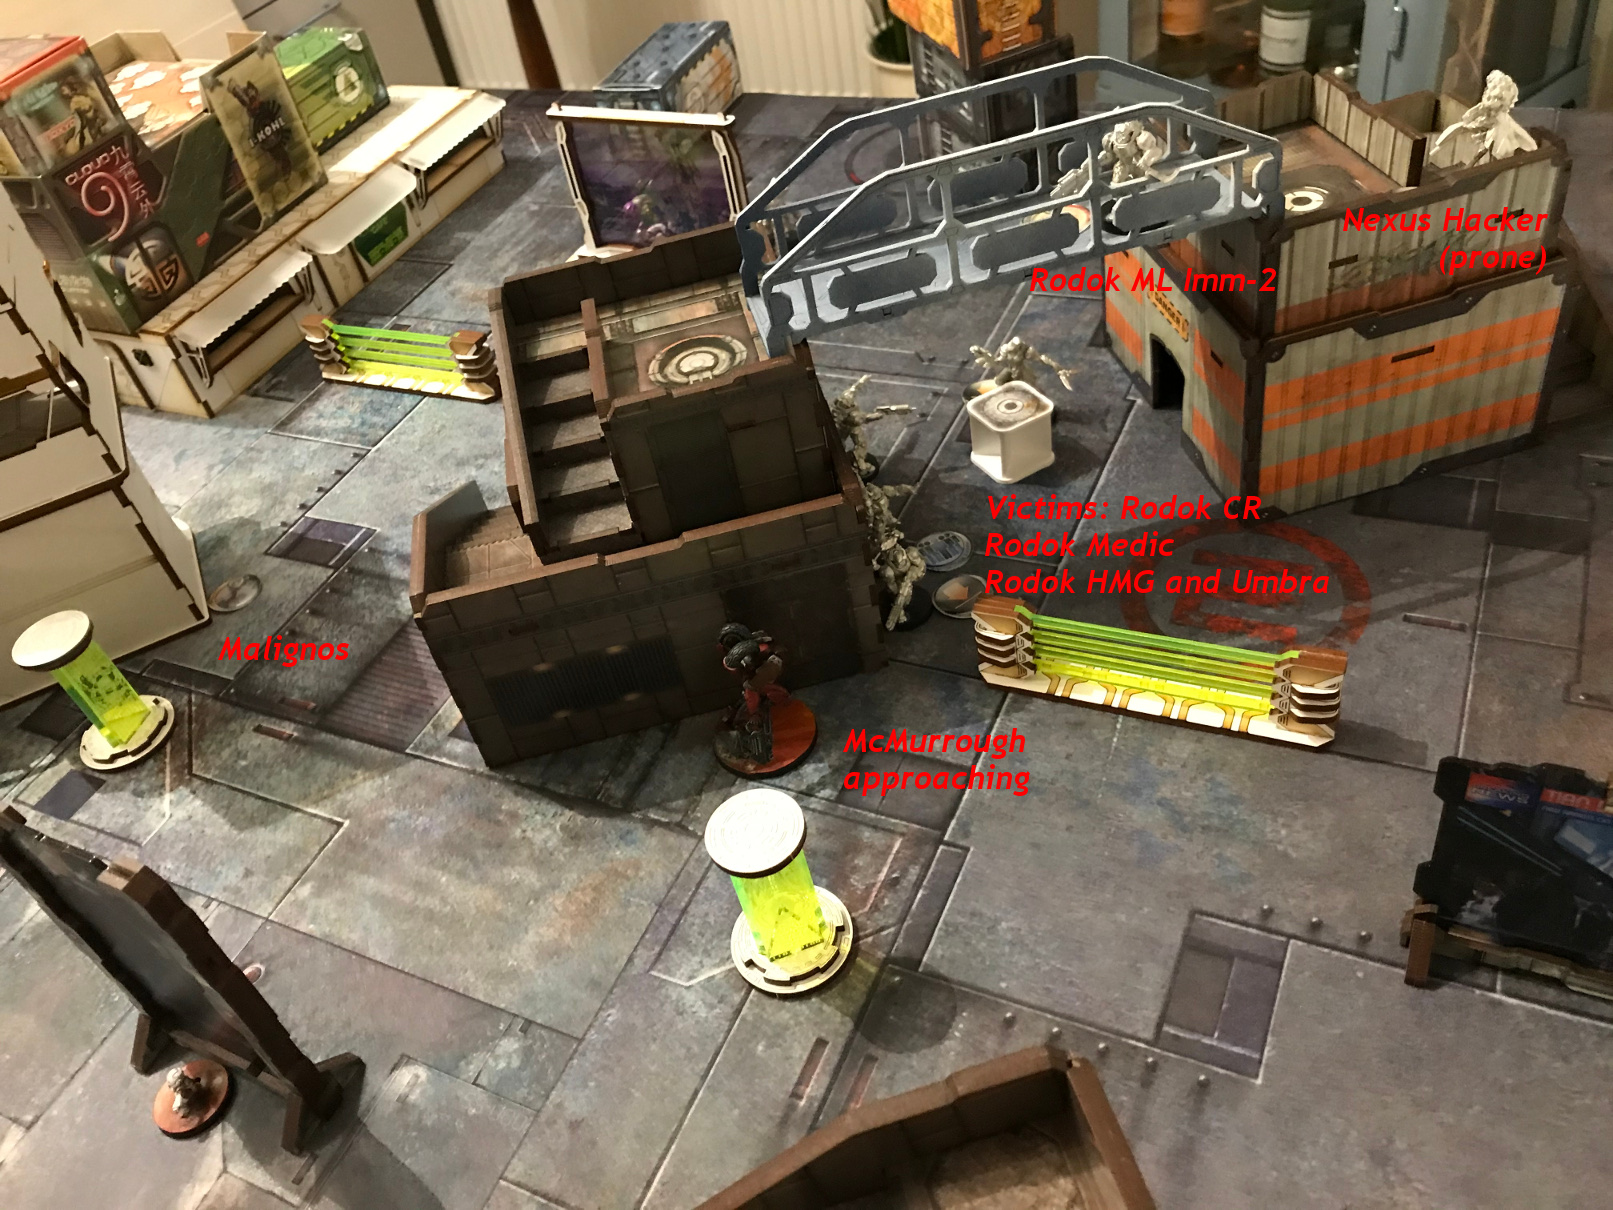
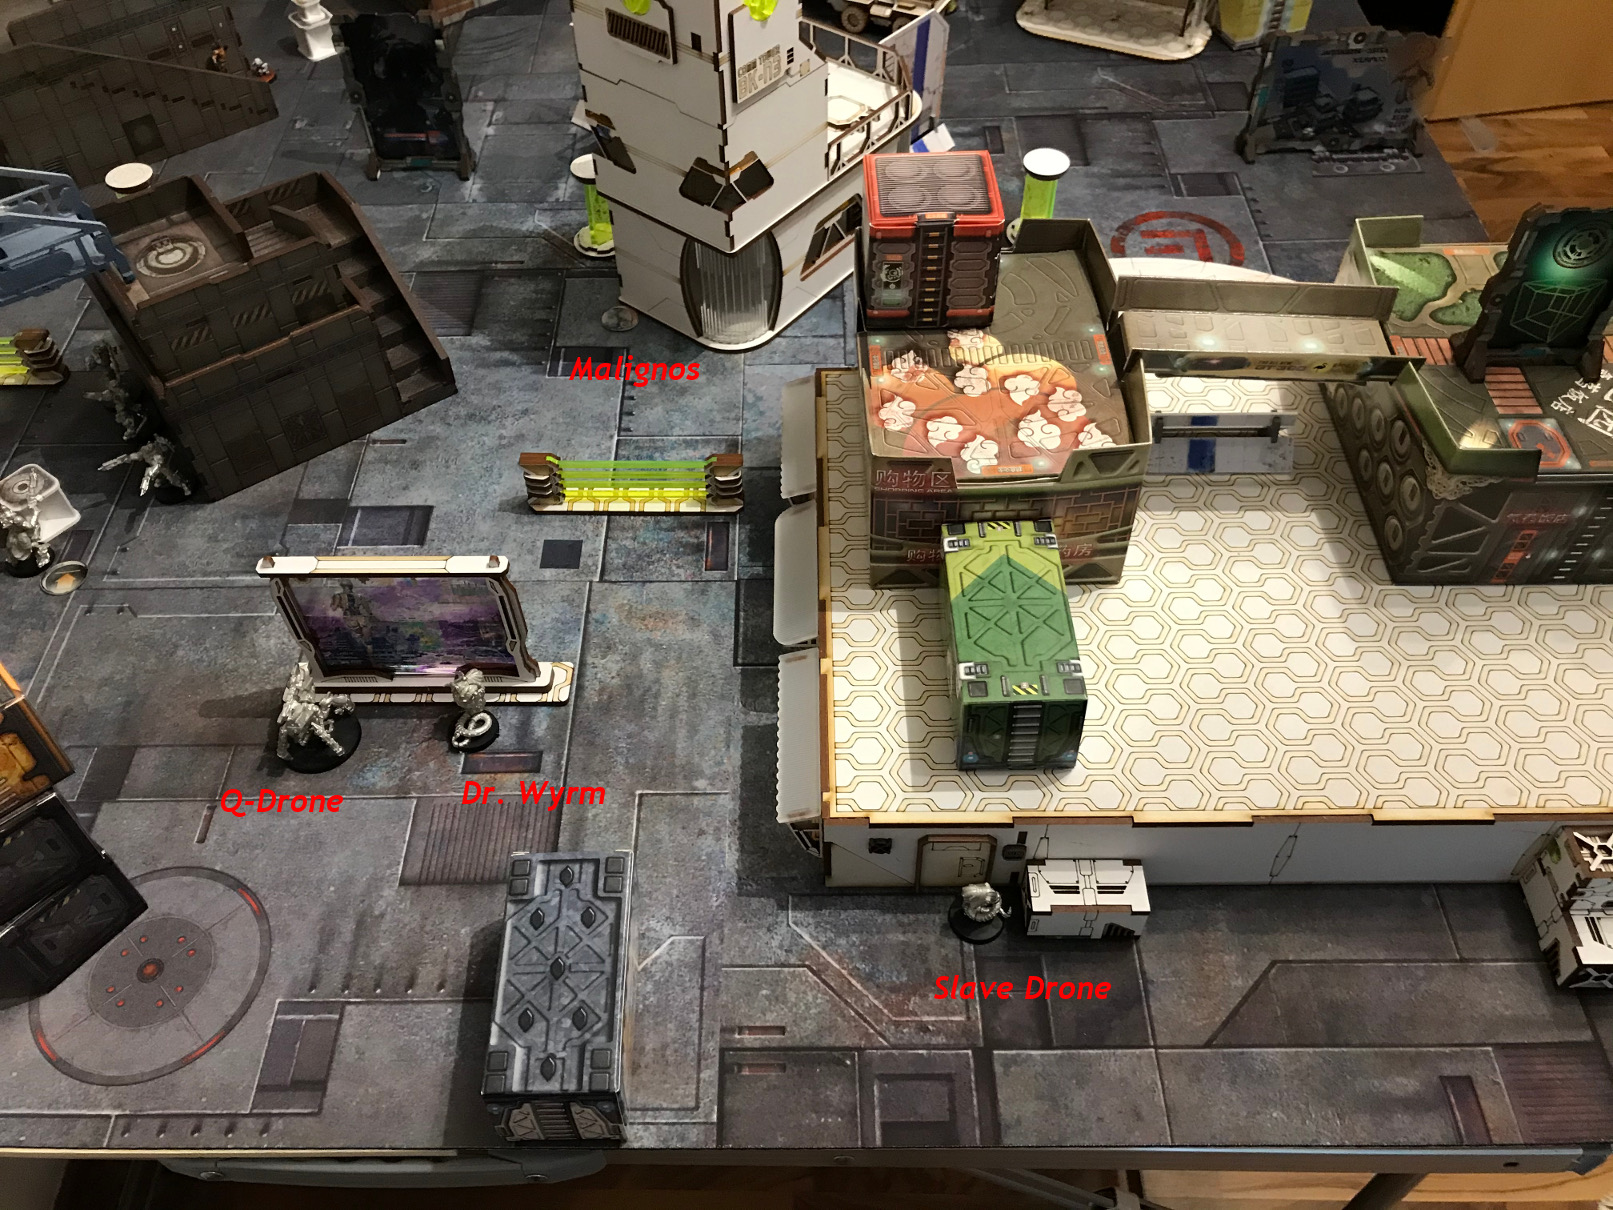
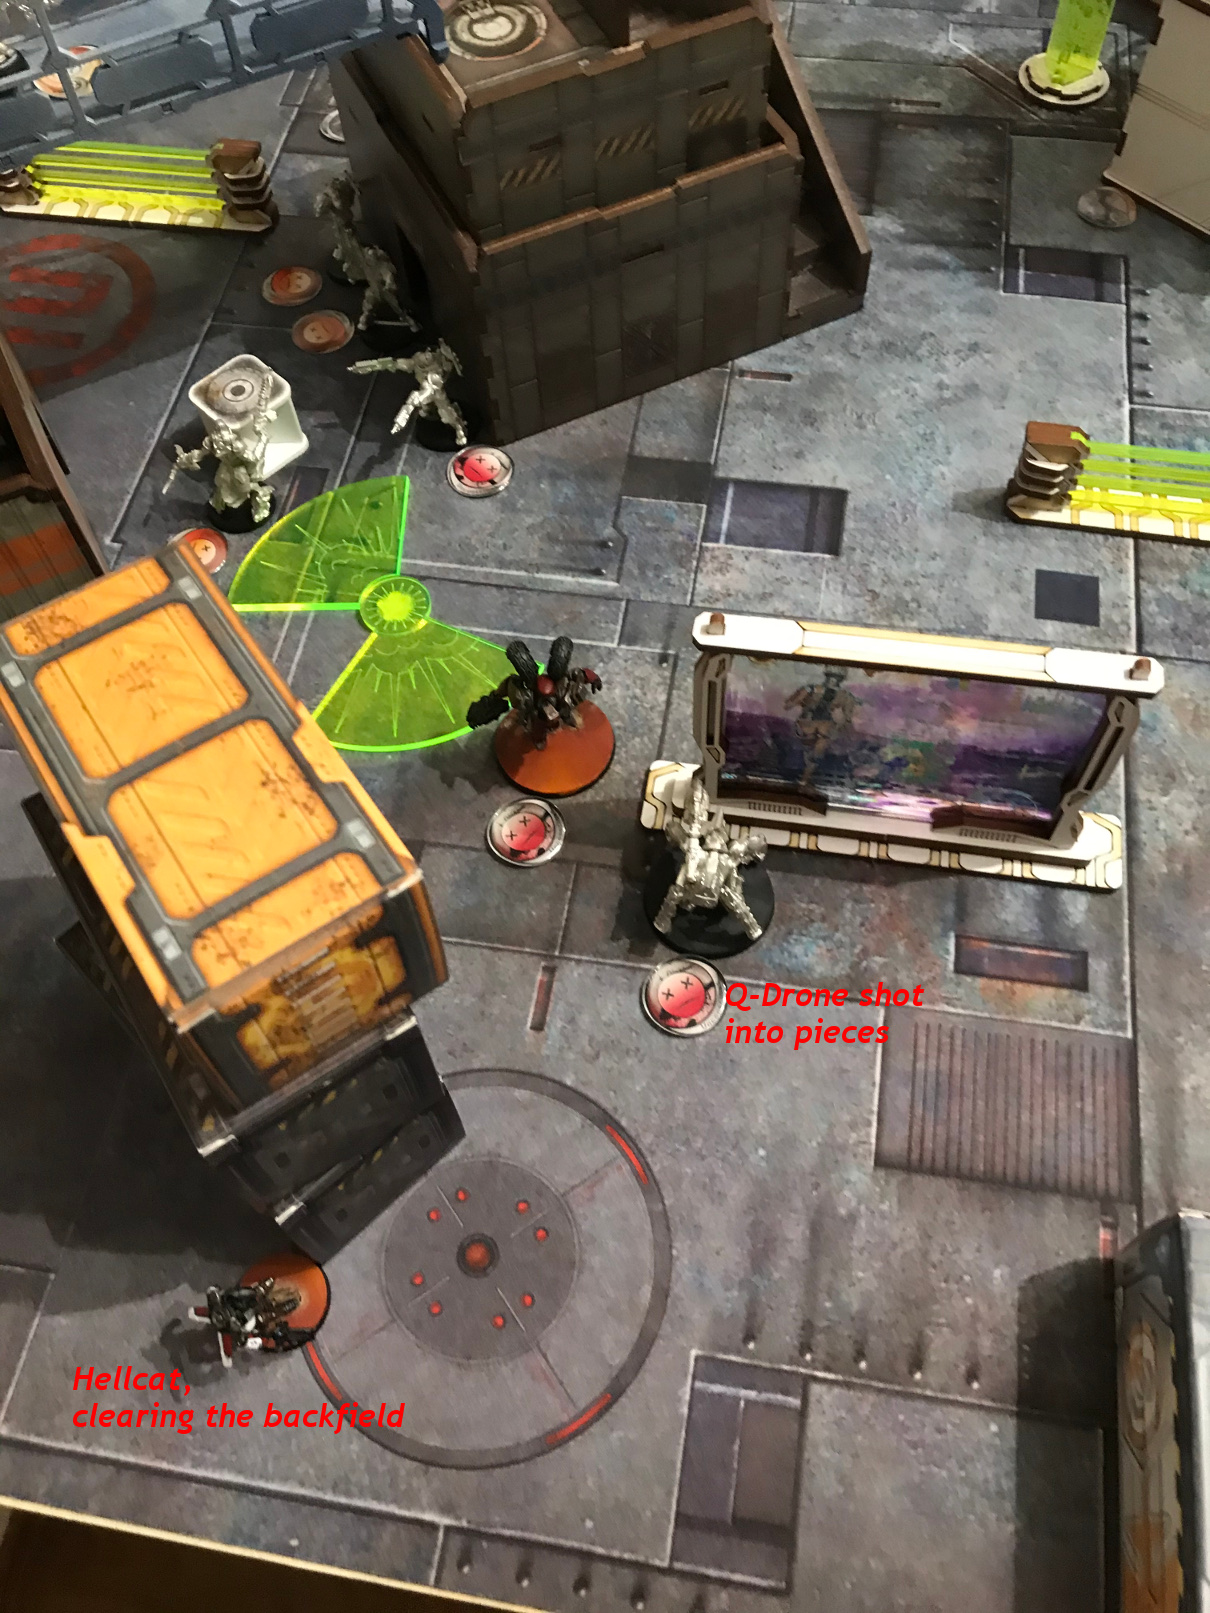
Going careful (prone), but aggressive he was laying the Chain Rifles over the Rodoks, while avoiding the Total Reaction bot. After some shootouts, while the Rodoks were mostly dodging, all Rodoks were dead or at least unconscious. To get the Umbra, he threw smoke to avoid the Q-Drone and then went for the Umbra.
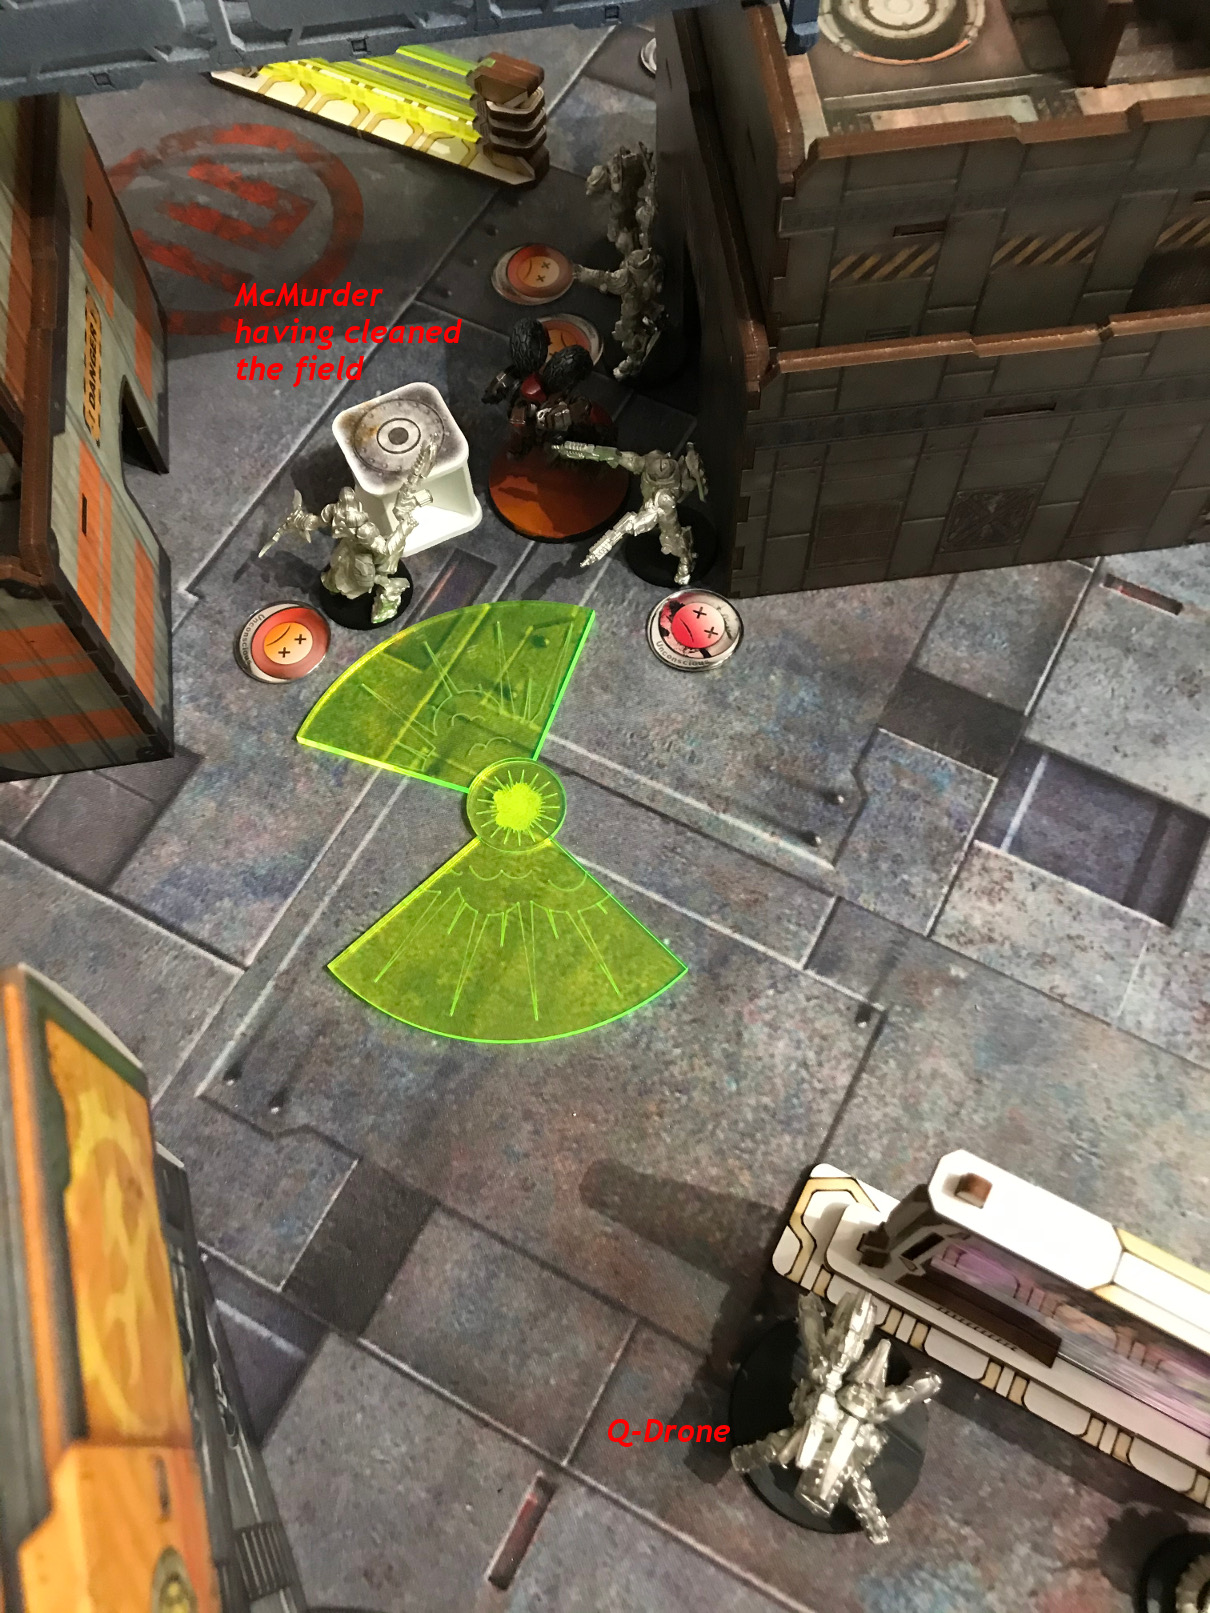
While he was at it, he tried to go for the TR Bot as well, but the TR-Bot was lucky, saved the hits and McMurrough took all four HMG-shots, going unconscious.
Using her Irregular Order the Bandida recamoed.
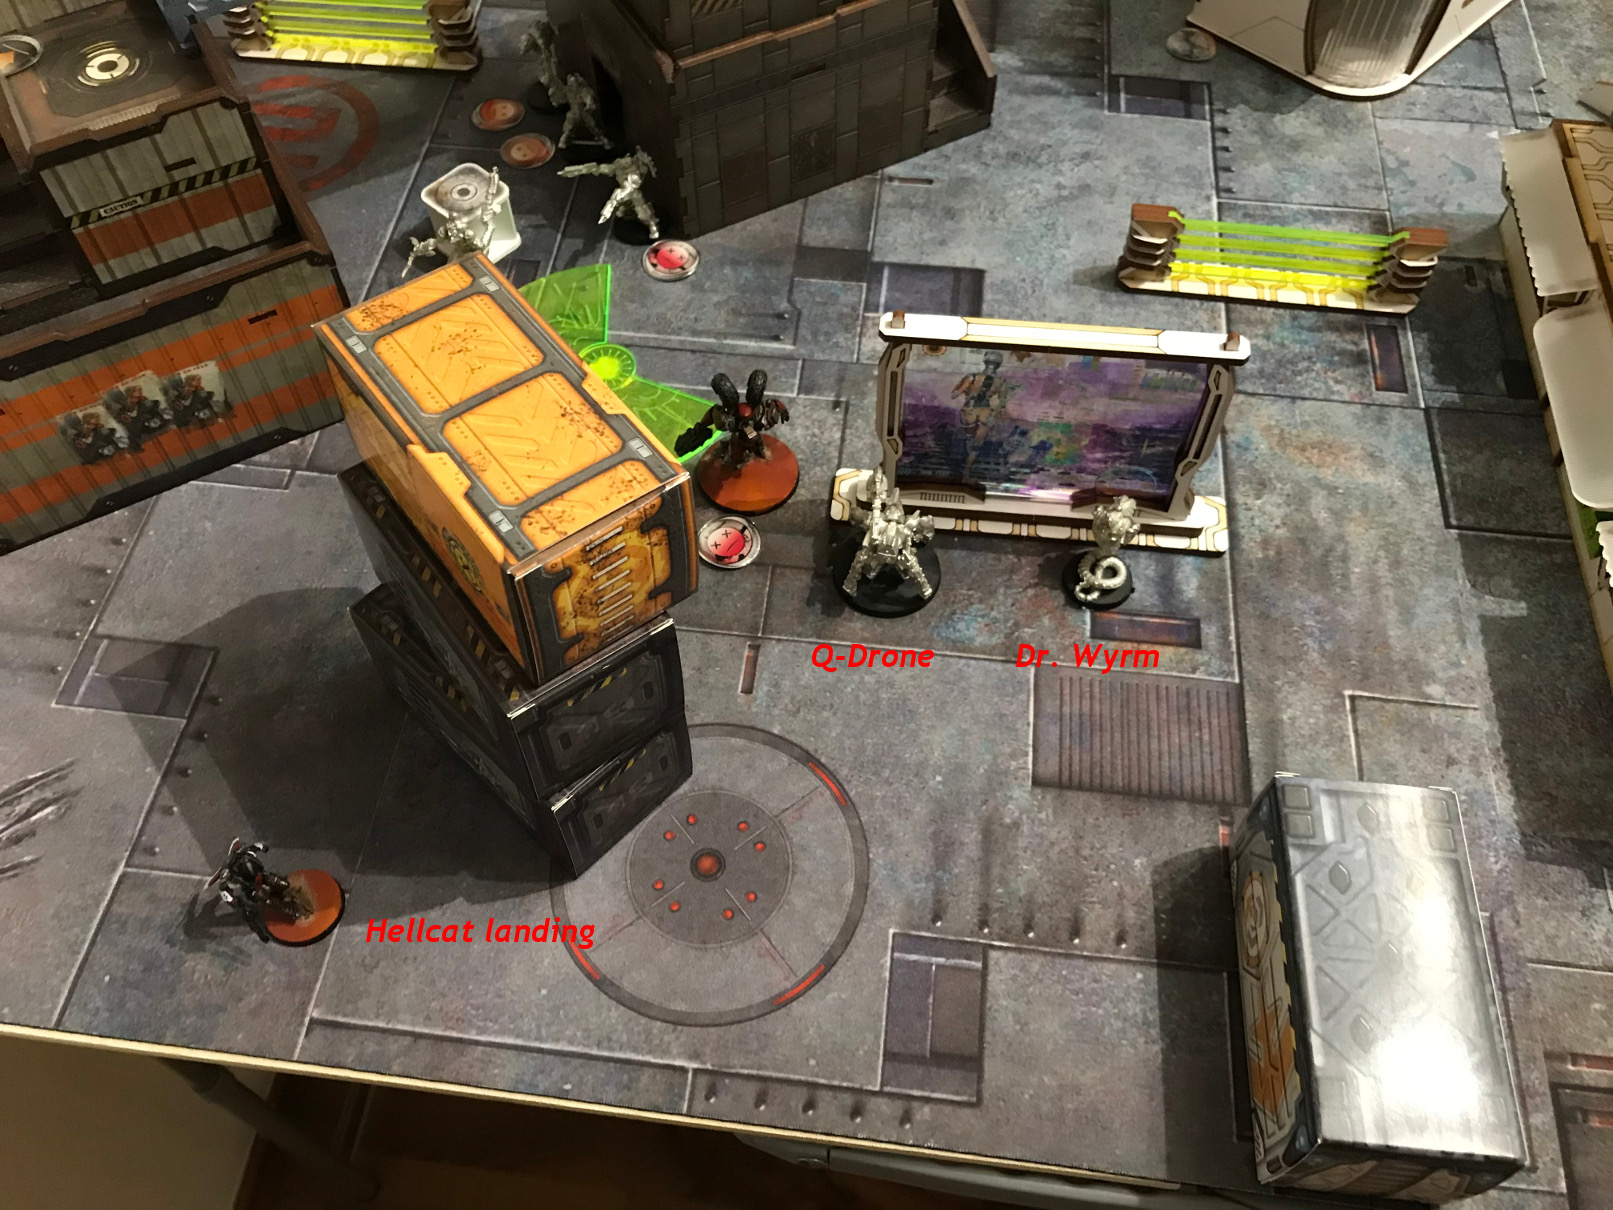
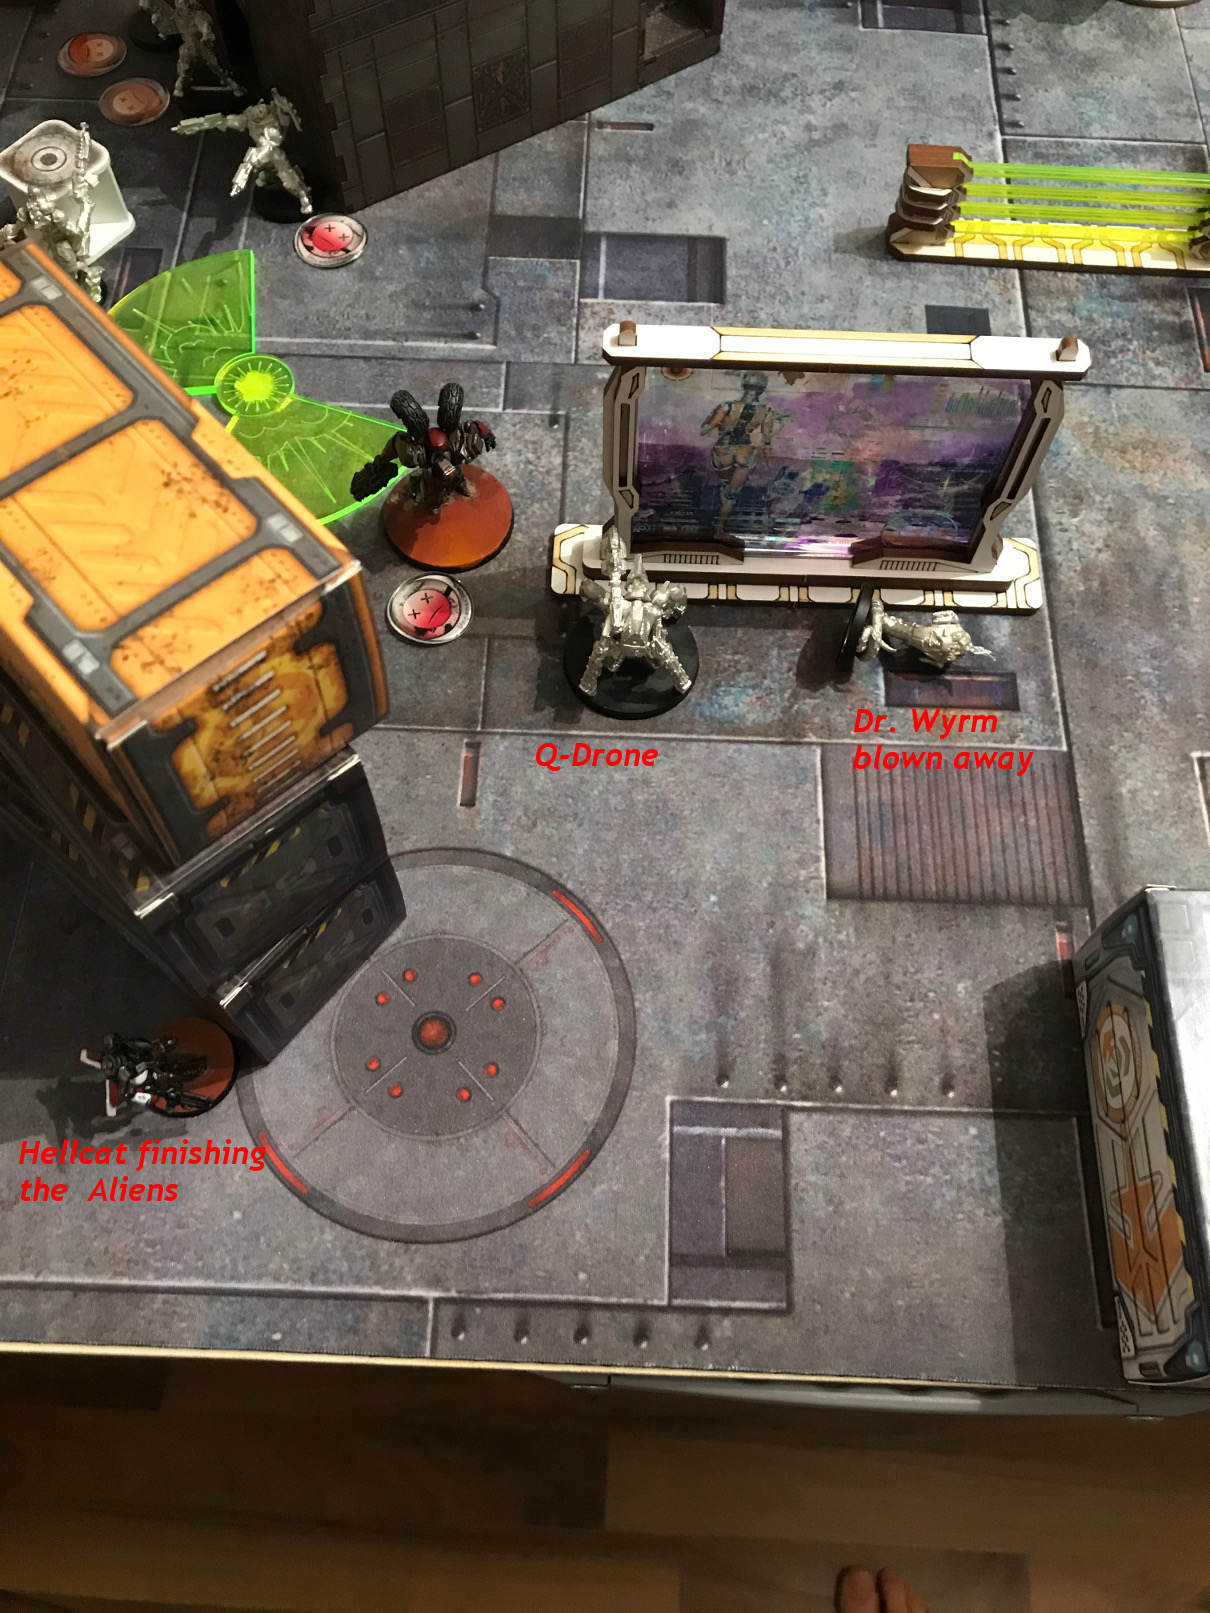
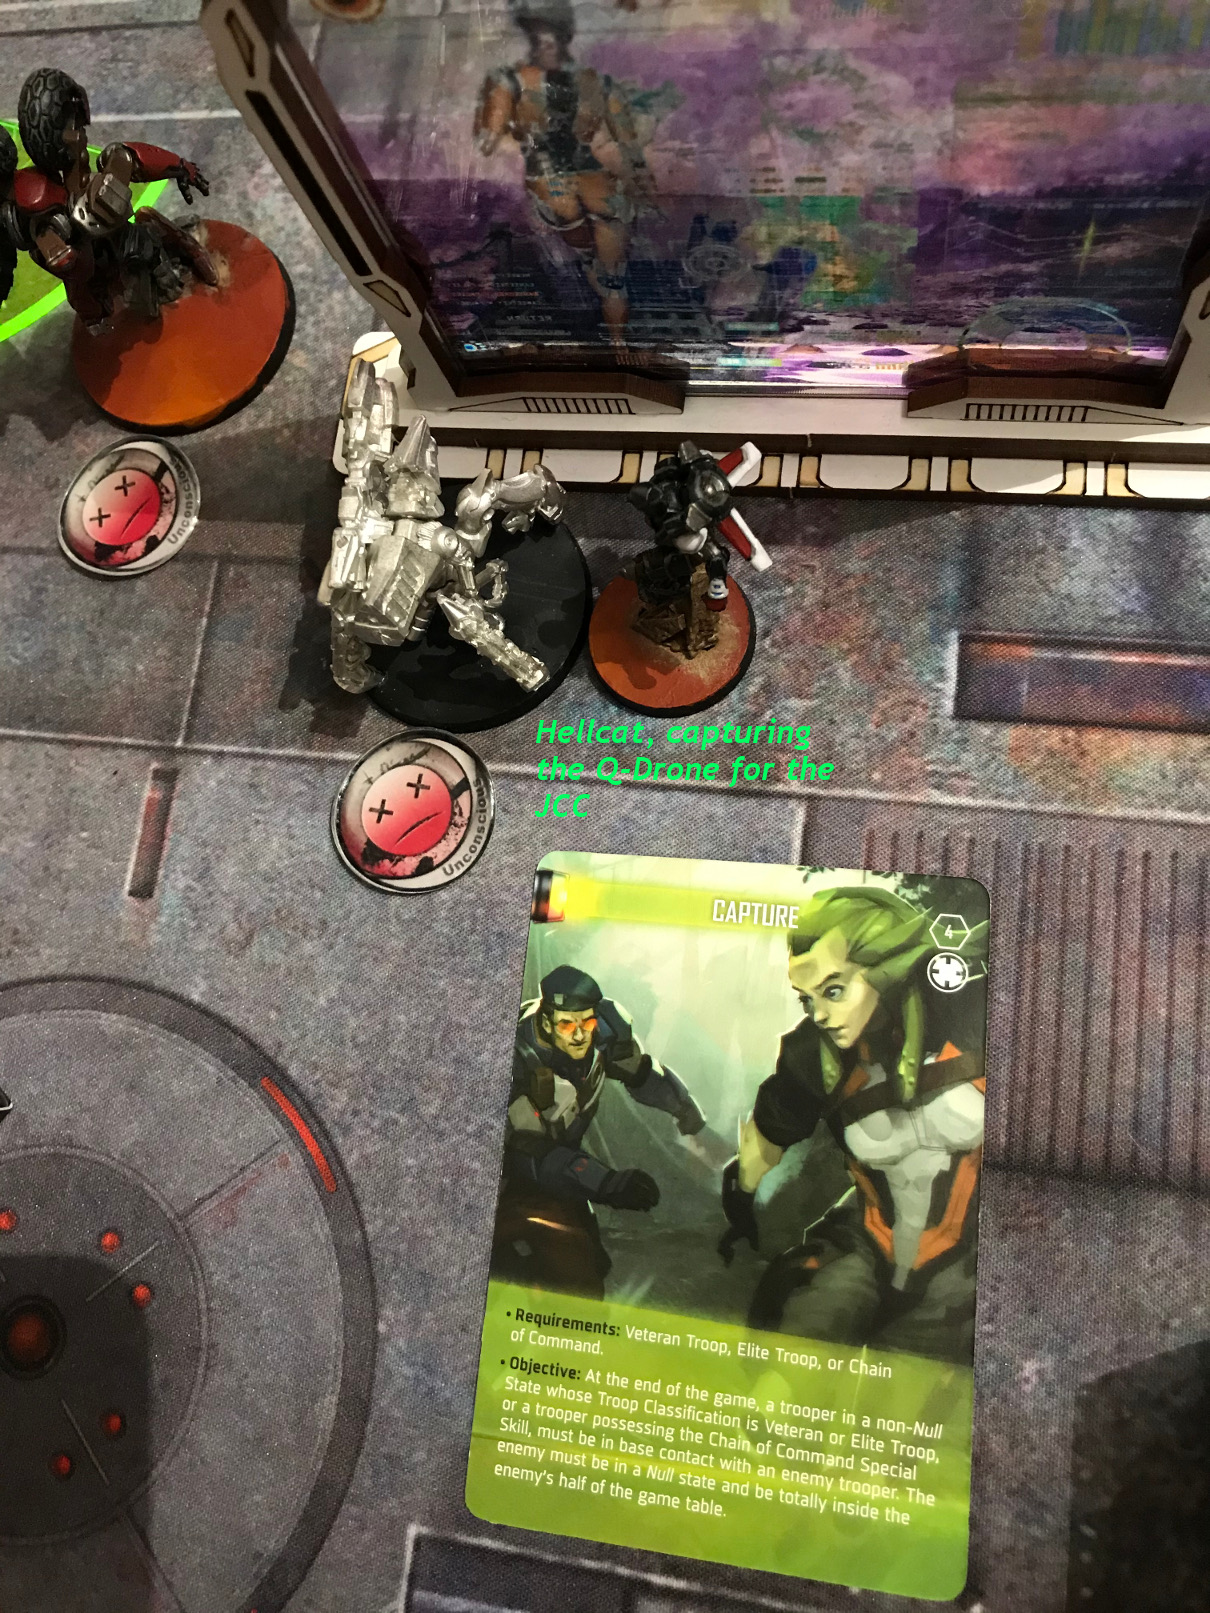
Then the Hellcat landed right on the spot out of sight of everyone to clear the backfield of the aliens once and for all.
Battle Report Author

Army Lists Used In This Battle
Recommend Commander For Commendation
Share this battle with friends
Spitfire_TheCatWins

Well played! Go go nomads!
I’d say you kicked some alien ass, but we’re still not sure if they actually have asses.
Great report and game!
Woah! Those are pretty nice pieces of terrain.
Excellent work bromad, You’re on the rush!
For P0NY!
Didn’t like the scult of McMurrough too, so I never played him, but maybe I’ll change my mind and use same proxy as you
Nomads and Combined making drill excecises….
what are you playing? you dont deceive nobody traitor to your kind!
(good report and hillarious9
Dat ain’t a pony XD
Giid report bruh 😉
Nice report, I enjoyed reading it.
So, Pony is safe?
Very nice photos! We will strike aleph harder and harder!!!!
Congrats with victory!