Fought At Xaraks Battery: Fire Control Module
1664 days 5 hours 4 minutes ago
OSS vs Merovingian - Xarax Battery: Fire Control Module (Power Pack)
300 POINTS
ALEPH
PolyB
VS
Ariadna
Merovingian-RF
TLDR: OSS victory 7-2 in a very bloody game.
LEARNING POINTS:
– Saturation zones aren’t always a detriment for offense and can allow for some potentially good risk plays.
– Template weapons HURT link teams (especially teams that contain remotes).
NOTE: Army list and points remaining from opponent are derived from memory and potentially not entirely accurate, but likely within 90% accuracy.


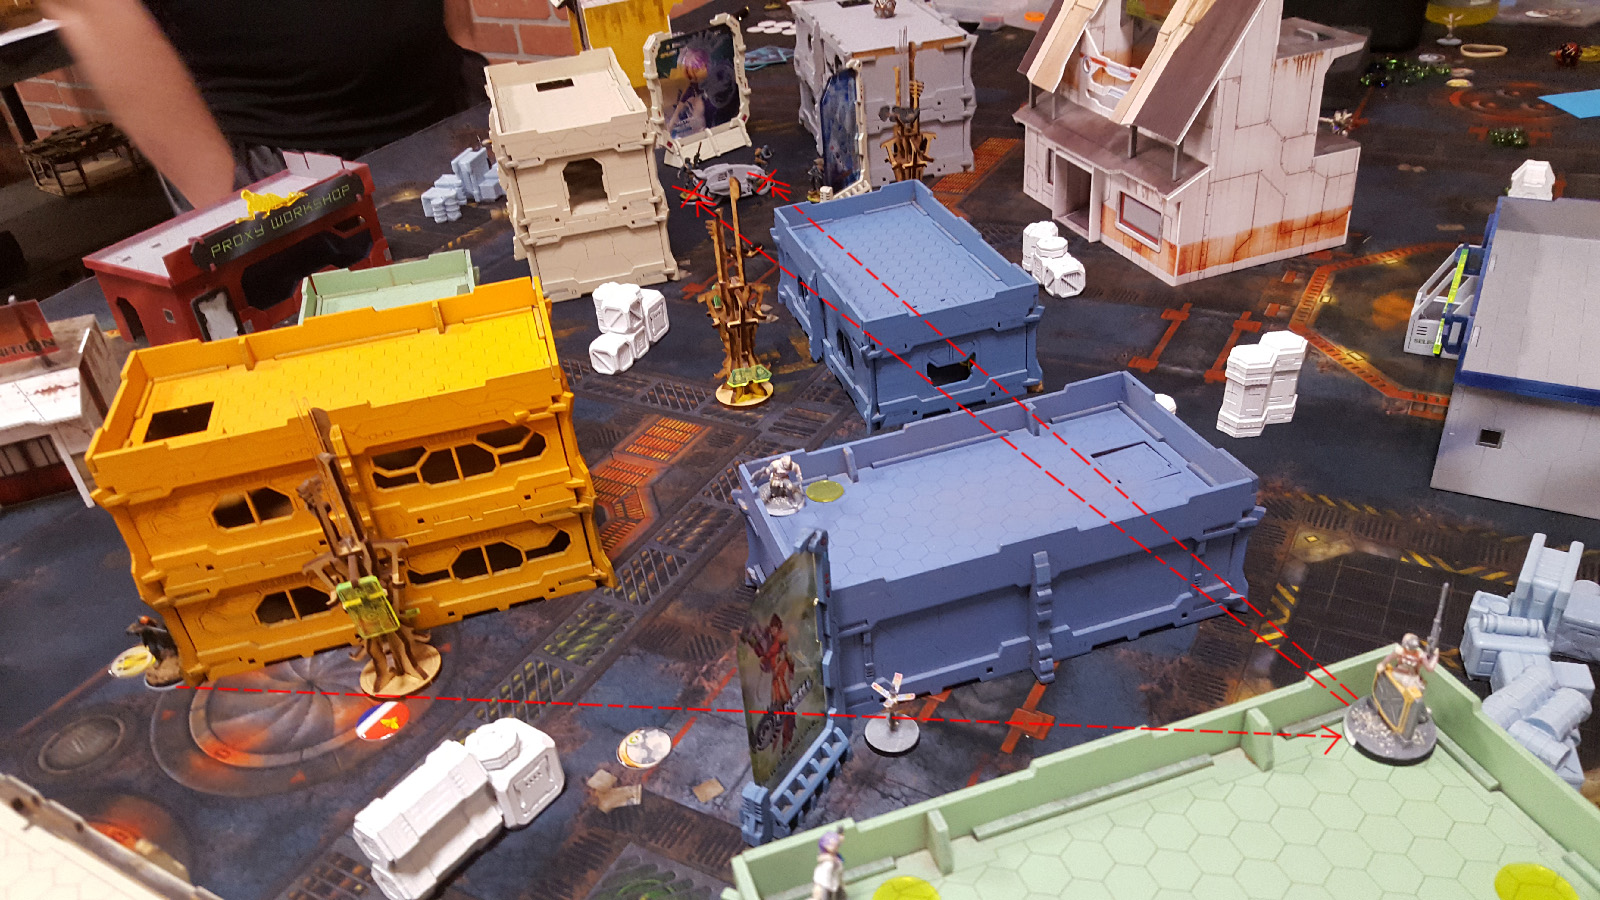


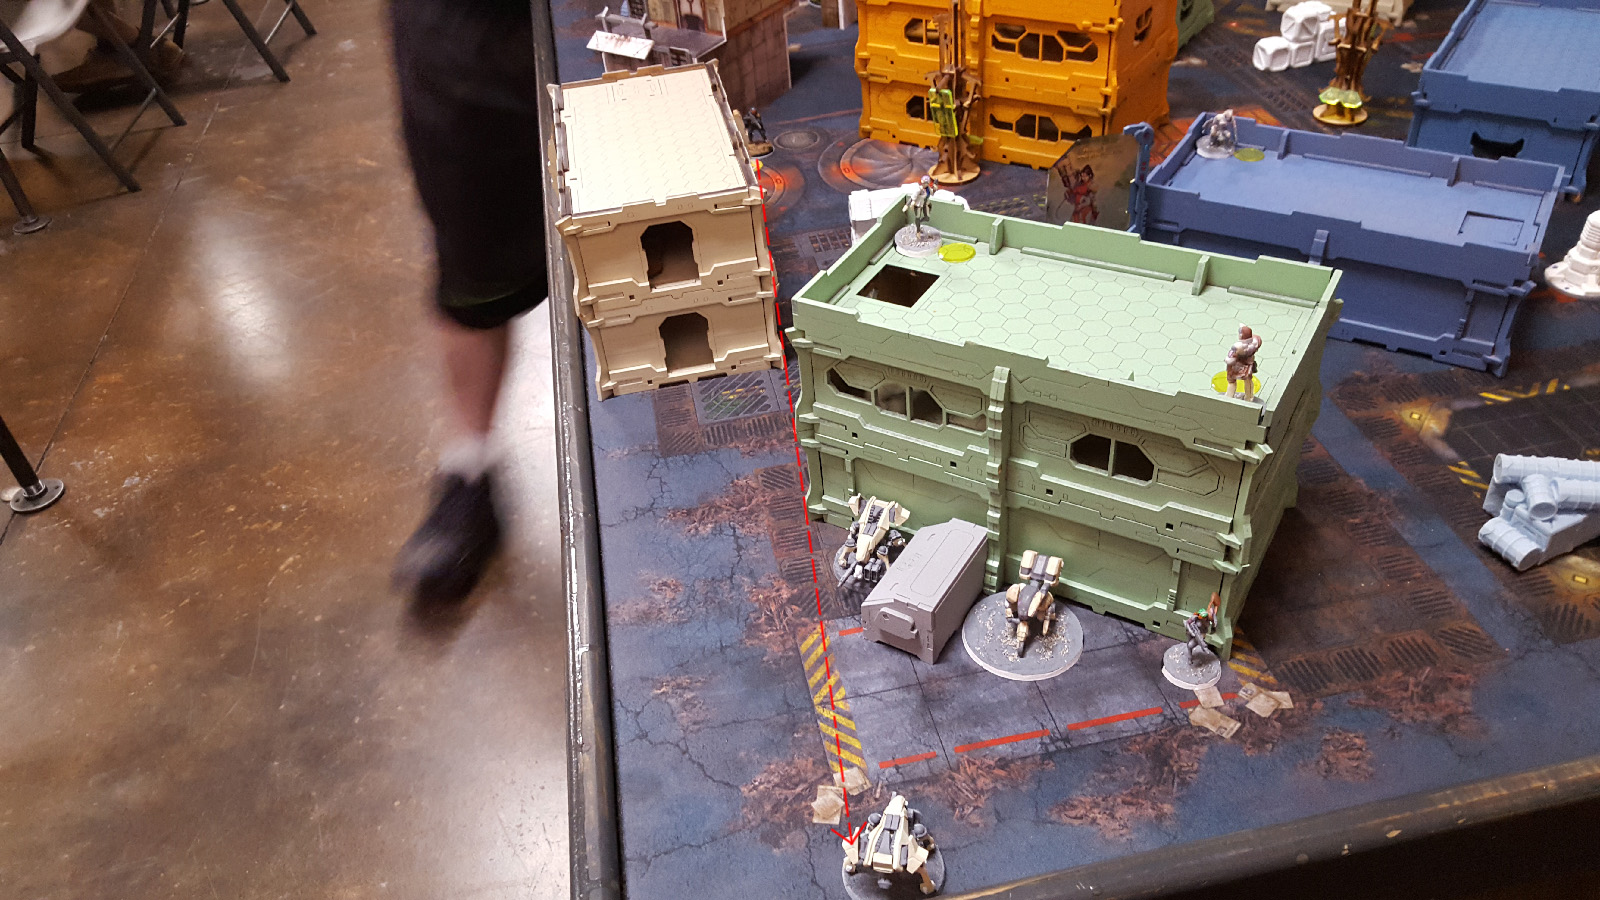


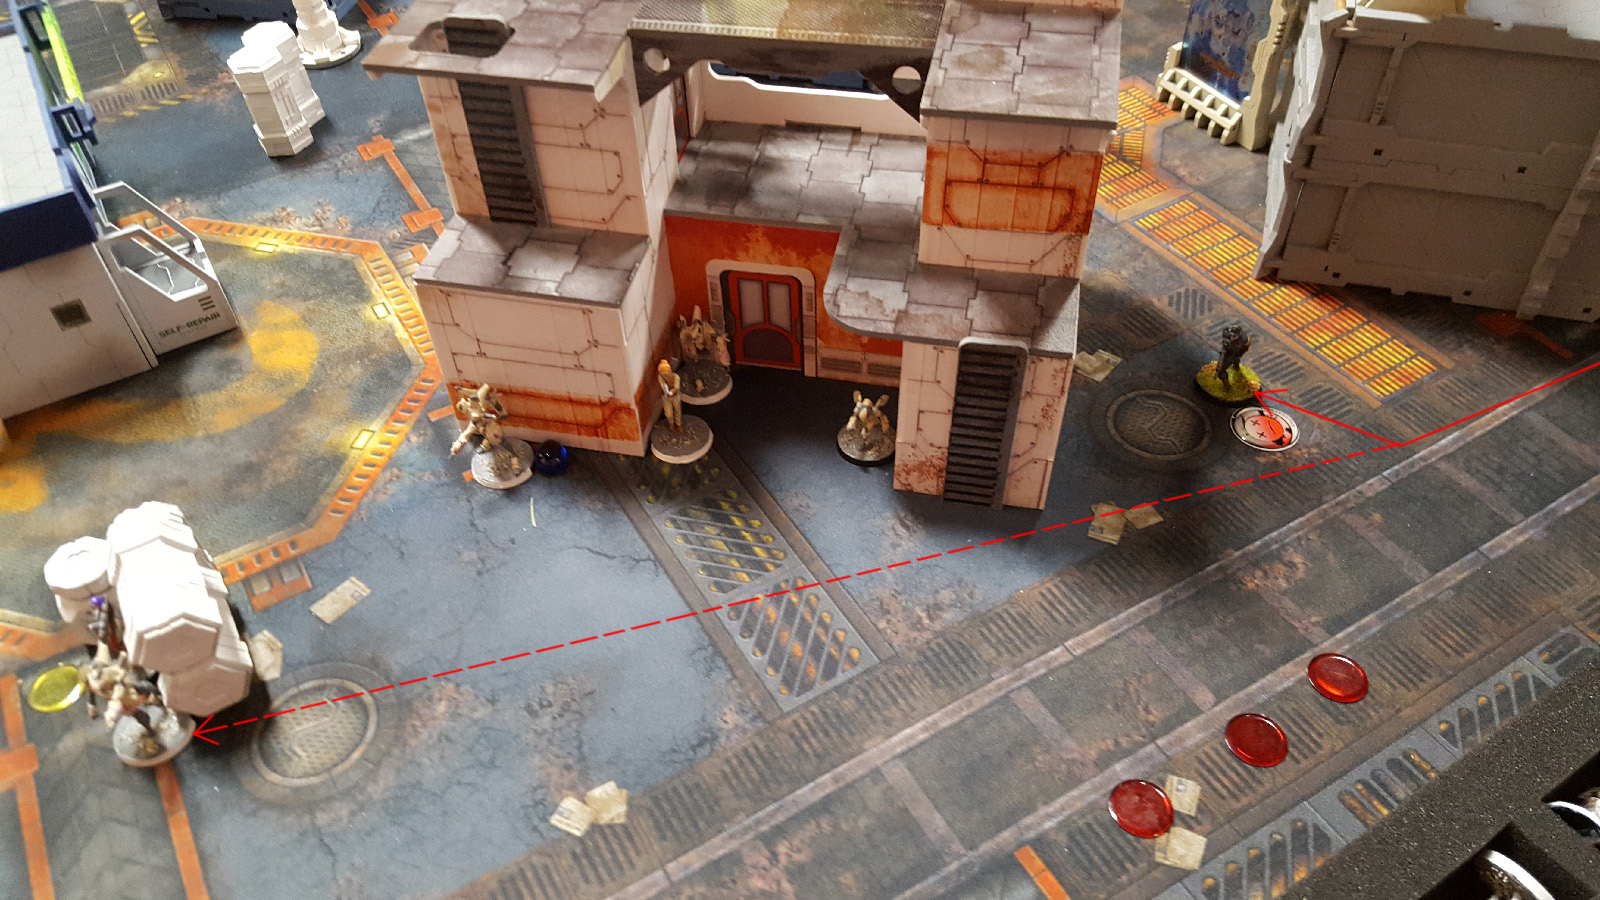

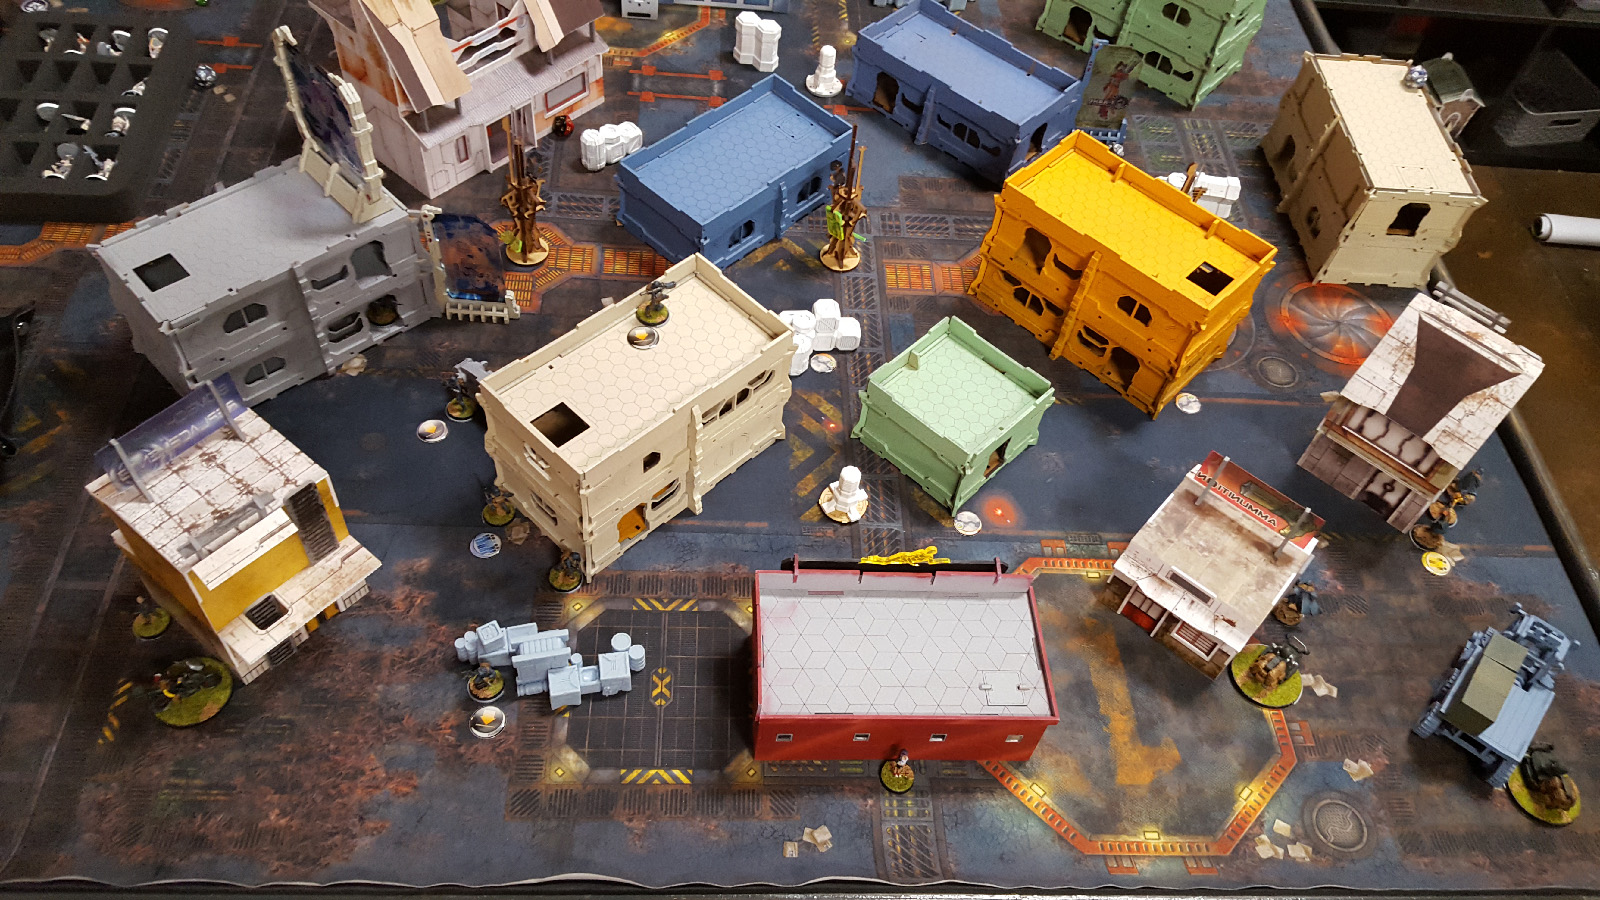


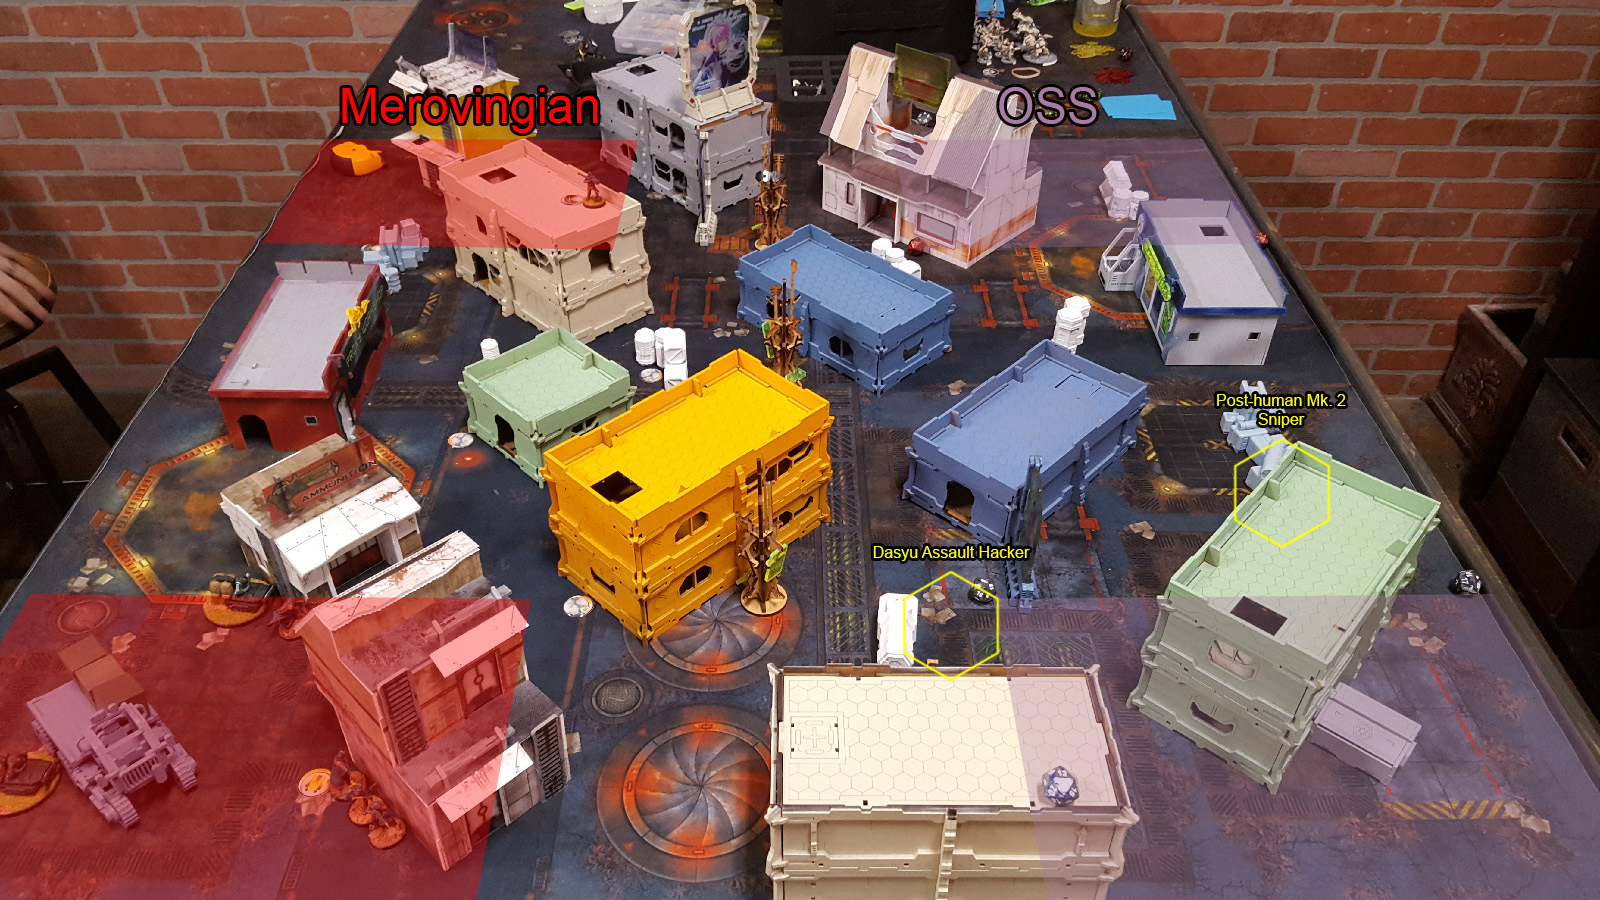 Merovingian wins lieutenant roll-off and opts for first turn while OSS chooses deployment and deploys on picture right. Note that deployment zones for Power Pack force deployment to the corners unless troops are infiltrators or have forward deployment.
 Merovingian deploys core fire-team around their left flank with missile launcher on top of building prone. Then deploys Haris fire-team on their right flank. Reserve trooper is the mobilized 112 deployed far back on the left flank behind a building.
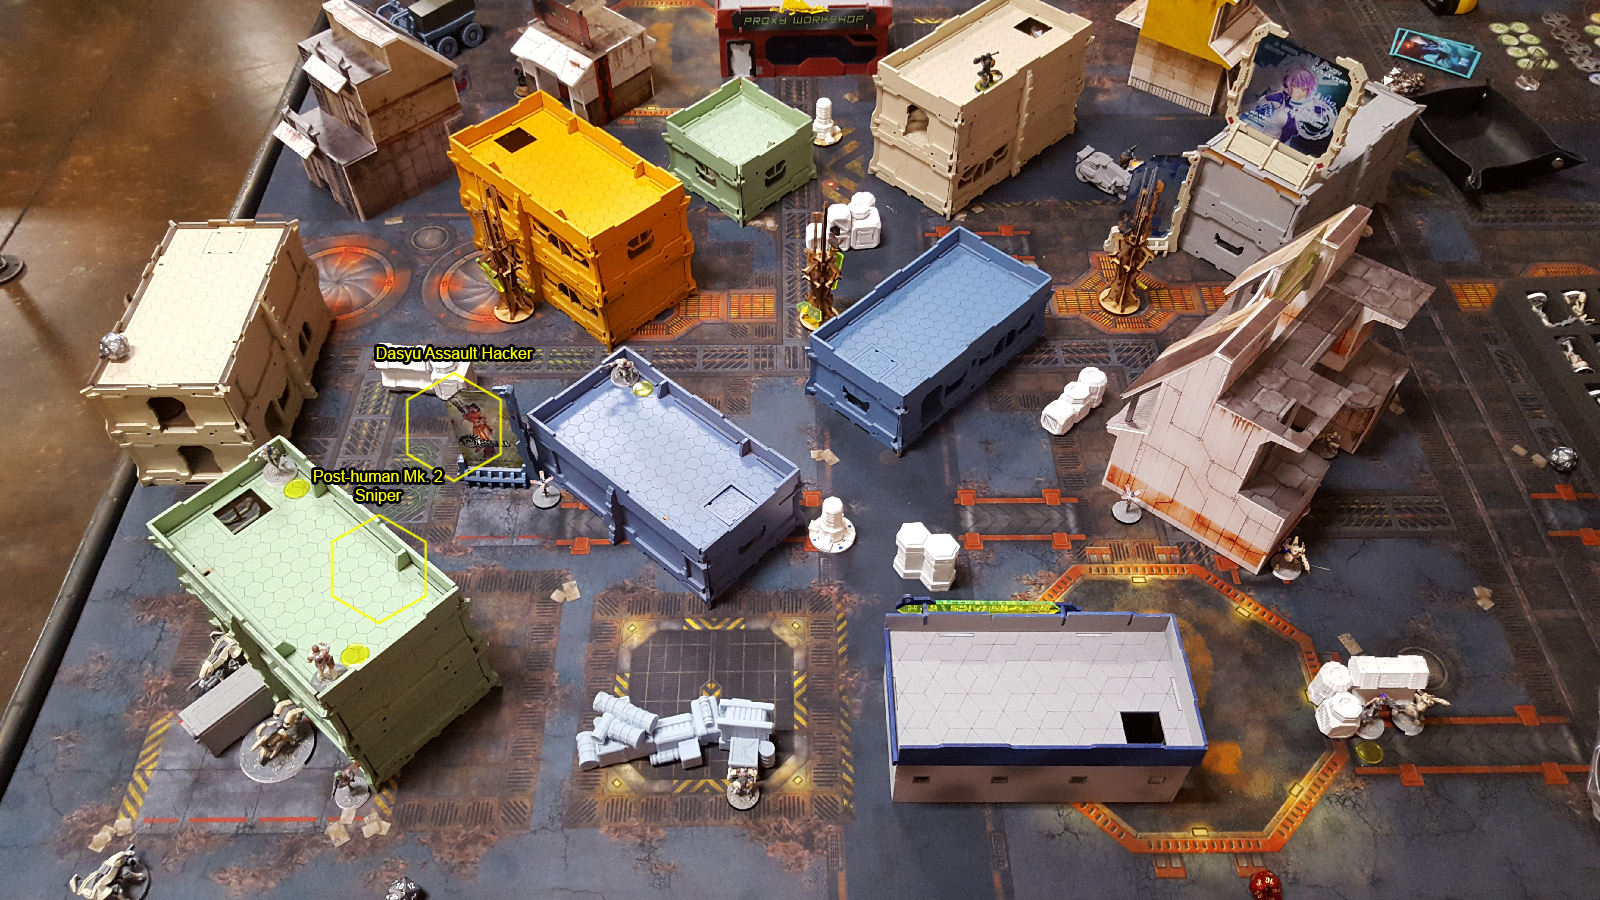 OSS deploys Dakini fire-team on their far right flank fully covered by the large building, Shukra consultant and Danavas on the rooftop left flank, and remotes far back left flank. Reserve trooper for OSS is the Post-human with Mk. 1 engineer deploying left flank near the remotes sync'ed to the Yudbot near the Dakini fire-team, Mk. 2 sniper on the rooftop near the Shukra, and Mk. 5 FO deployed almost table center prone on a rooftop.
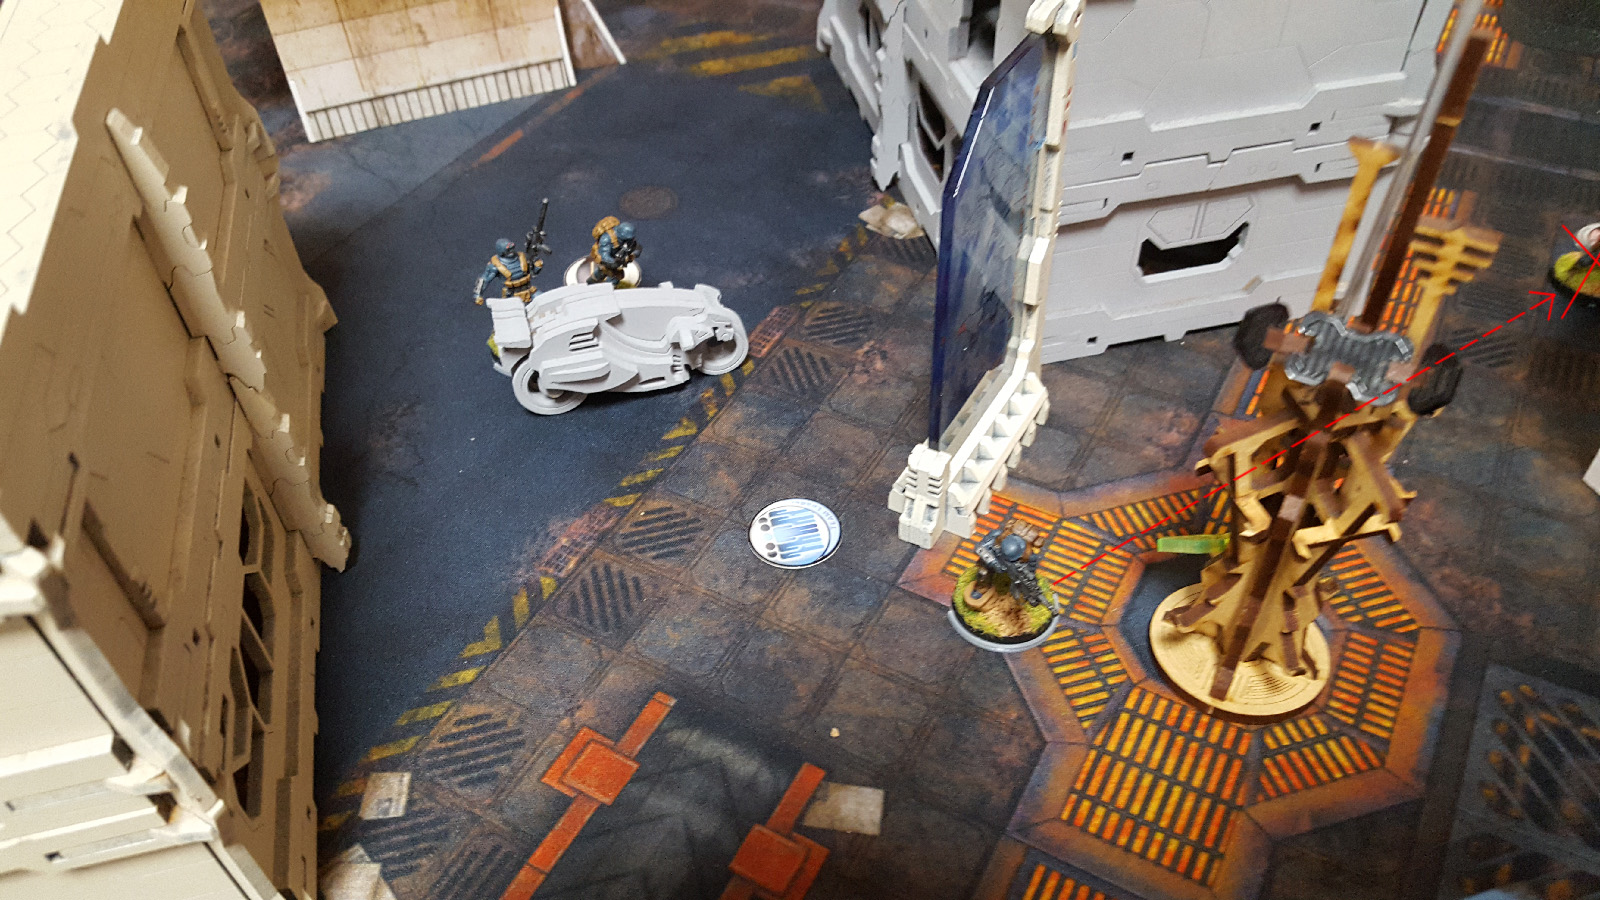
 Merovingian opens with movement on their left flank approaching the Dakini fire-team with a Chasseur in marker state. One of the Dakinis has line of sight and attempts to discover, forcing the Chasseur to take shot early and leave marker state. Initial shots from the Chasseur miss and on the subsequent order he's shot down by the Dakini as he attempts to move to a better angle of approach.
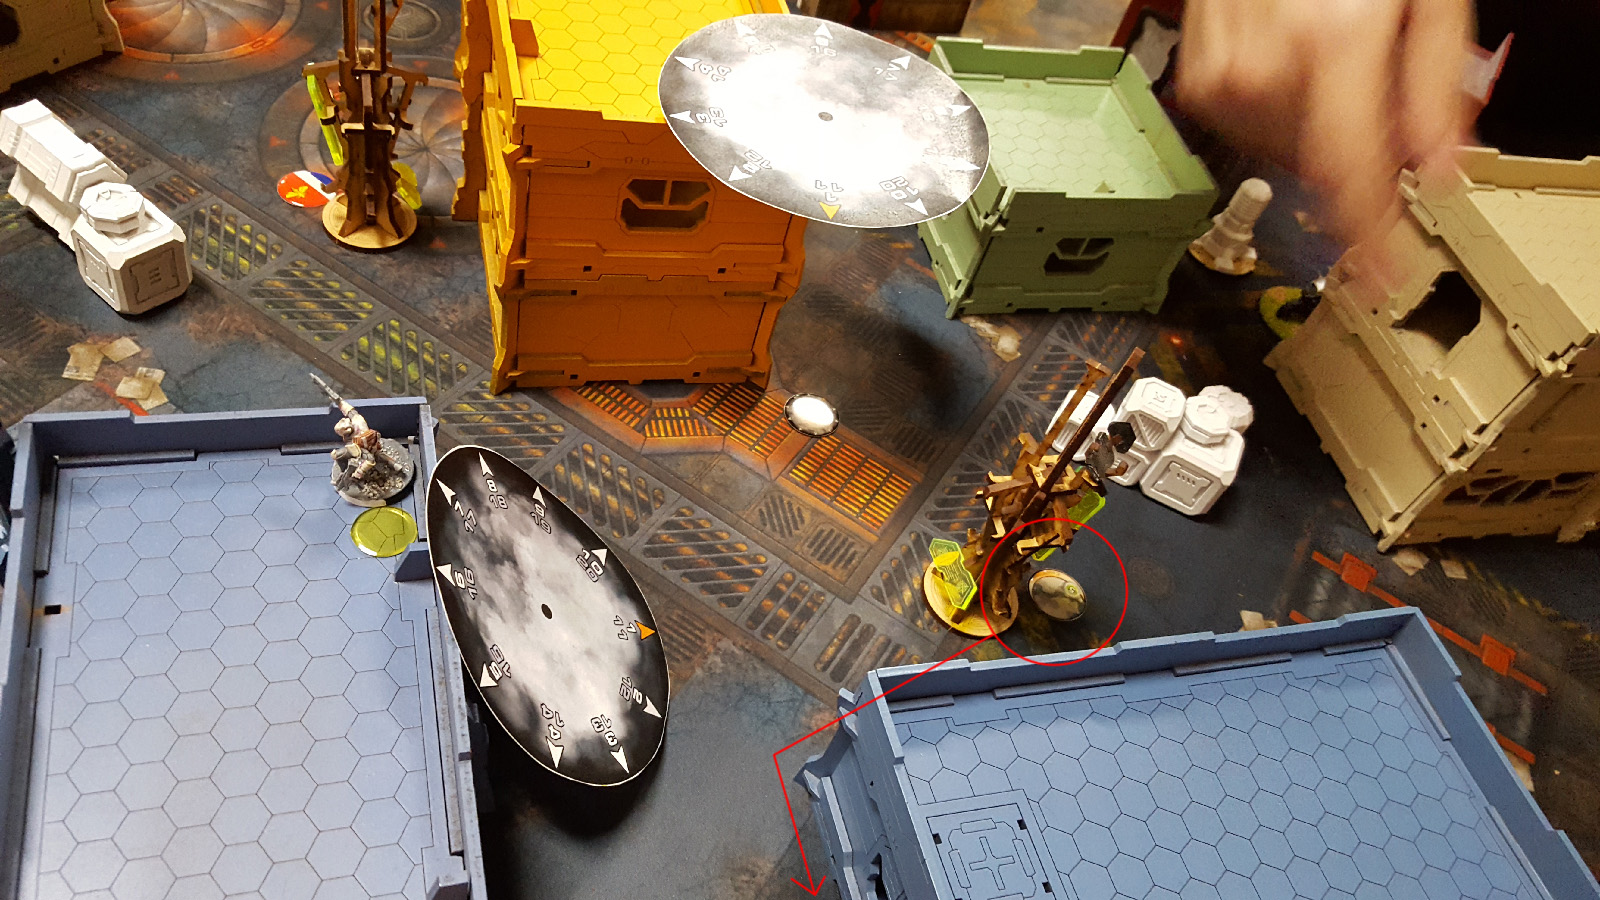
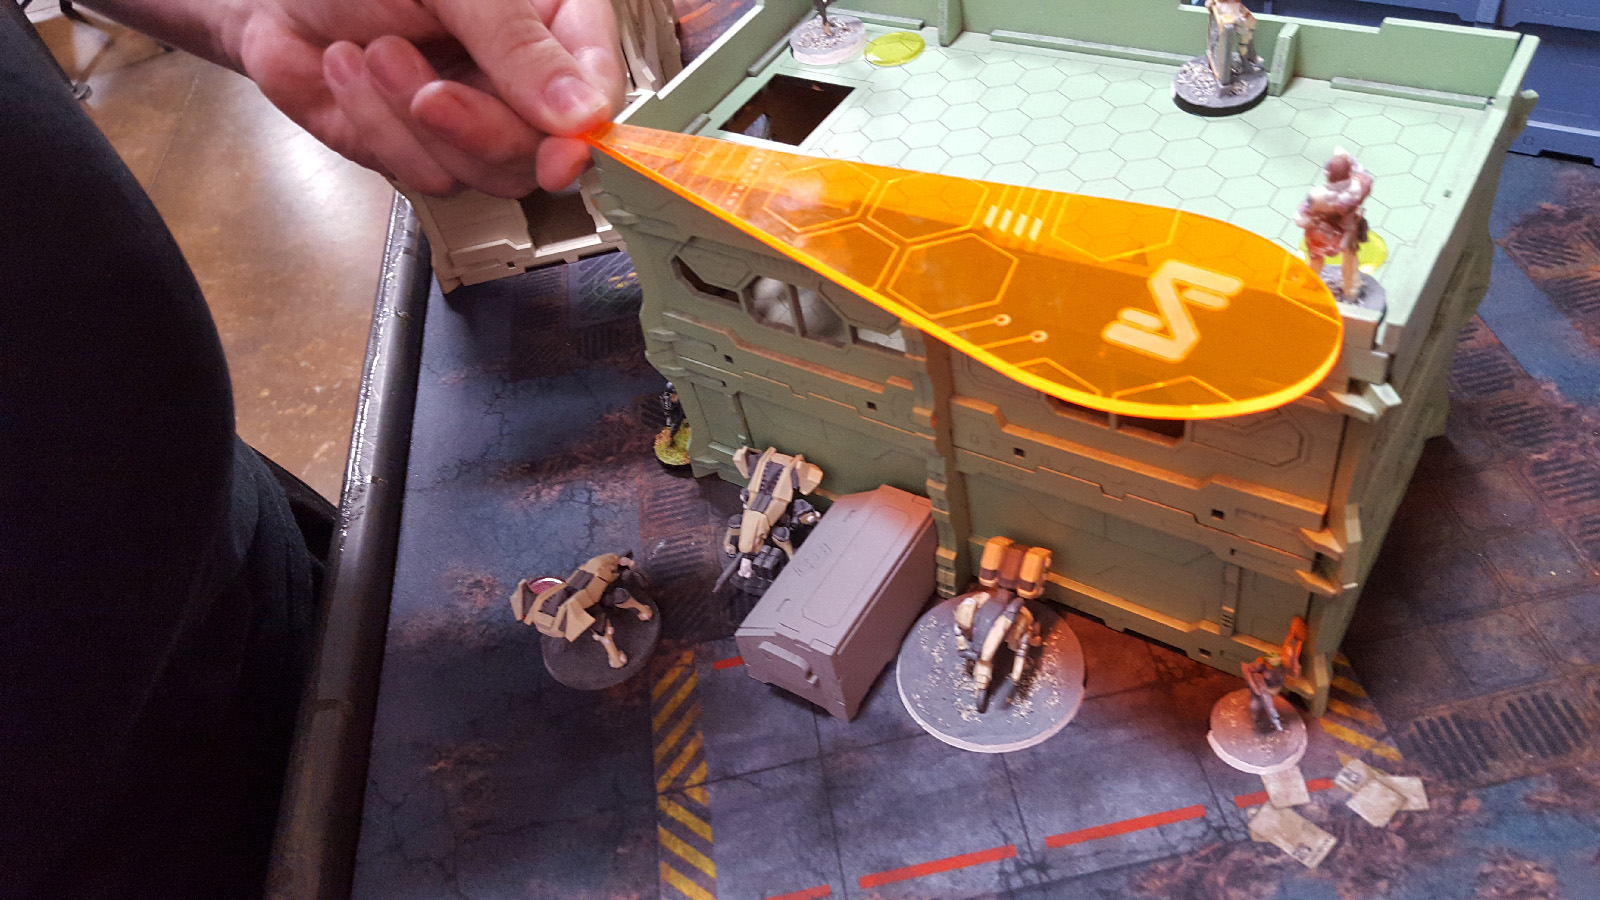
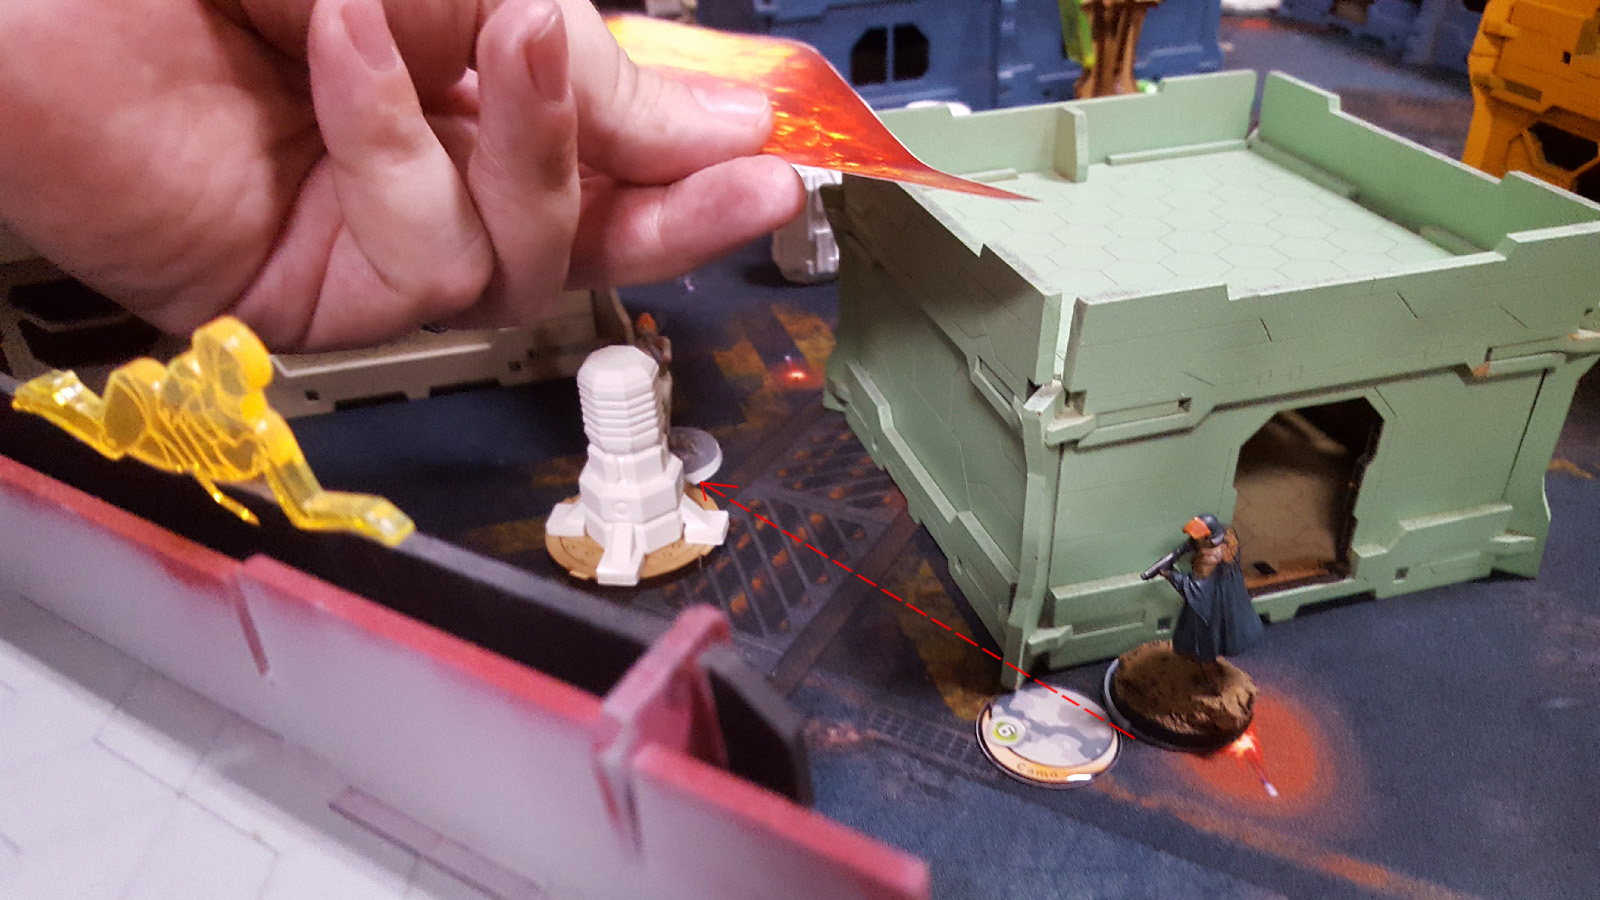
 Briscard fire-team activates to move their missile launcher along the rooftop and pop up to melt the exposed Netrod lying in the middle of the street below.
 Briscard fire-team activates again to move their paramedic within range of the unfortunate Chasseur from earlier and attempt to revive him from range. The shot lands, but the Chasseur fails the physical check and is unfortunately killed.
 Briscard fire-team continues to activate and move unhindered by ARO's to claim the antenna on their left flank and position themselves nicely back into half-height cover.
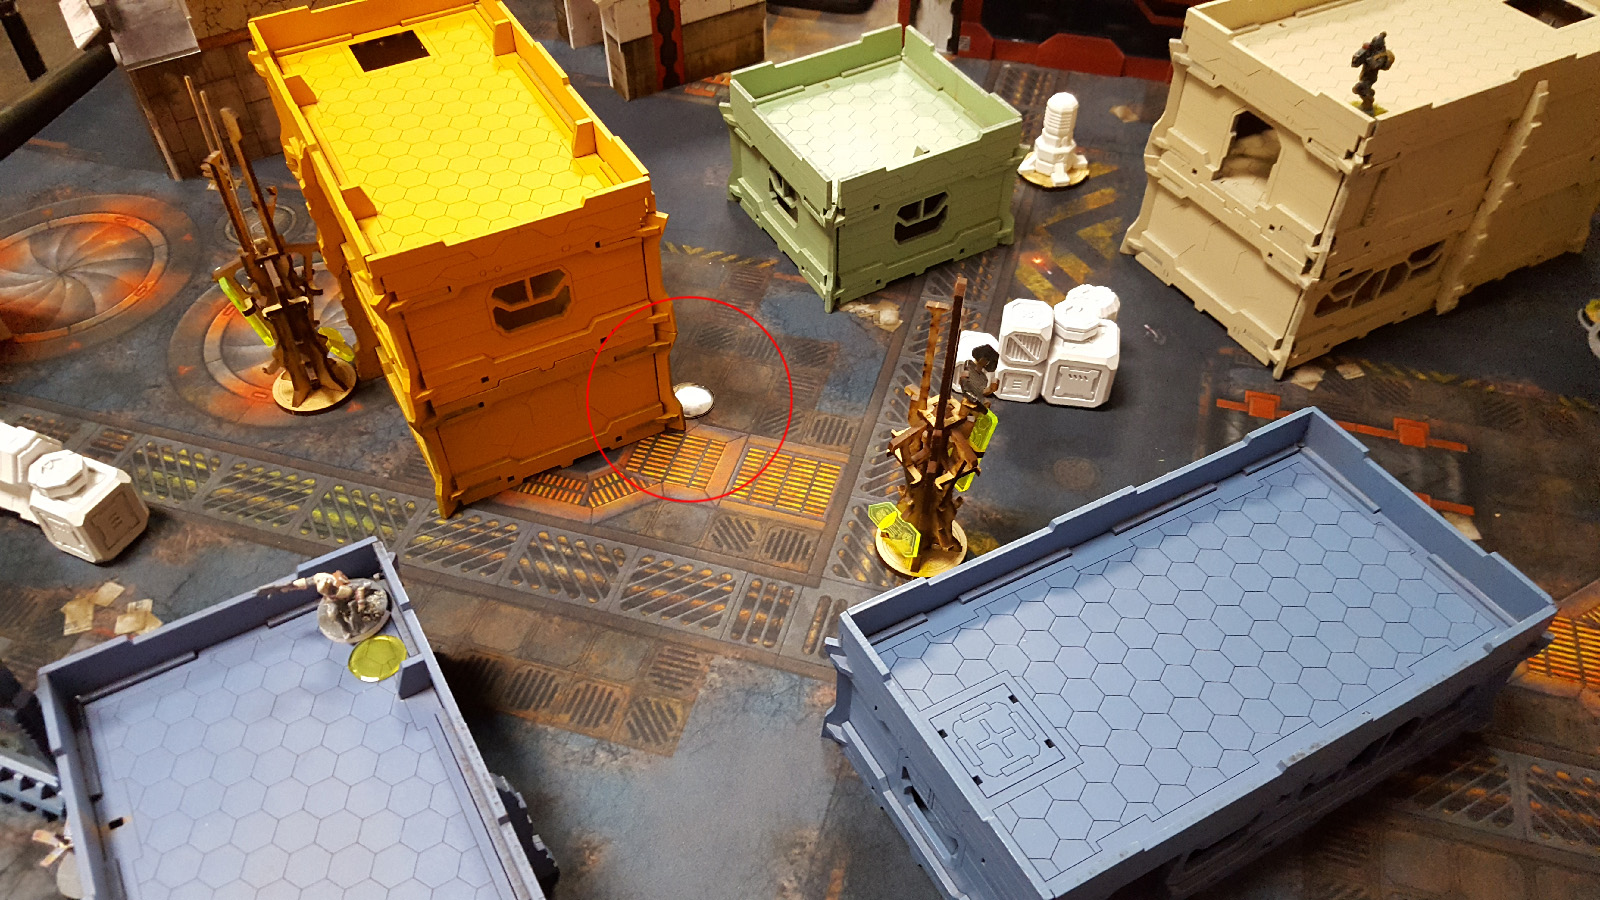 Last orders from the Briscard order pool are used to shift a camo marker around table center closer to the central antenna to protect it and potentially claim it in future turns.
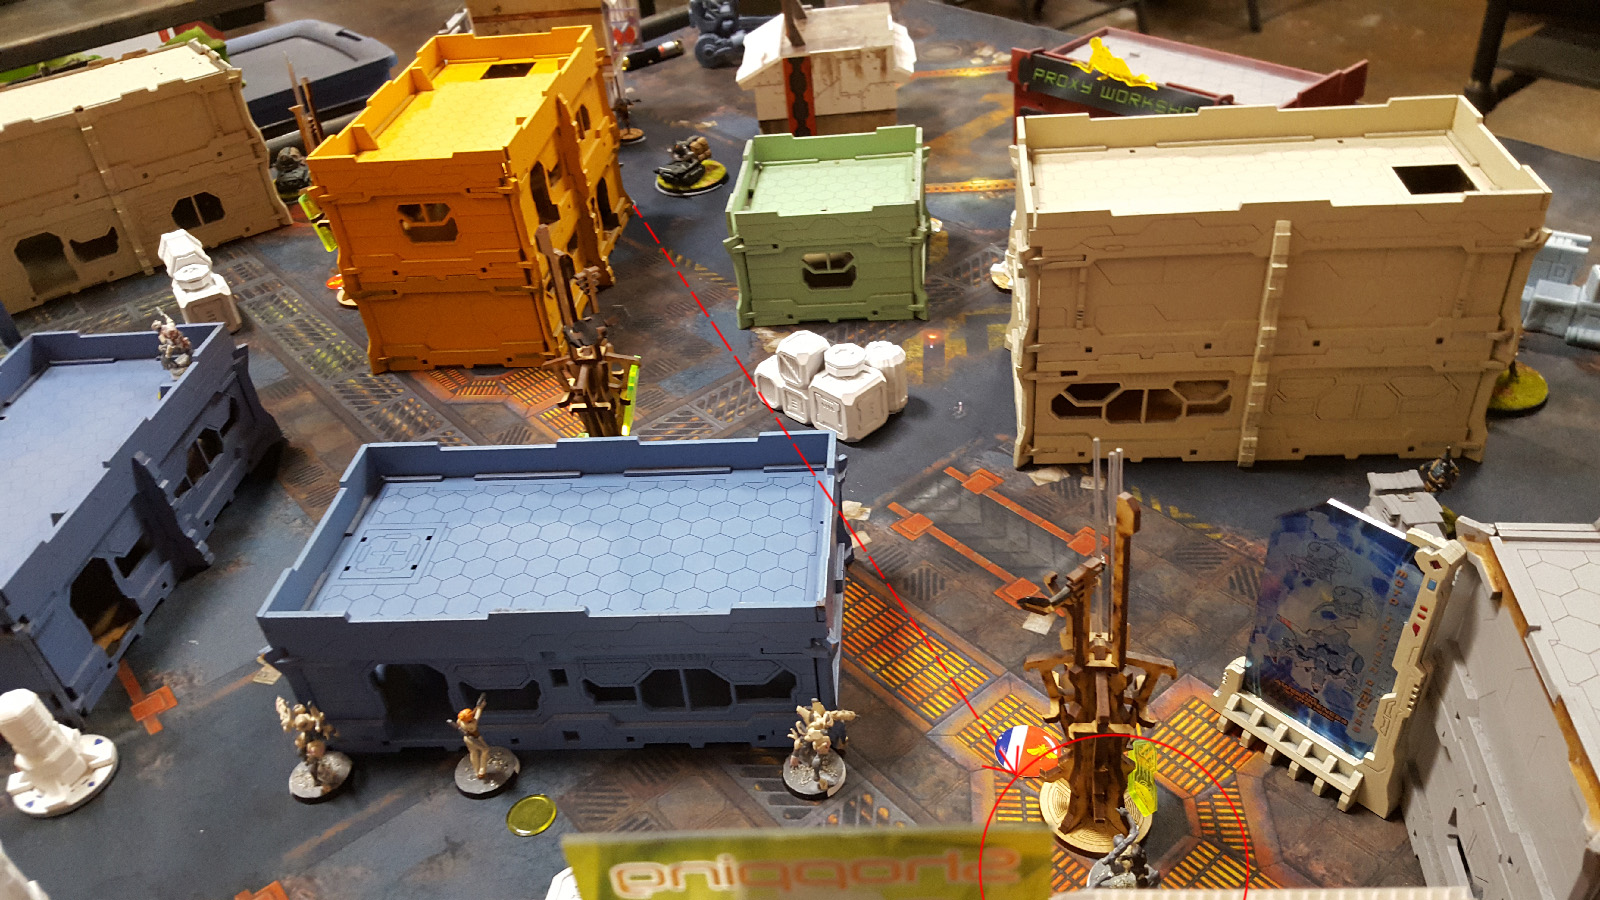
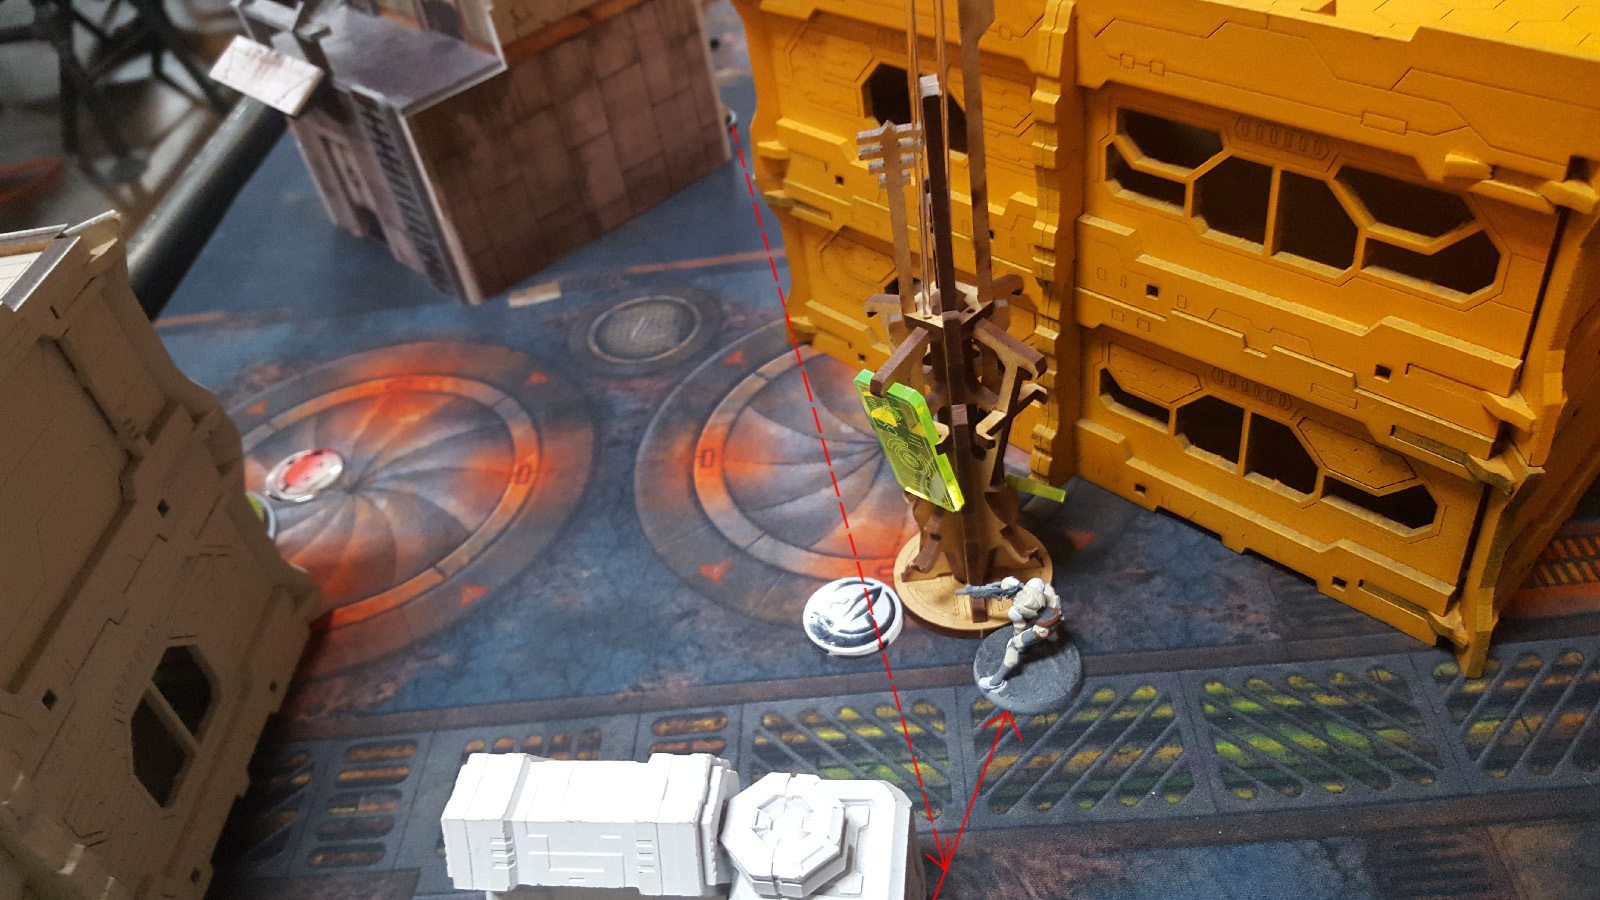
 After shifting around a couple buildings the Haris fire-team pops out toward the antenna on their right flank to take viral rifle shots at the OSS flash-pulse bot. Shots end up canceled either way, mostly due to the saturation zone reducing fire from the fire-team.
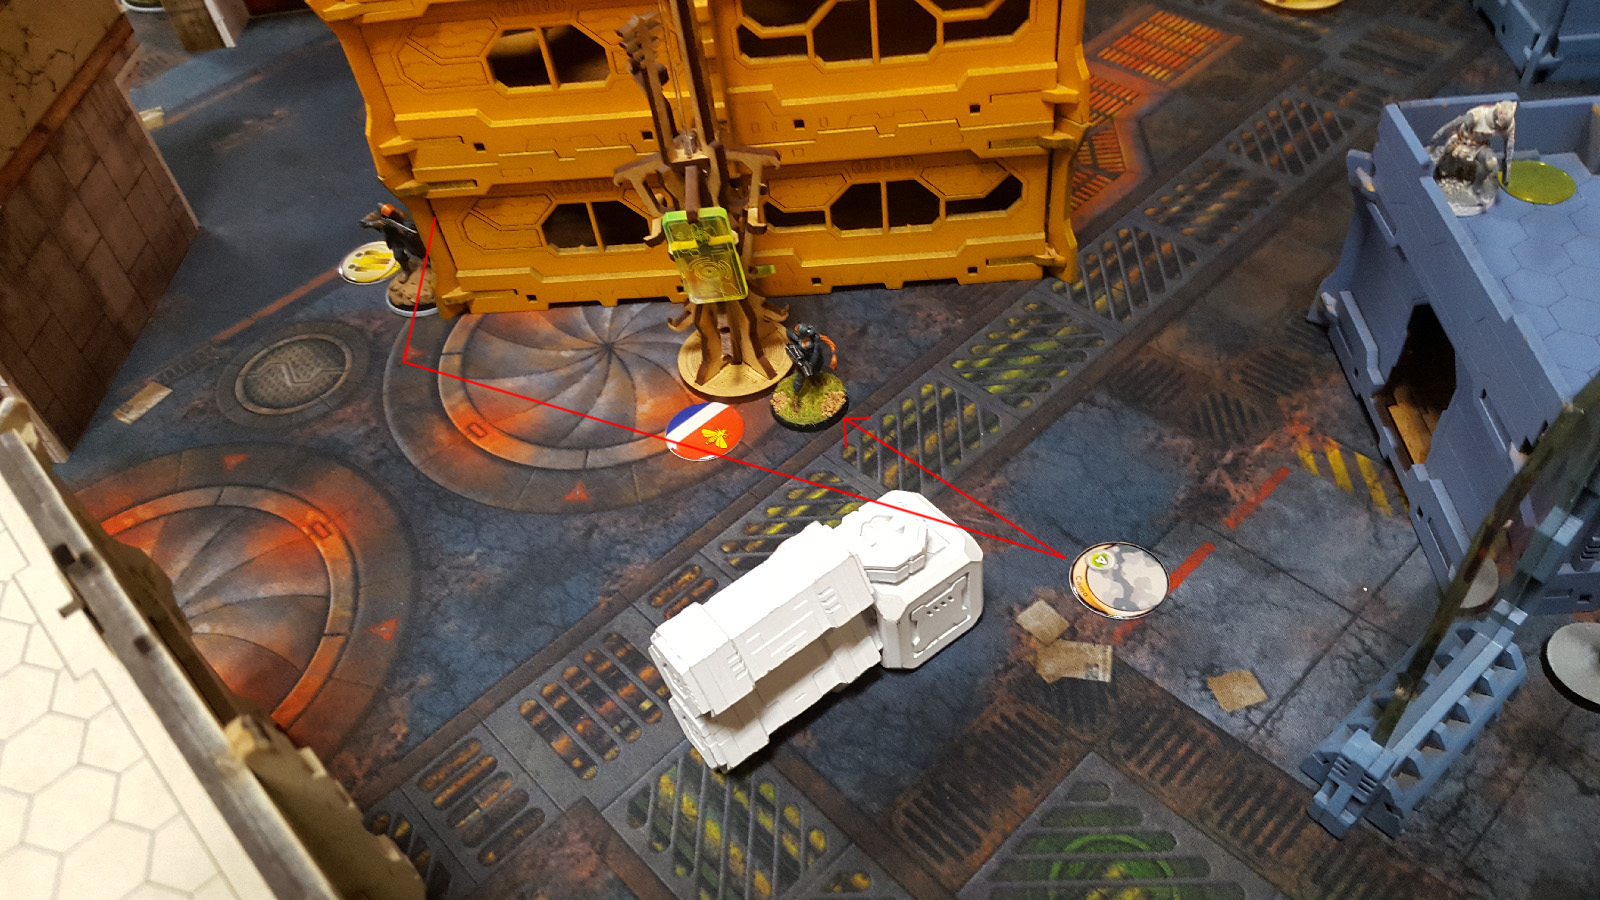 After Haris fire-team is nicely positioned looking around corners for cover response to the upcoming OSS turn the remaining orders for Merovingian are spent on another Chasseur FO moving in marker state up the right flank to plant a mine along OSS path towards the nearby antenna before claiming it for Merovingian.
 Final order of the Merovingian turn is spent moving the Chasseur FO up to cover and returning her to marker state.
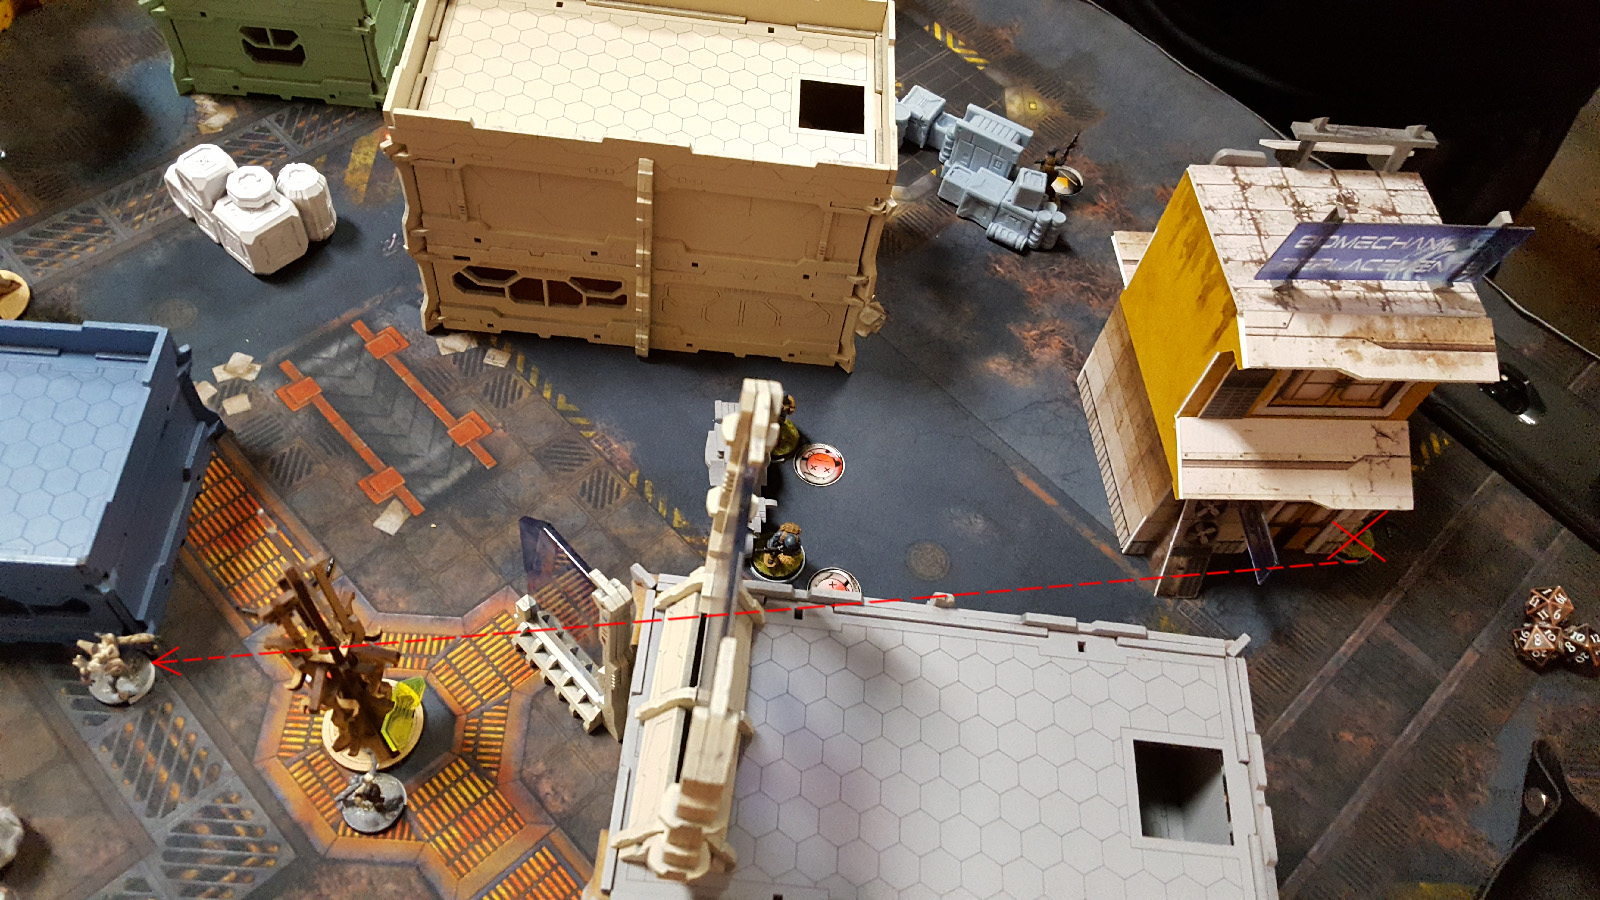
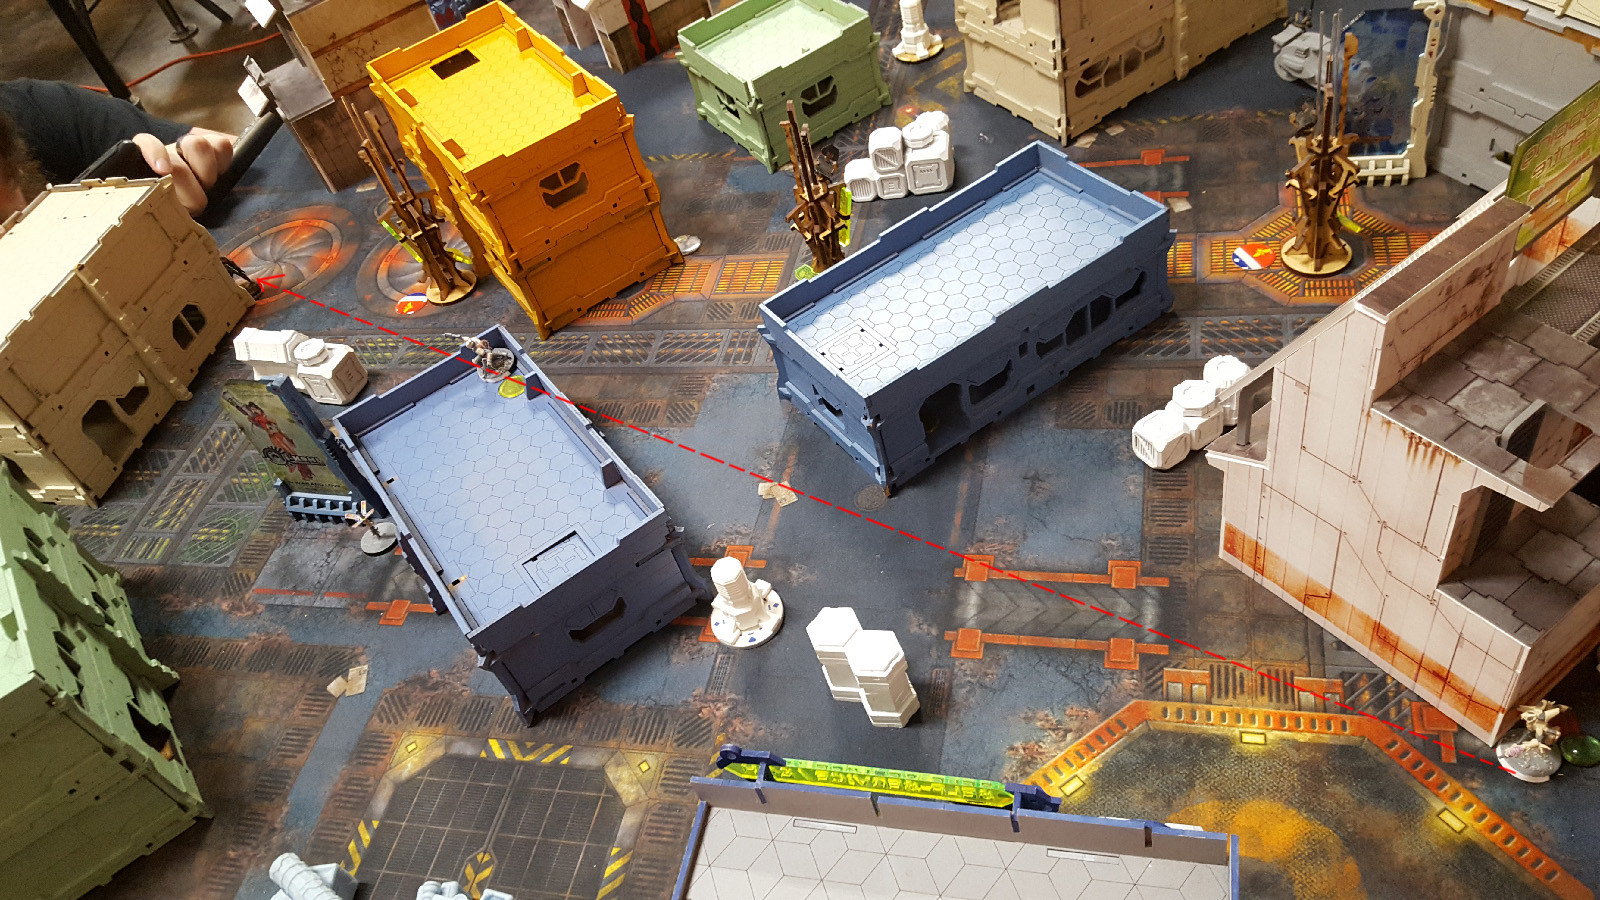
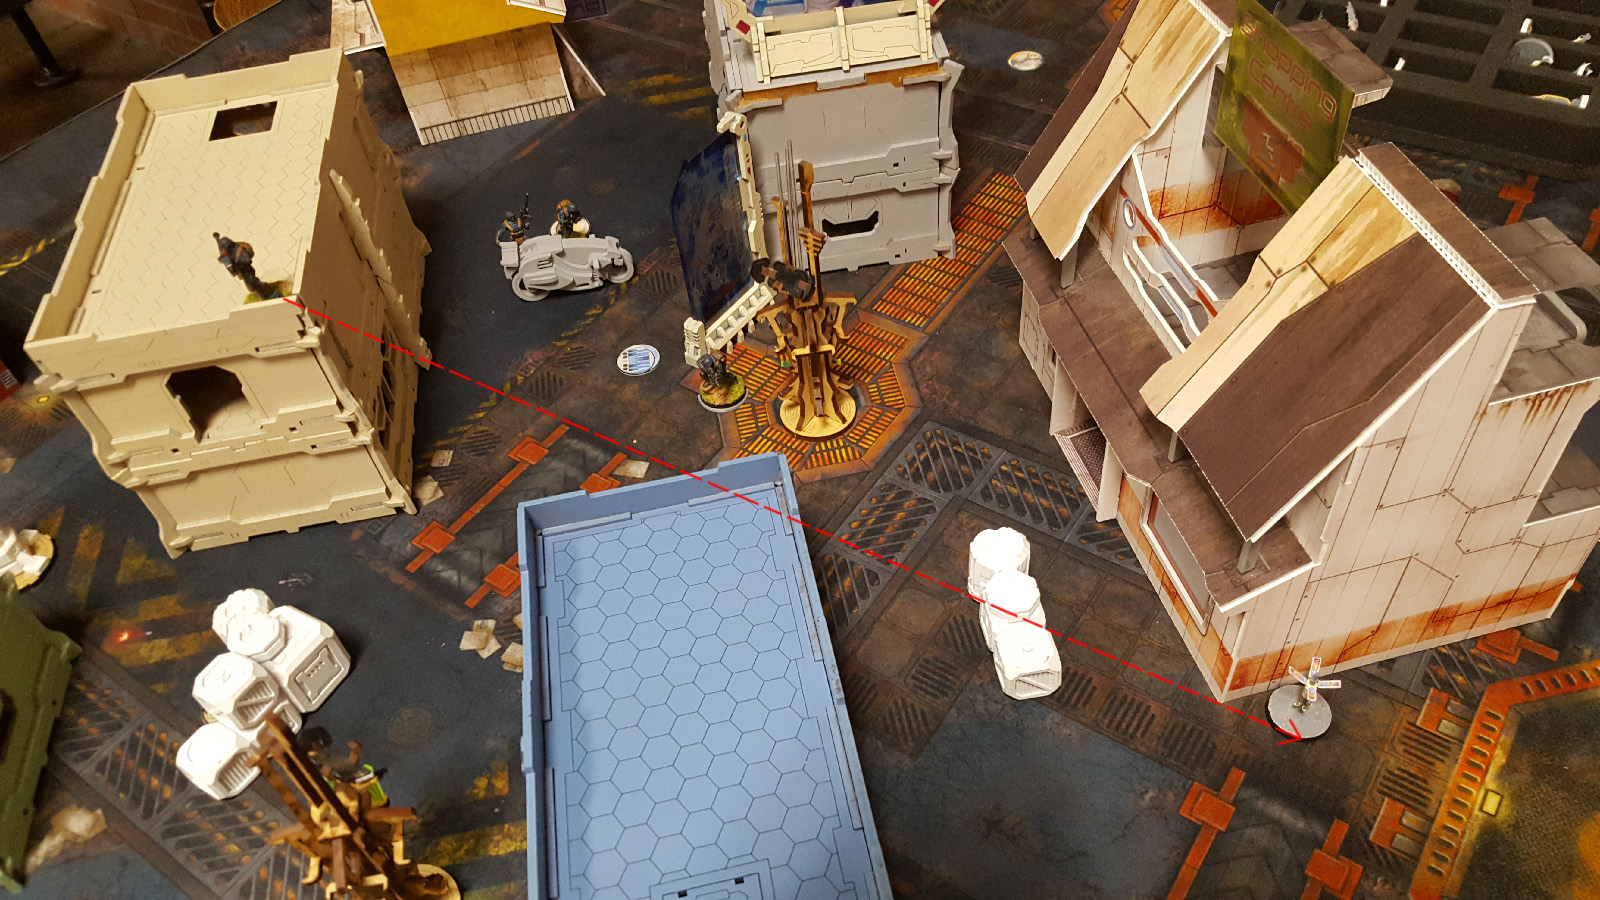
 Dakini fire-team is split up with a long fire line along the width of the table between the team members so the first couple of orders are used to shift them around and allow the Deva to apply Assisted Fire on the Dakini HMG. Once all units are in position the Dakini HMG peaks the corner to fire cross-table at the Loup-Garou viral rifle in the Haris fire-team. The shots land and the Loup-Garou is removed.
 Next target for the Dakini fire-team is breaking down the Briscard fire-team to reduce as much Merovingian firepower as possible. The Dakini HMG shifts up the OSS right flank behind the building to peak the corner at the Marksman rifle Briscard through his window, but loses the shootout and the Dakini is knocked unconscious.
 Thankfully for OSS the Post-human Mk. 1 engineer has a Yudbot nearby to revive the downed Dakini HMG (though not before spending a command token to re-roll the save and not fully kill him). This also conveniently accomplishes the "Test Run" classified objective for OSS.
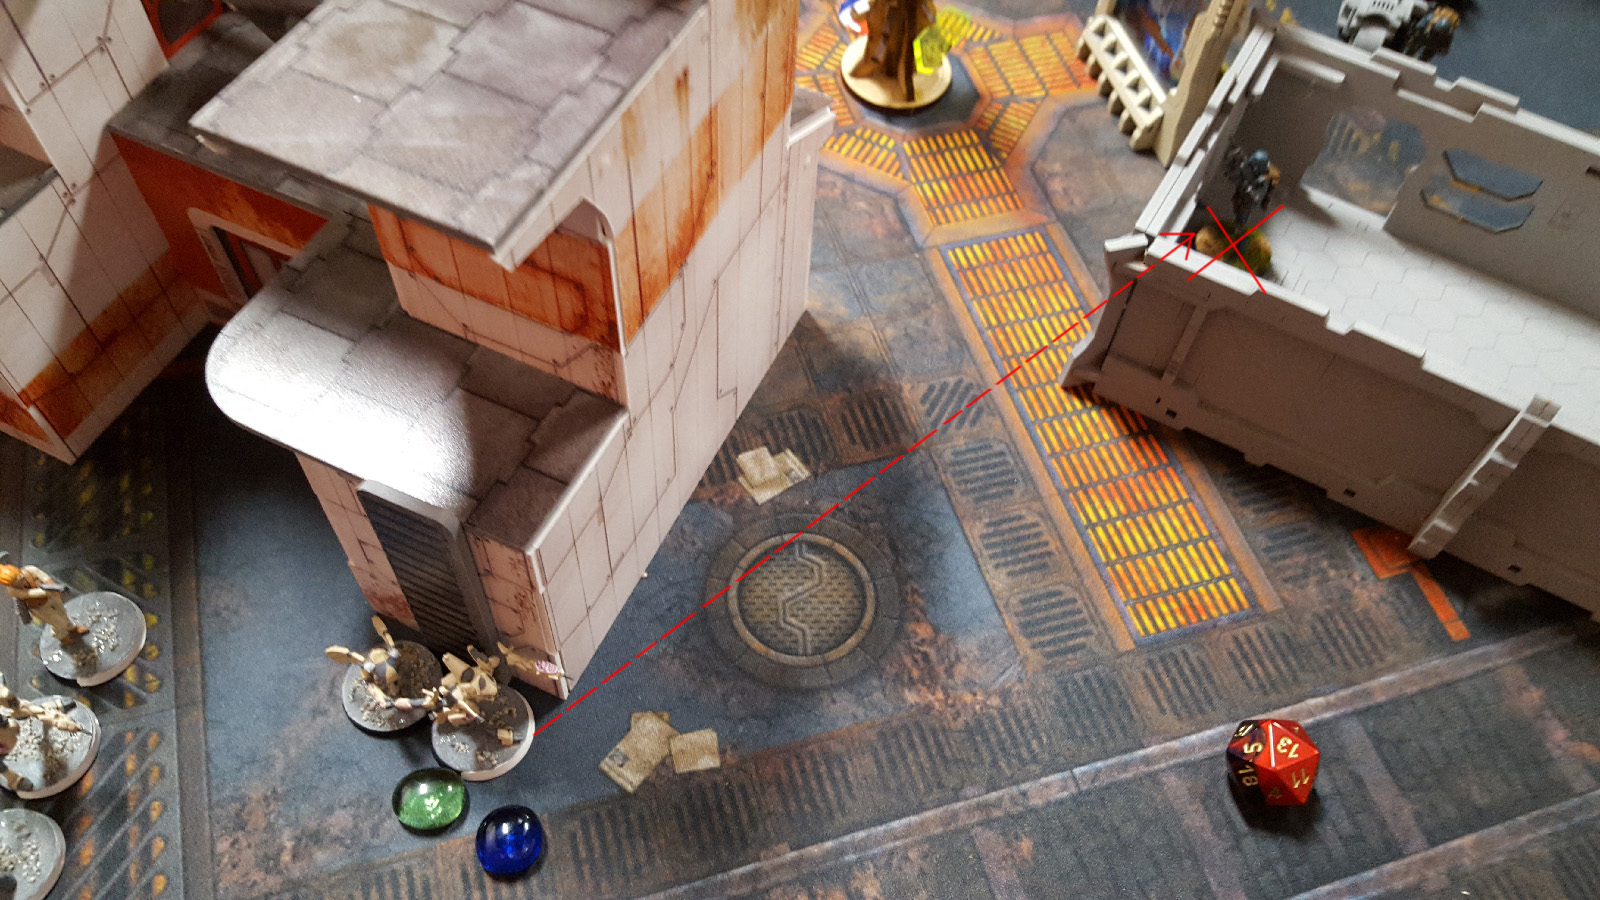 With the fire-team re-established the Dakini HMG has a second attempt at the Briscard marksman and eliminates him from the table.
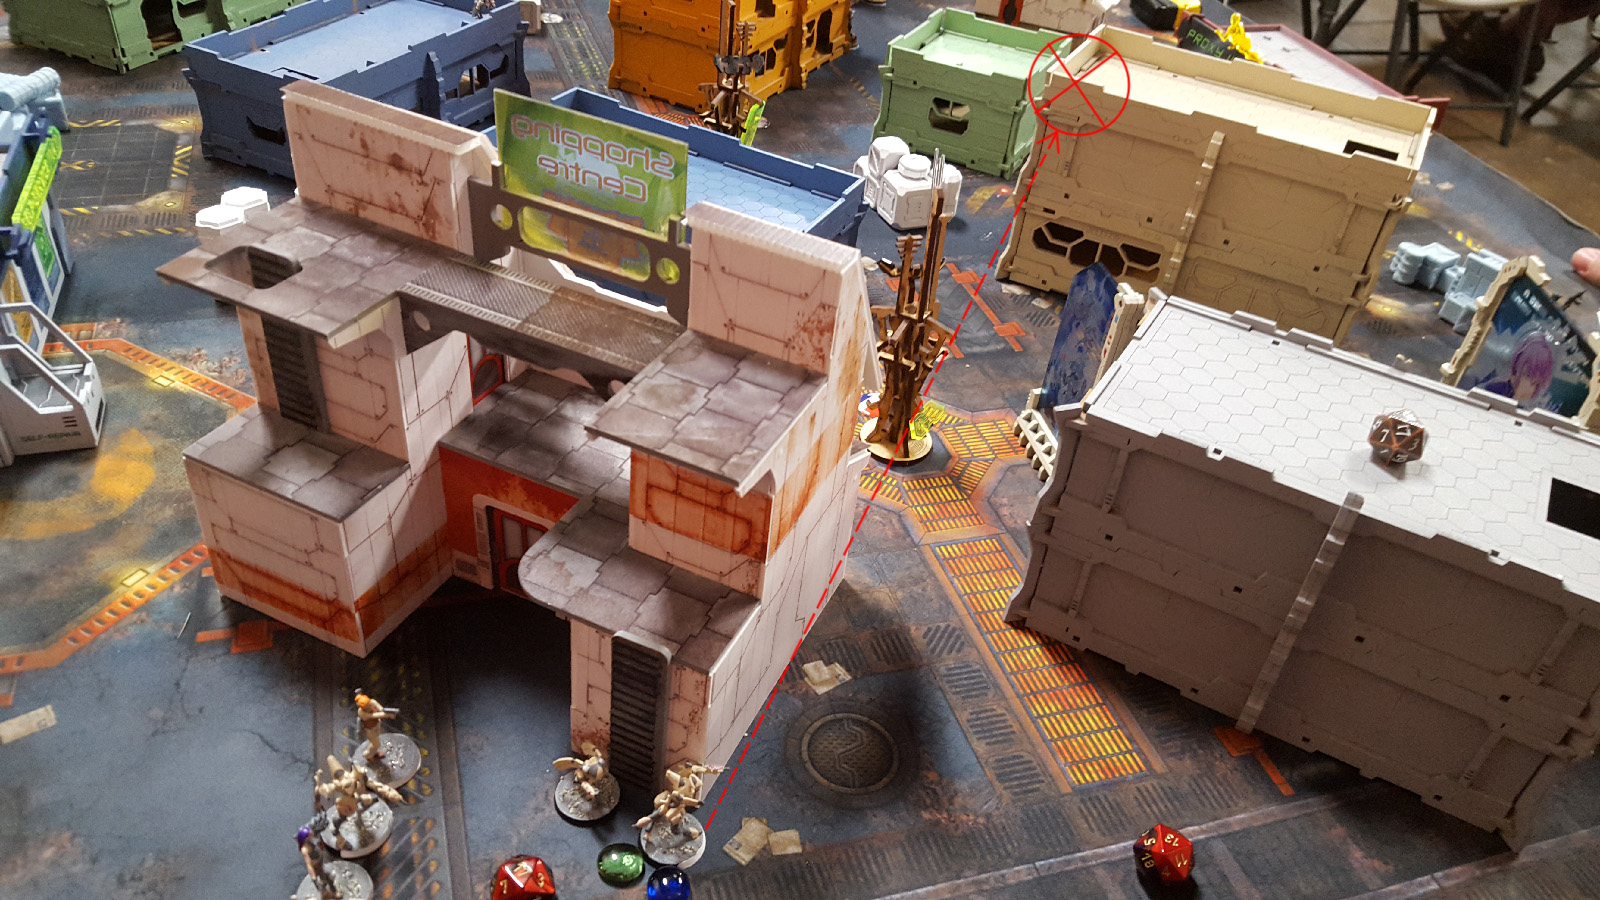 With the Briscard fire-team down to 4 members now the Dakini HMG peaks further around the corner and opens fire on the Briscard missile launcher with the rest of the Dakini fire-team safely back out of template range. The Briscard missile launcher is removed from the table.
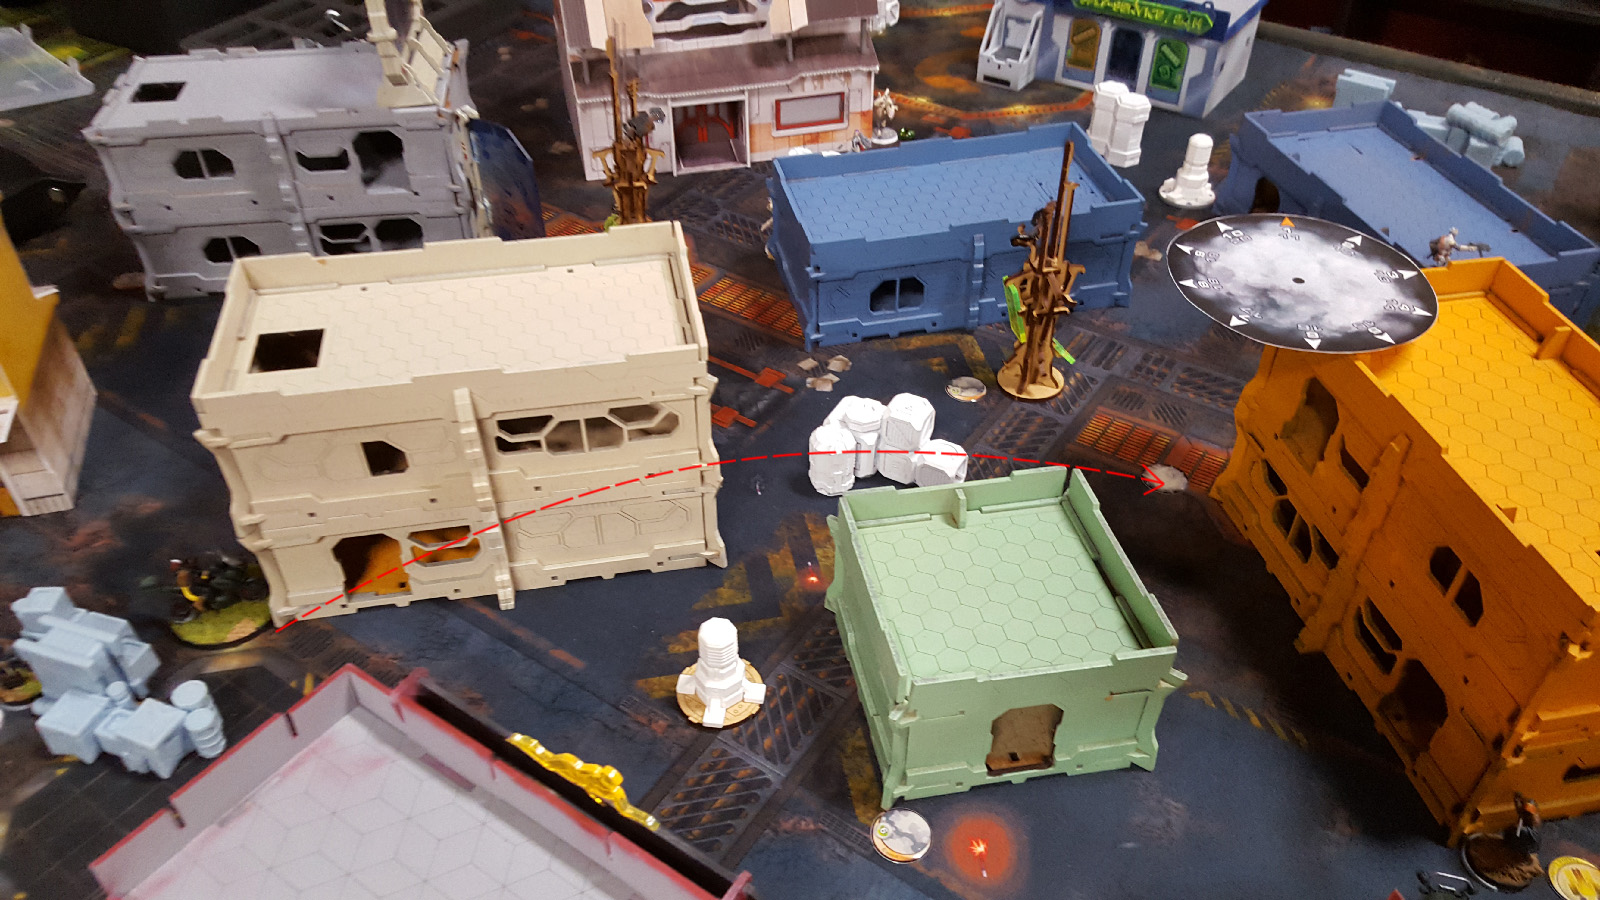
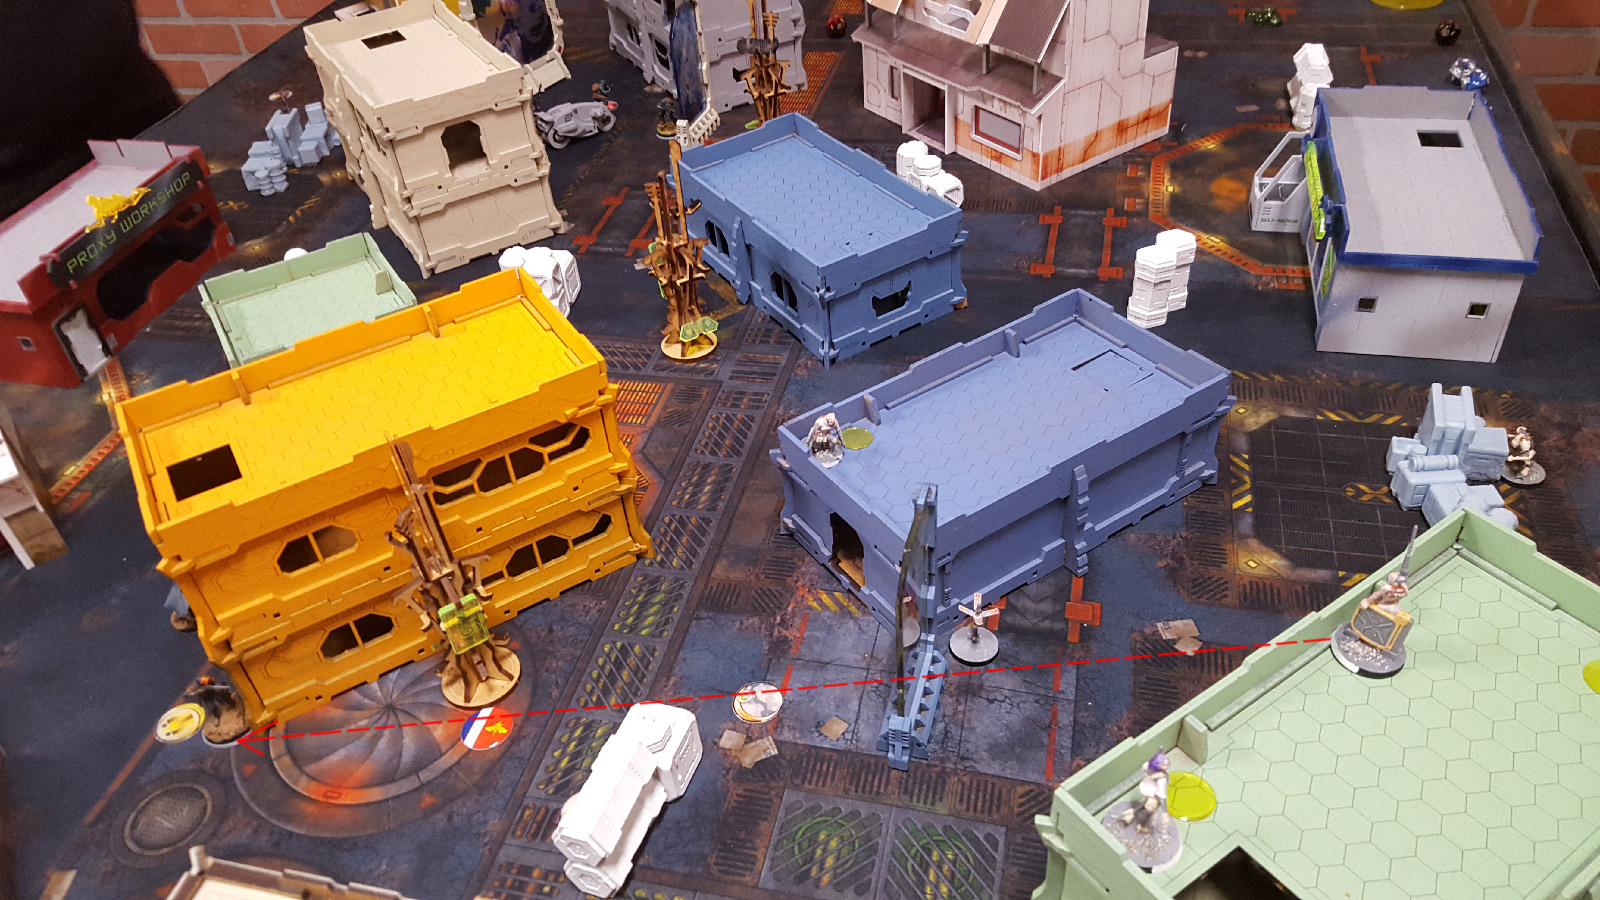
 Now that the Briscard fire-team is down to only 3 members remaining, the Post-human Mk. 2 sniper reveals from hidden deployment to fire across the table at two of the other members. Surprise shot is used against the Briscard sniper so that he's only rolling 1 die on a 5 while the marksman rifle is only rolling on a 4. Splitting the burst from the Post-human allows her to negate the negative affects of the saturation zone while not falling victim to a two-die response from the fire-team. The Post-human is able to remove both members of the Briscard team as a result. The Loup-Garou boarding shotgun has a line to the Post-human as she fires, but his response shots fly wide and miss.
 Post-human Mk. 2 sniper then attempts to have face-to-face with the Loup-Garou boarding shotgun, but all shots miss and the threat still remains.
 With no more orders in order pool 1 OSS activates the flash-pulse bot to attempt to move up and blind the Loup-Garou shotgun before moving into position to remove the mine laid earlier by the Chasseur, but the Loup-Garou proves to be having quite a good opening by taking down the flash-pulse bot before it has a chance.
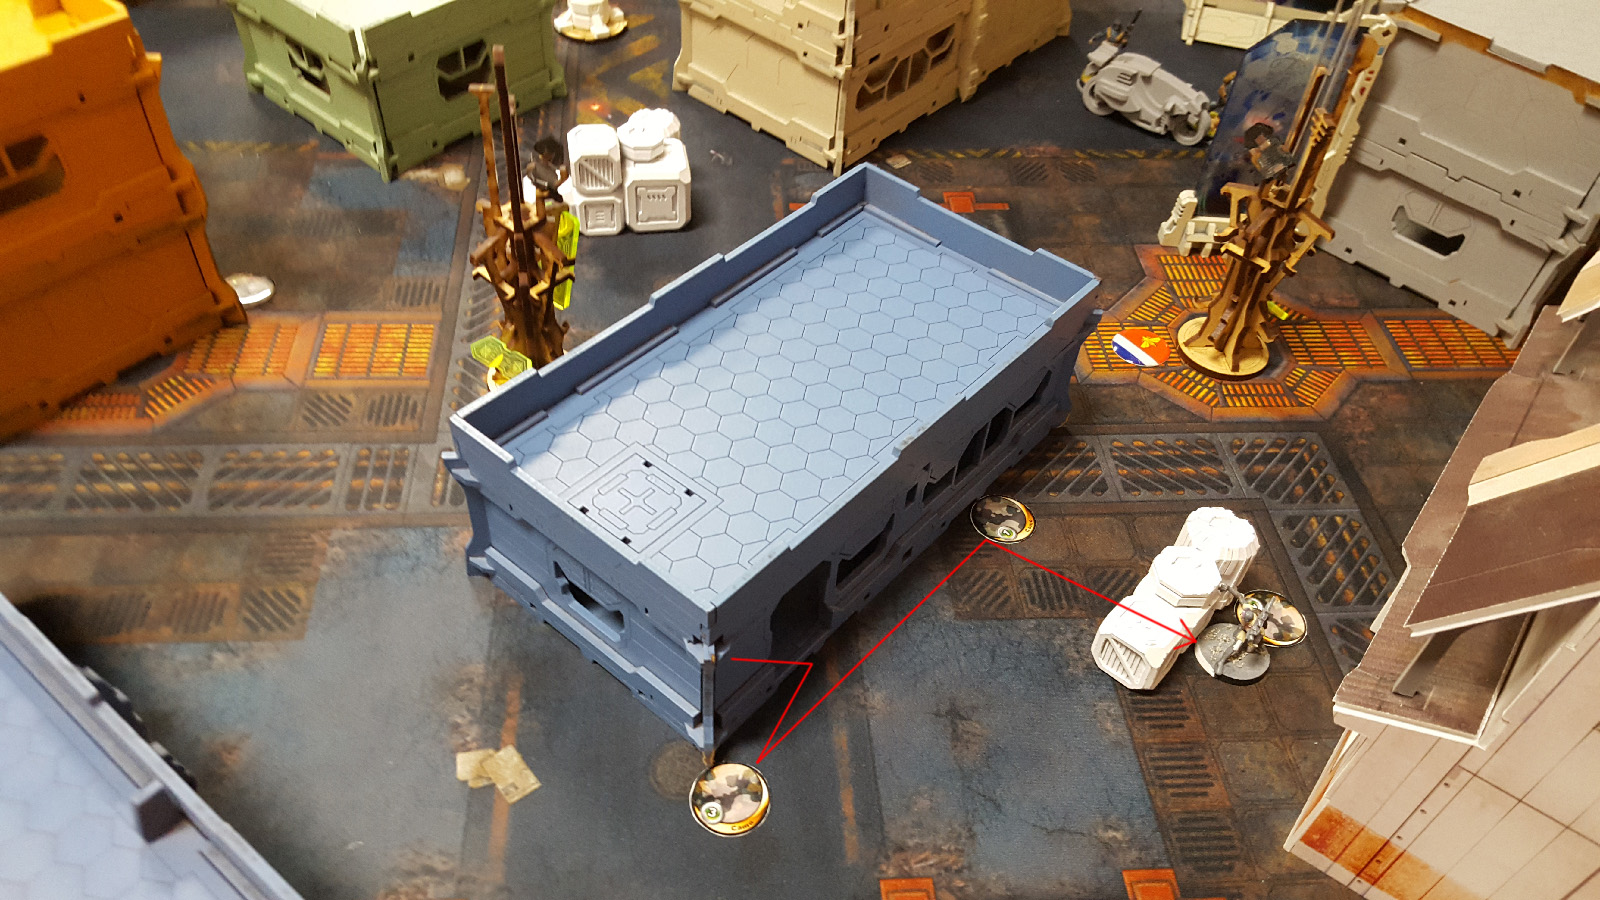
 With the remaining orders in order pool 2 OSS moves out with the Naga to lay a small field of monofilament mines on all paths to the Dakini fire-team before setting up behind a crate for cover.
 After significant damage dealt to the Briscard fire-team, Merovingian spends a command token to move a Chasseur between order pools for the sake of approach and reveal from marker state.
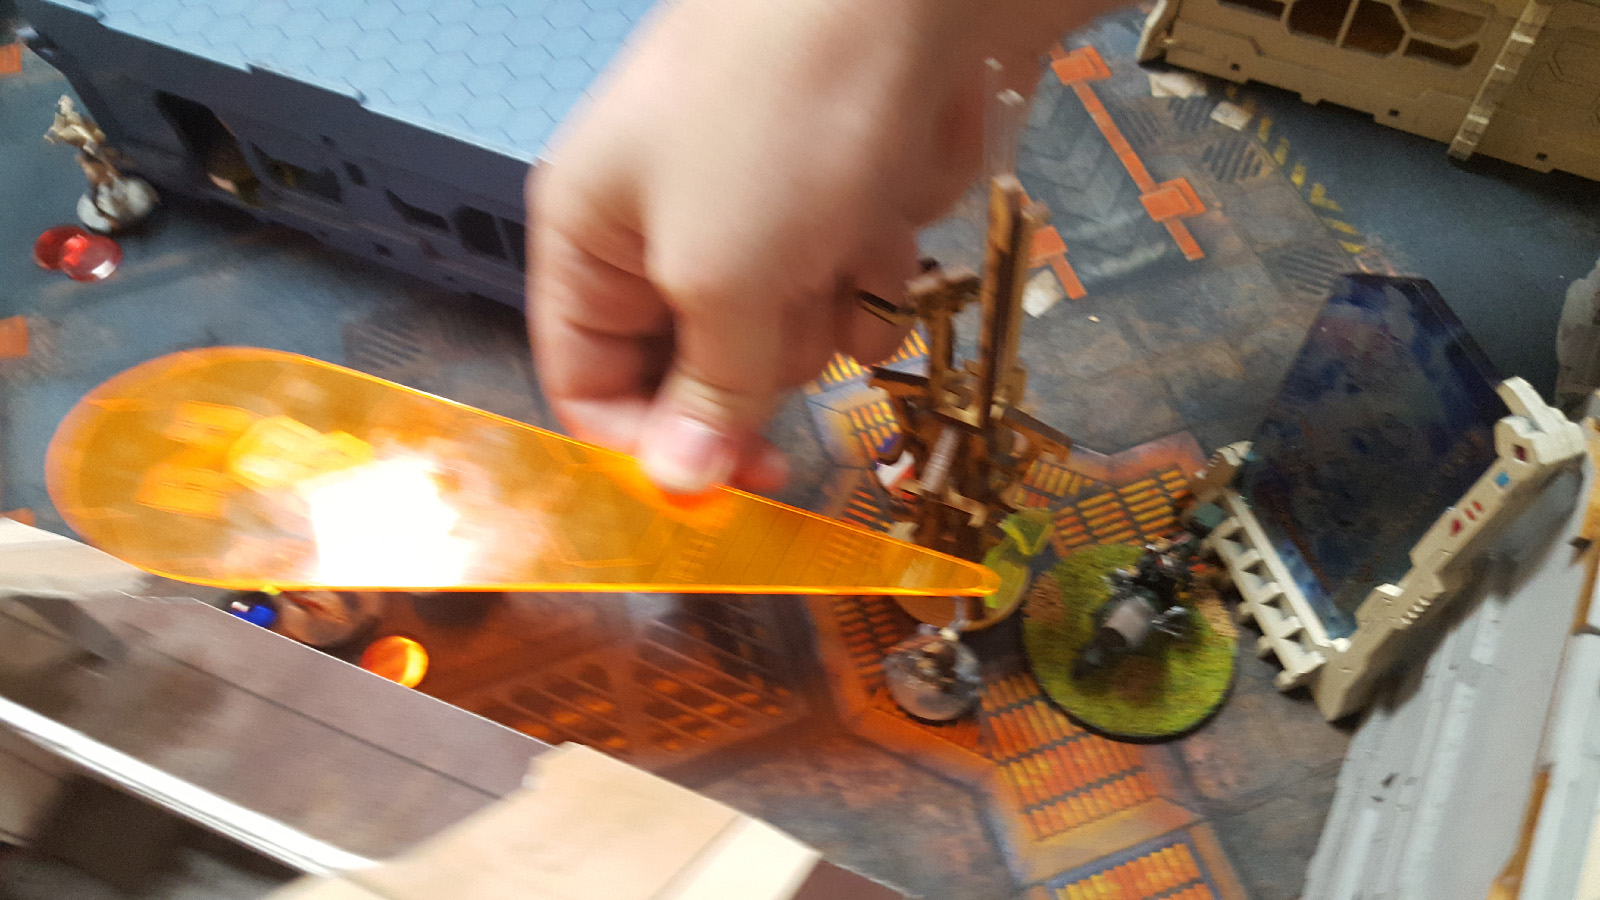
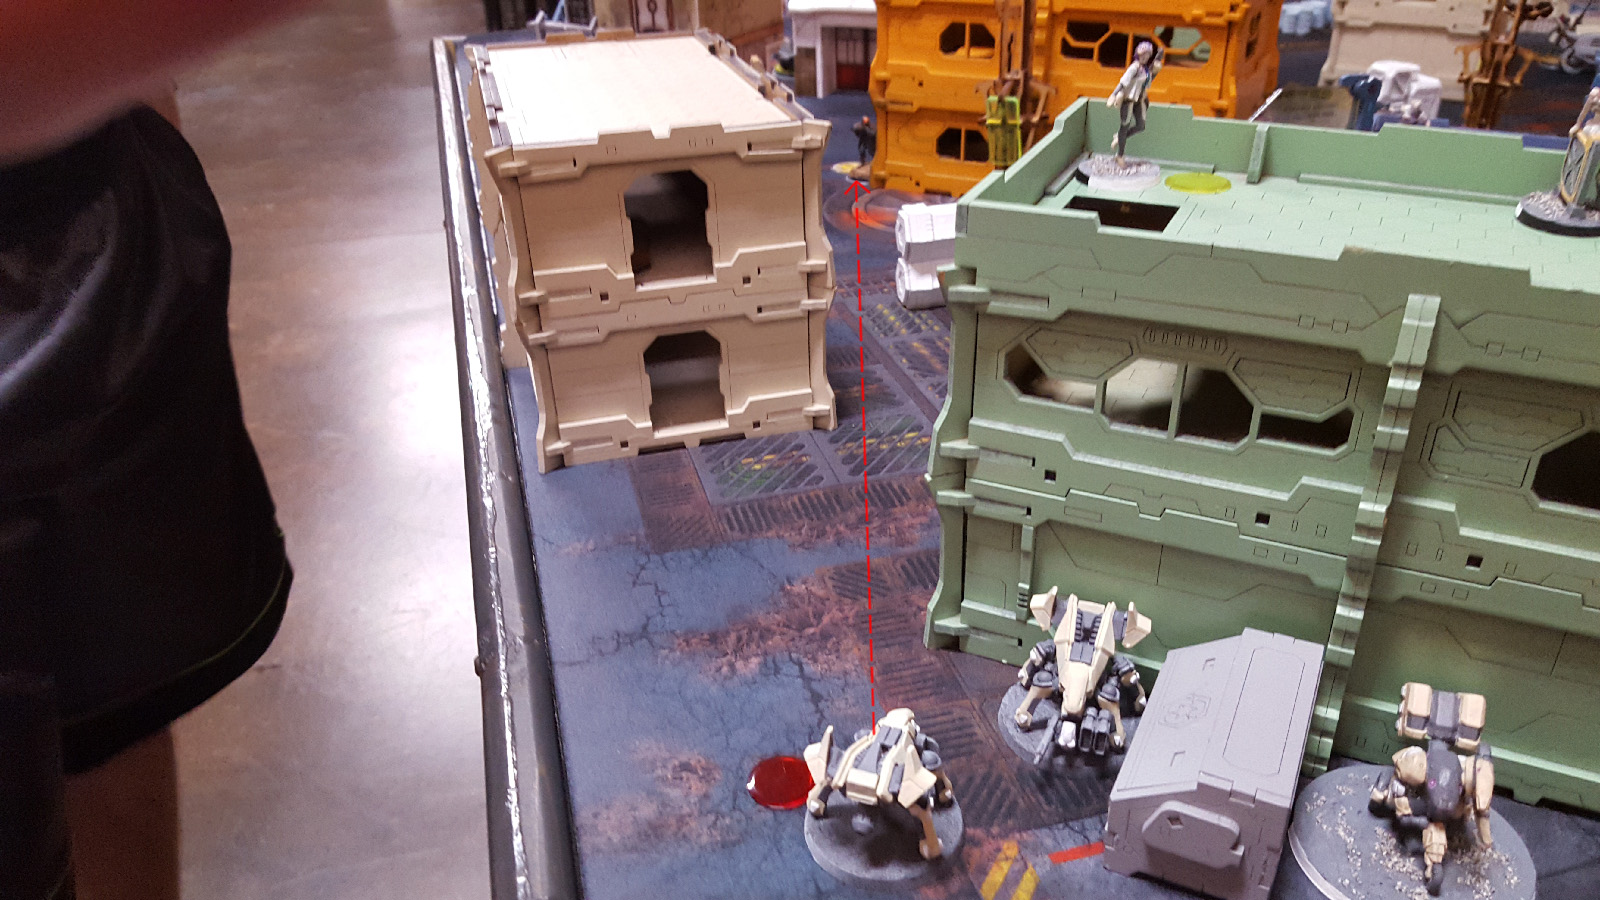
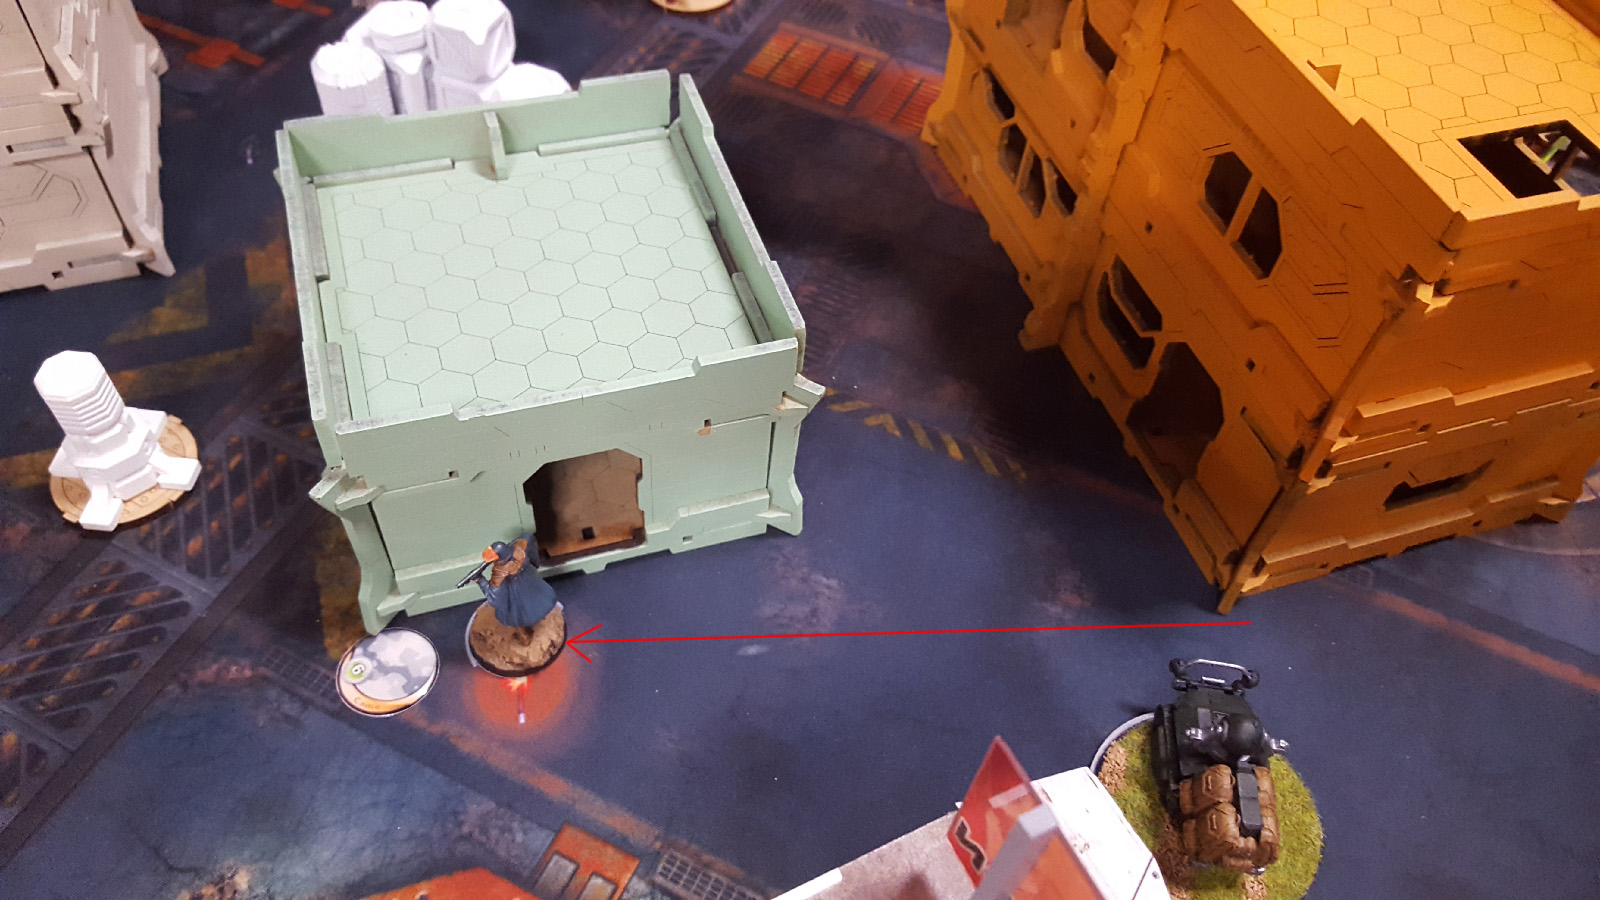
 Chasseur on Merovingian right flank moves up from her claimed antenna position to loop around behind the building where the OSS remotes and Post-human Mk. 1 are hiding to lay a light flamethrower template on the lot of them.
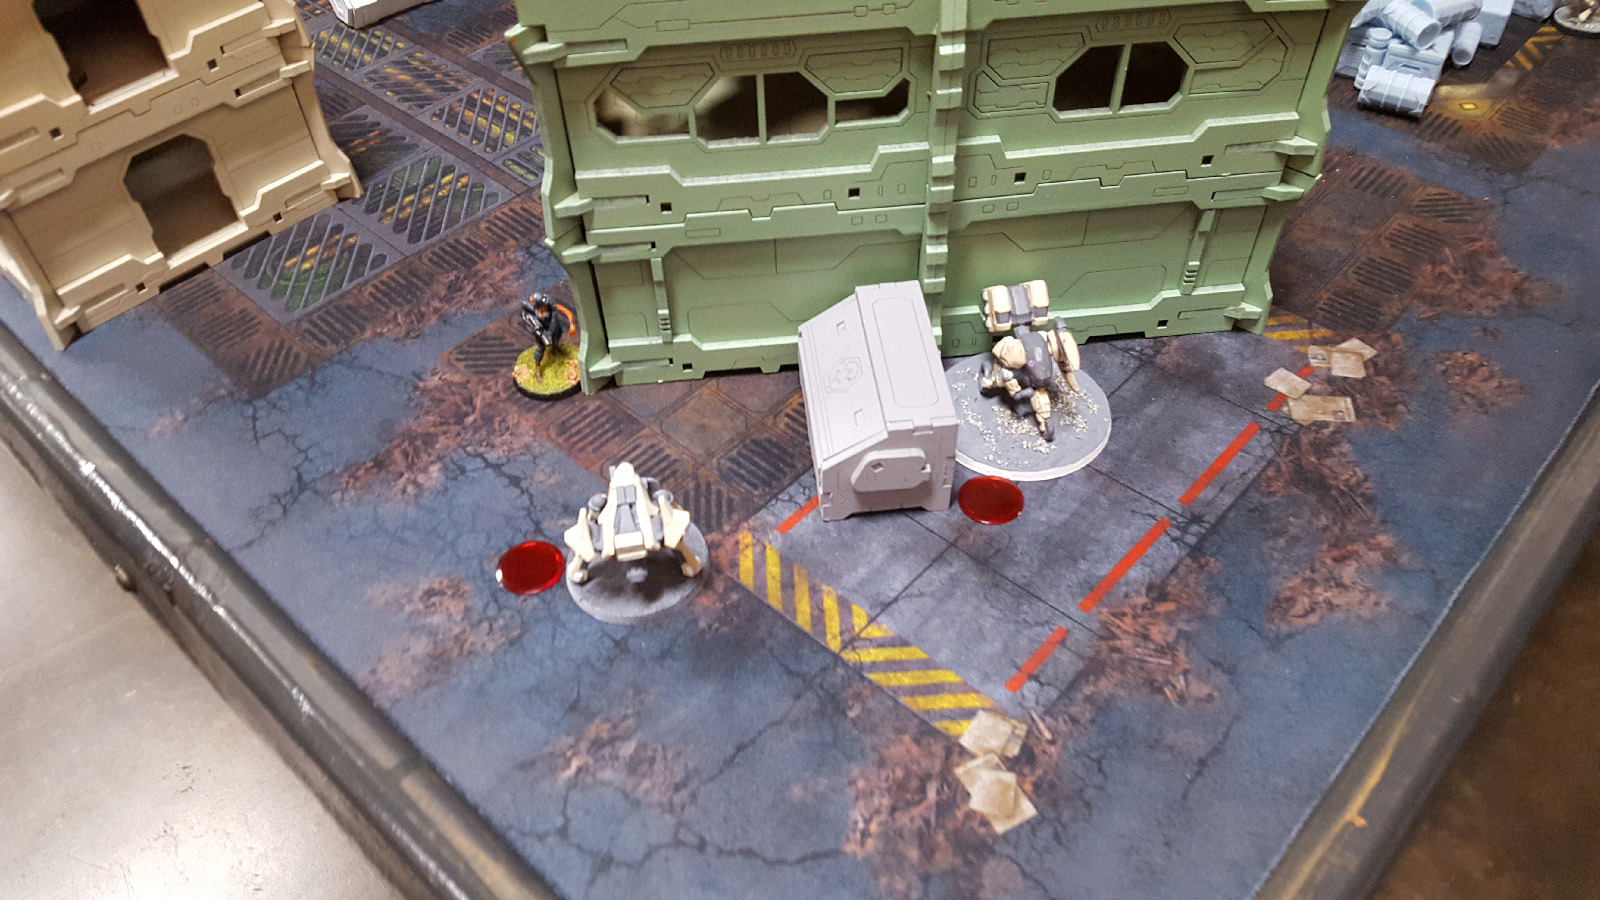 If no one told you before, remotes are terrible at dodging and the Post-human can't dodge because she's at the edge of the template (8.5 inches) so the attack isn't even in her zone of control. As a result the smart missile launcher remote is burned to death, the minesweeper bot is reduced to unconscious level 1, and the Post-human is also removed from the table.
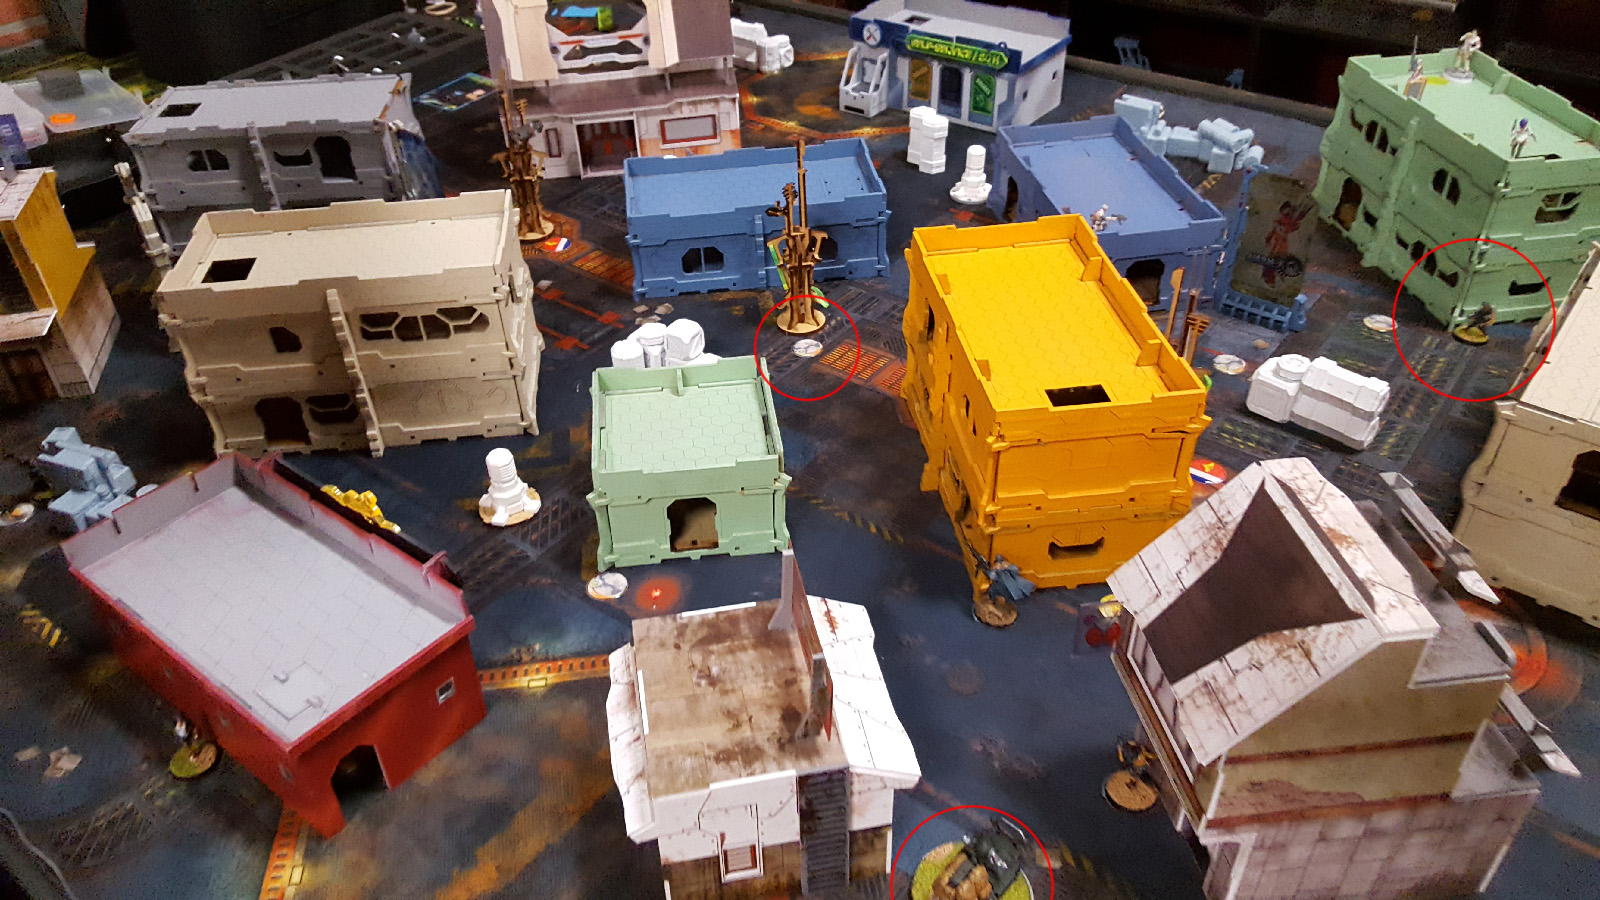 Merovingian then uses a coordinated order to move the camo marker up midfield, shift Traktor Mule bots up along their right flank, re-position the committed Chasseur, and push the Warcore up to have better angles across the table.
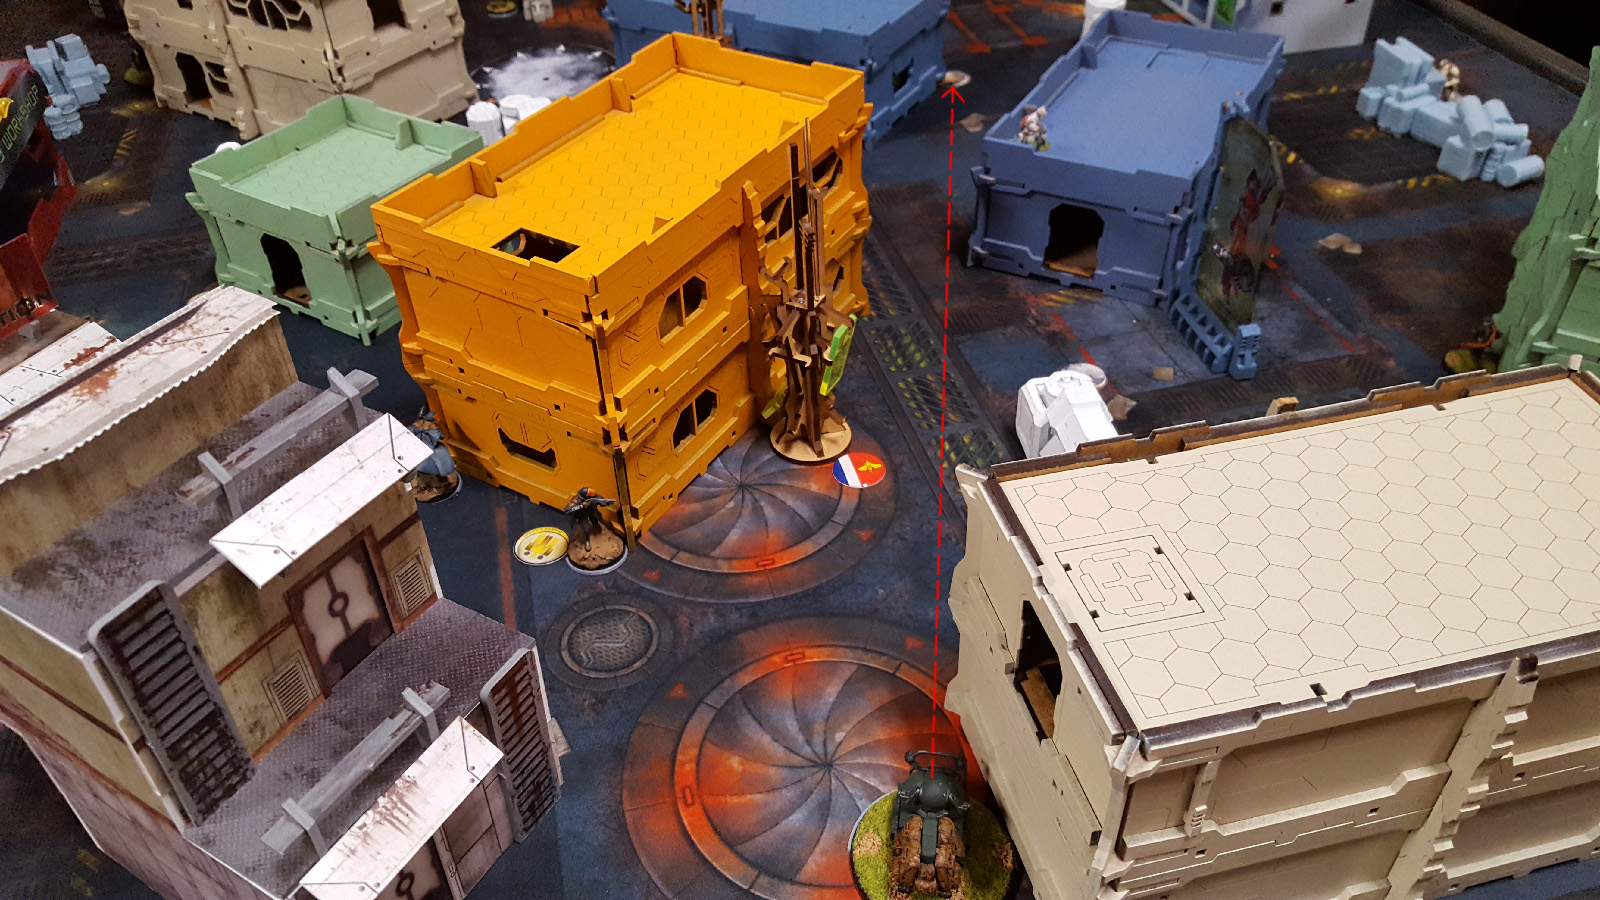 Merovingian then continues to move a Traktor Mule up along their right side of the table to get into a position with clear view of a monofilament mine and successfully minesweep it and claim it for themselves.
 Final member of the original Briscard fire-team then shifts out from cover just enough to avoid ARO from the Post-human Mk. 2 sniper and discover-shoot another monofilament mine to remove it from the table.
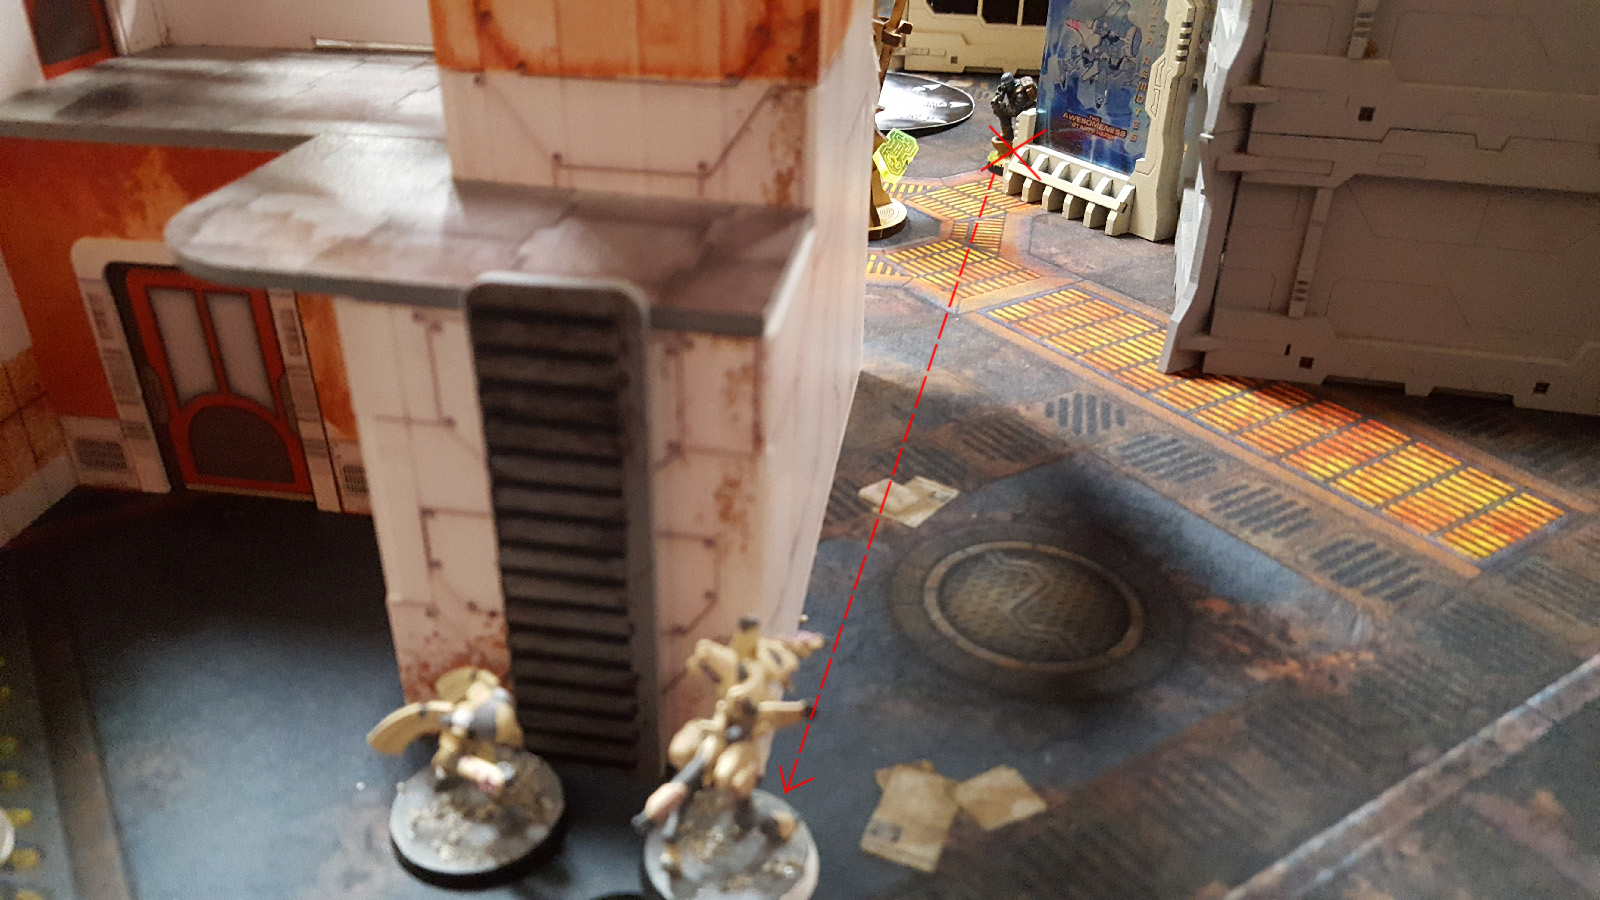 With confidence gained from removing the mine and smoke laid down to prevent ARO from the sniper, the Briscard then curls around cover to attempt revenge on the Dakini HMG for the loss of his comrades. The Dakini HMG still has assisted fire though and wins the fire fight to remove the Briscard from the table.
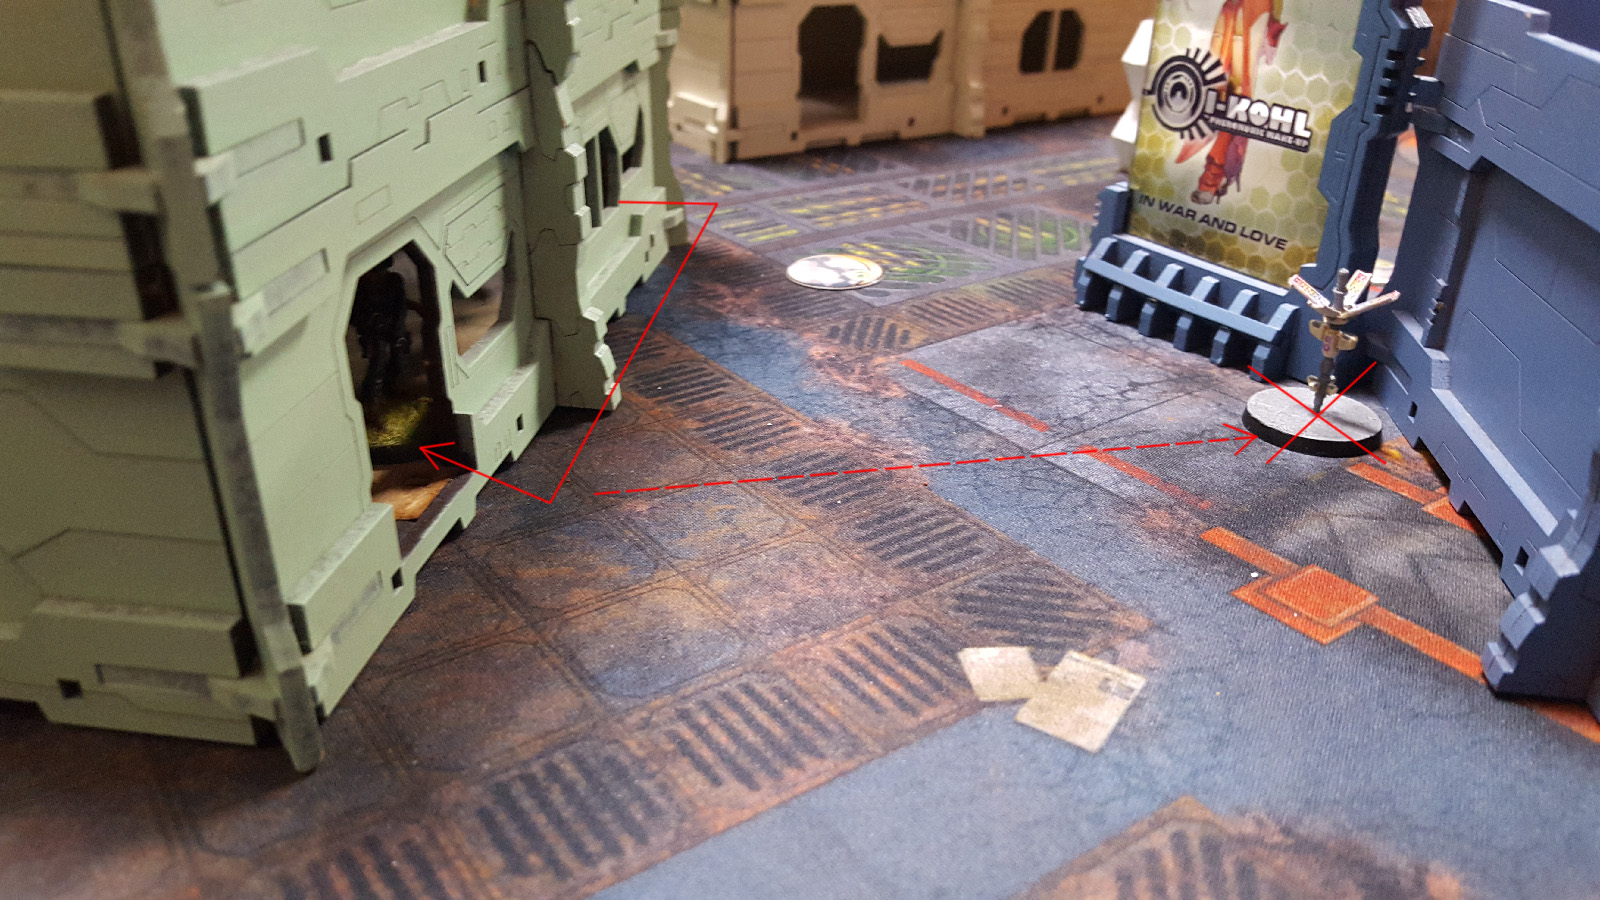 With orders now running low, Merovingian shifts the Chasseur deeply committed on the right flank into the building under the Danavas and Shukra consultant, laying another mine in the street and removing the last Netrod along the way.
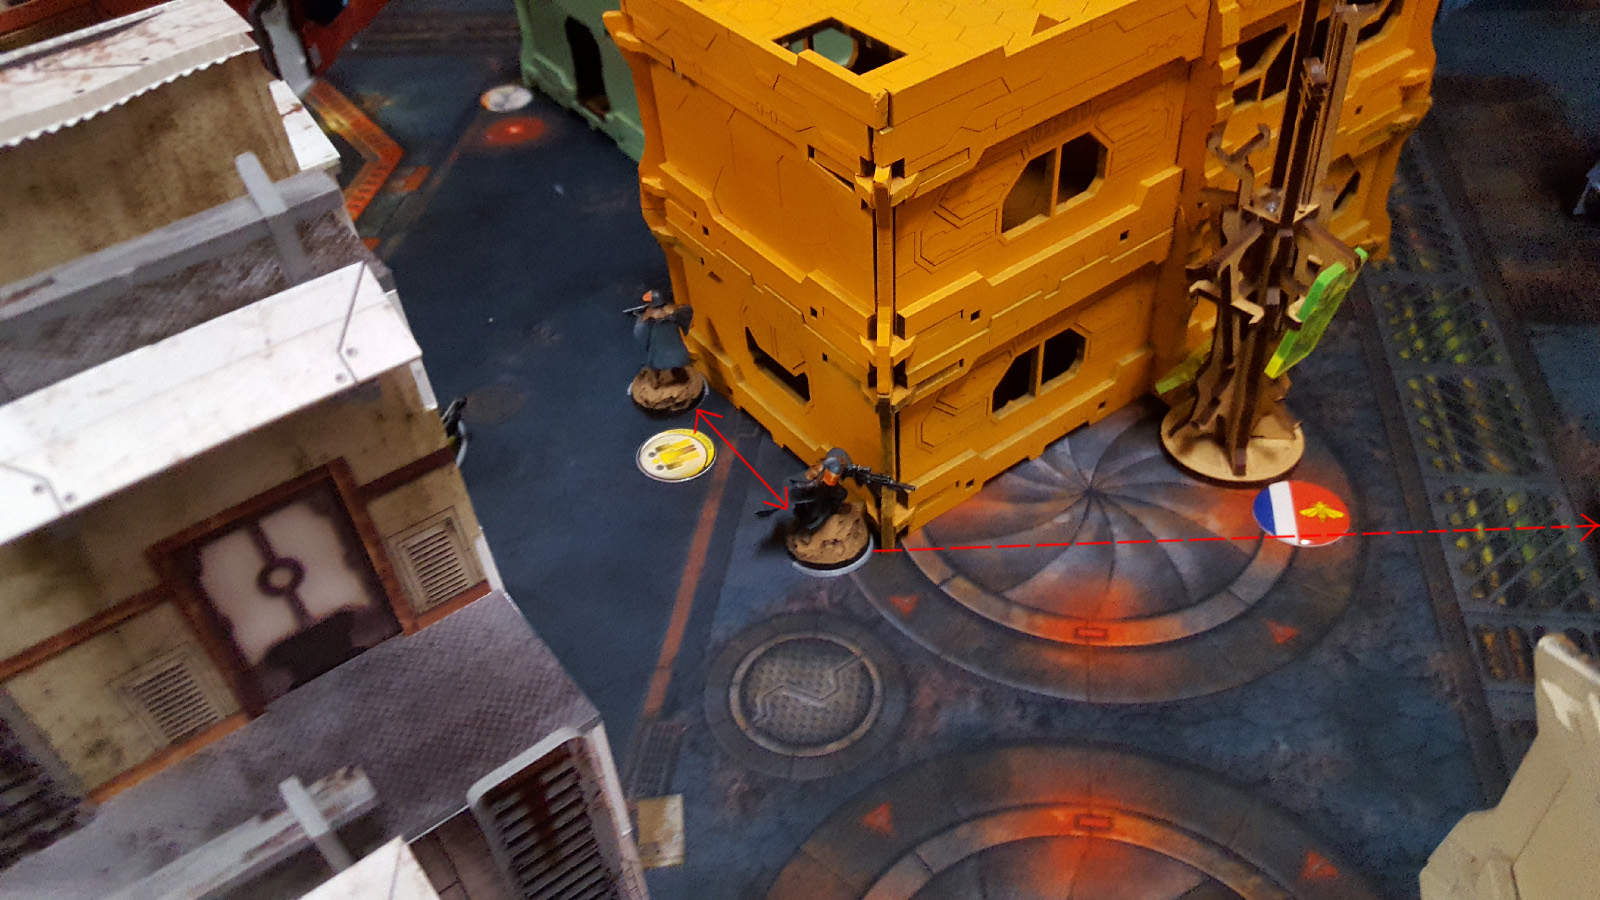 Final order of the Merovingian turn is spent switching the positions of the remaining Haris fire-team members to give the Loup-Garou sniper view of the right flank instead of the boarding shotgun. Shots are fired between the Loup-Garou and the Post-human Mk. 2, but nothing lands and the turn ends with them both still up.
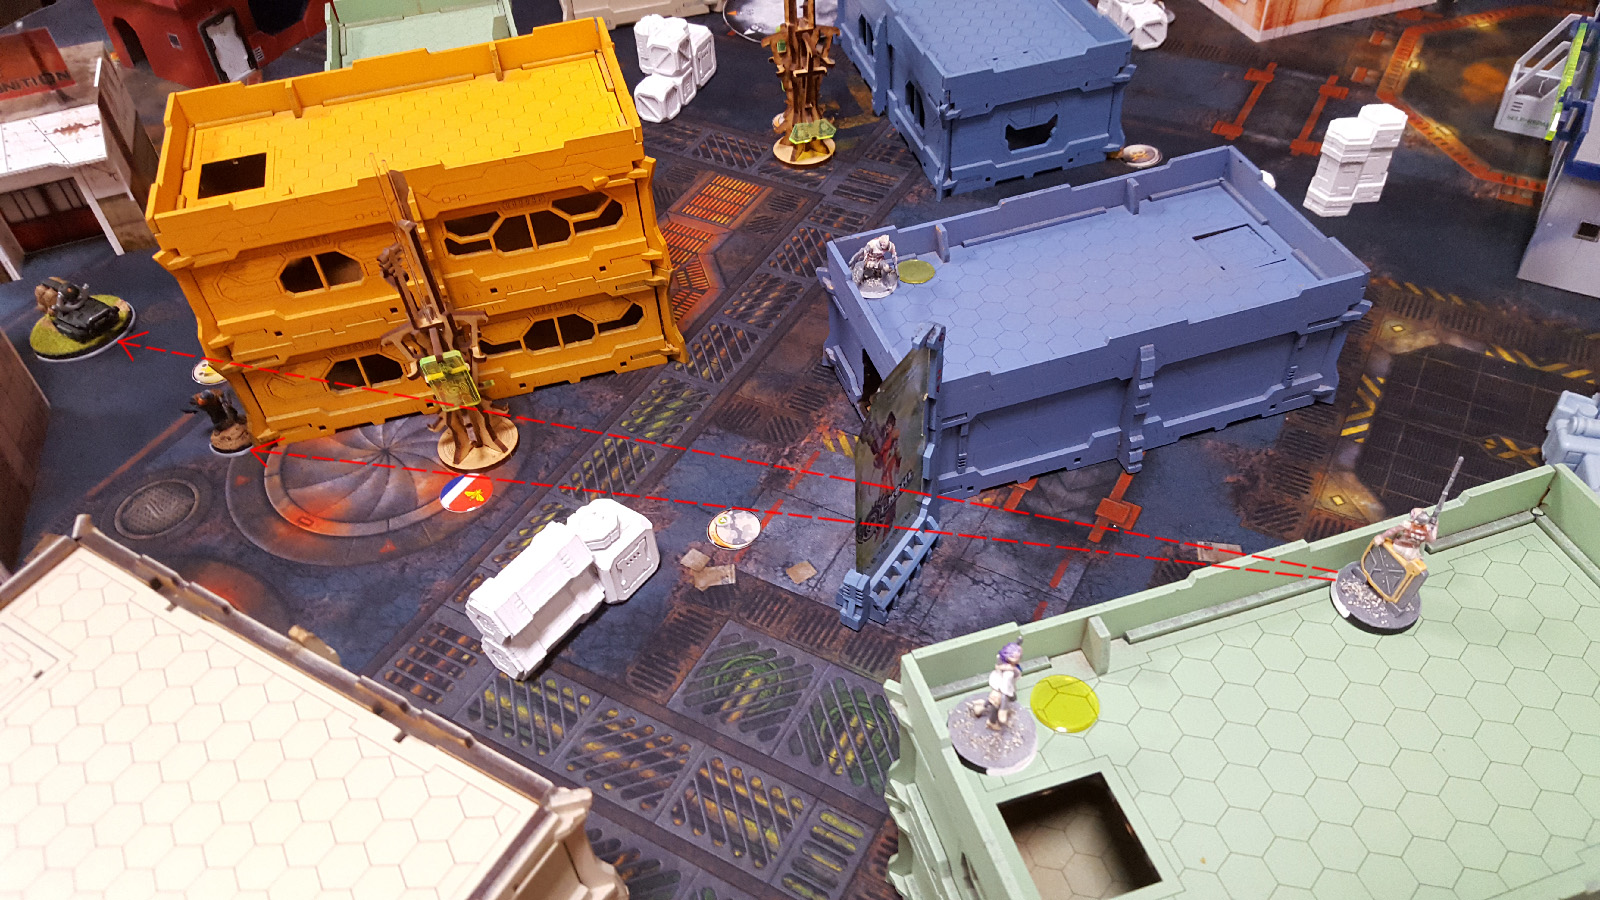 OSS opens turn 2 with the Post-human Mk. 2 again splitting burst to negate the effects of the saturation zone and attempt shots on the Loup-Garou sniper as well as an exposed Traktor Mule. Both shots miss and both threats remain, but the Post-human isn't shot down either.
 The Deva hacker re-applies Assisted Fire onto the Dakini HMG and he peeks back across the table to split burst between the newly traitorous mine and Chasseur tucked under the OSS left flank. The Chasseur attempts a dodge, but is taken down. The mine is hit, but tanks an armor save to continue its taunting of the OSS lines.
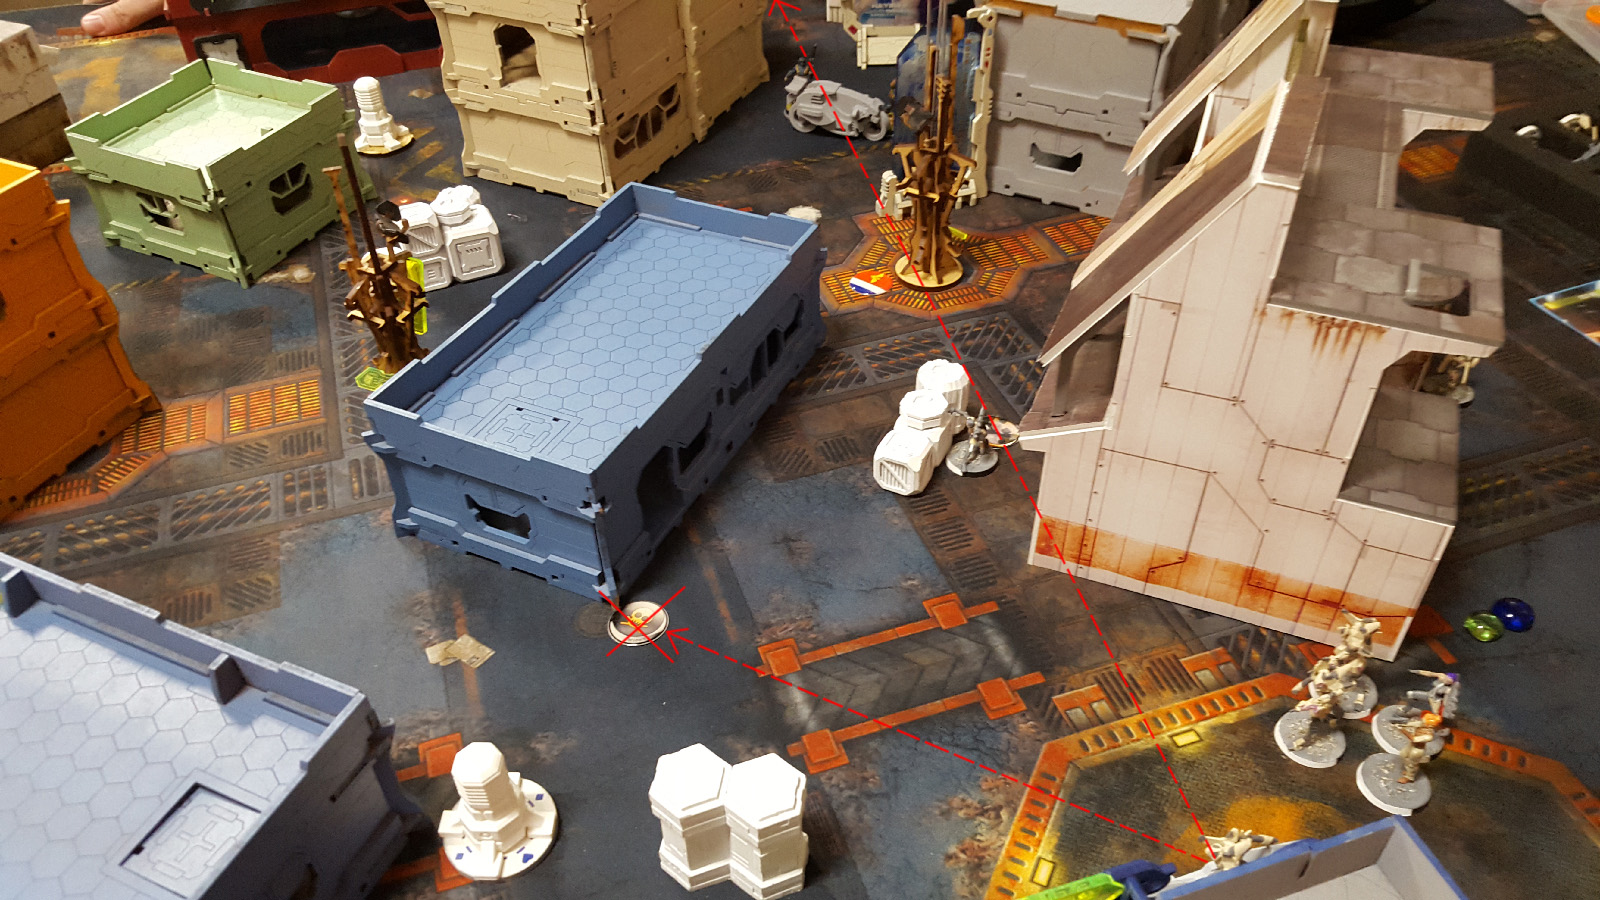 The Dakini HMG continues to moves along the back of OSS territory, now attempting TWO shots at the now infamous mine as well as attempting two shots at an exposed mobile 112 unit in the back of Merovingian territory that wasn't fully covered from when it threw out smoke earlier. The 112 is hit twice, but tanks both armor saves and tucks behind cover. The mine is successfully removed and will no longer plague the days of OSS.
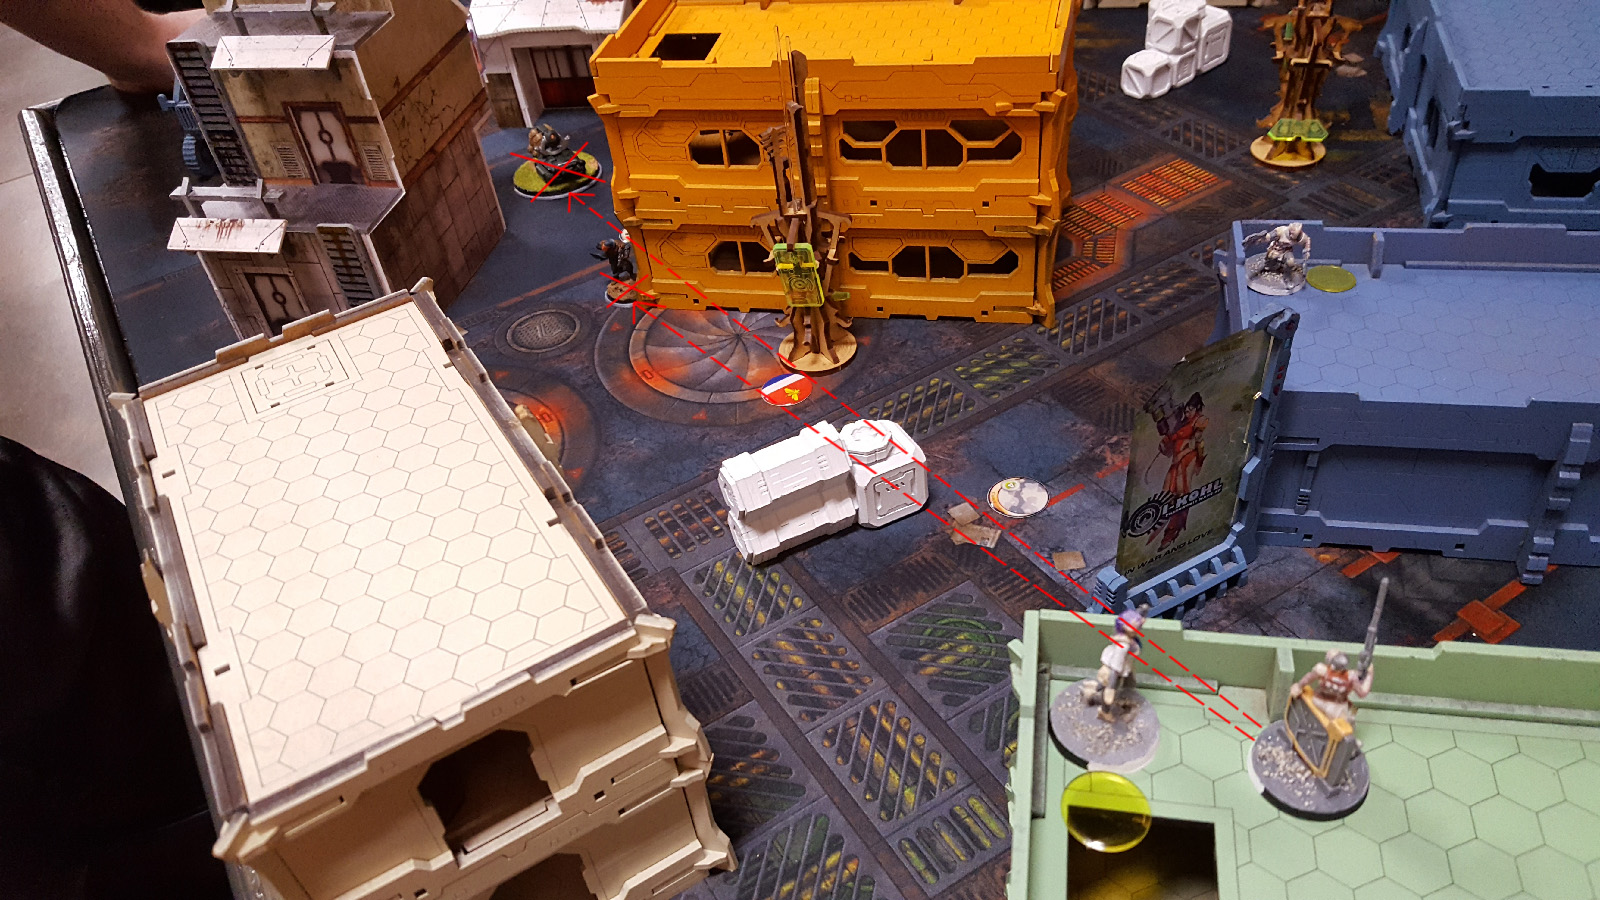 The Post-human Mk. 2 sniper again attempts to split burst between the Loup-Garou sniper and the exposed Traktor Mule, attempting to tank the most recent mine from the Chasseur in the process. This time the Post-human successfully lands hits on both, removing both of them from the table while her 2 armor manages to just be enough to tank the damage from the mine.
 Final orders from OSS order pool 1 are used to reposition the Dakini fire-team to attempt to deter approach on their position and be closer to midfield where they might move onto objectives next turn.
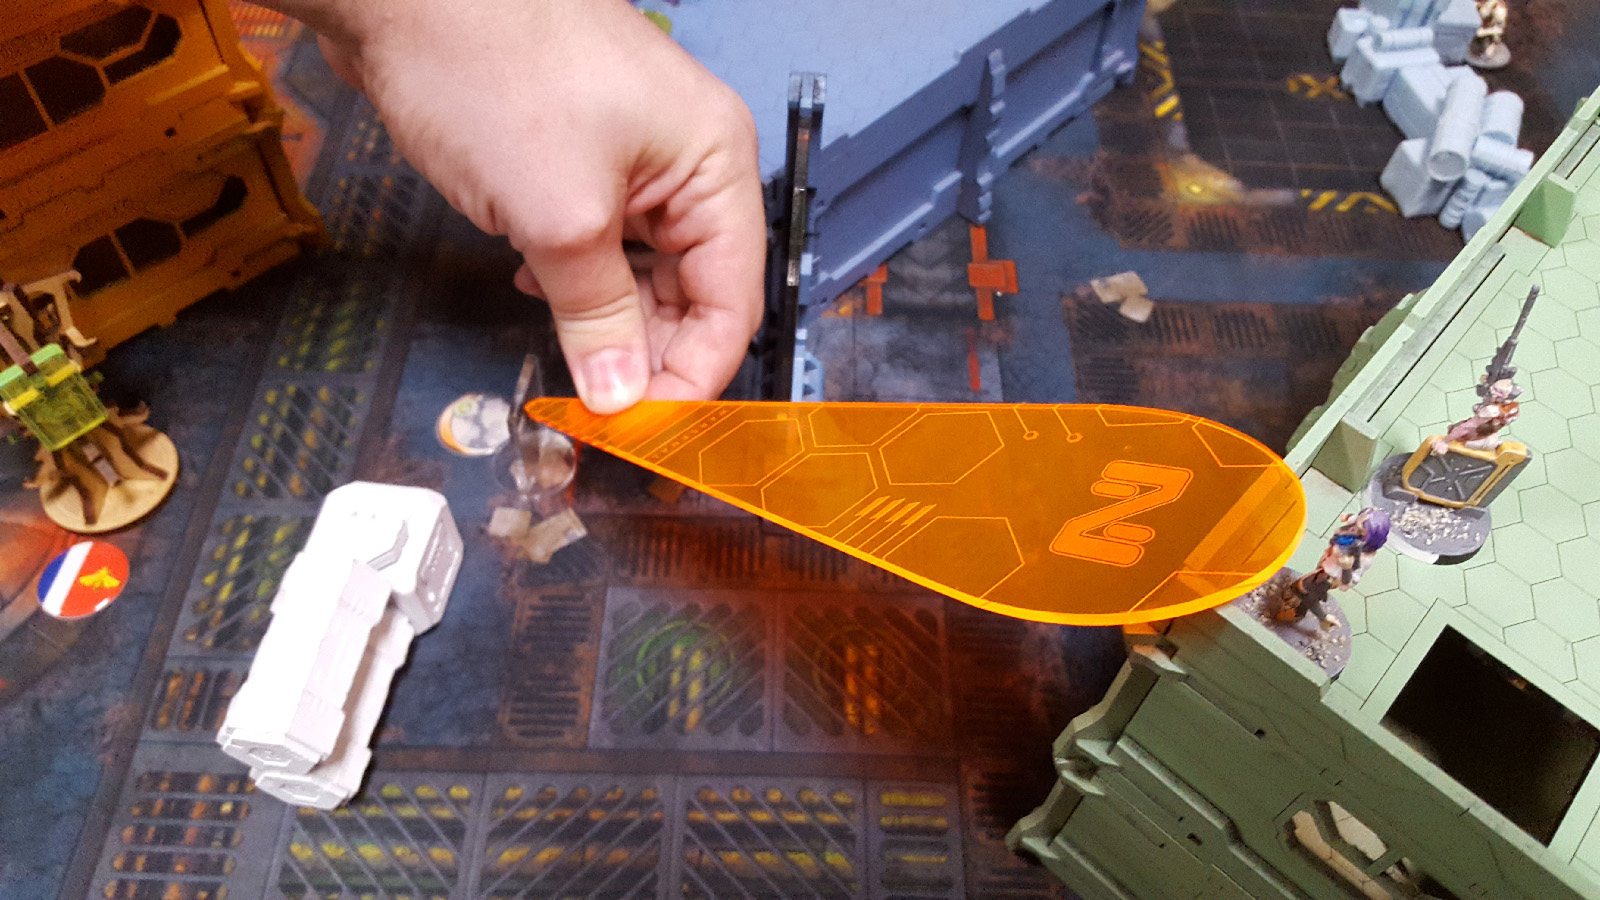 The Danavas hacker stands up and attempts a dodge to remove the remaining mine laid long ago by the recently departed Chasseur. Unfortunately the Danavas fails the dodge and is removed by the shock damage.
 Final orders of OSS turn 2 are used to shift the Naga over into position near the antenna on OSS right flank. The once infamous boarding shotgun Loup-Garou attempts to tag the Naga along the way with his X-visor to reduce bad ranges, but is unsuccessful.
 Merovingian activates mobile 112 to lay down smoke in the middle of the table and reduce sight lines from the Post-human Mk. 2 sniper.
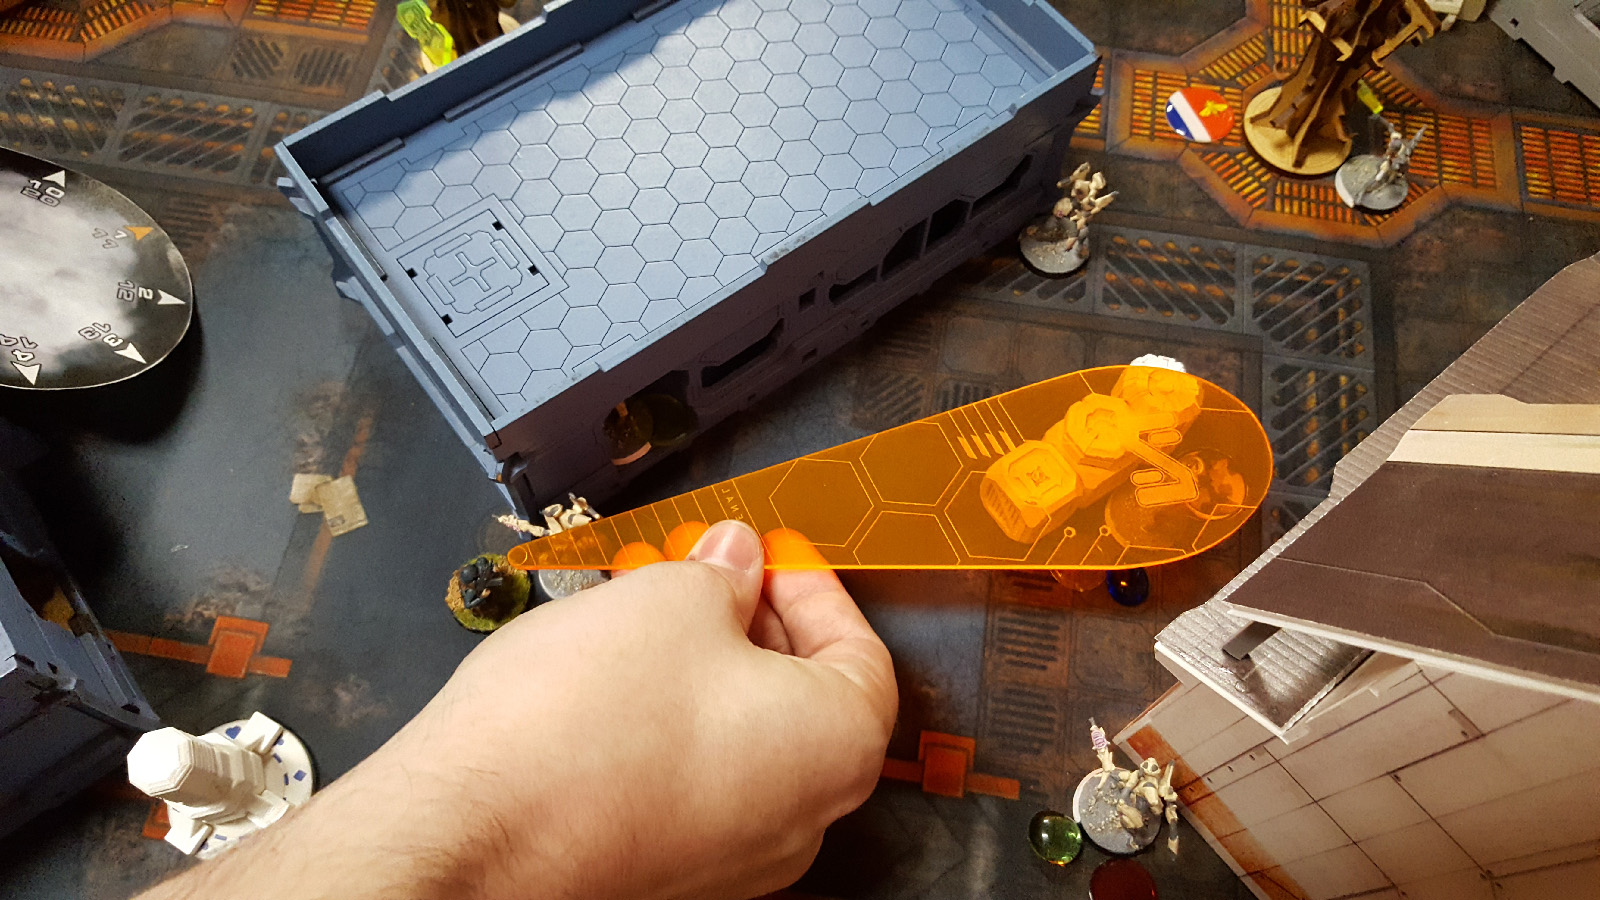
 Under the cover of the recently laid smoke by the 112, the final Chasseur (Minelayer) moves up in marker state towards the position of the Dakini fire-team.
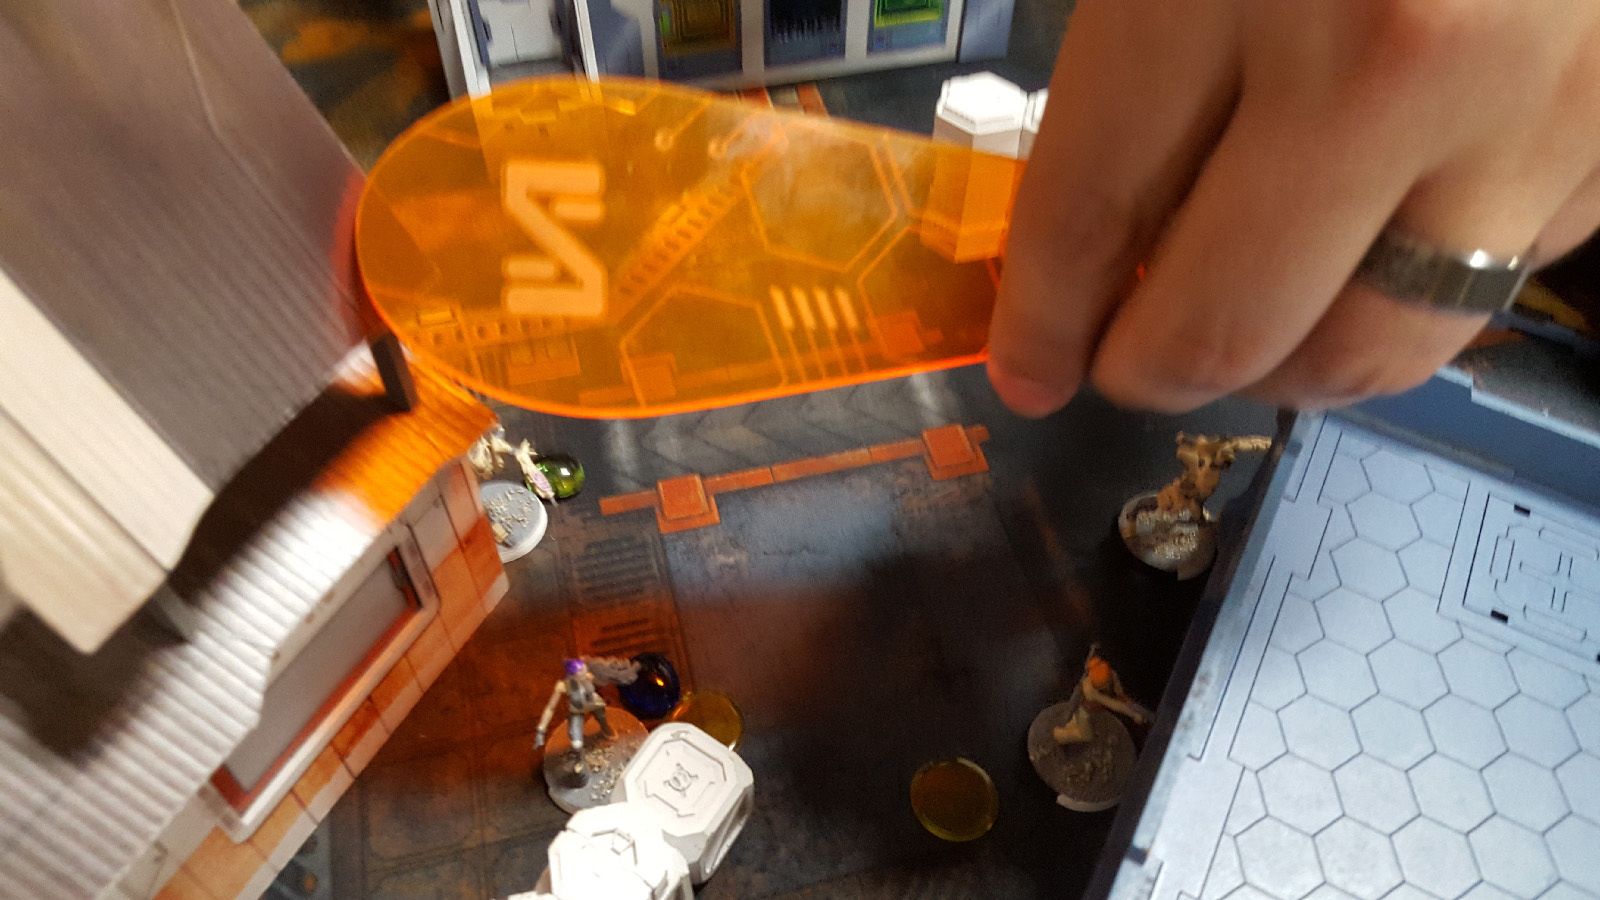 The Chasseur lays the light flamethrower template down on three members of the Dakini fire-team. The Dakini with combi-rifle fails the dodge and tanks the armor save, the Dakini with HMG burns to unconscious level 2, and the Deva successfully dodges further back into cover. The Post-human Mk. 2 sniper is allowed a sniper shot uncontested at the Chasseur, but misses so more fire is likely in the future.
 With a member removed from the Dakini fire-team, Merovingian uses their lieutenant order to attempt shots on an exposed Dakini with their Metro Lieutenant. The mimetism of the Dakini causes the Metro to miss and the Metro is knocked unconscious.
 The Chasseur sees the need to continue her work and moves up to again attempt a flame template, this time only on the single Dakini and Deva. The Dakini is consumed by the flame and the Deva fails her initial dodge, but manages to tank the armor save and remain in commission. The Post-human Mk. 2 sniper finally lands a shot into the back of the Chasseur and it is removed from the table.
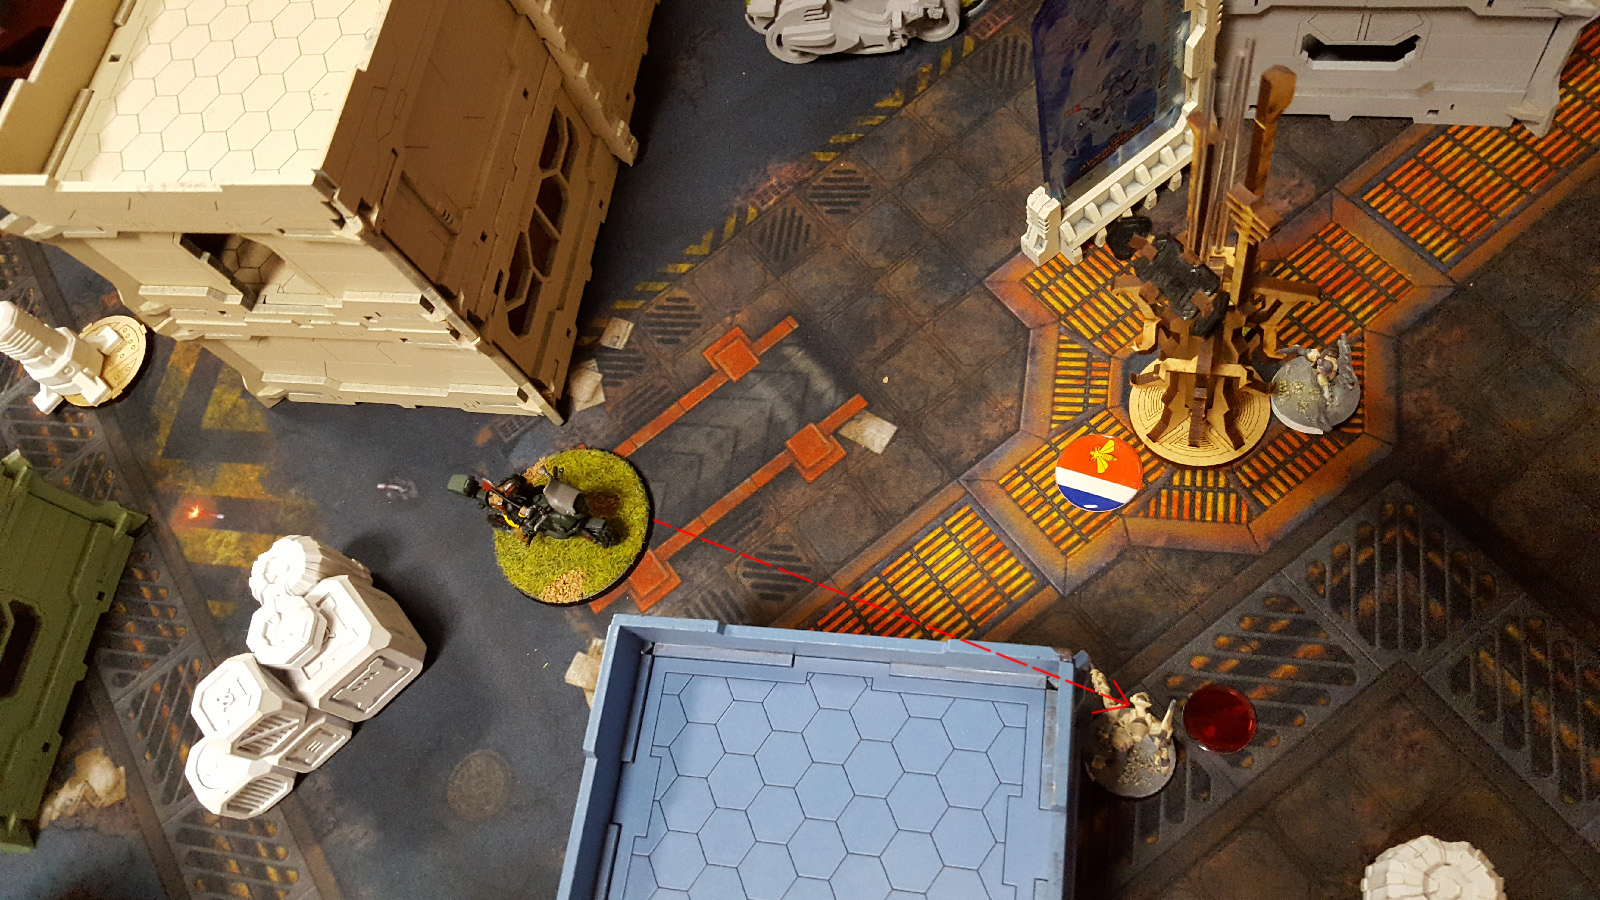 With only so many units left alive on the table, the mobile 112 moves up on the final remaining Dakini and uses his light shotgun to knock the Dakini out on the way to the Naga and Deva positions.
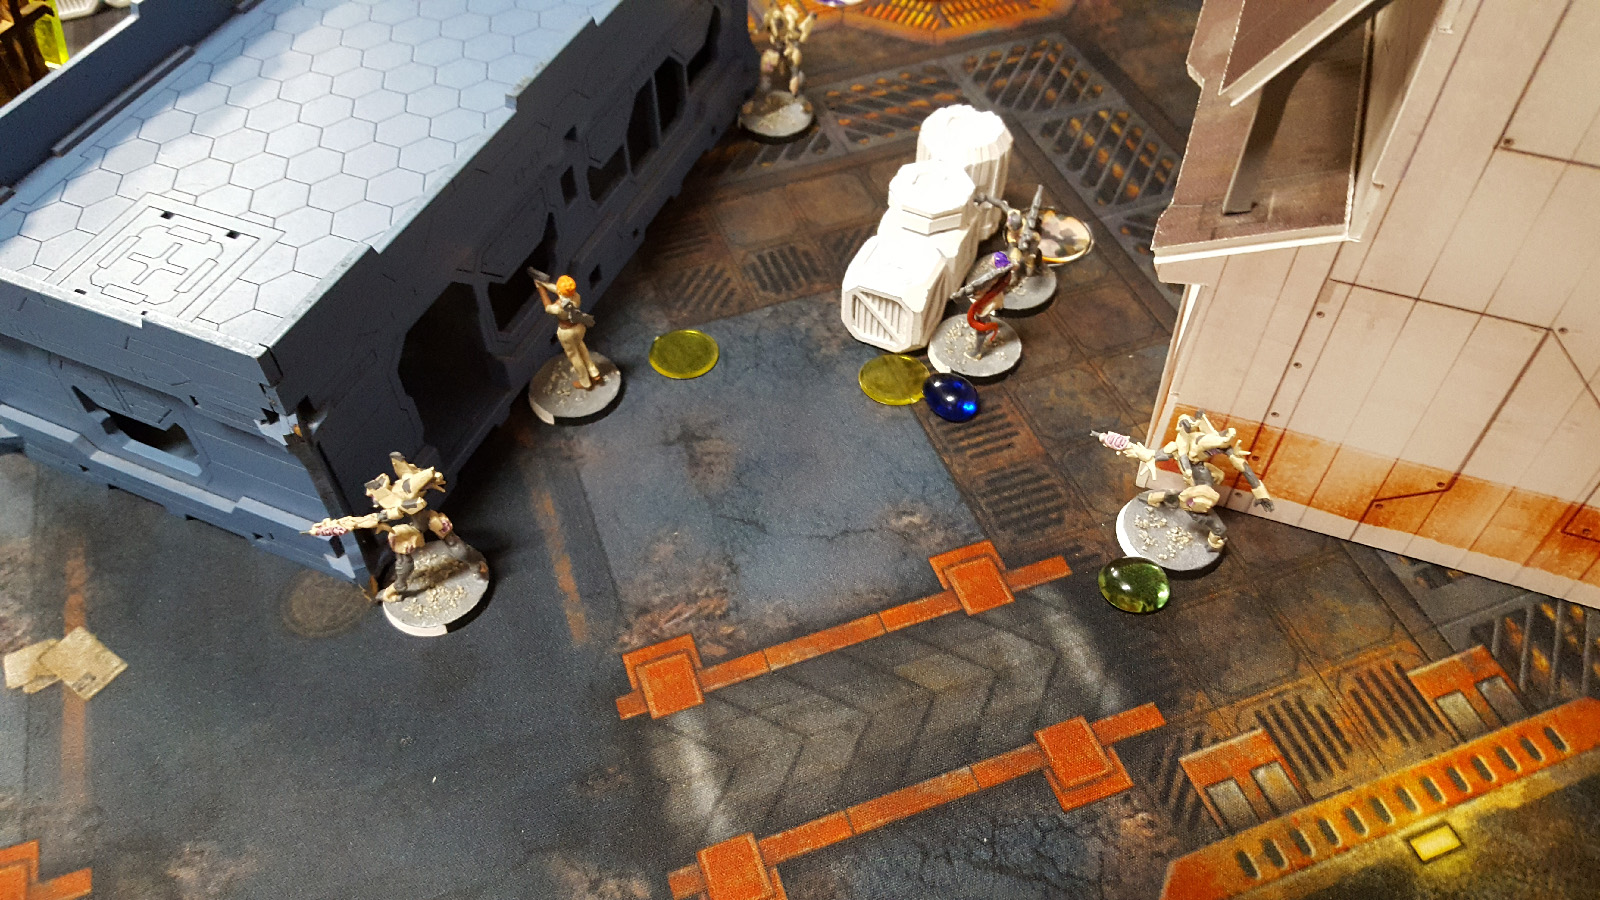
 The mobile 112 manages to loop behind the antenna to avoid ARO from the Post-human Mk. 2 sniper and engage the Naga. With the shotgun template laid down the Deva will also be hit in the back. The Naga is able to win the face-to-face roll and knock the mobile 112 unconscious, but the Deva fails her dodge and ends up tanking 1 armor save to go NWI.
 With the final order of the turn, Merovingian shifts the Loup-Garou boarding shotgun back around to have view of their console to protect it during the final OSS turn.
 OSS opens turn 3 revealing the Dasyu assault hacker from hidden deployment near the antenna on their left flank and moving him into base-to-base contact with the objective. The Merovingian Warcore gets an unopposed flash-pulse that succeeds, but the Dasyu tanks the BTS save so that he'll still be able to attempt to claim the antenna. It's a good thing too because he fails the initial attempt that gave the Warcore an unopposed flash-pulse so he needs to use the final order in order pool 2 to steal the antenna.
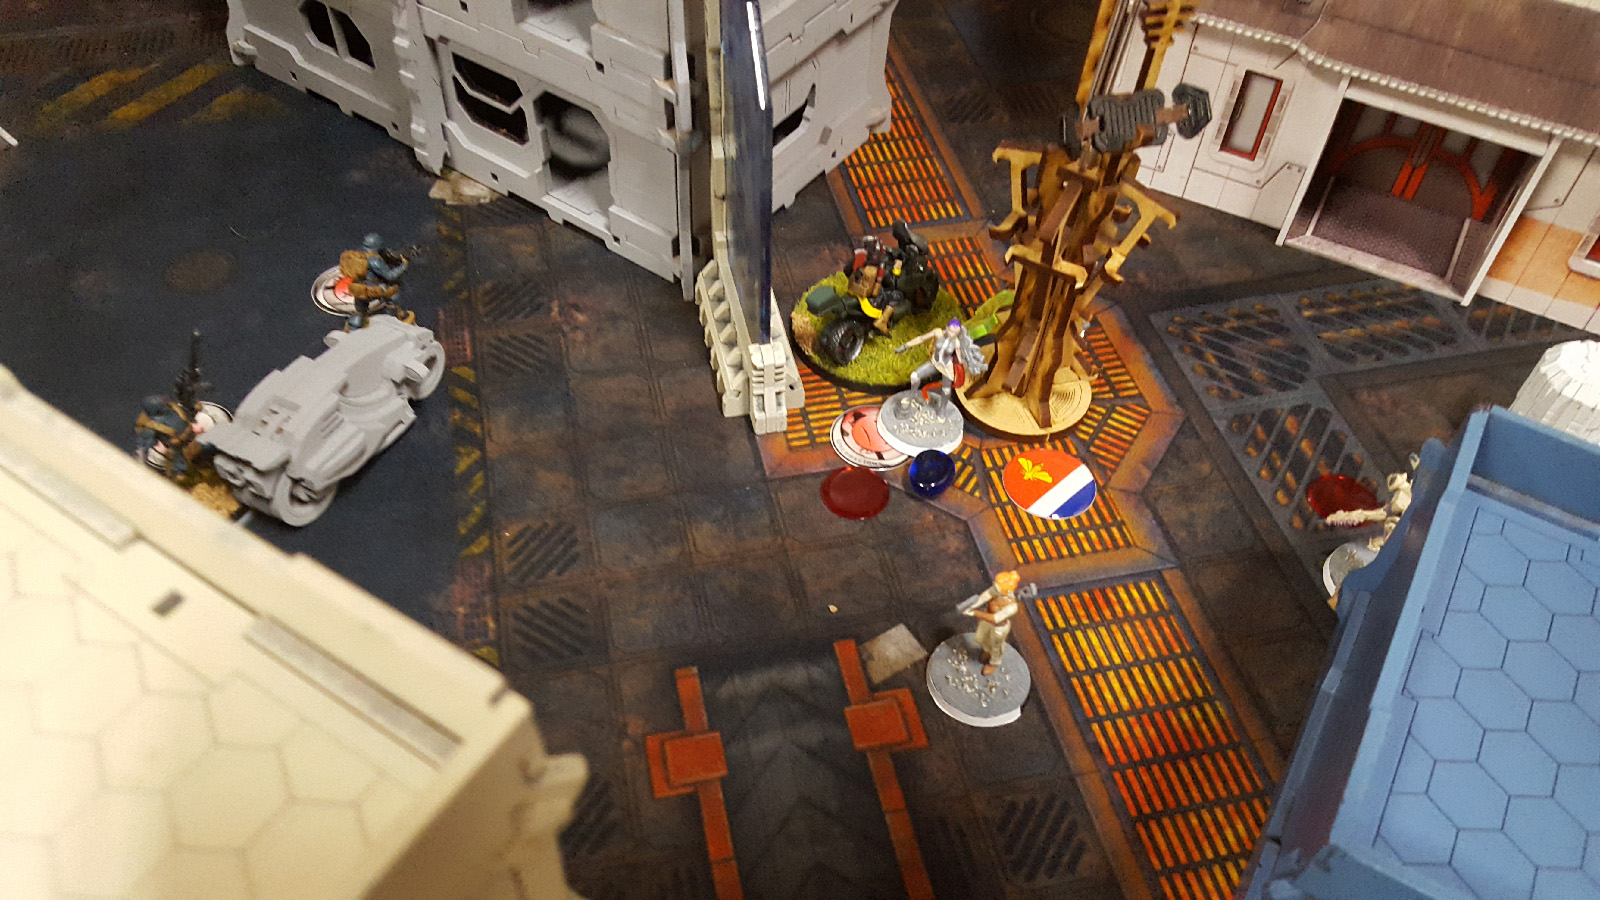 The Deva and CSU remaining in the original Dakini fire-team move along the OSS right flank and use a cautious move to cross sight lines from the Warcore to avoid the same kind of risk. The Deva ALSO fails her first attempt to claim the antenna on the OSS right flank, but has several orders and WIP 15 so it does eventually happen.
 With only a couple of orders remaining in the game the CSU sees her opportunity to shine (just like last game). She only has just enough orders to move into base-to-base contact with the Merovingian console, but has to tank a mine AND a response shot from the infamous Loup-Garou boarding shotgun. She did have +1 armor from her metachemistry roll, but didn't have THAT much armor and is unfortunately removed from the table.
Battle Report Author

Army Lists Used In This Battle
Recommend Commander For Commendation
4 People Recommended PolyB for commendation
Share this battle with friends
ALEPH
PolyBWins
PolyBWins

Nice report. I like the lesson at the start, then followed by a detailed write up.
Keep it up!
Great write-up and photos! Congratulations on your victory!
Good report and victory!!
Great battle report, the photos are excellent. Congrats on the win 🙂