Fought At Liberty Cargo Logistics Center: Cross-Docking & Storage Area
1678 days 19 hours 36 minutes ago
PanOceania forces repel Foreign Company Aggression!
300 POINTSI have fought BakuninUnbound before at our gaming club, and where I believe my win ratio against him is probably 1:4. That is to say, going into this match I had to carefully consider what options that I wanted to go with.
We had a roll off to decide the mission, then had time to prepare an appropriate list. I won the roll off with a 6, to his 5, and chose Liberty Cargo Logistics Center. I had lost there before in my first game, and felt the need to redeem myself.
I’m familiar with BakuninUnbound employing trickery in his games, so I decided to employ some of my own!
List:
Jotum (Lt)
Sepulchre (CoC, Spitfire)
Bulleteer (Spitfire)
Pathfinder
Regular (Sensor, Minelayer)
Mulebot (Evo hacking)
Fusilier (Forward Observer)
Trauma Doc
Monstrucker (SMG)
+ Palbot
Bolt (KHD)
Anticipating Camo, TO, and Smoke from an NA2 army, my Knight of the Holy Sepulchre would masquerade as an Aquila. Obviously, pretending to be an Aquila is not the same as being an Aquila, but it may mess with BakuninUnbound’s plans if he thinks there is an Aquila on the table. Further to that, if he attempts to counter the Aquila with the use of White Noise, well, he’ll have a surprise.
For the rest of my game plan, my intention was relatively simple. I planned to have the Jotum and Sepulchre occupy the middle, accompanied by the Fusilier (FO). The Jotum and the Sepulchre are 159 points together, so hopefully they can dominate the zone. The Bulleteer would advance to the enemy side of the table, and try to cause as much chaos as possible. My remaining forces would occupy the zone closest to my deployment. If all goes according to plan, I would be able to accomplish the following:
· Dominate the nearest sector (+1)
· Dominate central sector (+3)
o Dominate Central with Liaison (+1)
· Classified (+1)
· Liaison Officer special rule (+1)
Whereas my opponent could only complete the following;
· Dominate the nearest sector (+1)
· Classified (+1)
· Liaison Officer Special Rule (+1)
With all that said, onto the game!
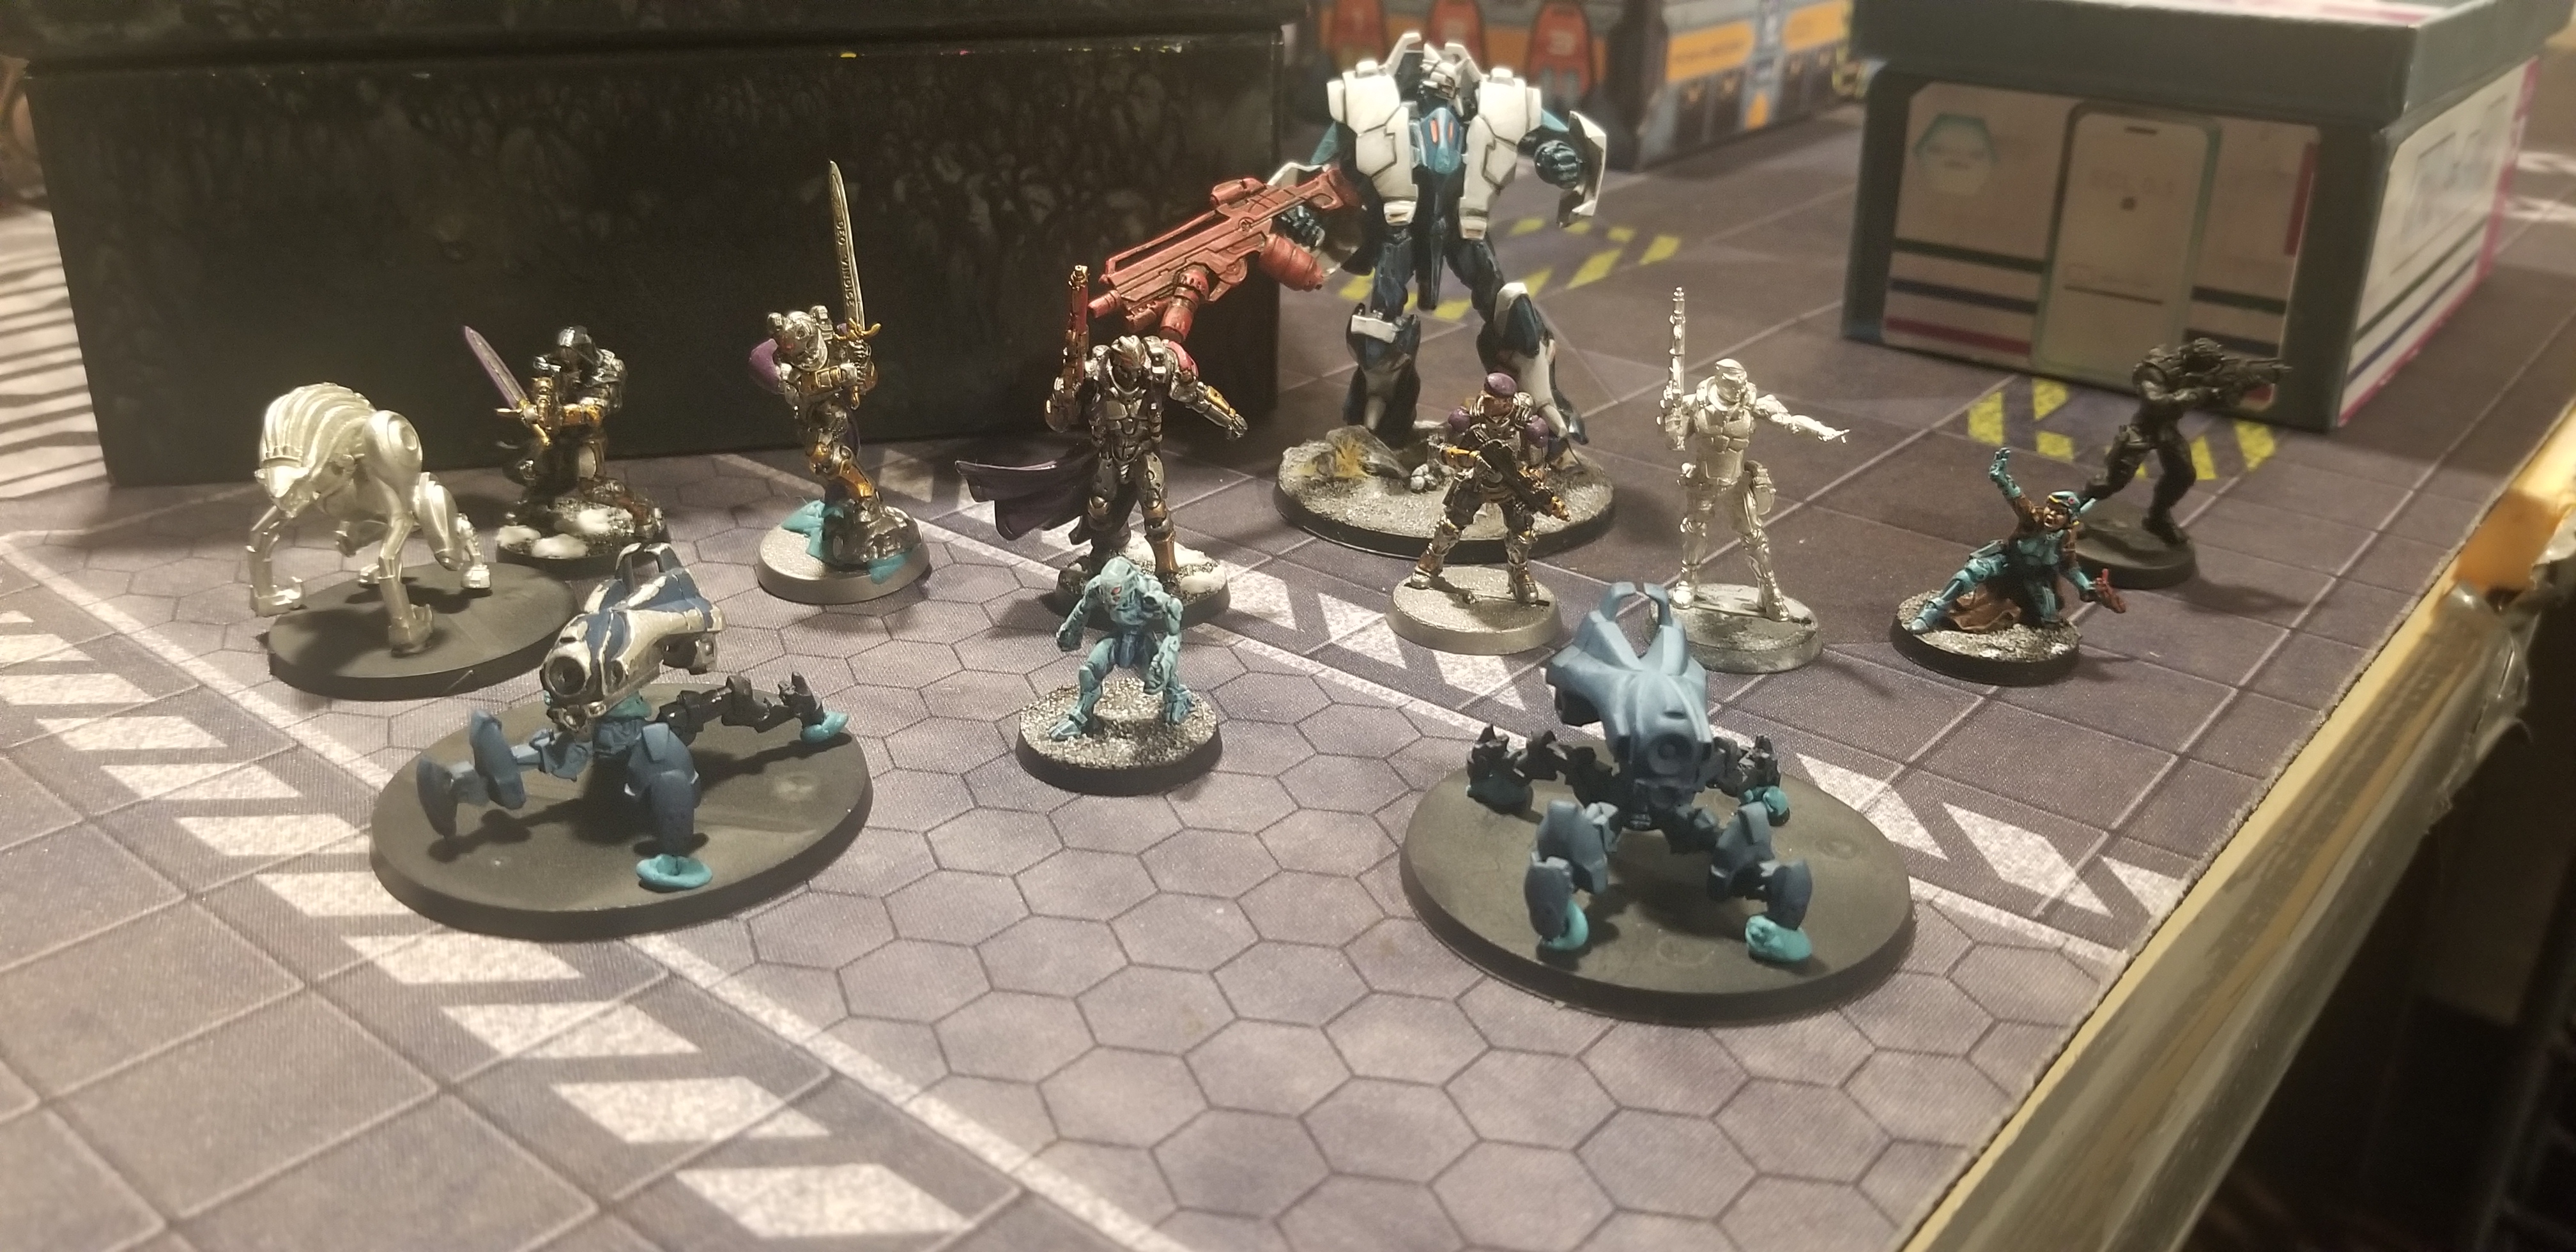 My list; (L-R) Pathfinder Dronbot (Proxy, SiriusBot), Bolt KHD (Proxy, Black Friar), Mulebot EVO (Proxy, Bulleteer with peeling paint), Knight of the Holy Sepulchre (Proxy, Father Knight), Aquila HMG [Holoprojected Sepulchre], Palbot, Jotum, Fusilier Forward Observer, Bulleteer Spitfire, Regular Sensor & Minelayer (Proxy, Fusilier Hacker), Trauma Doctor, Monstrucker (Proxy, Aguicile)
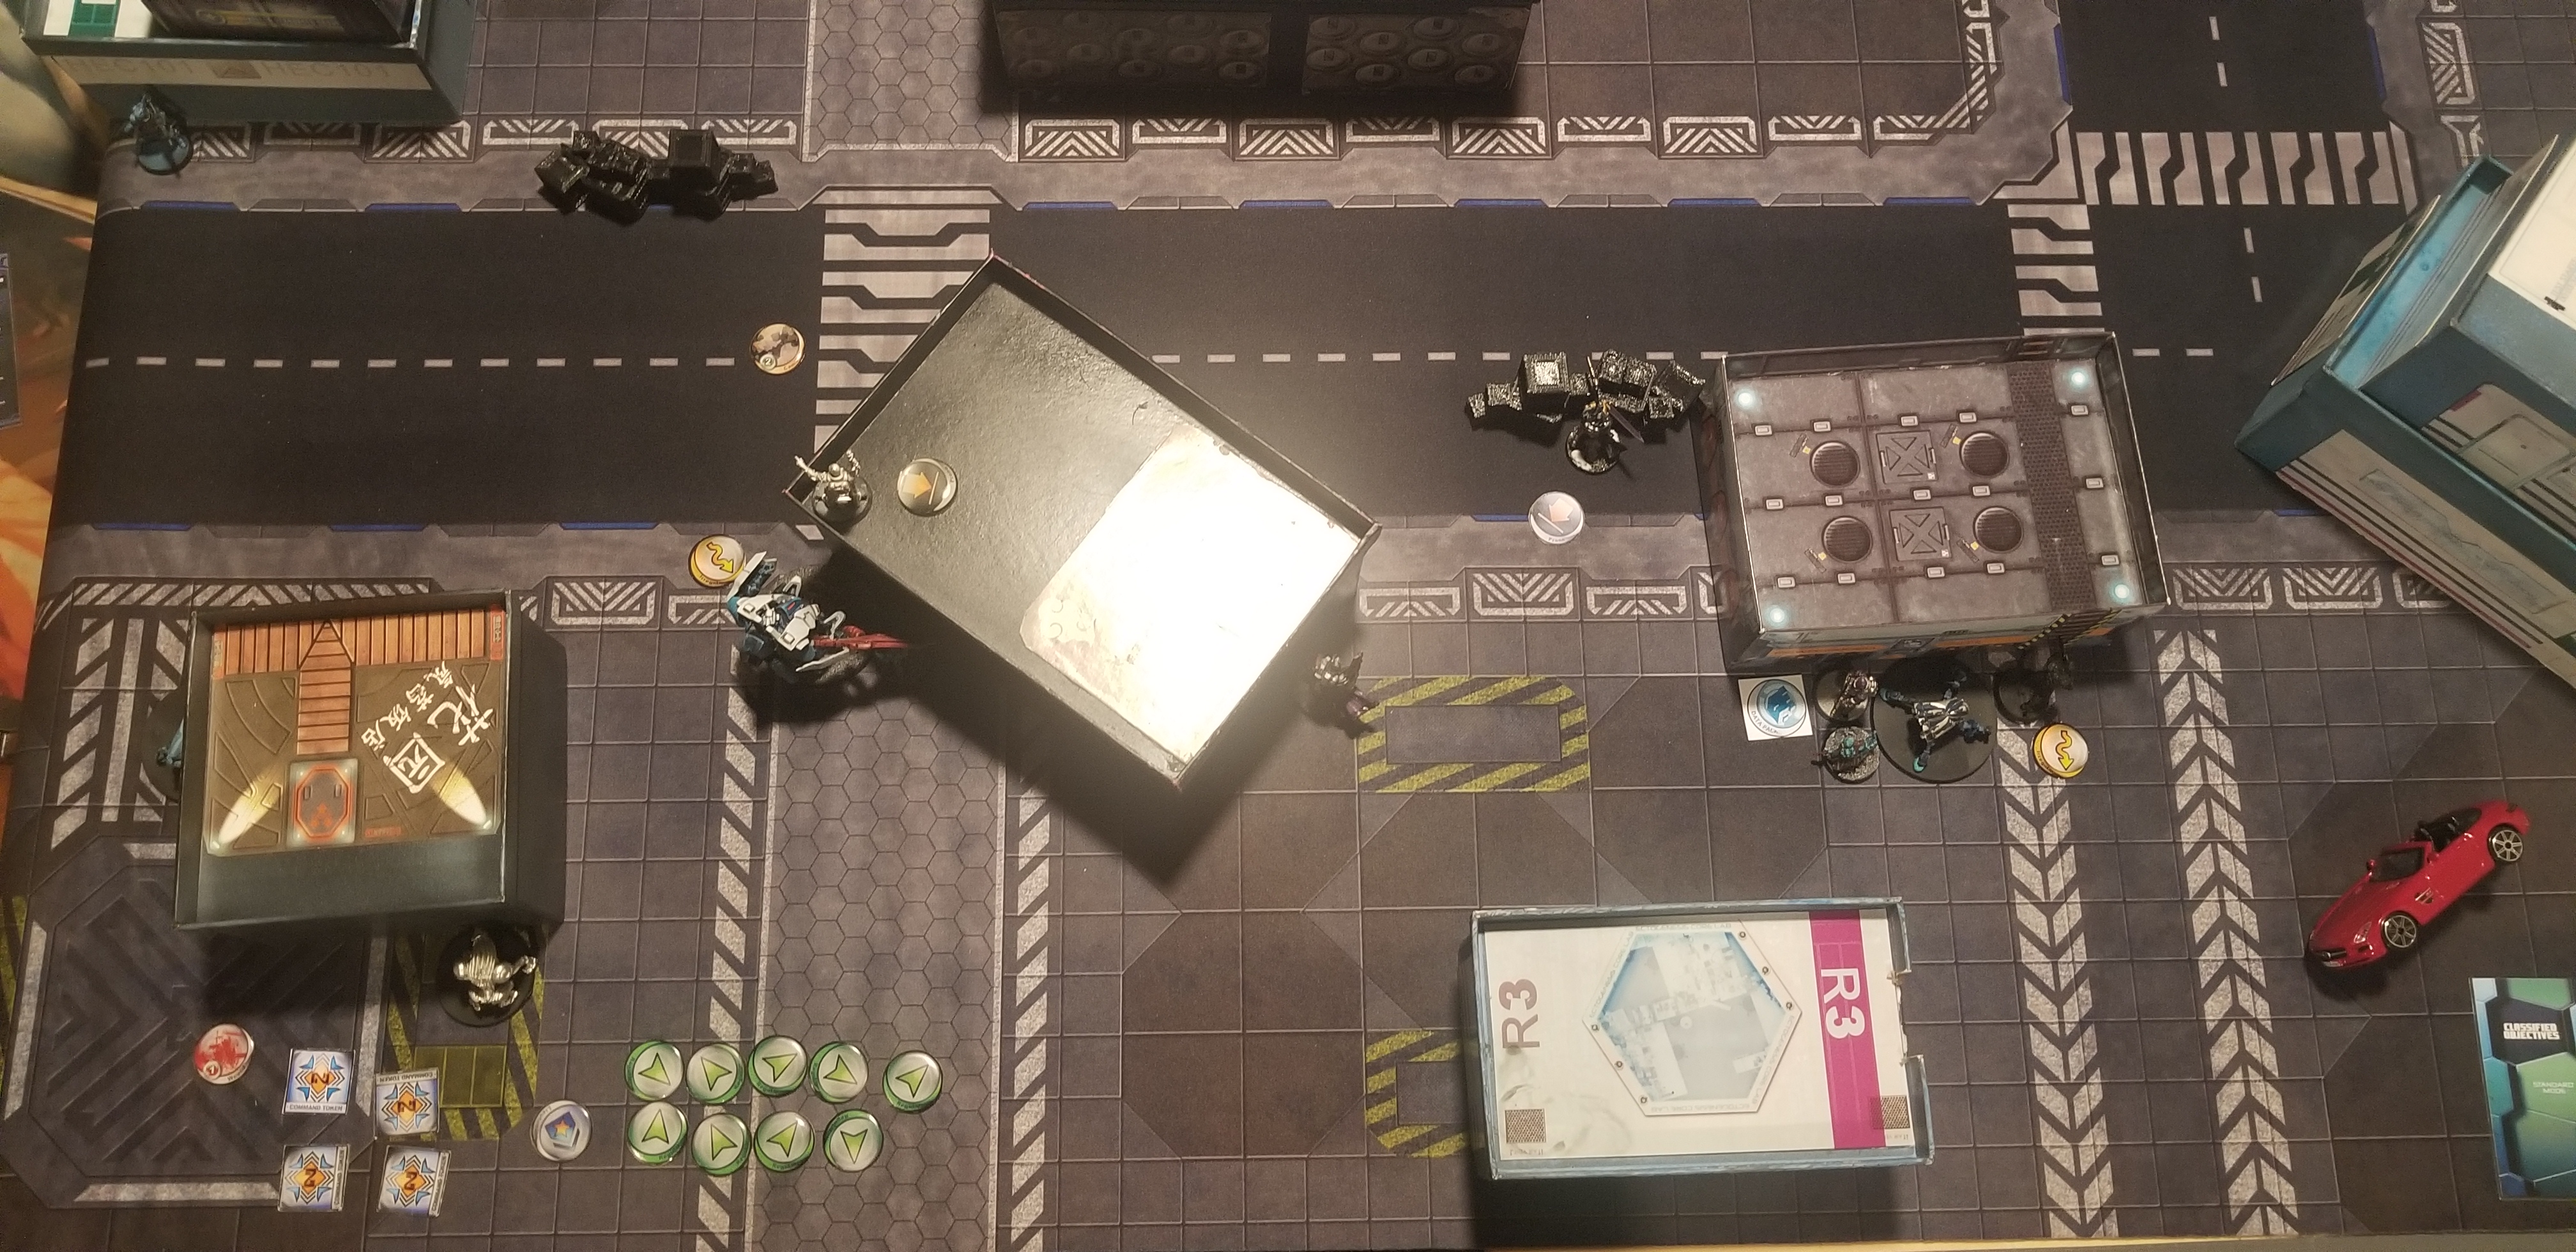

PANOCEANIA: TOP OF TURN 1
With the remote pilots having loaded in, PanOceania had the first turn. The pilot controlling the Mulebot EVO activated Assisted Fire on the Bulleteer, while the Monstrucker decided to protect himself and his allies by deploying a Drop Bear. Once those preparations were made, it was time for the true battle to commence.
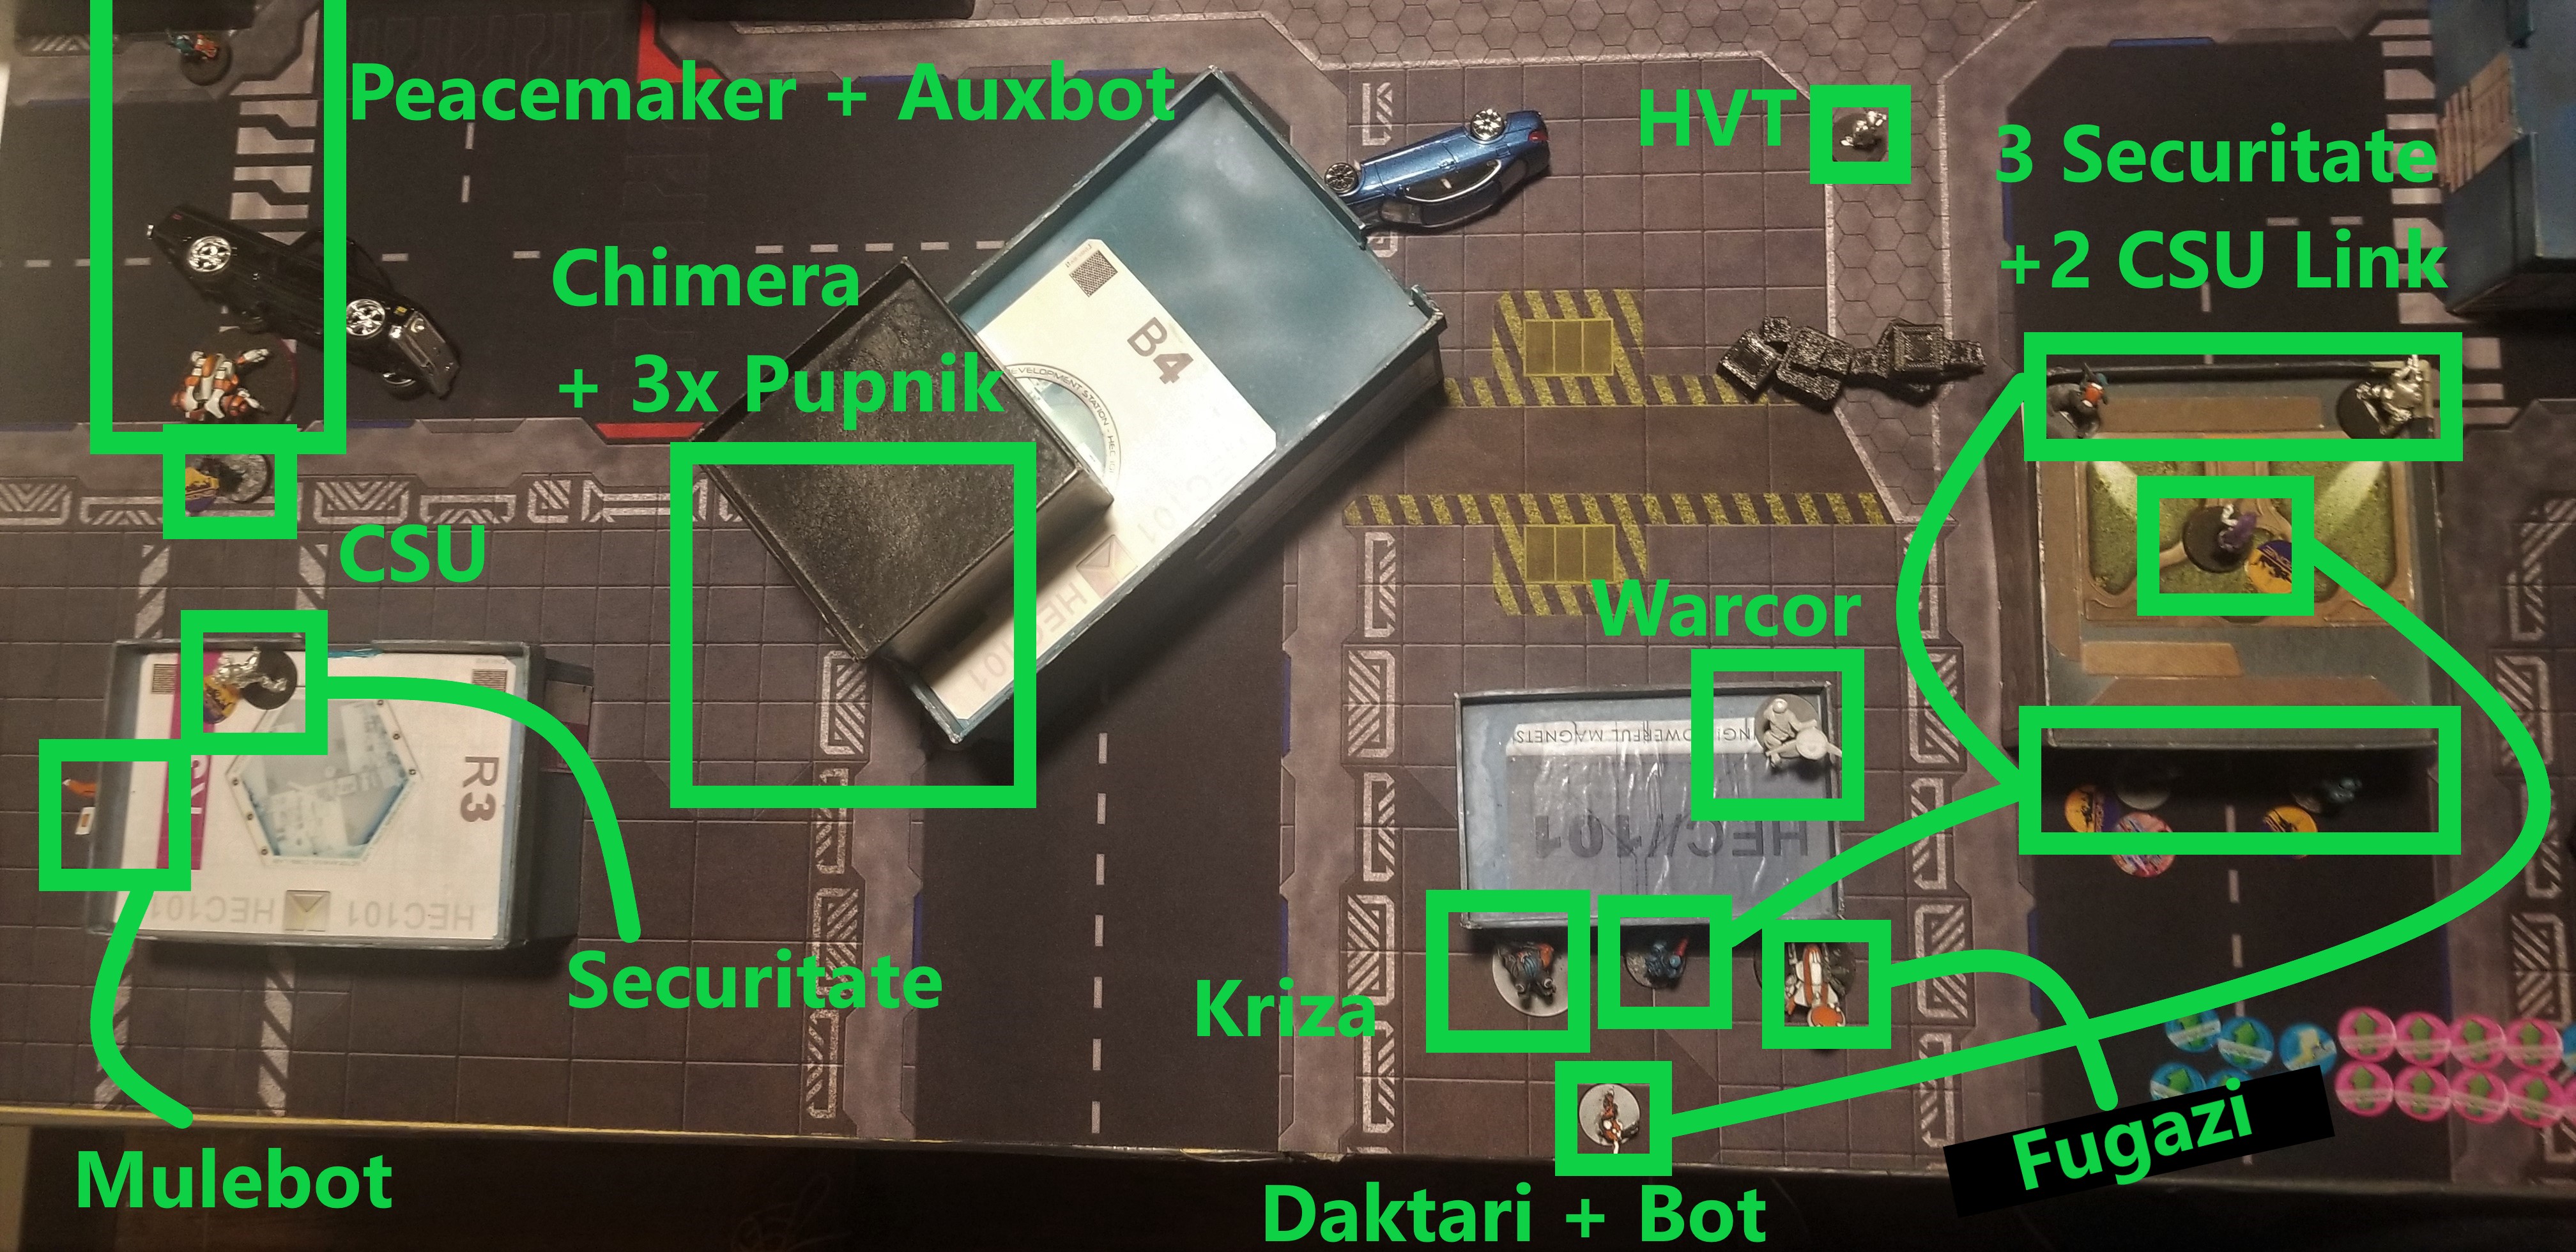
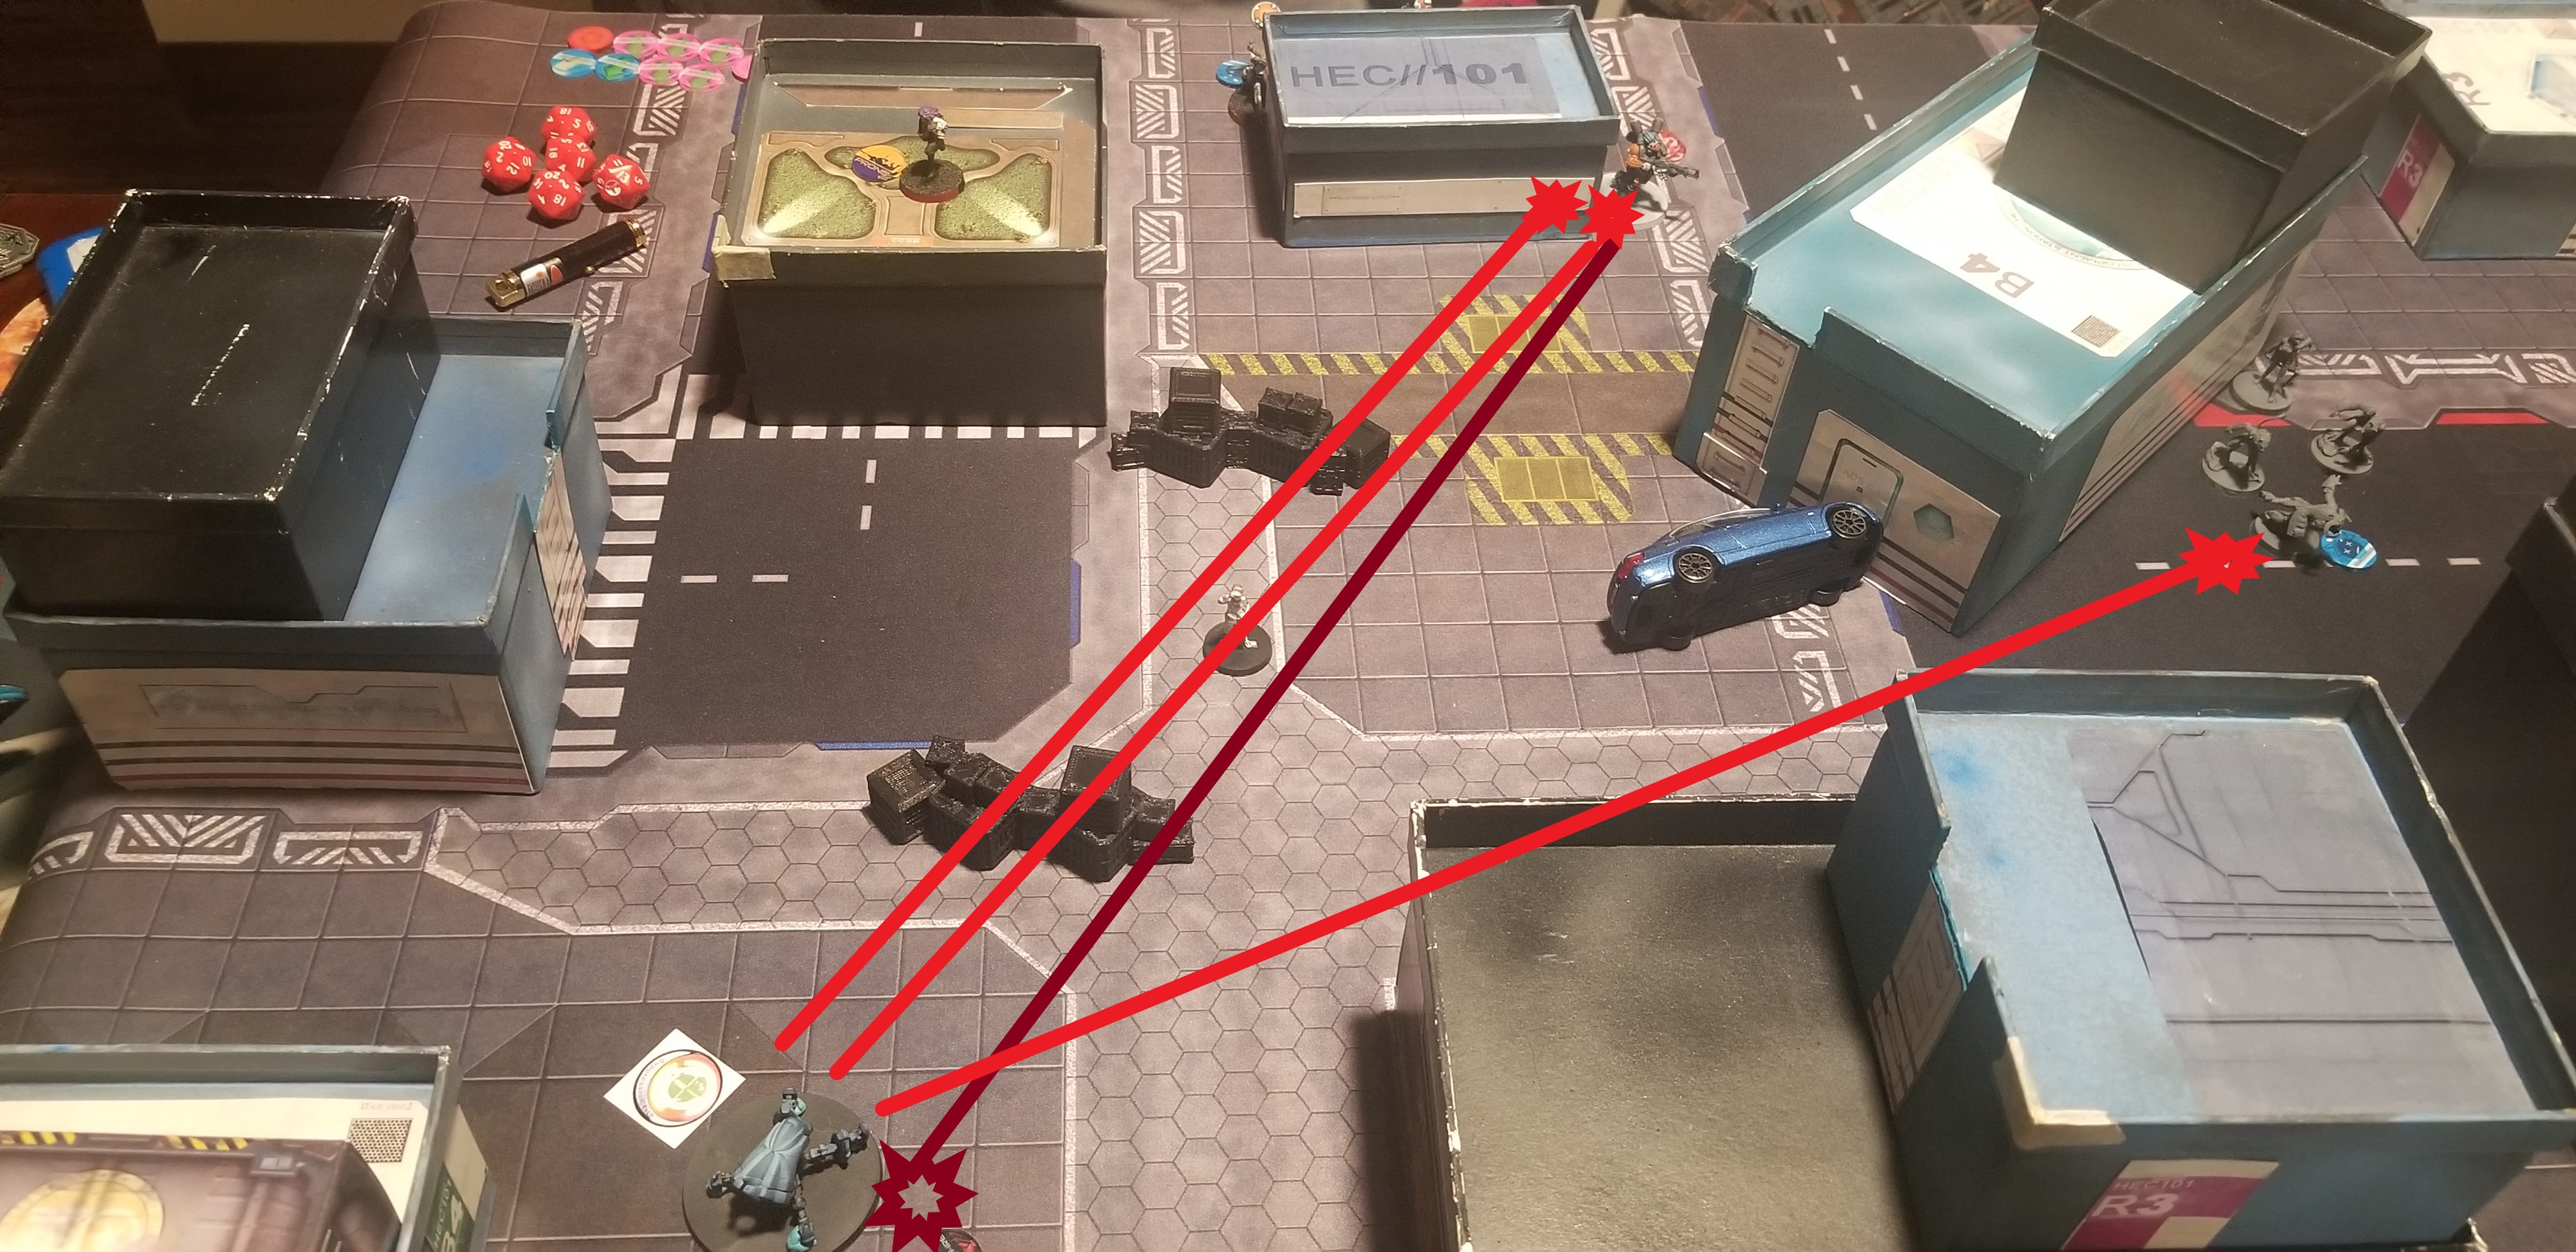
The Jotum begins it's assault by attacking the Securitate link which lays dead ahead. In retaliation; two Securitate, both with Feuerbach, a Warcor, and a Fugazi fire back. The pilot realizes that while he's in cover, his TAG is all but impervious from oncoming ballistic and technical weapons. Splitting it's fire between the two Securitate, while ignoring the flash pulses completely, the Jotum kills one Feuerbach. Though the other Feuerbach, and both flash pulses managed to land on the it's armoured chassis, the Jotum merely shrugs off the damage. The Jotum opens fire again, focusing on the other Feuerbach, ignoring the mere annoyances of the flash pulses. Once the other Securitate lays slain, the Jotum splits its fire between the Warcor and Fugazi. The Warcor goes down, but the Fugazi scores a critical hit on the Jotum! Fortune seemed to be with PanOceania this day though, as the Jotum in return scores a critical on the Fugazi, ignoring the stun.
The Bulleteer's pilot decided it was time to deal with that Fugazi, and began advancing towards it, firing along the way. After two orders, the Bulleteer was firmly in the center of the table, but a wrench is thrown into the plan! A camouflaged Zero reveals himself, and attempts to Carbonite the Bulleteer. The bulleteer decides that removing the Fugazi more important, and decides to put all of his spitfire rounds into the Fugazi. Unfortunately for Foreign Company, the Fugazi falls to the weight of the Bulleteer's Spitfire, and the Zero fails to upload the Carbonite program into the Bulleteer.
In retaliation for the Zero's attempt, the Bolt KHD uses the Bulleteer's inbuilt repeater, and Redrum's the Zero.
With the remaining orders, the Jotum advances forward into cover, a coordinated suppression puts the Jotum, Bulleteer, and Forward Observer into suppression. ((Originally, the Monstrucker was included in this coordinated order as well. However, we later remembered that Irregular Troops, and those with G:Servants, cannot be part of coordinated orders, of which this Monstrucker fit both. The picture was already taken by the time we remembered.))
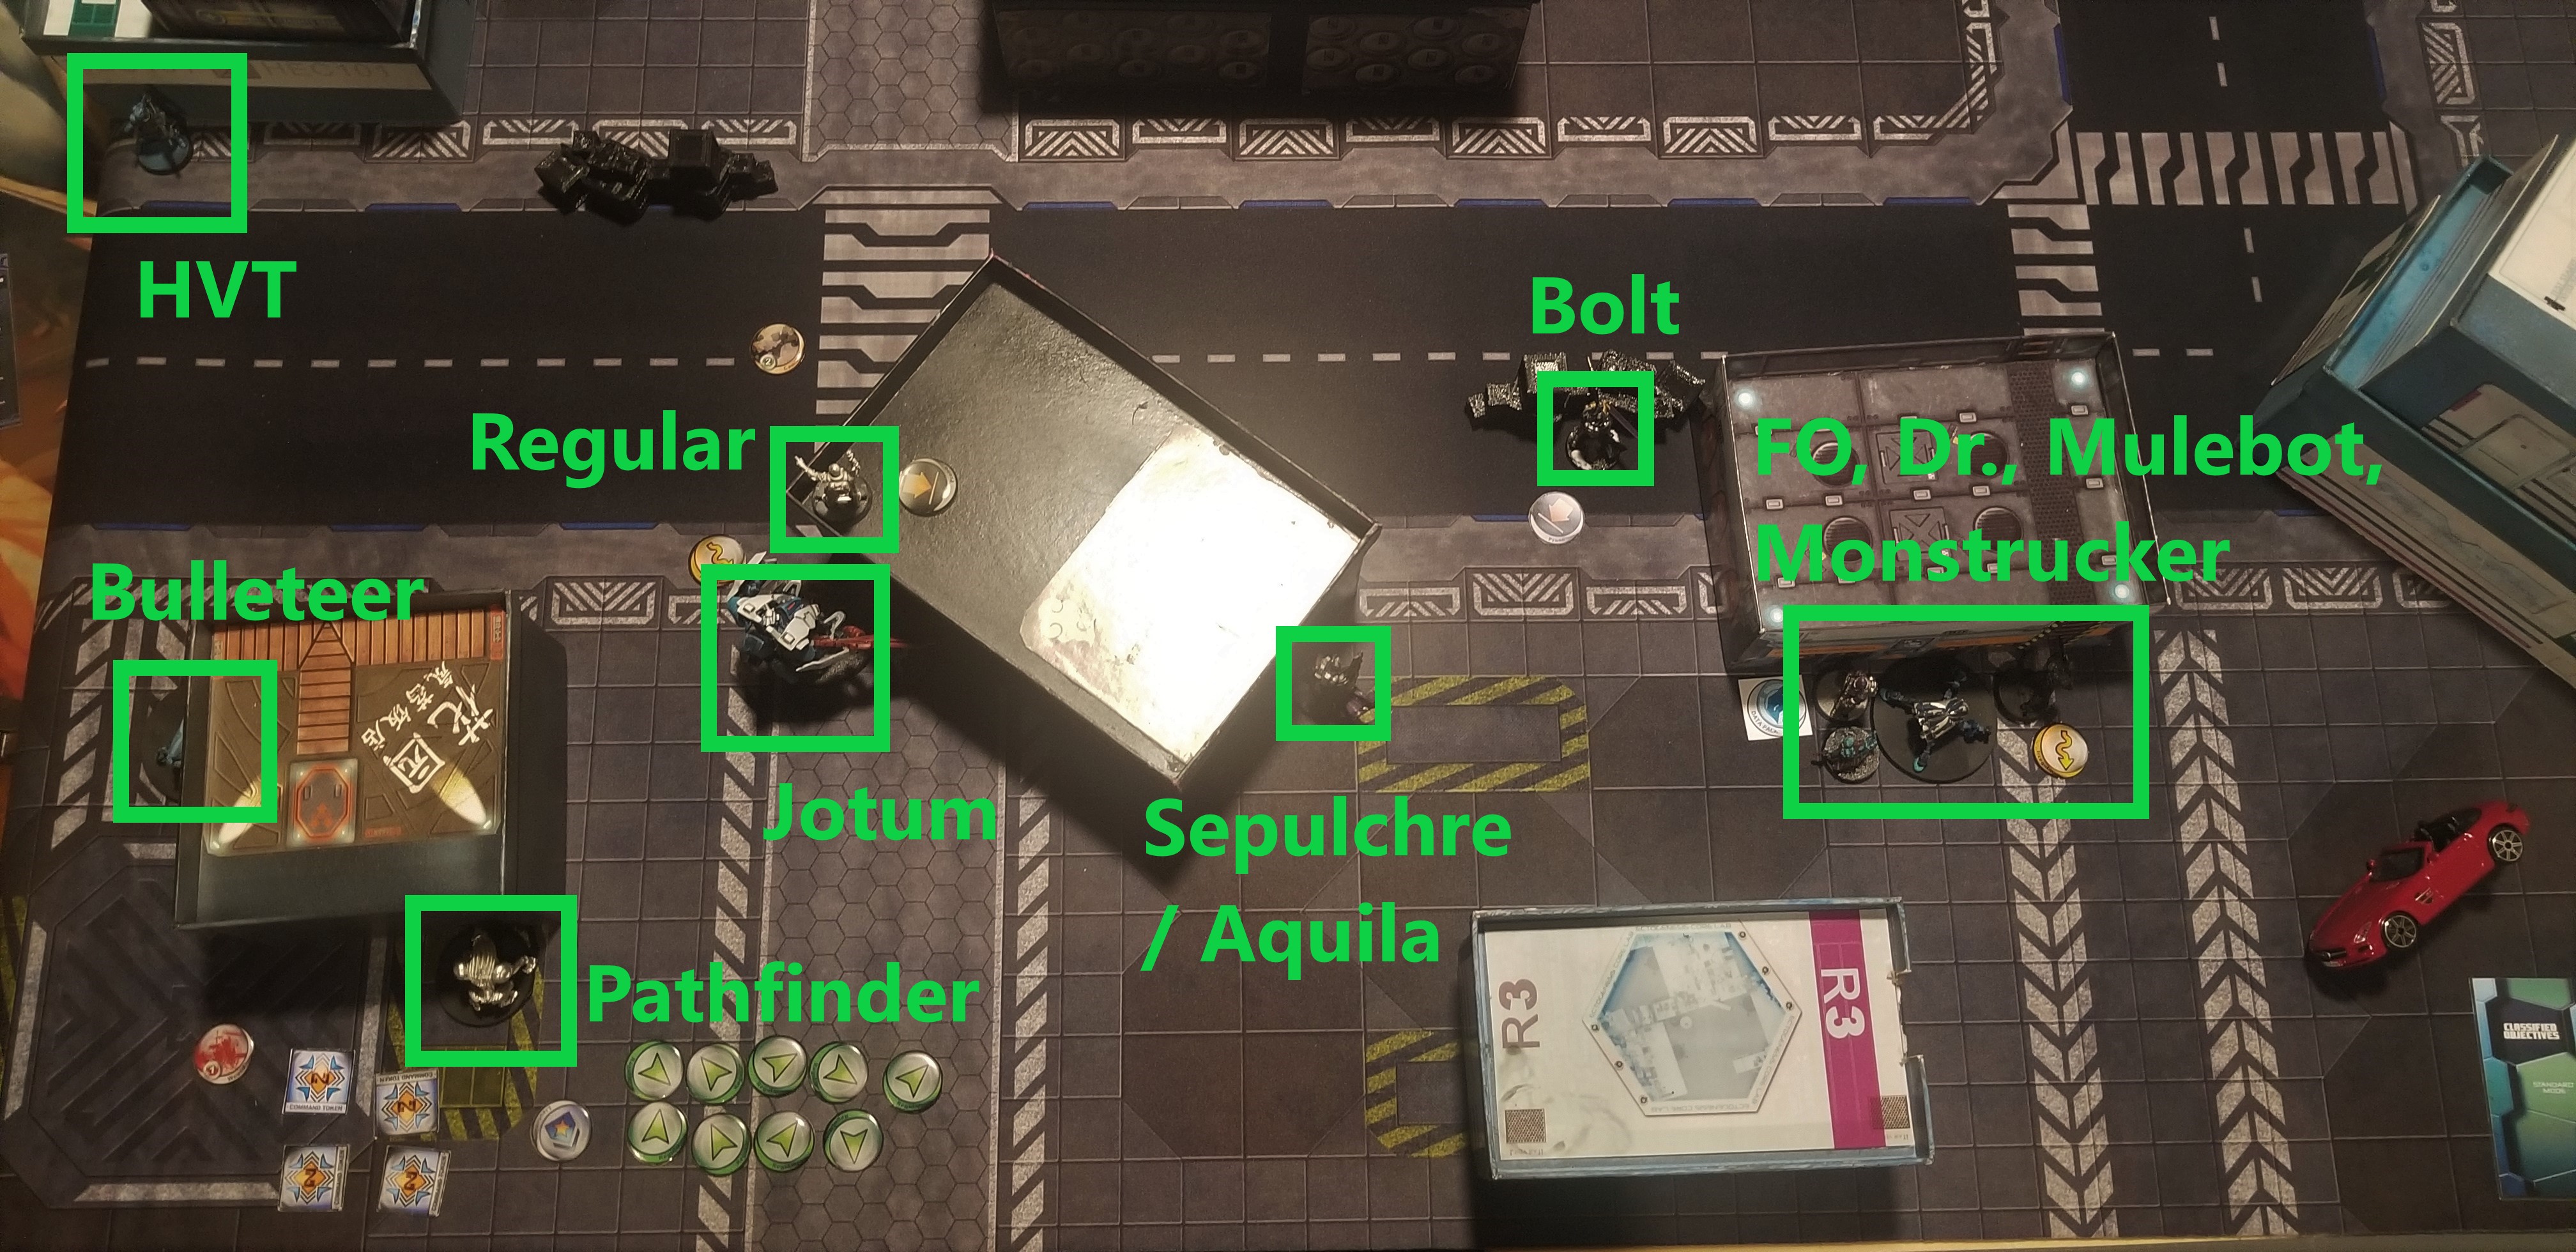
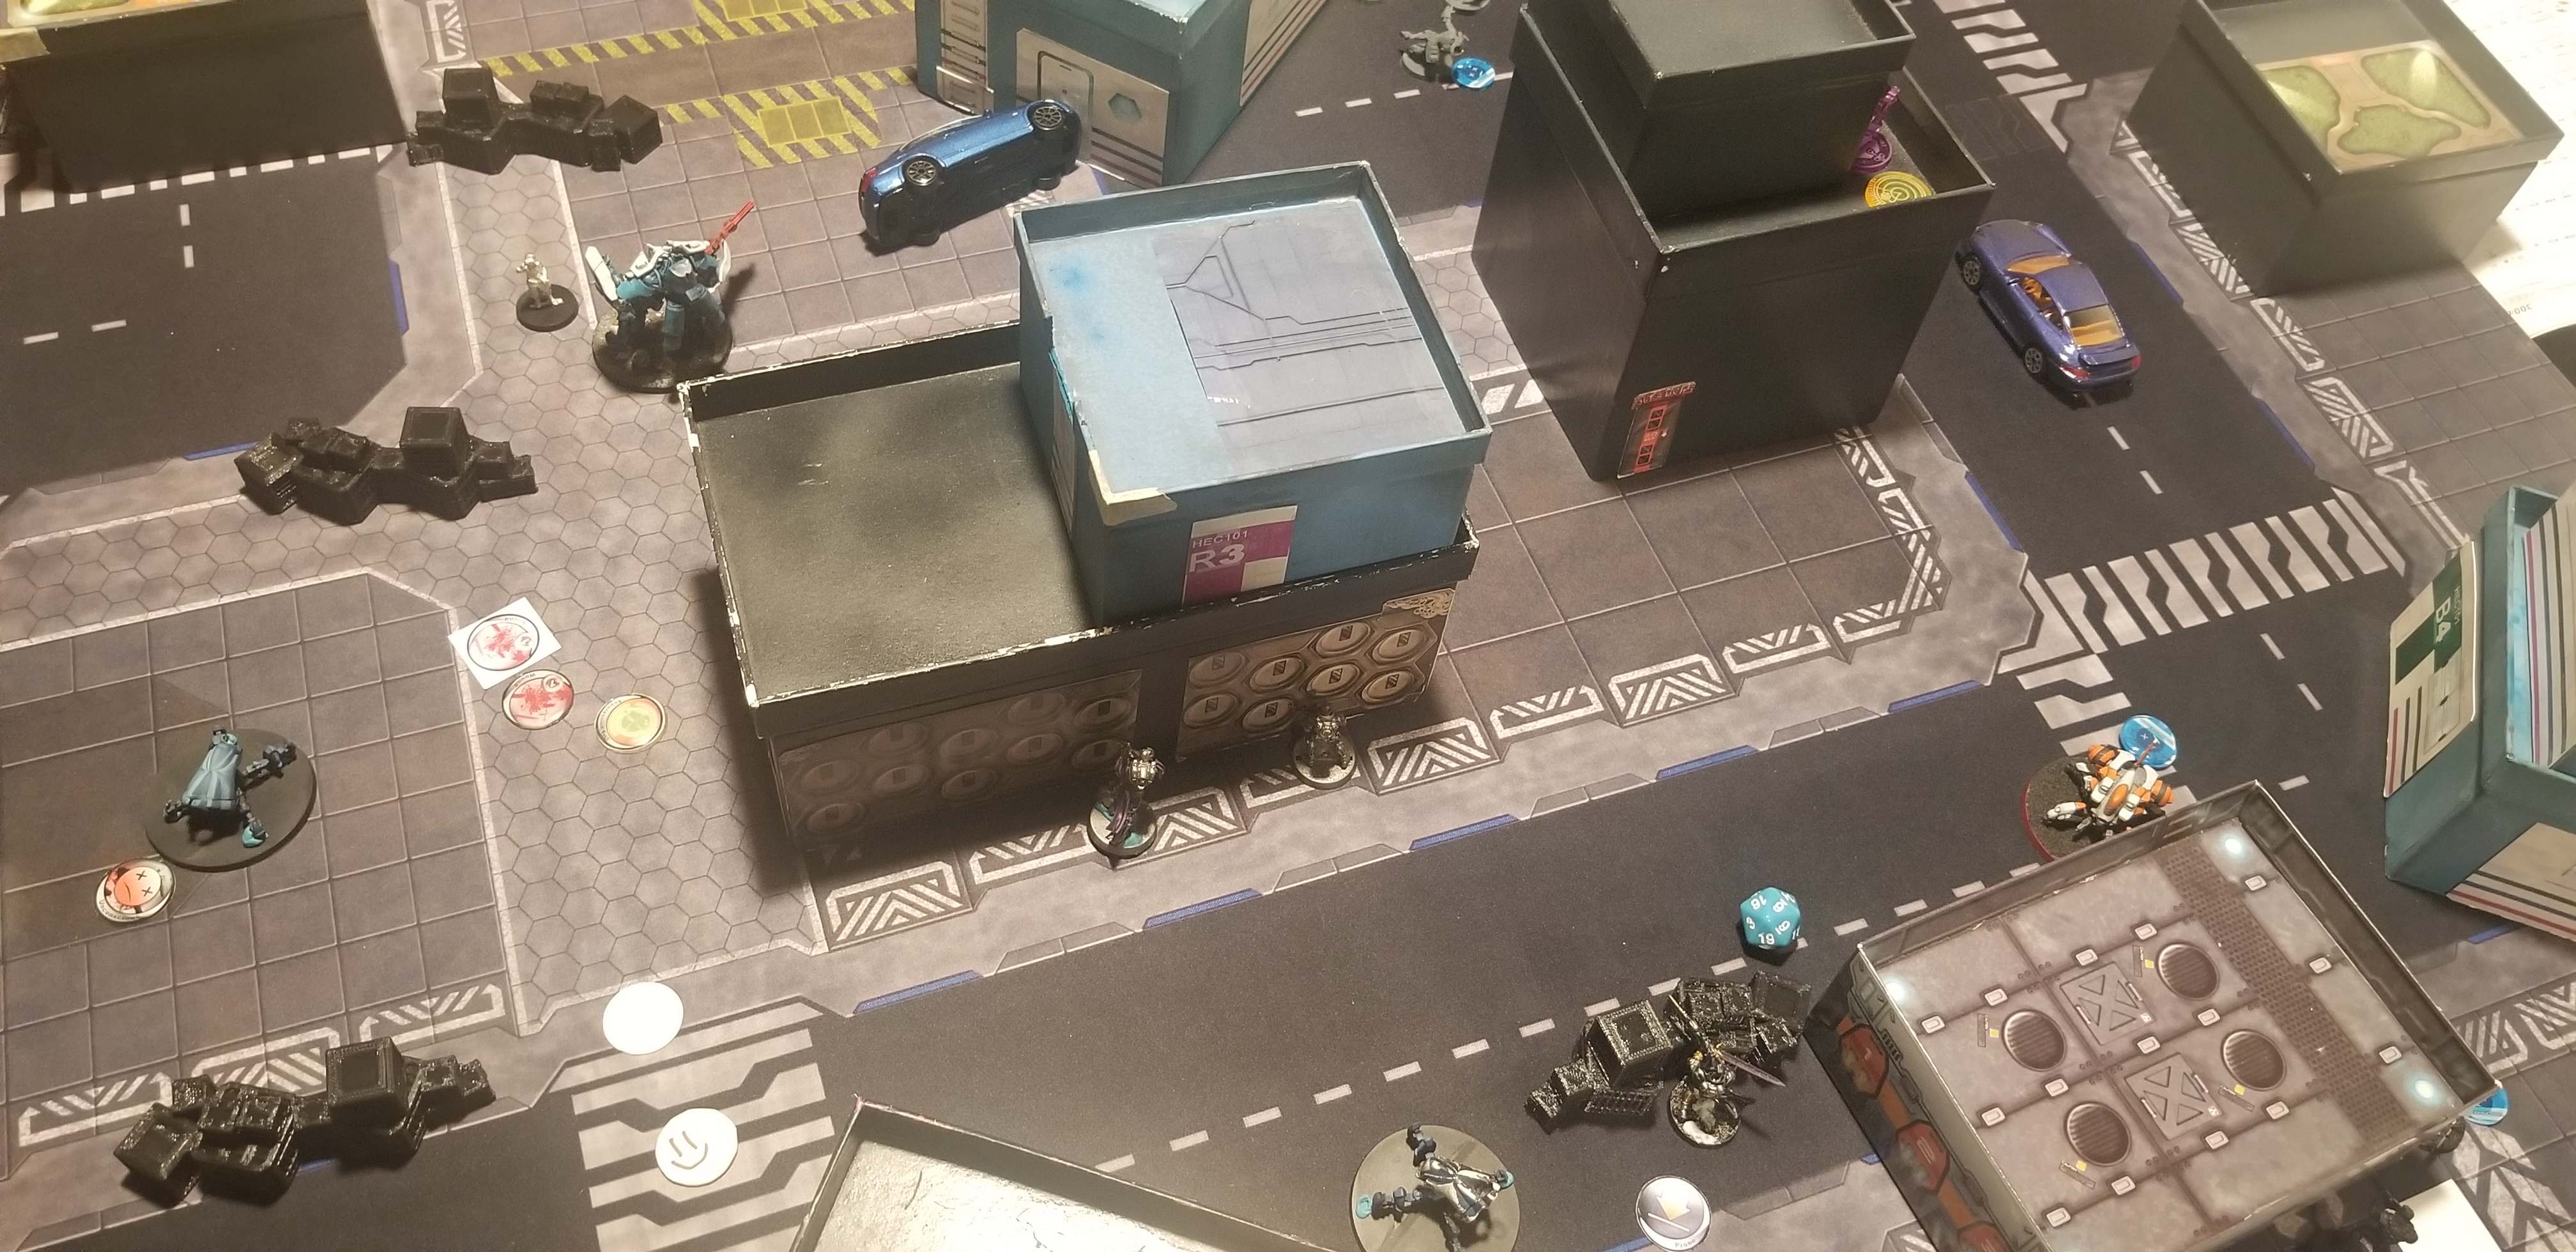
 The Jotum opens fire! The numbers indicate the order of which the casualties were inflicted. (3 Being a Warcor, slightly off Camera)
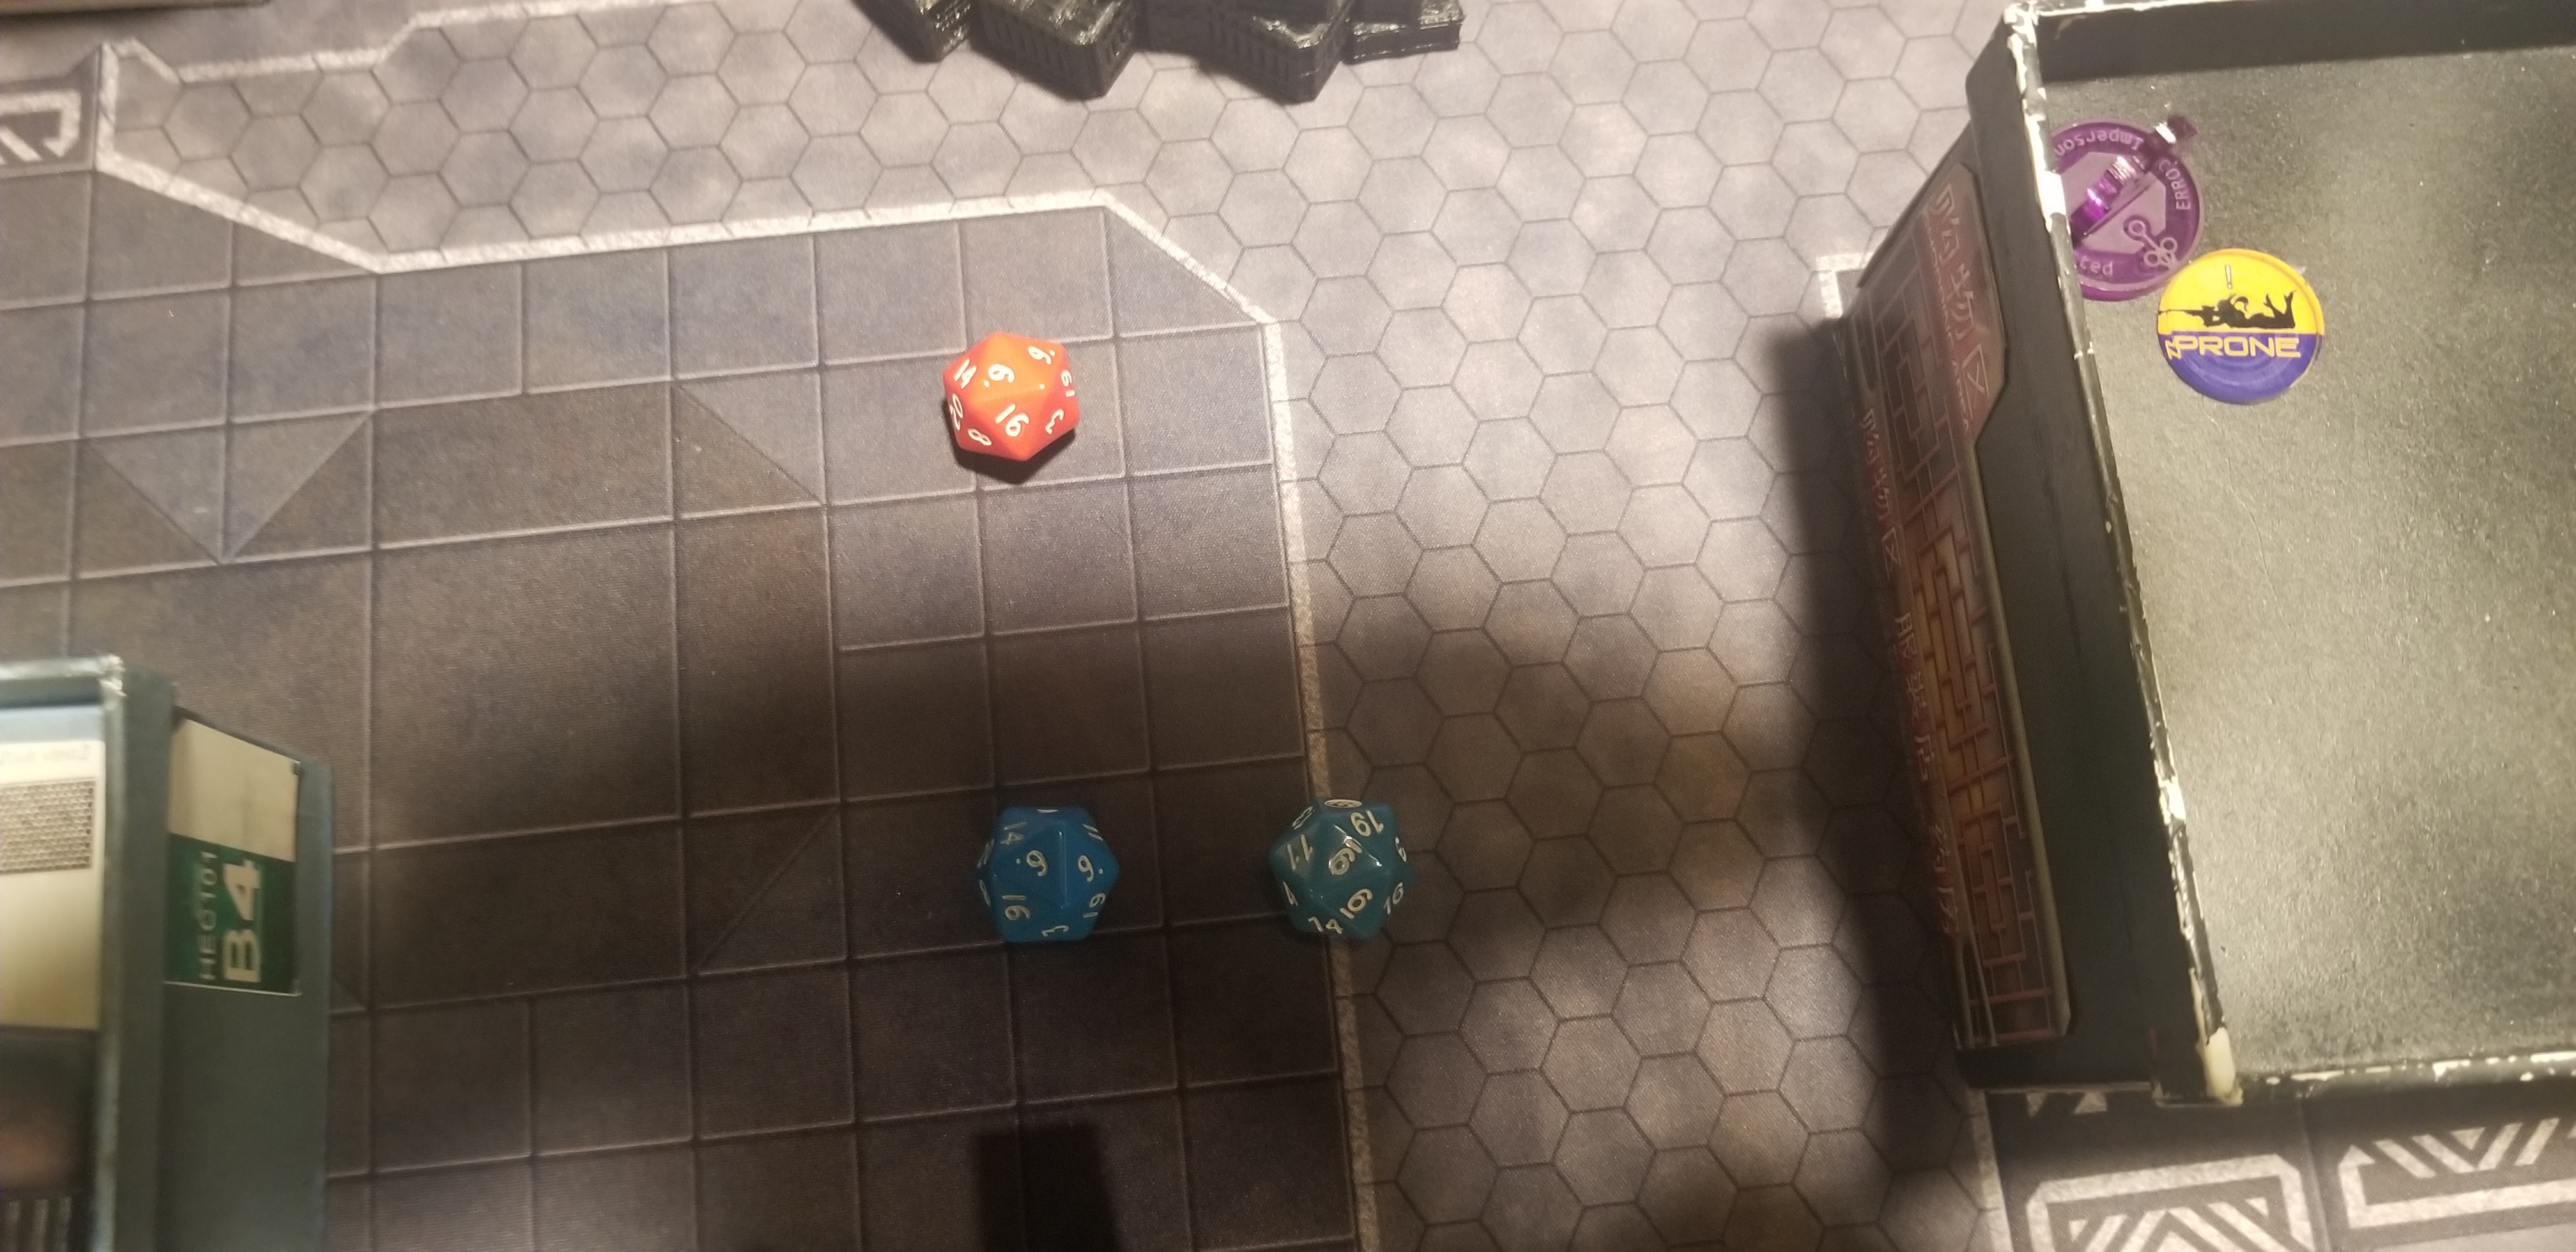
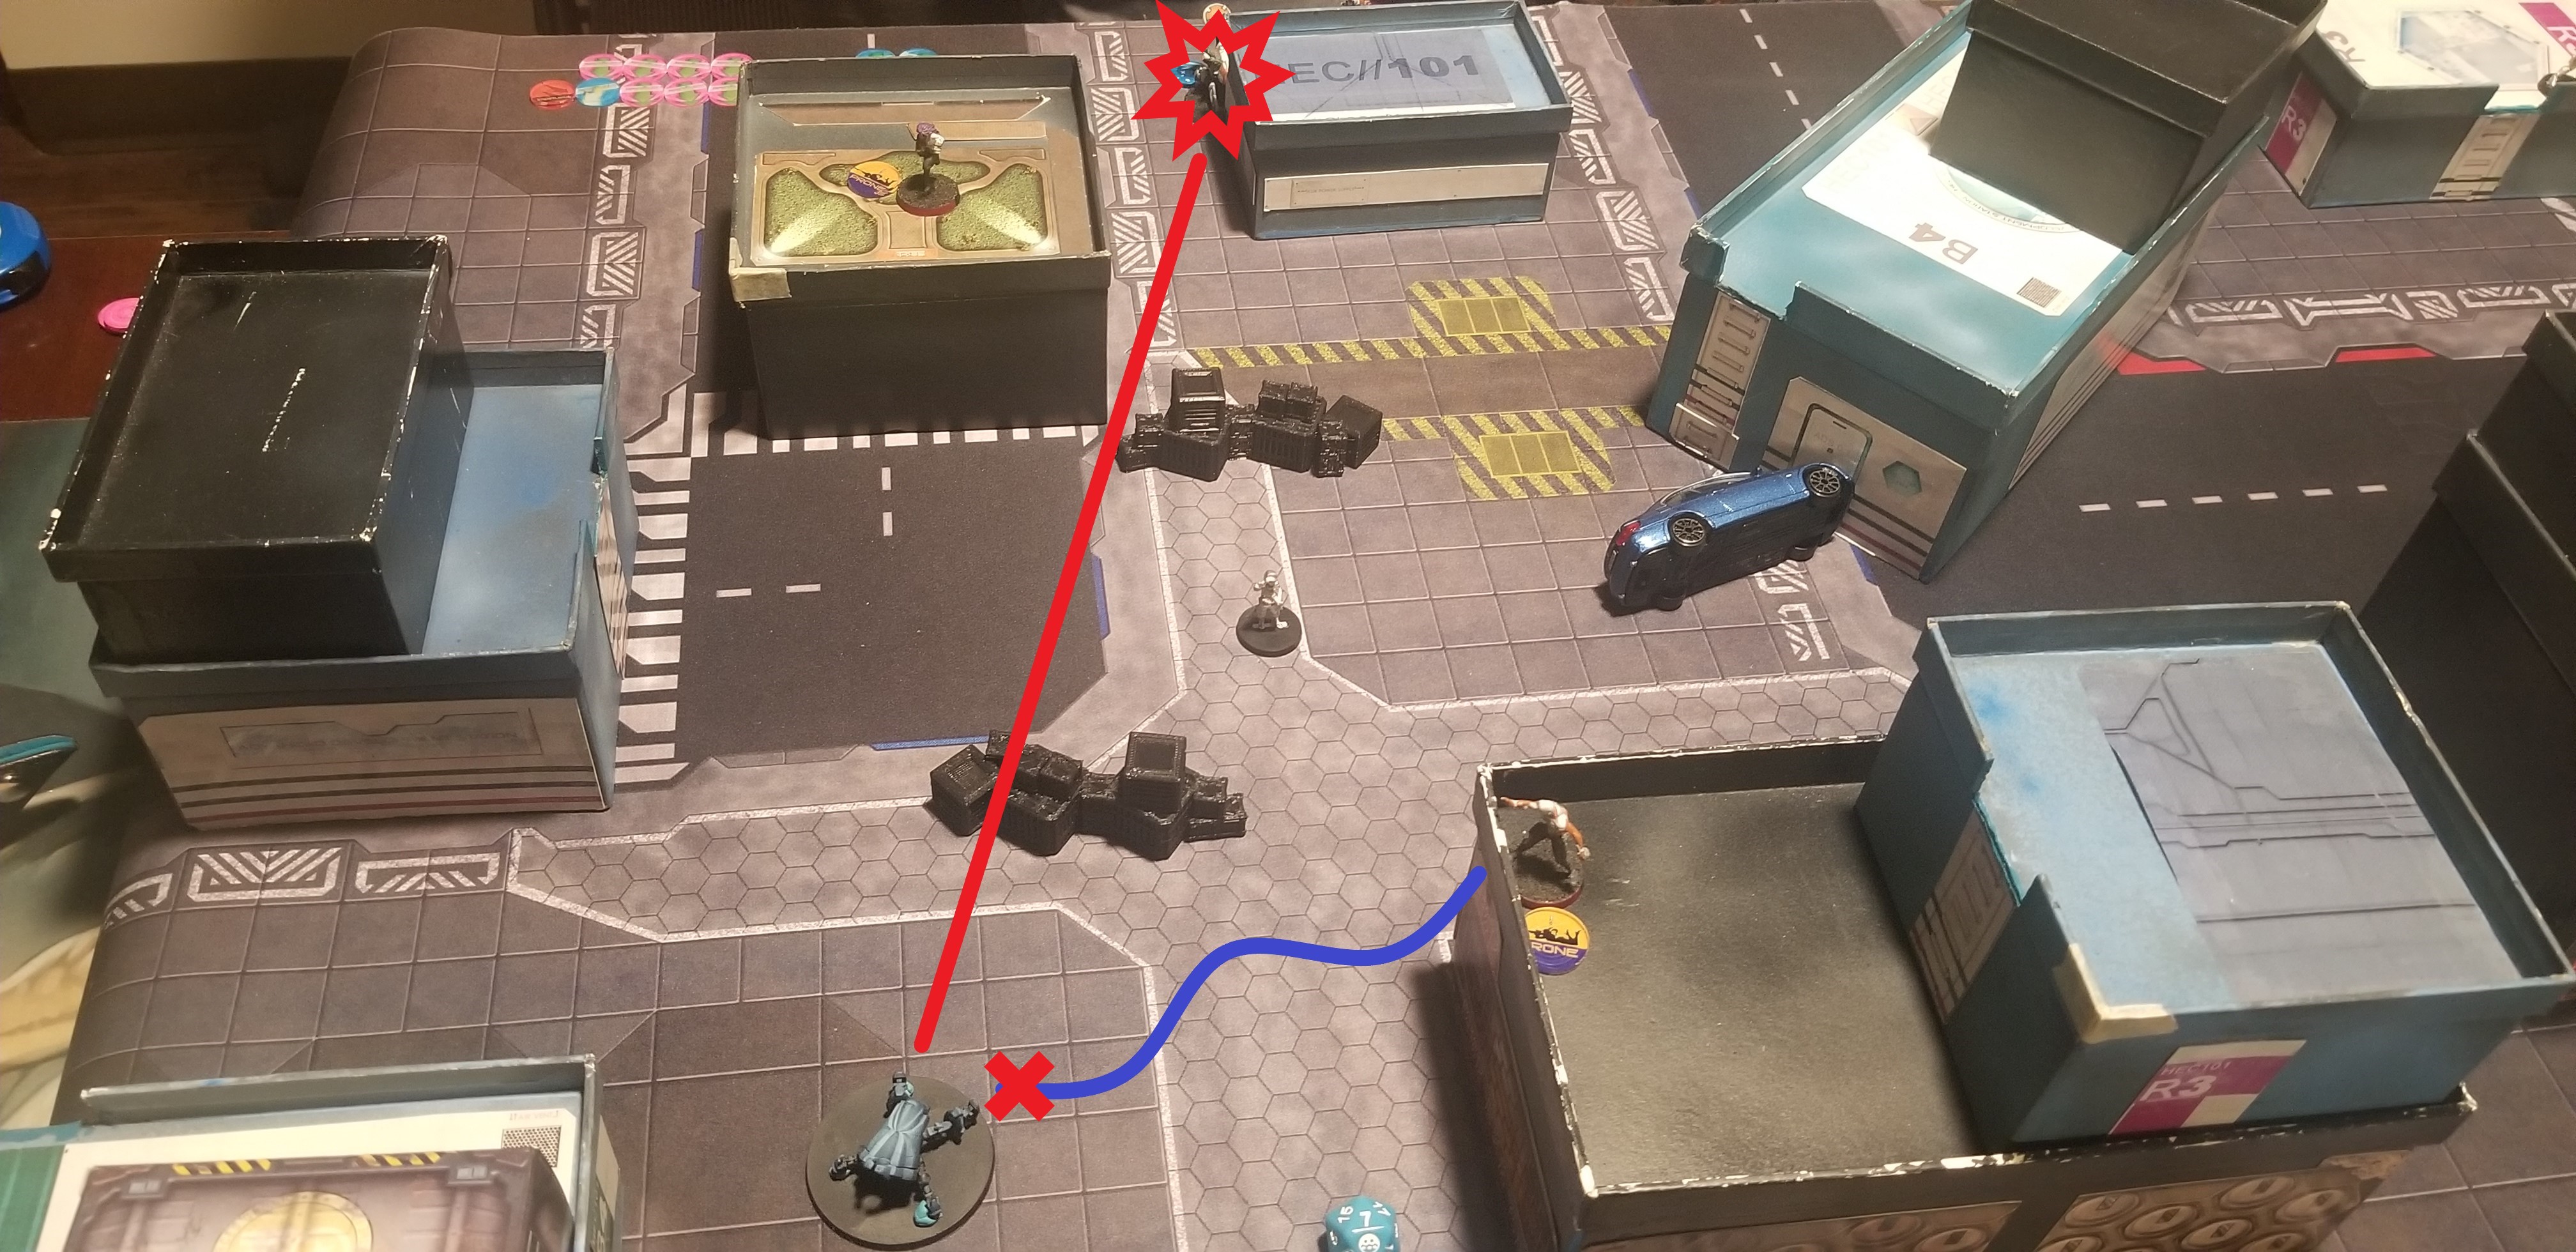 The Bulleteer unleashes on the Fugazi, while a Zero attempts to Carbonite the Bulleteer. Thankfully, the Zero missed.
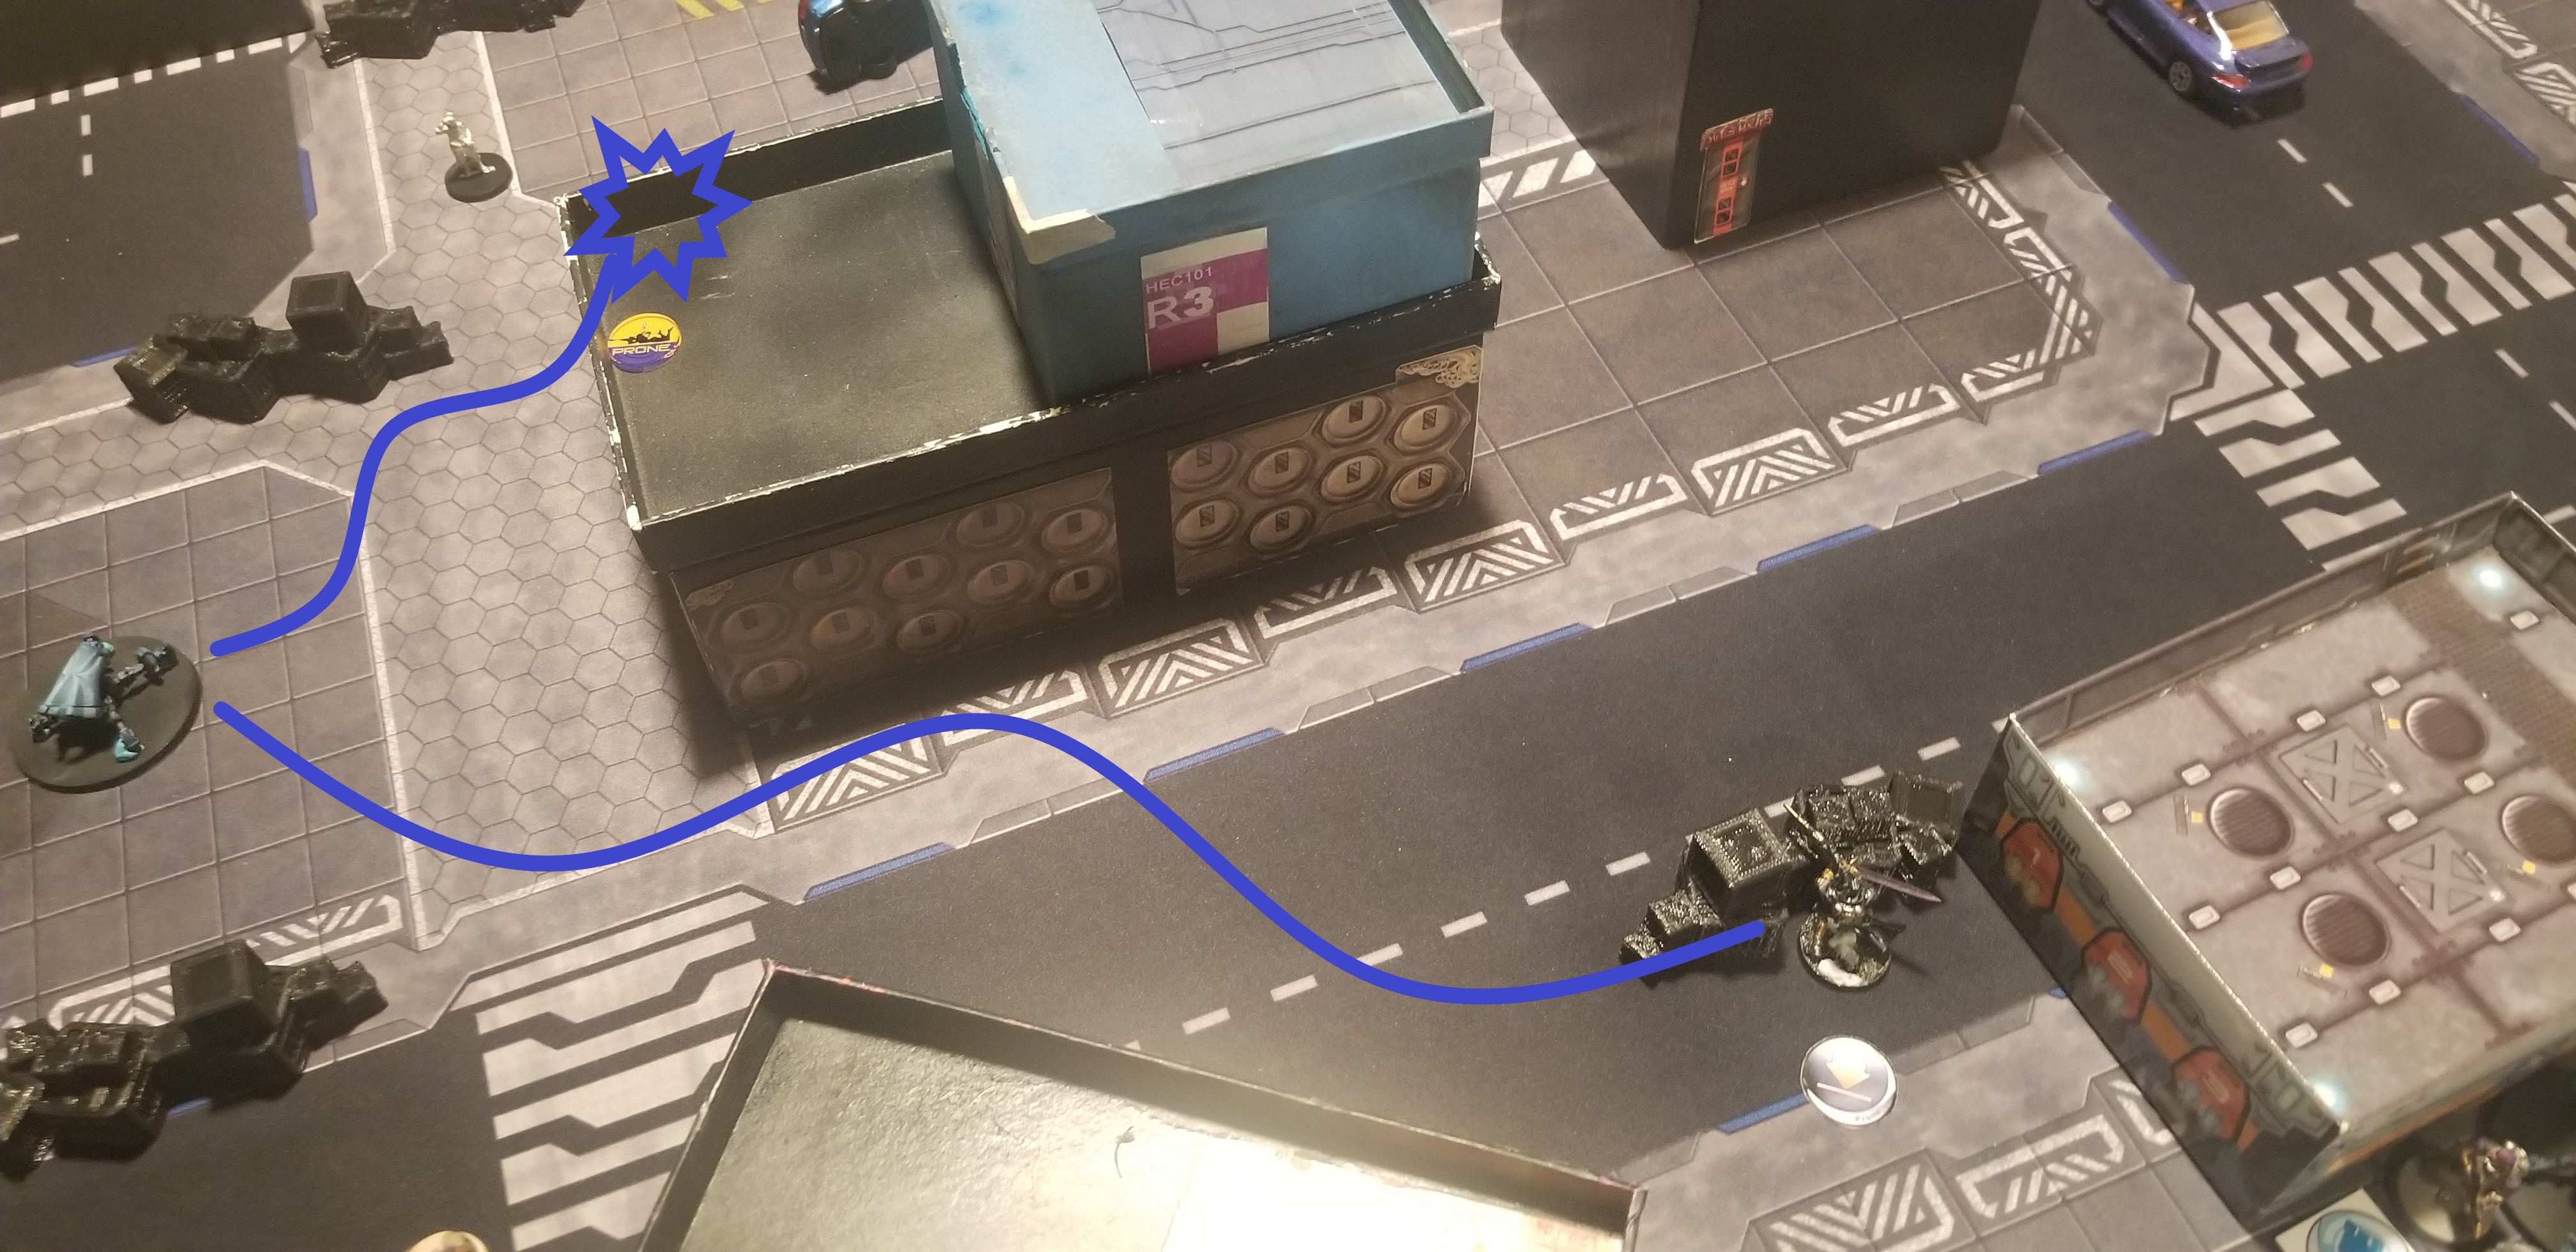
FOREIGN COMPANY: BOTTOM OF TURN 1
Before the Foreign Company command can begin to issuing commands to their forces, the Chimera and her Pupniks become overwhelmed with a seething blood lust. Charging from their cover, they intend to descend upon the Jotum. However, as they spring forth, the charge directly into the cross-hairs of the suppressing Bulleteer. Unable to see the Chimera herself, the Bulleteer begins to unleash its Spitfire at one of the Pupniks. Despite the beasts efforts to dodge, it is shot down in a hail of bullets.
Foreign Company command determines at this point, their best chance of accomplishing their goals is to remove the threat of the Bulleteer. The Kriza moves forward, and begins a firefight with the Bulleteer. However, fortune seems to have forsaken the mercenaries. After two rounds of shooting, the Kriza lay on the ground unconscious, as the Bulleteers weapons begin to overheat from the volume of fire it is unleashing. Fortunately for the Kriza, the Daktari is notified of his plight, and moves her Zondbot into position to resuscitate him. Back on his feet, and after four orders spent between him and the Daktari, the Kriza has broken the Bulleteers position.
Feeling they won't be able to break the Jotum, Foreign Company command decides their best course of action is to advance down the other flank of the table, and try to remove as much support as they can.
The Peacemaker and its Auxbot move forward, first beginning their firing at what they think is an Aquila. The Knight of the Holy Sepulchre reveals, and returns fire. Unable to beat the overwhelming fire, the Knight suffers a shot to the chest, which his armour repels. He drops to prone, to avoid more incoming fire.
The Peacemaker continues its advance, engaging with the Jotum, though neither is able to inflect wounds on each other. With the last order, the Auxbot finds an opportunity, and unleashes a torrent of flame on the Monstrucker, Evo Hacker, Doctor, and Fusilier Forward Observer. Coupled with the mine he laid earlier, the Monstrucker fires a shot at the Auxbot, killing the Auxbot. However, the flames are able to kill both the Monstrucker and Doctor.
 Before being downed in battle, the Bulleteer was able to knock down a Pupnik, and knock out the Kriza, before the Kriza was revived.
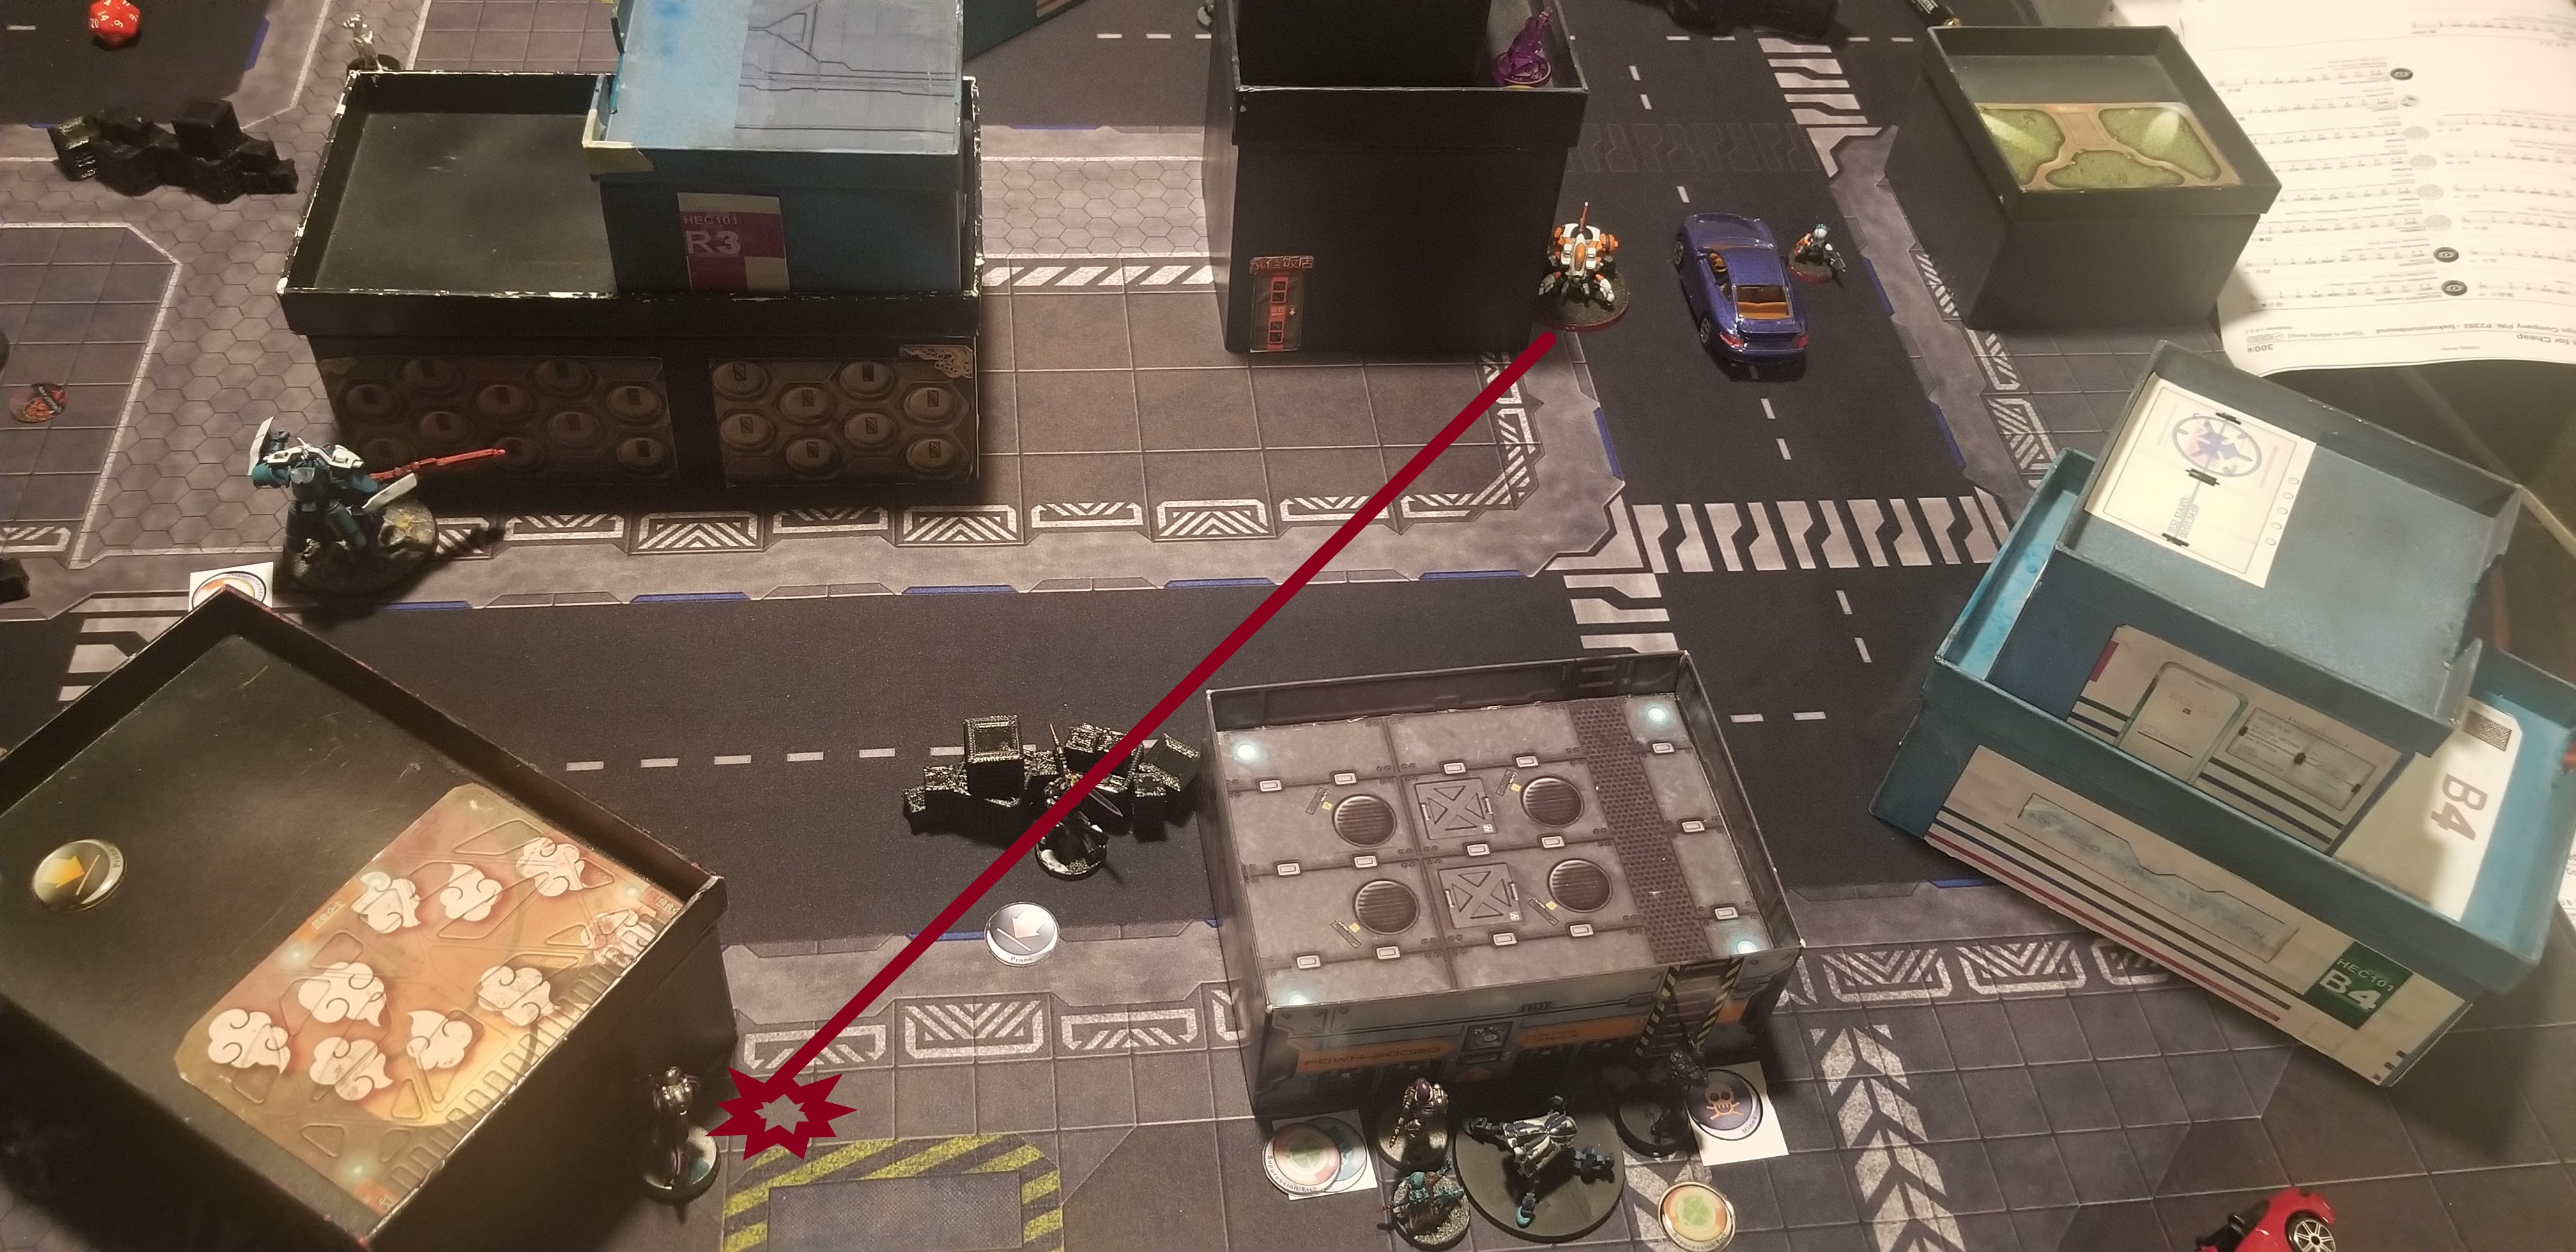 The Peacemaker attacks the 'Aquila', revealing a Knight of the Holy Sepulchre! The Knight loses the firefight, but is able to adopt the prone position after passing his armour saves!
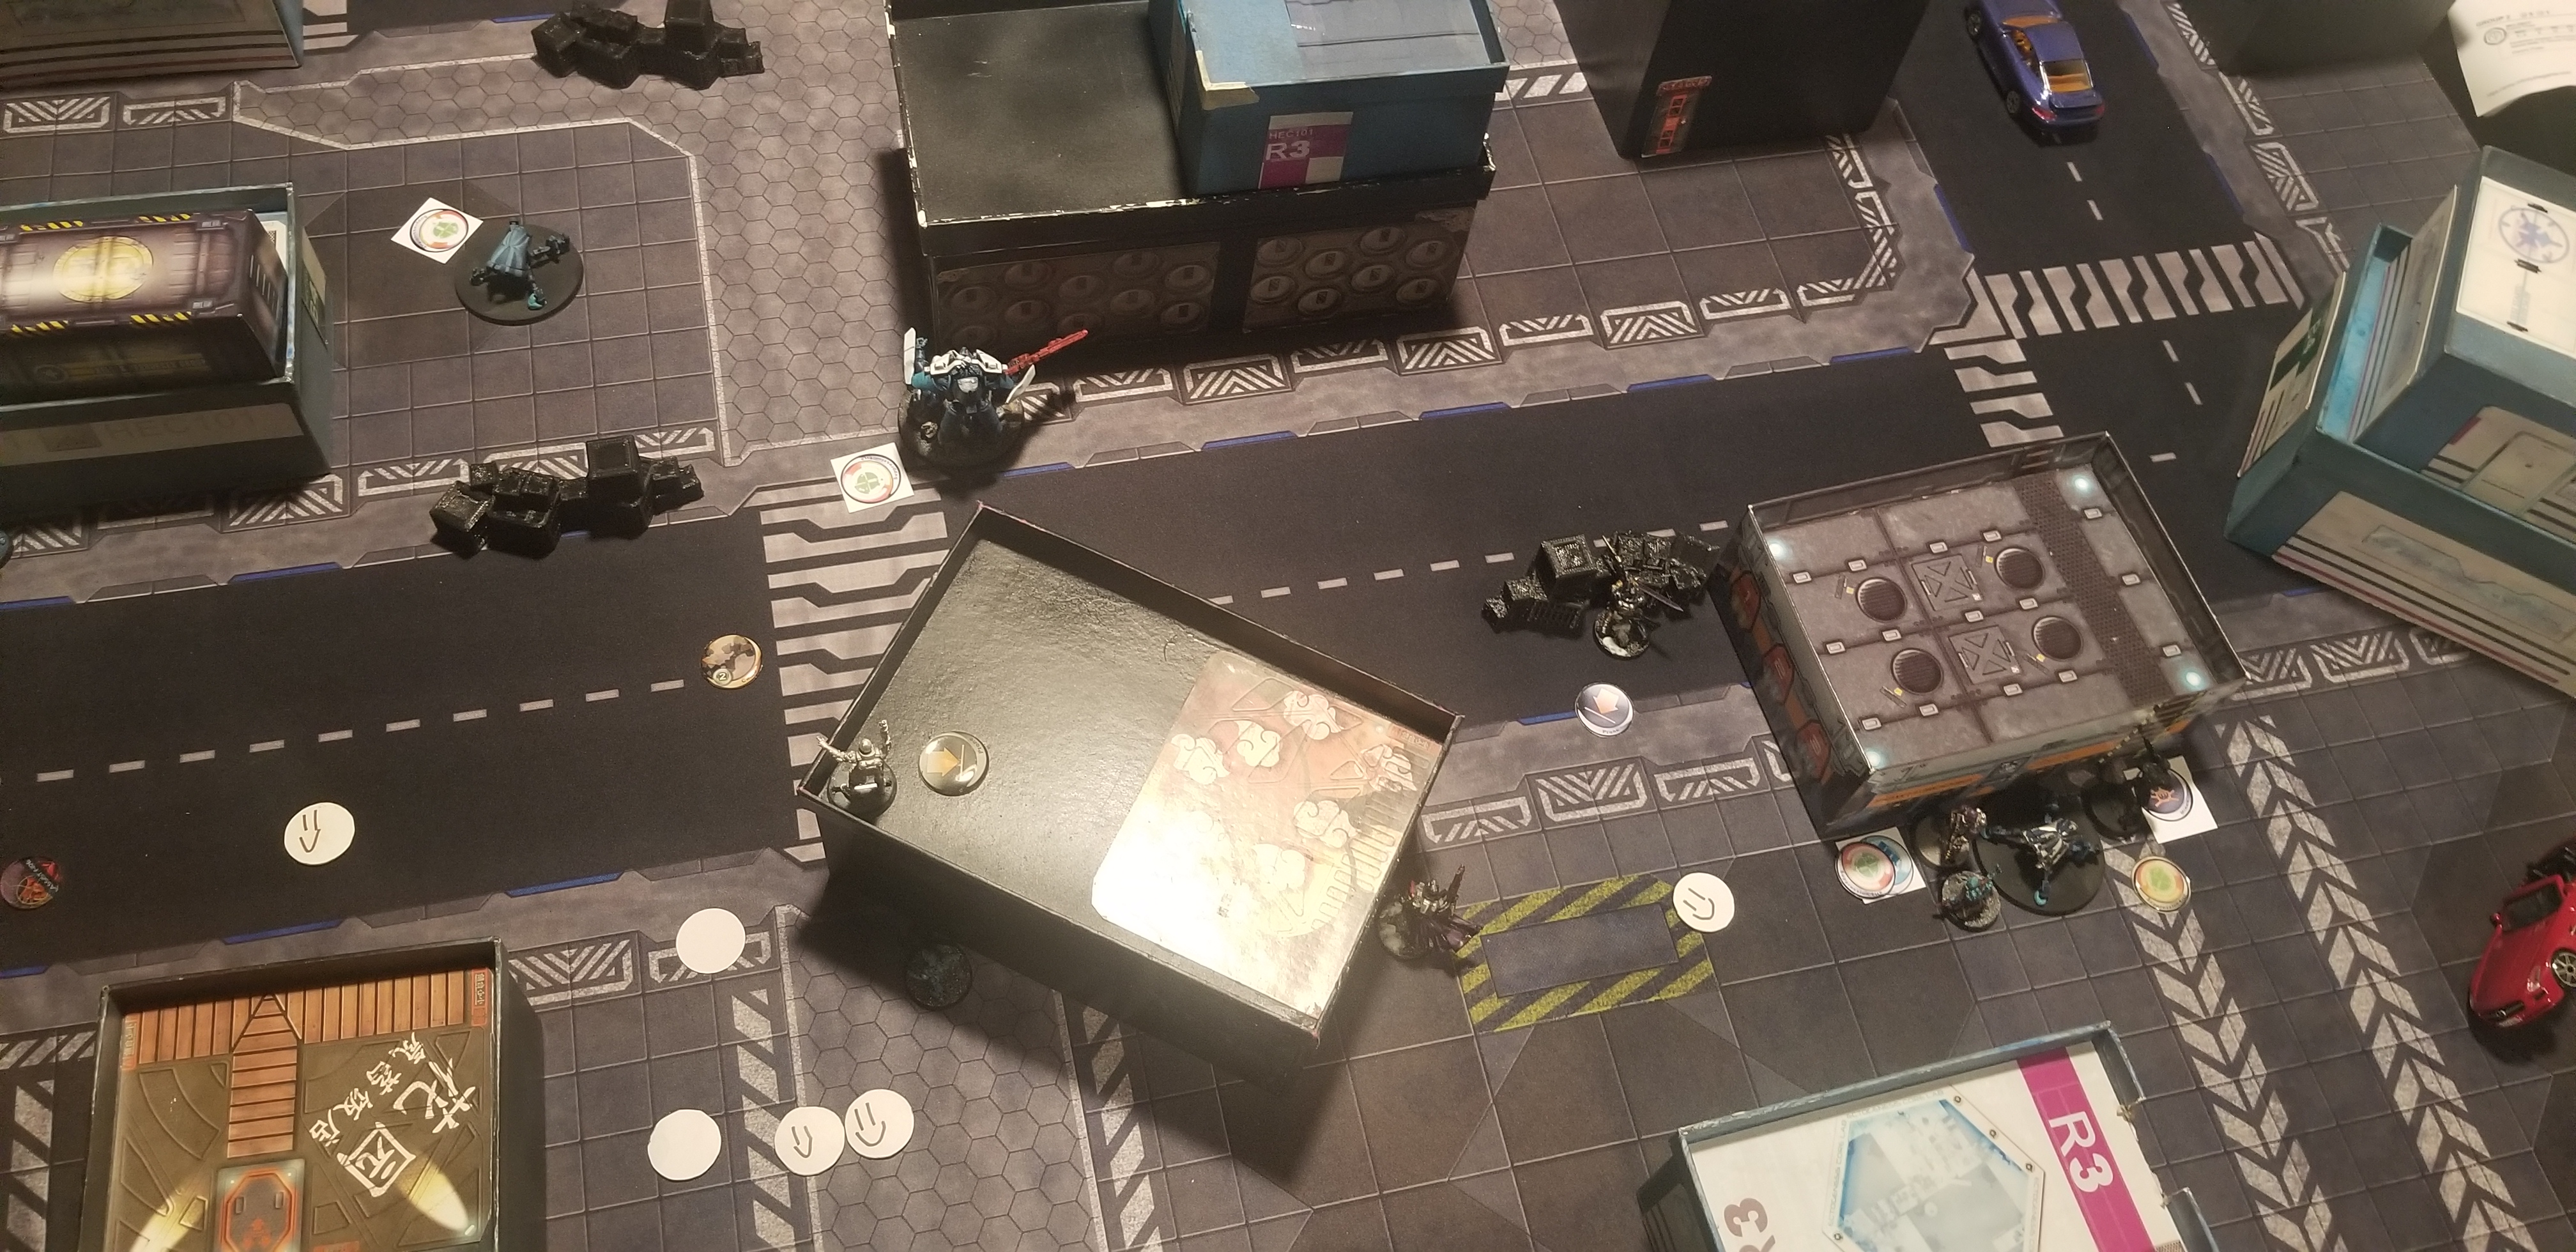
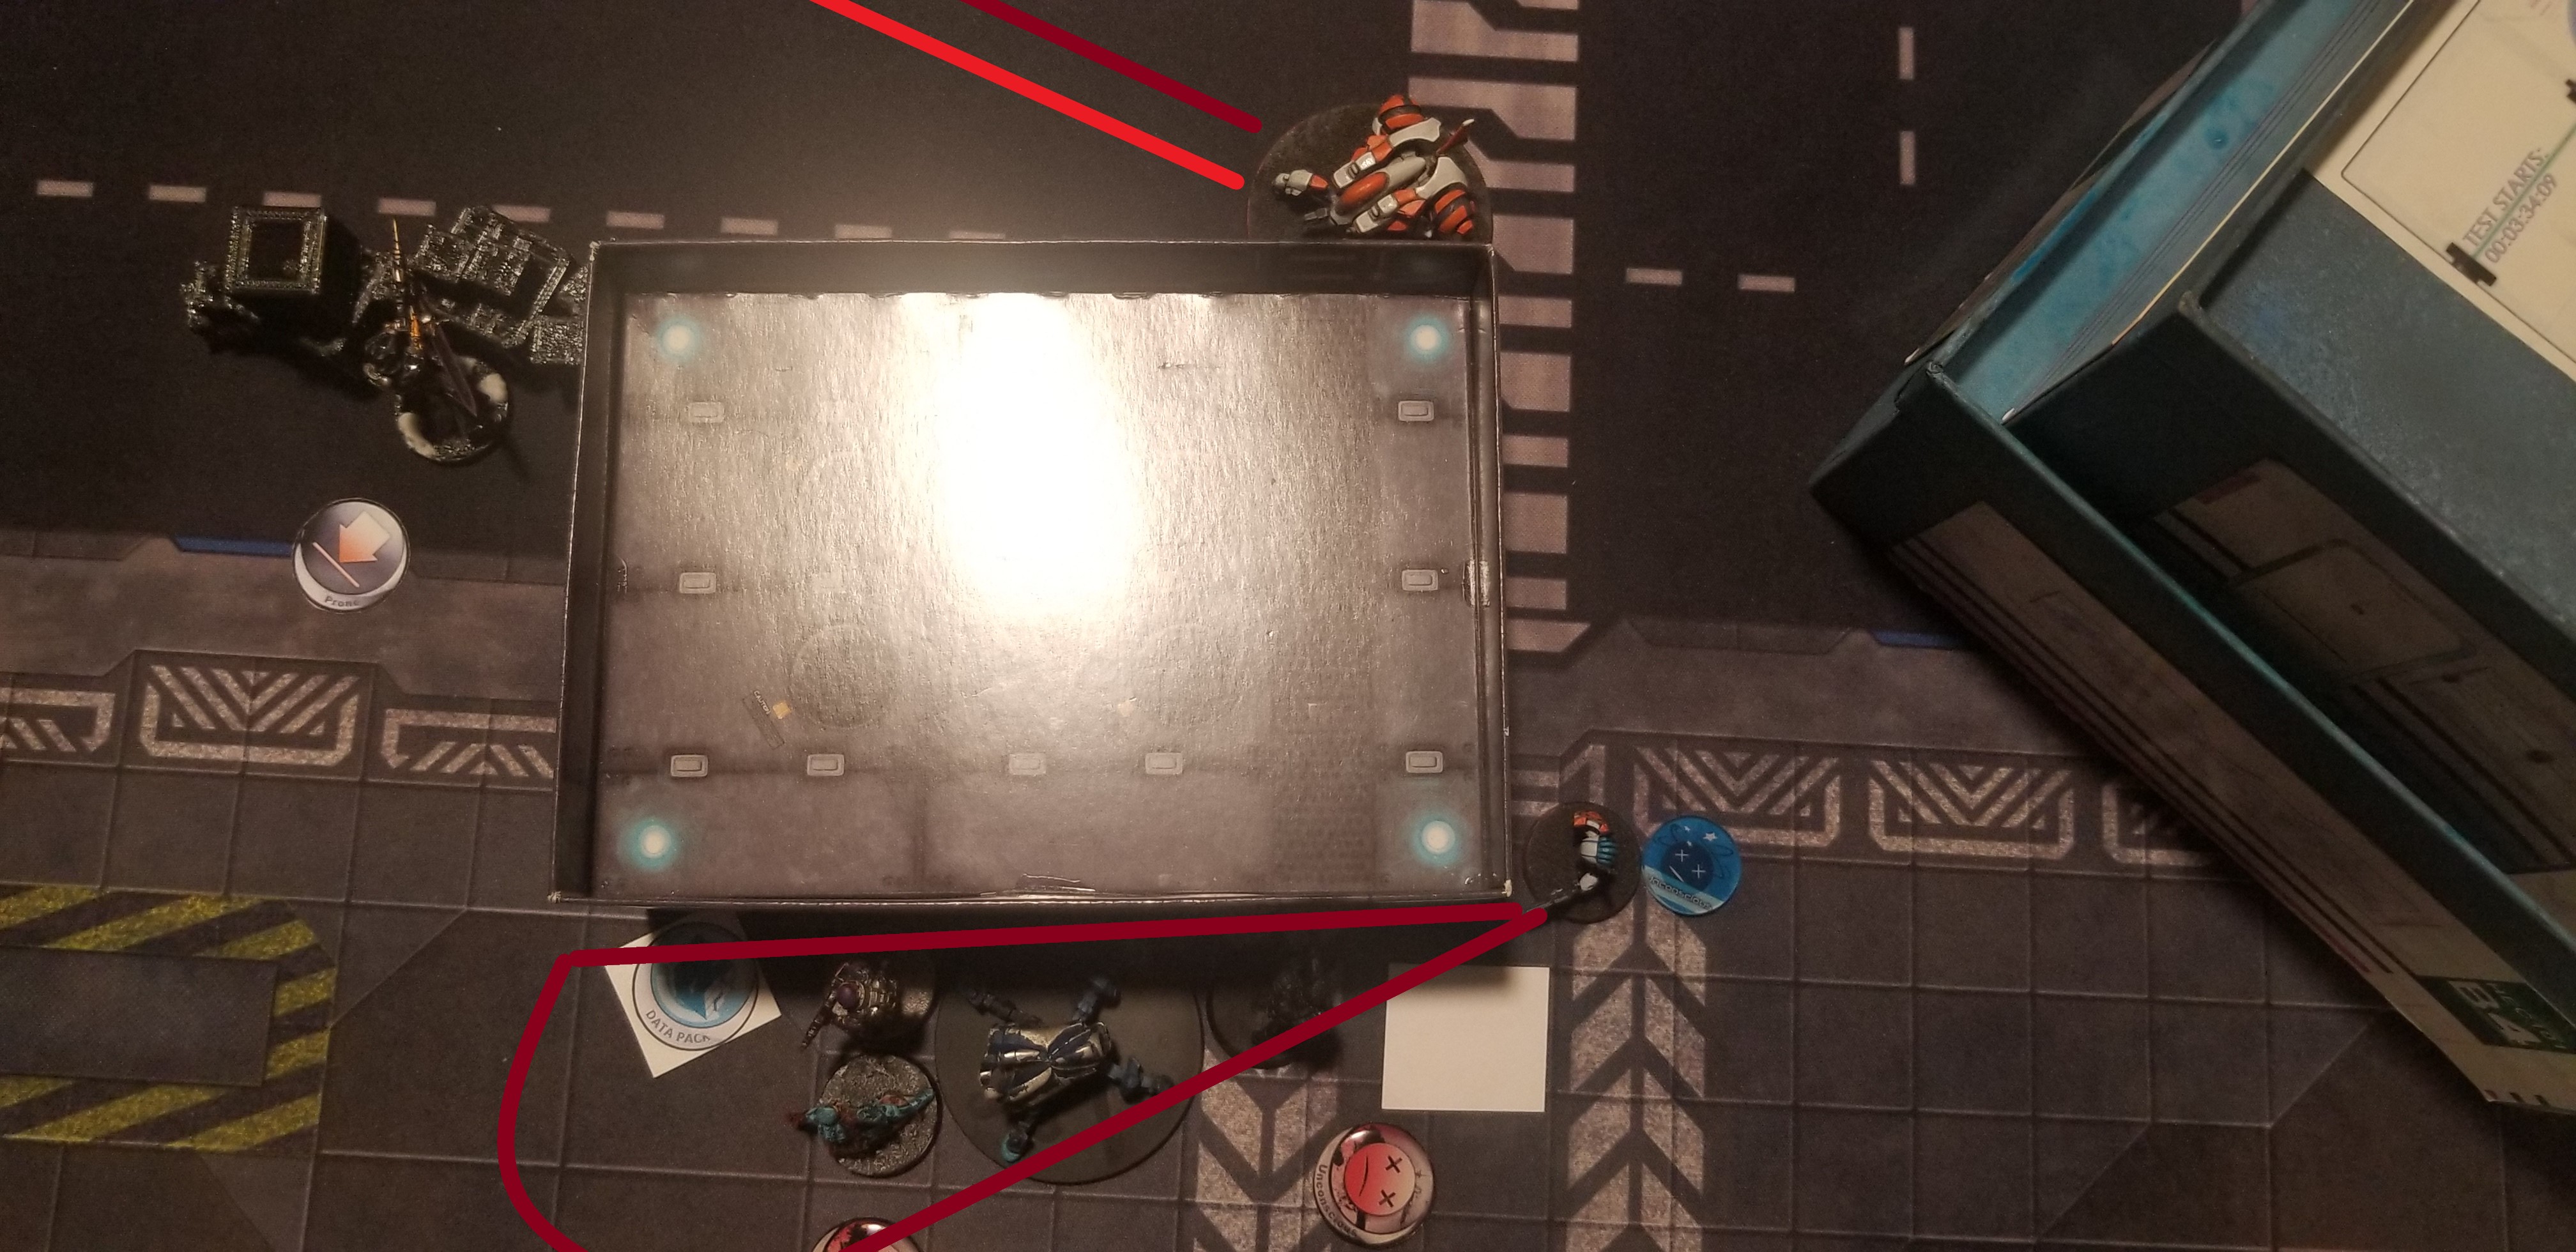 The Peacemaker engages with the Jotum off camera, while the Auxbot burns alive the Monstrucker and Trauma Doc, before dying to return fire.
PANOCEANIA: TOP OF TURN 2
PanOceania Command quickly determines that the Peacemaker must be dealt with. However, before the Jotum makes its play on the Peacemaker, the Bolt KHD uses the Peacemaker's repeater to attack at a Securitate Hacker, killing him with Redrum.
The moment the Peacemaker outlived its usefulness, the Jotum turns its MULTI HMG on it. Removing the threat of the Peacemaker, the Jotum turns its attention to the Kriza. After advancing into position, they begin several rounds of shooting. The Jotum eventually knocks the Kriza unconcious, and not wanting a repeat of last time, shoots the downed Heavy Infantry.
With the Kriza downed, the Knight of the Holy Sepulchre advances, firing his Spitfire at the Chimera. Despite her attempt to Smoke-Dodge, the Knight removes her threat in a hail of holy bullets.
Finally, the Jotum advances and enters suppressive fire with the last two orders.
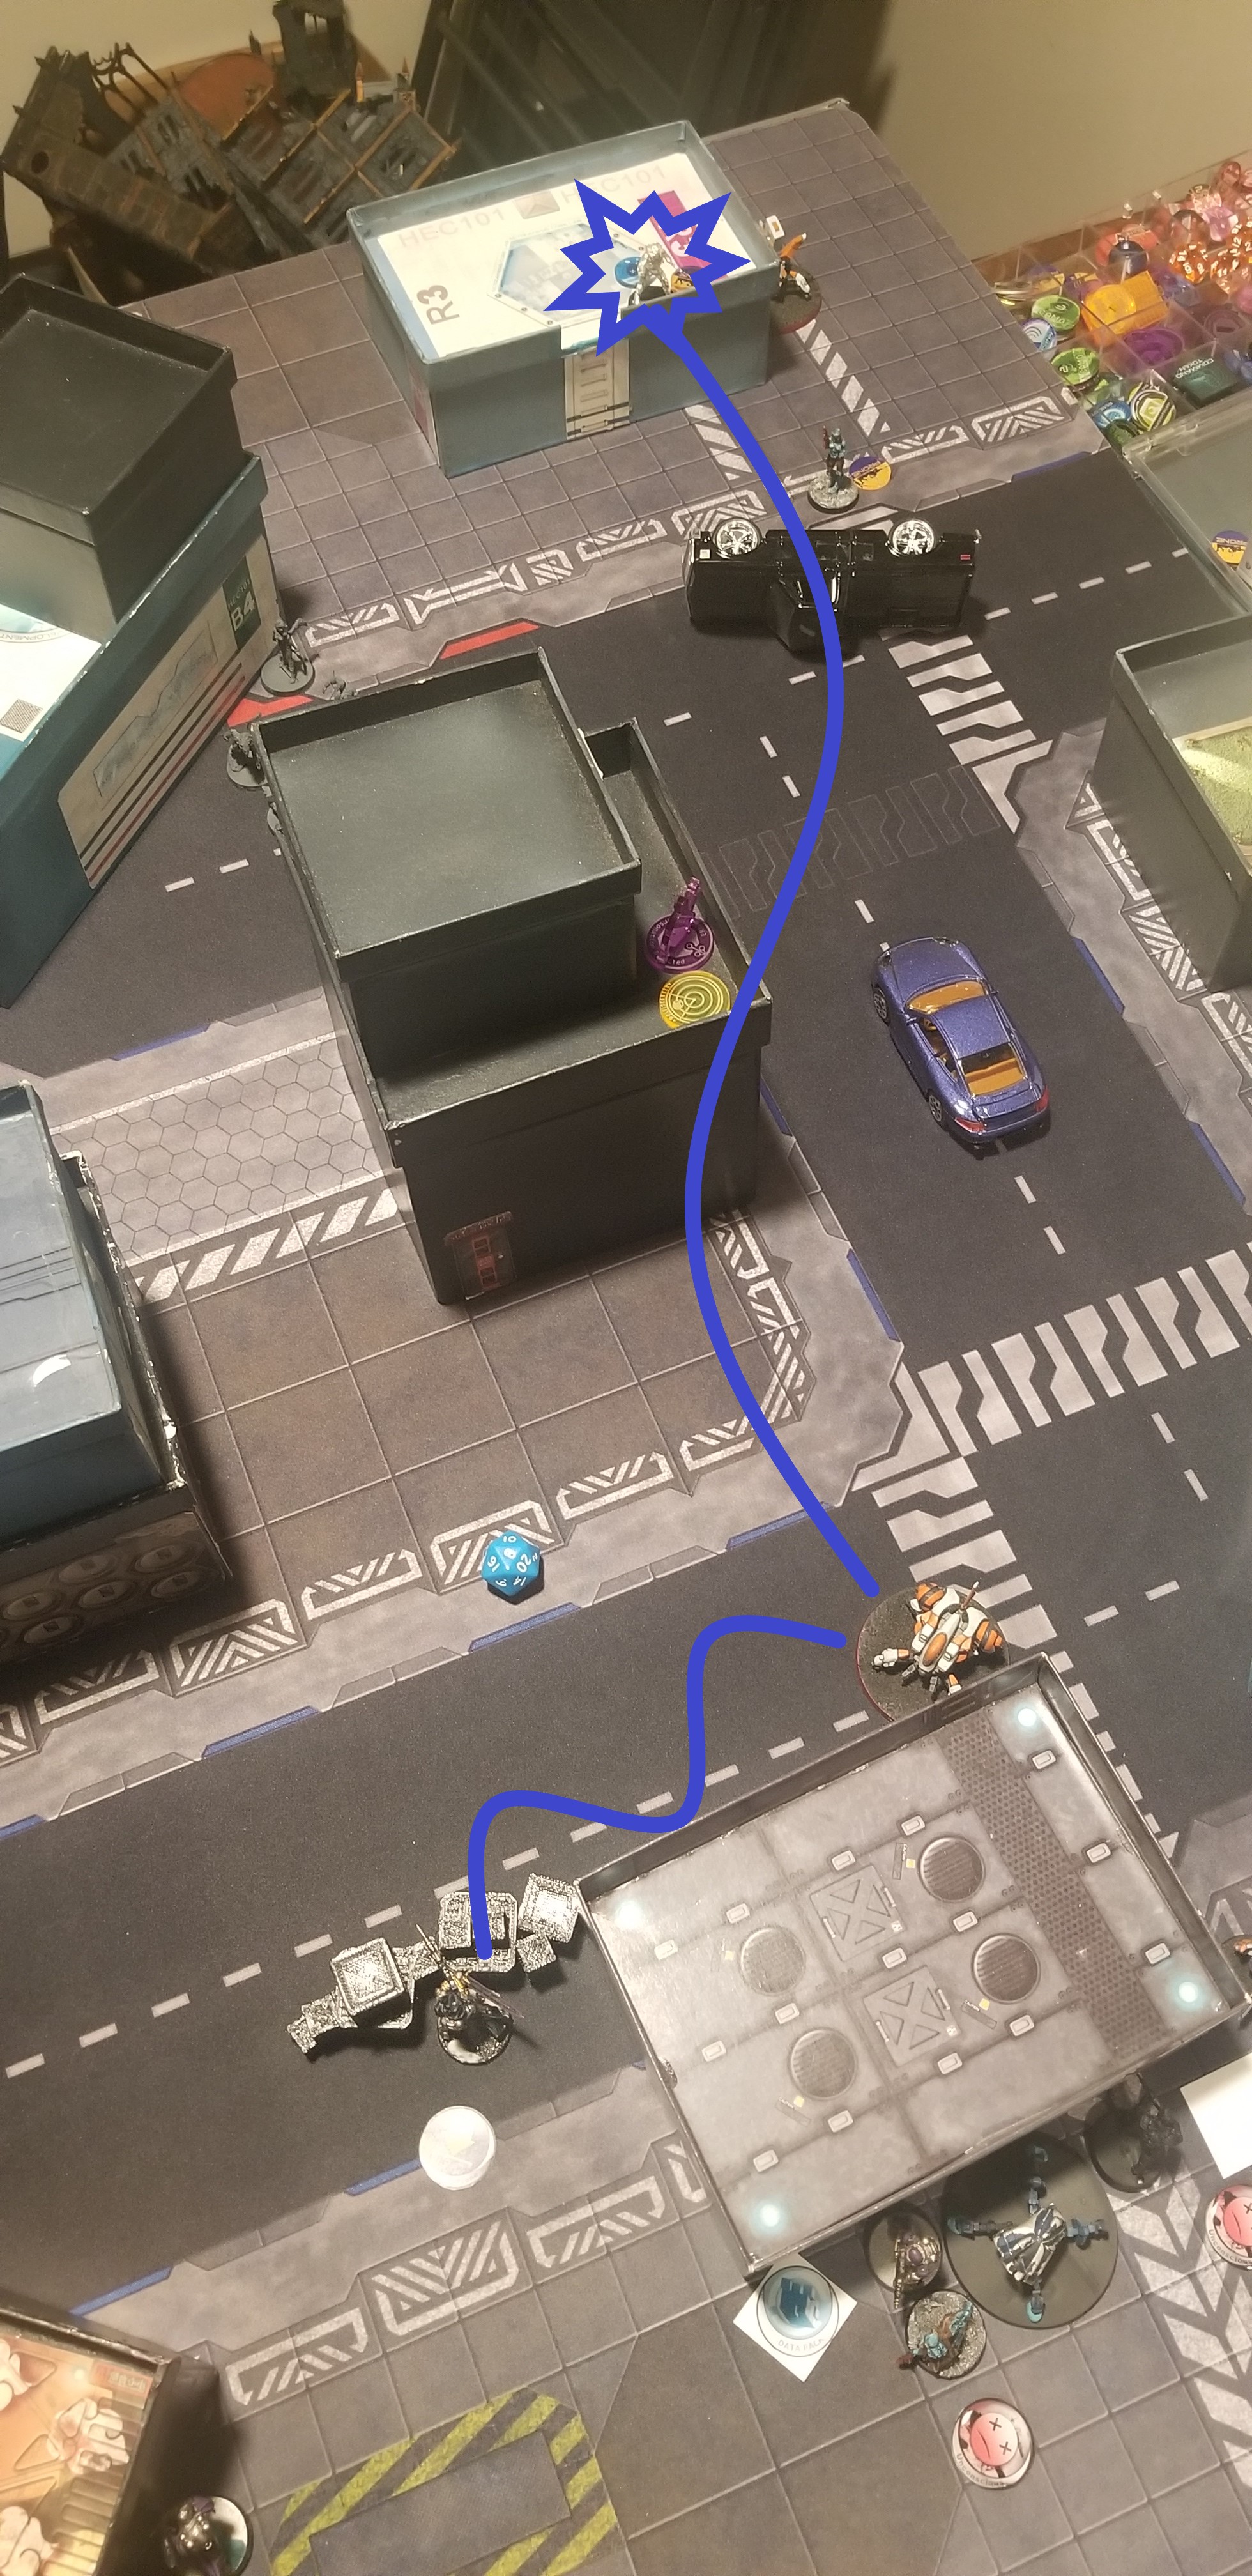 Before it is destroyed the Jotum, the Peacemaker's repeater is used to attack a Securitate Hacker within the Foreign Company Deployment Zone!
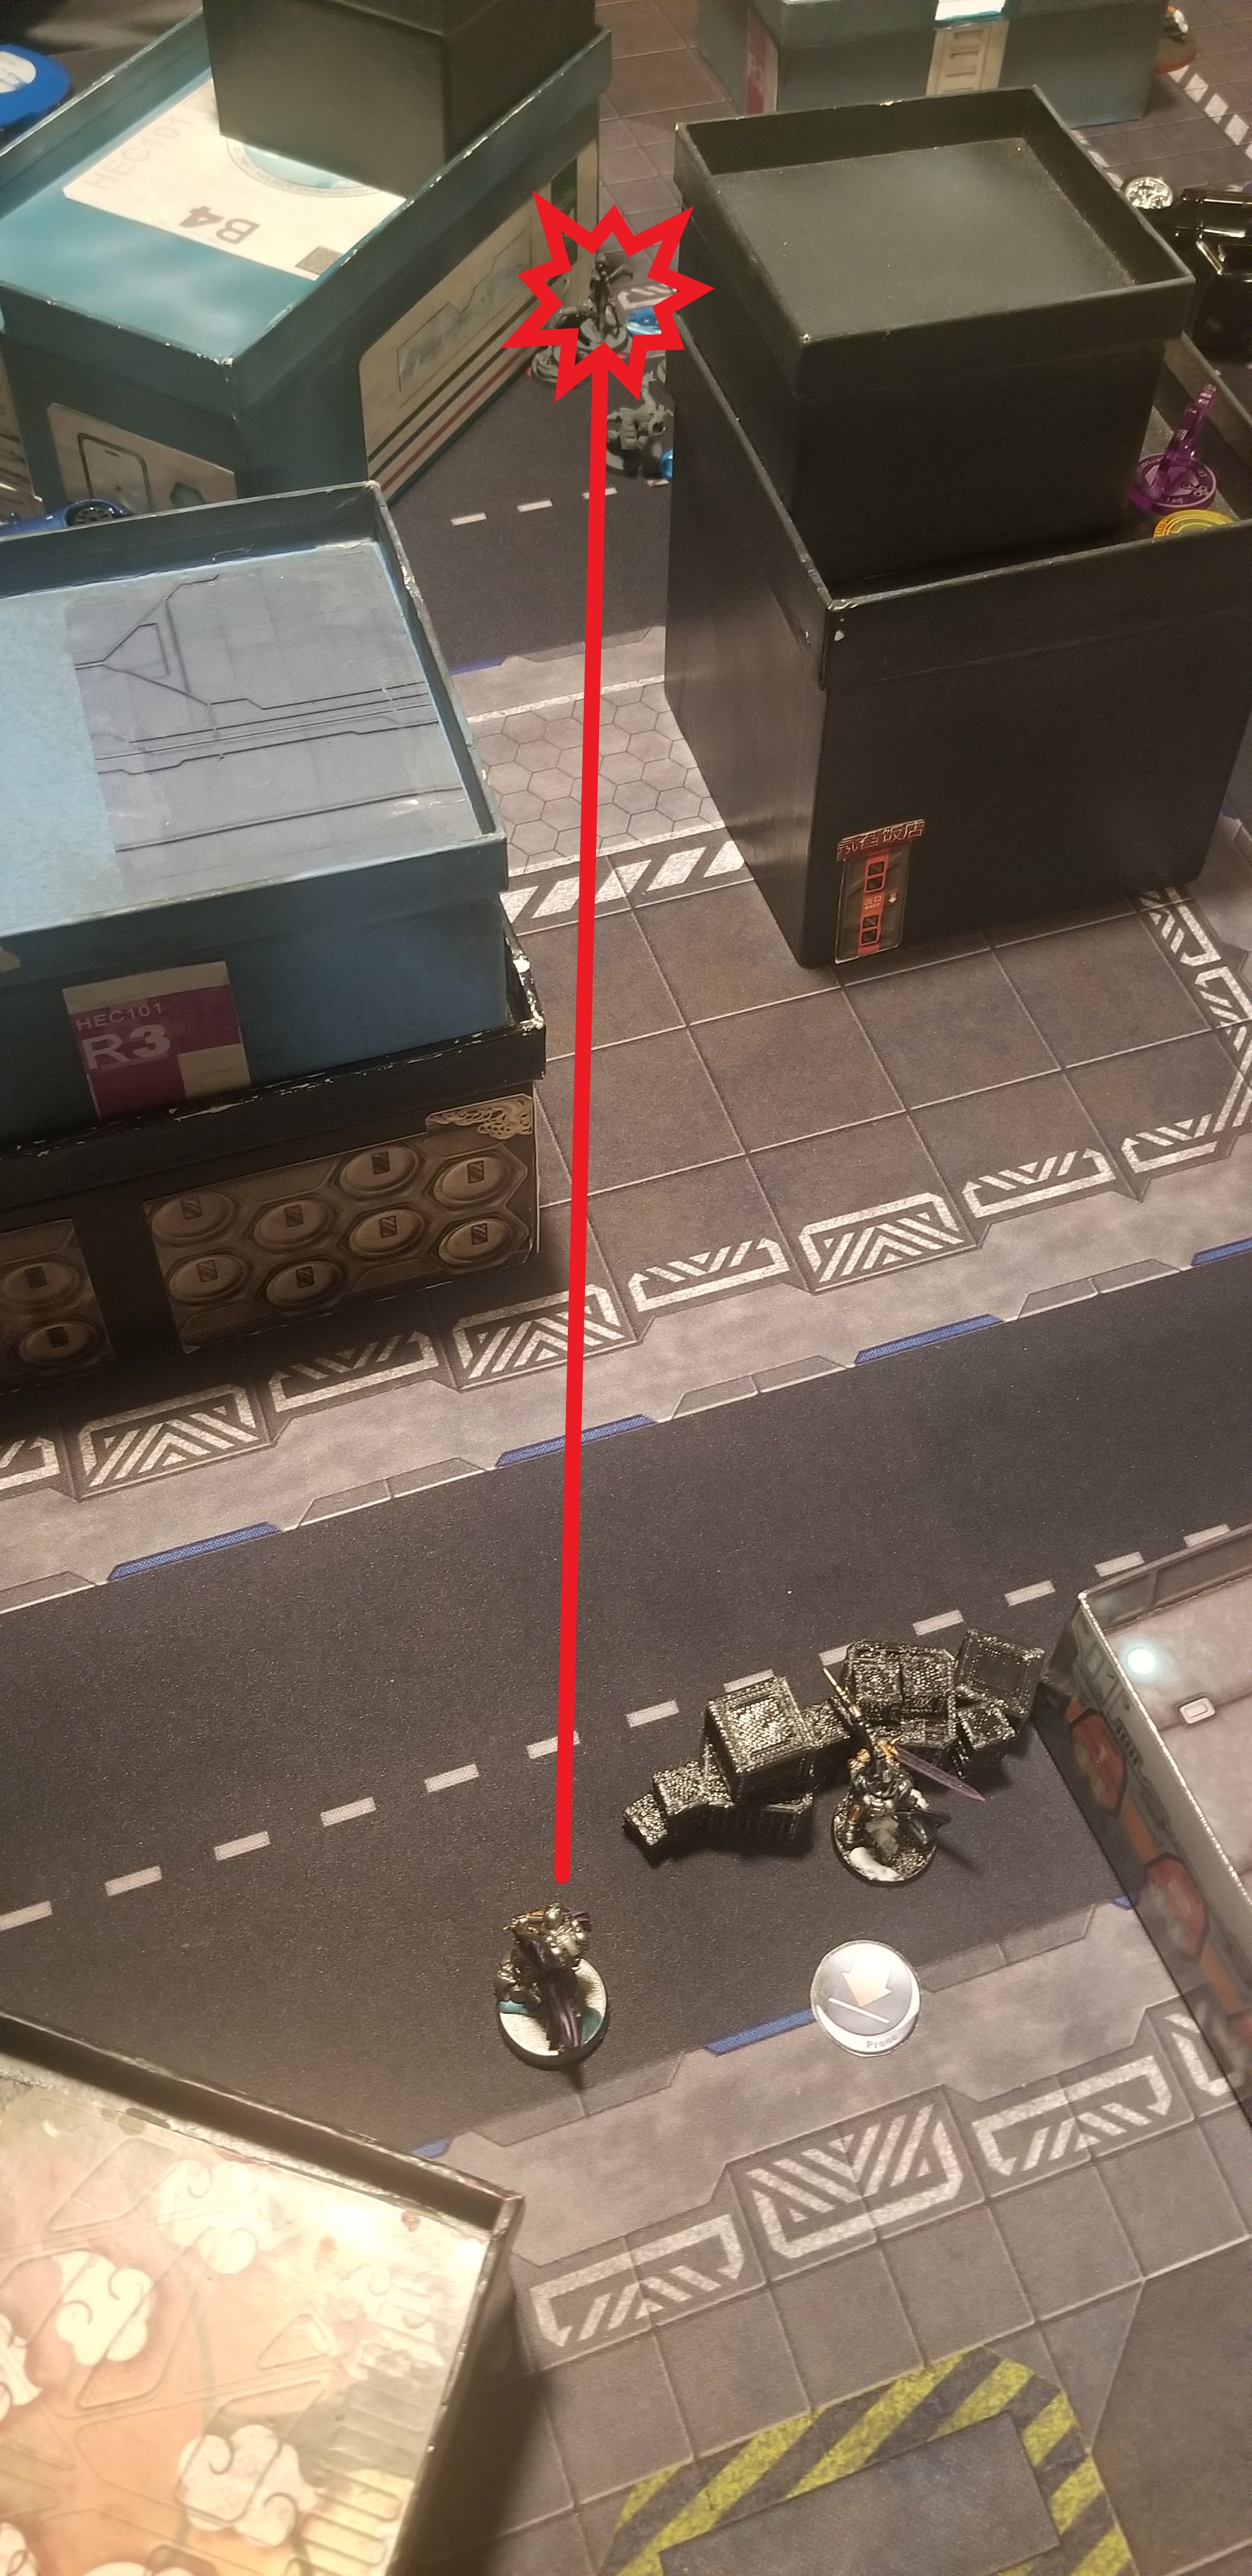
FOREIGN COMPANY: BOTTOM OF TURN 2
Foreign Company, now in a state of desperation, begins to throw everything they have at the PanOcenian forces.
Securitates and CSUs attempt to down the Jotum, and despite it's massive armour, the unthinkable almost happens! The first Securitate opens fire on the Jotum with a combi rifle, and scores a critical hit. Firing again, the Securitate scores another critical! On the third volley though, with no critical hit from the Securitate, the Jotum is easily able to down his aggressor.
Despite their best efforts, the Jotum is able to survive (Despite those two back-to-back criticals, and almost failing a save to a Combi-Rifle).

PANOCEANIA: TOP OF TURN 3
With very little opposition left, the PanOceanian forces move to occupy the optimal positions for scoring. No shots were fired on the top of turn 3.
FOREIGN COMPANY: BOTTOM OF TURN 3
With three surviving soldiers, and their Lieutenant dead, the Foreign Company forces begin their retreat.
Berithh
- Dominate the nearest sector to your deployment zone (+1)
- Dominate the Central Sector (+3)
--Dominate the sentral sector with Liason Officer (+1)
-Dominate the farthest sector from your deployment zone (+4)
-Liaison Officer WIP Roll at the end (+1)
BakuninUnbound
-Liason Officer WIP Roll at the end (+1)
FINAL SCORE
BERITHH (10) - BAKUNINUBOUND (1)
Battle Report Author

Army Lists Used In This Battle
Recommend Commander For Commendation
Share this battle with friends
BerithhWins

Sounds like it was a really fun game and that Jotum is BEASTLY.
Well done! Rated & commended! Thanks for the detailed report!
Great report!
Loved the report! Great job with those lines connecting actions on the table!
Good report Commander!
Great report, you’ve done great work with the modification to the images.
Keep it up!
Nice report, nice table … and nice result!! 🙂
Nice win man!! Great report too!
You leveraged your JOTUM very well, commander!
#BromadFistBump
pretty painted army
good result!
remember; service grants resurrection!