Fought At Pakngein NBIS, The NB International Spaceport: Traffic Control Offices
1649 days 11 hours 12 minutes ago
BLOODY STALEMATE
300 POINTSThis was a frustrating game that degenerated into carnage and finished in a brutal, bloody stalemate. I had a completely atrocious start and then fickle fate took great delight in smacking both of us around the head. My narrative comes from this rollercoaster, shared by my opponent.
MISSION: Highly Classified
INITIAITVE: QK won the initiative and decided to go first. Tohaa chose ends and let QK set-up first.
CLASSIFIEDS: Main = In Extremis Recovery, Rescue, Nano-Espionage, Net Undermine.
QK = Follow Up; Tohaa = Experimental Drug
LIEUTENANTS: QK = Sekban AP Rifle; Tohaa = Rasail
Hafza operations officer TRA852 entered the debriefing room to see the assembled team from NTF Zulu-21, including the newly recovered wounded, waiting there for him. He had to marvel at the capabilities of Haqqislam medicine; four seriously injured troopers were back up and ready within an hour of being wounded in a brutal firefight. TRA852 looked around the room at the stern-faced troopers. The whole team was here less the three Sekbans tragically killed in the battle.
Taking in their grim demeanour, TRA852 detected a sense of savage satisfaction amongst the team. They had the attitude of people who had extracted payment for a grievous wrongdoing. He pondered that for a moment. Zulu-21 had been sent out on a security sweep of the NBIS facility with the task of clearing hostile infiltration and assisting any Haqqislam personnel in need. While conducting this mission they had been ambushed by Tohaa raiders. Probably the same Tohaa raiders who had captured their comrade in the previous battle. This had resulted in a brutal firefight with no quarter given or asked for.
"So", TRA852 asked cautiously, "How did it go?"
The recently wounded Sekban Lieutenant answered him in a measured tone.
"Well sir, the Tohaa might have prevented us from getting any of the objectives; but we sure as hell made certain they got none of them. Nor will they be able to in the future!"
Nods of grim agreement along with the occasional vicious smile came from the assembled troopers.
"Here sir, let me show you the tactical data." The Sekban officer activated the battle readout console on the wall of the room.
TRA852 turned and studied it carefully.
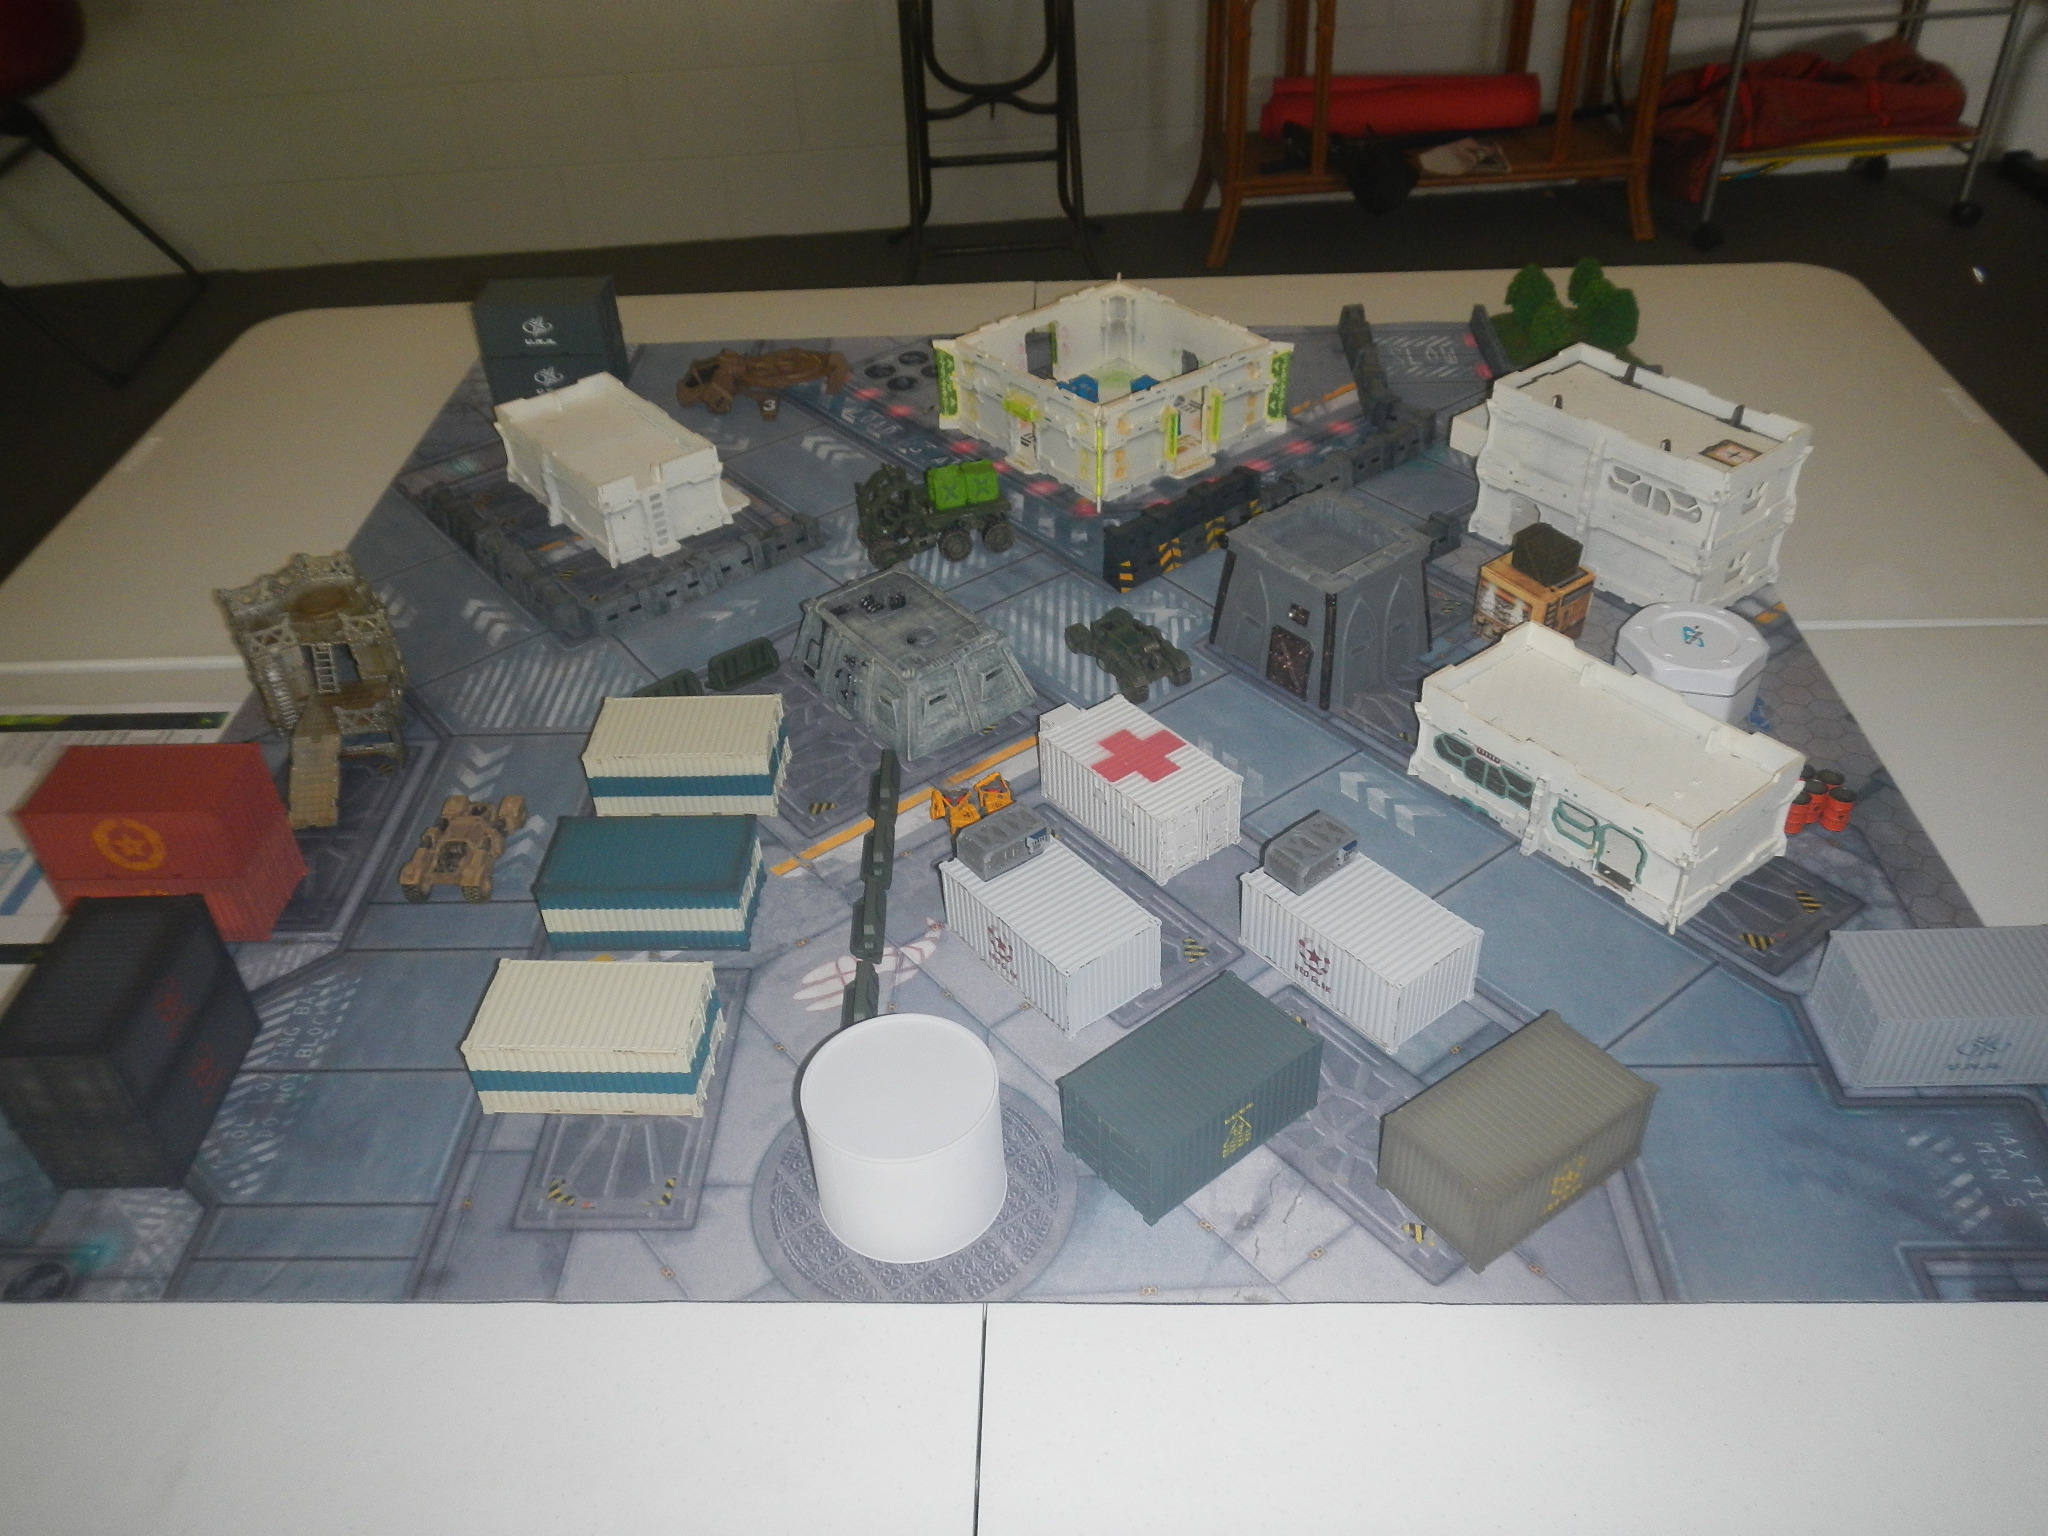
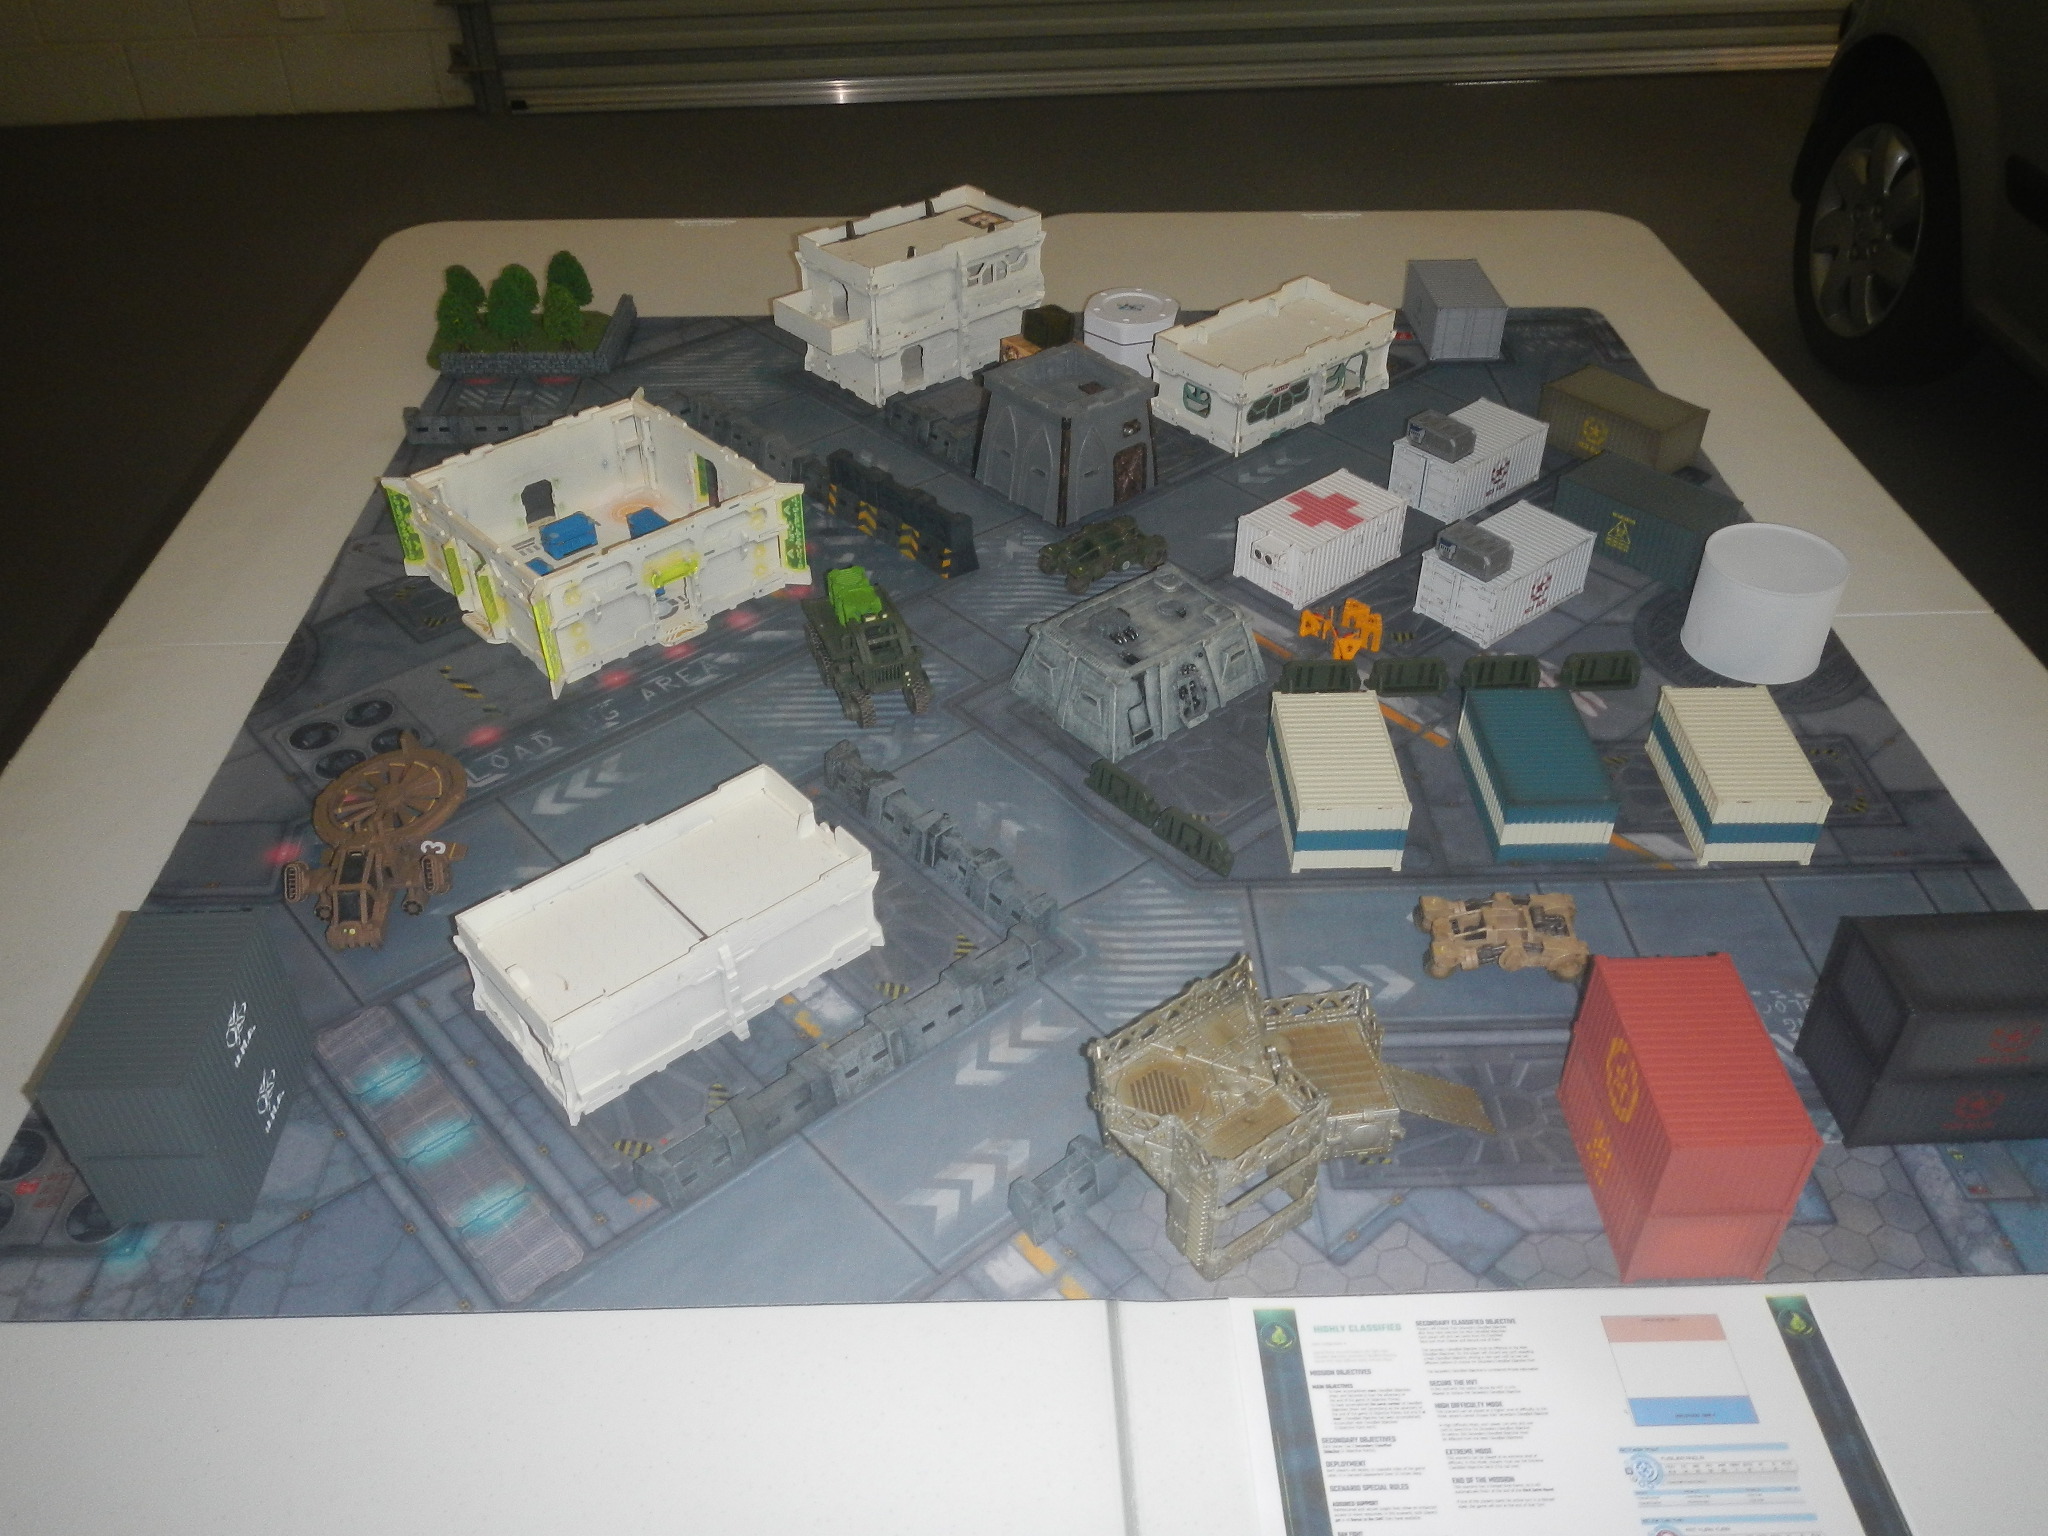
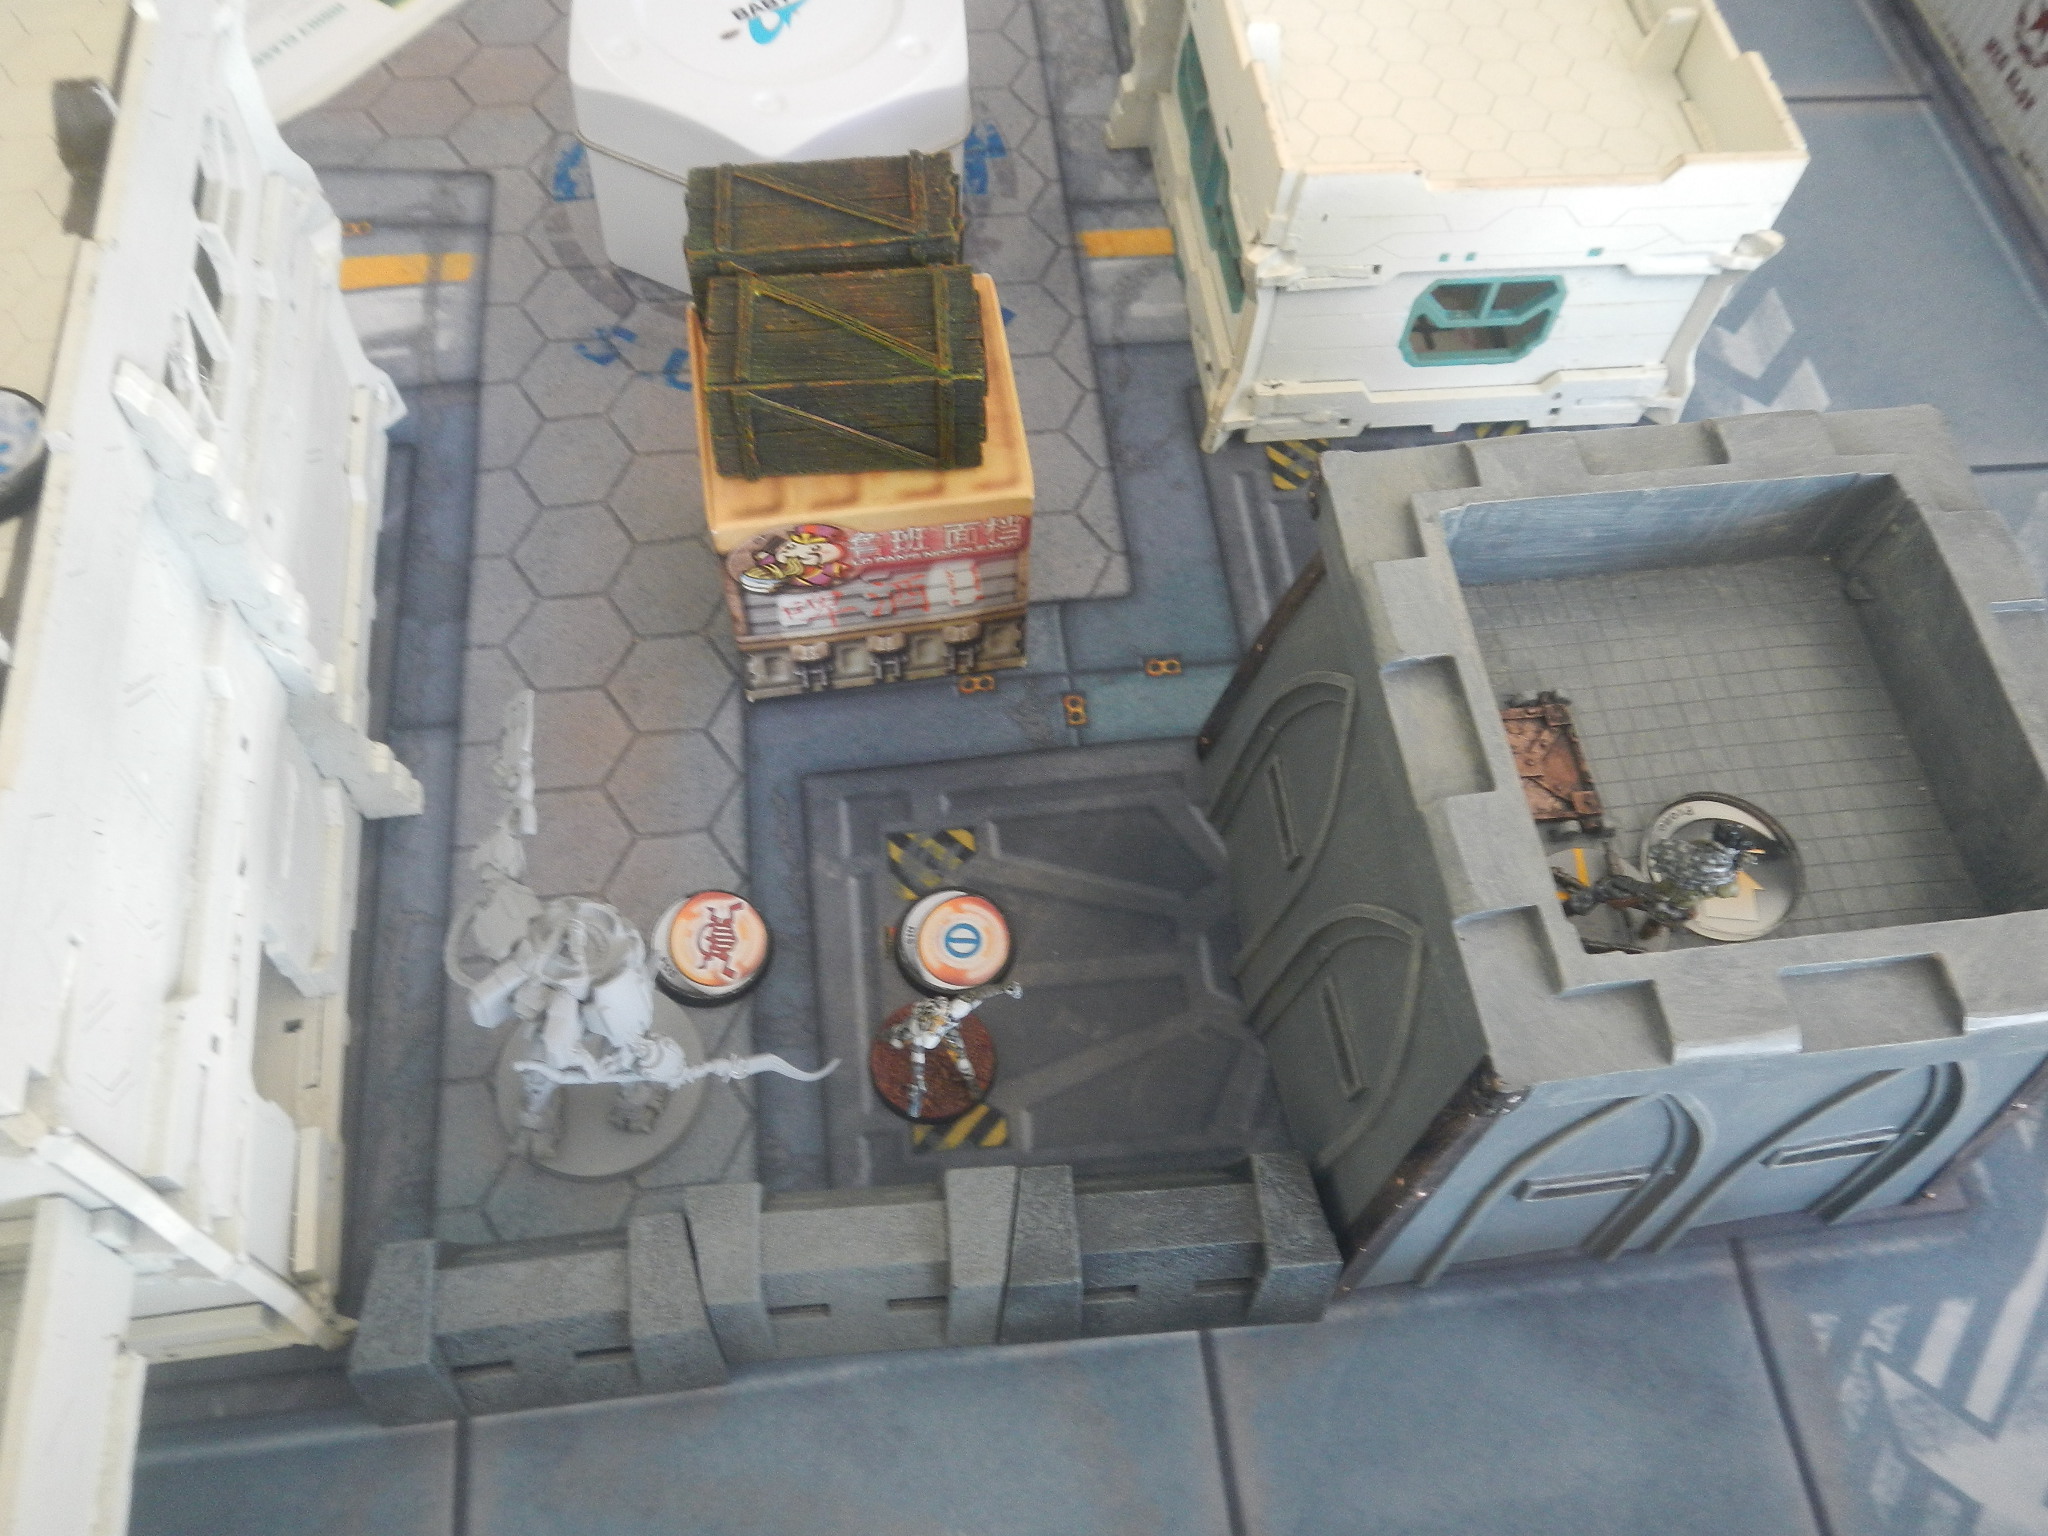
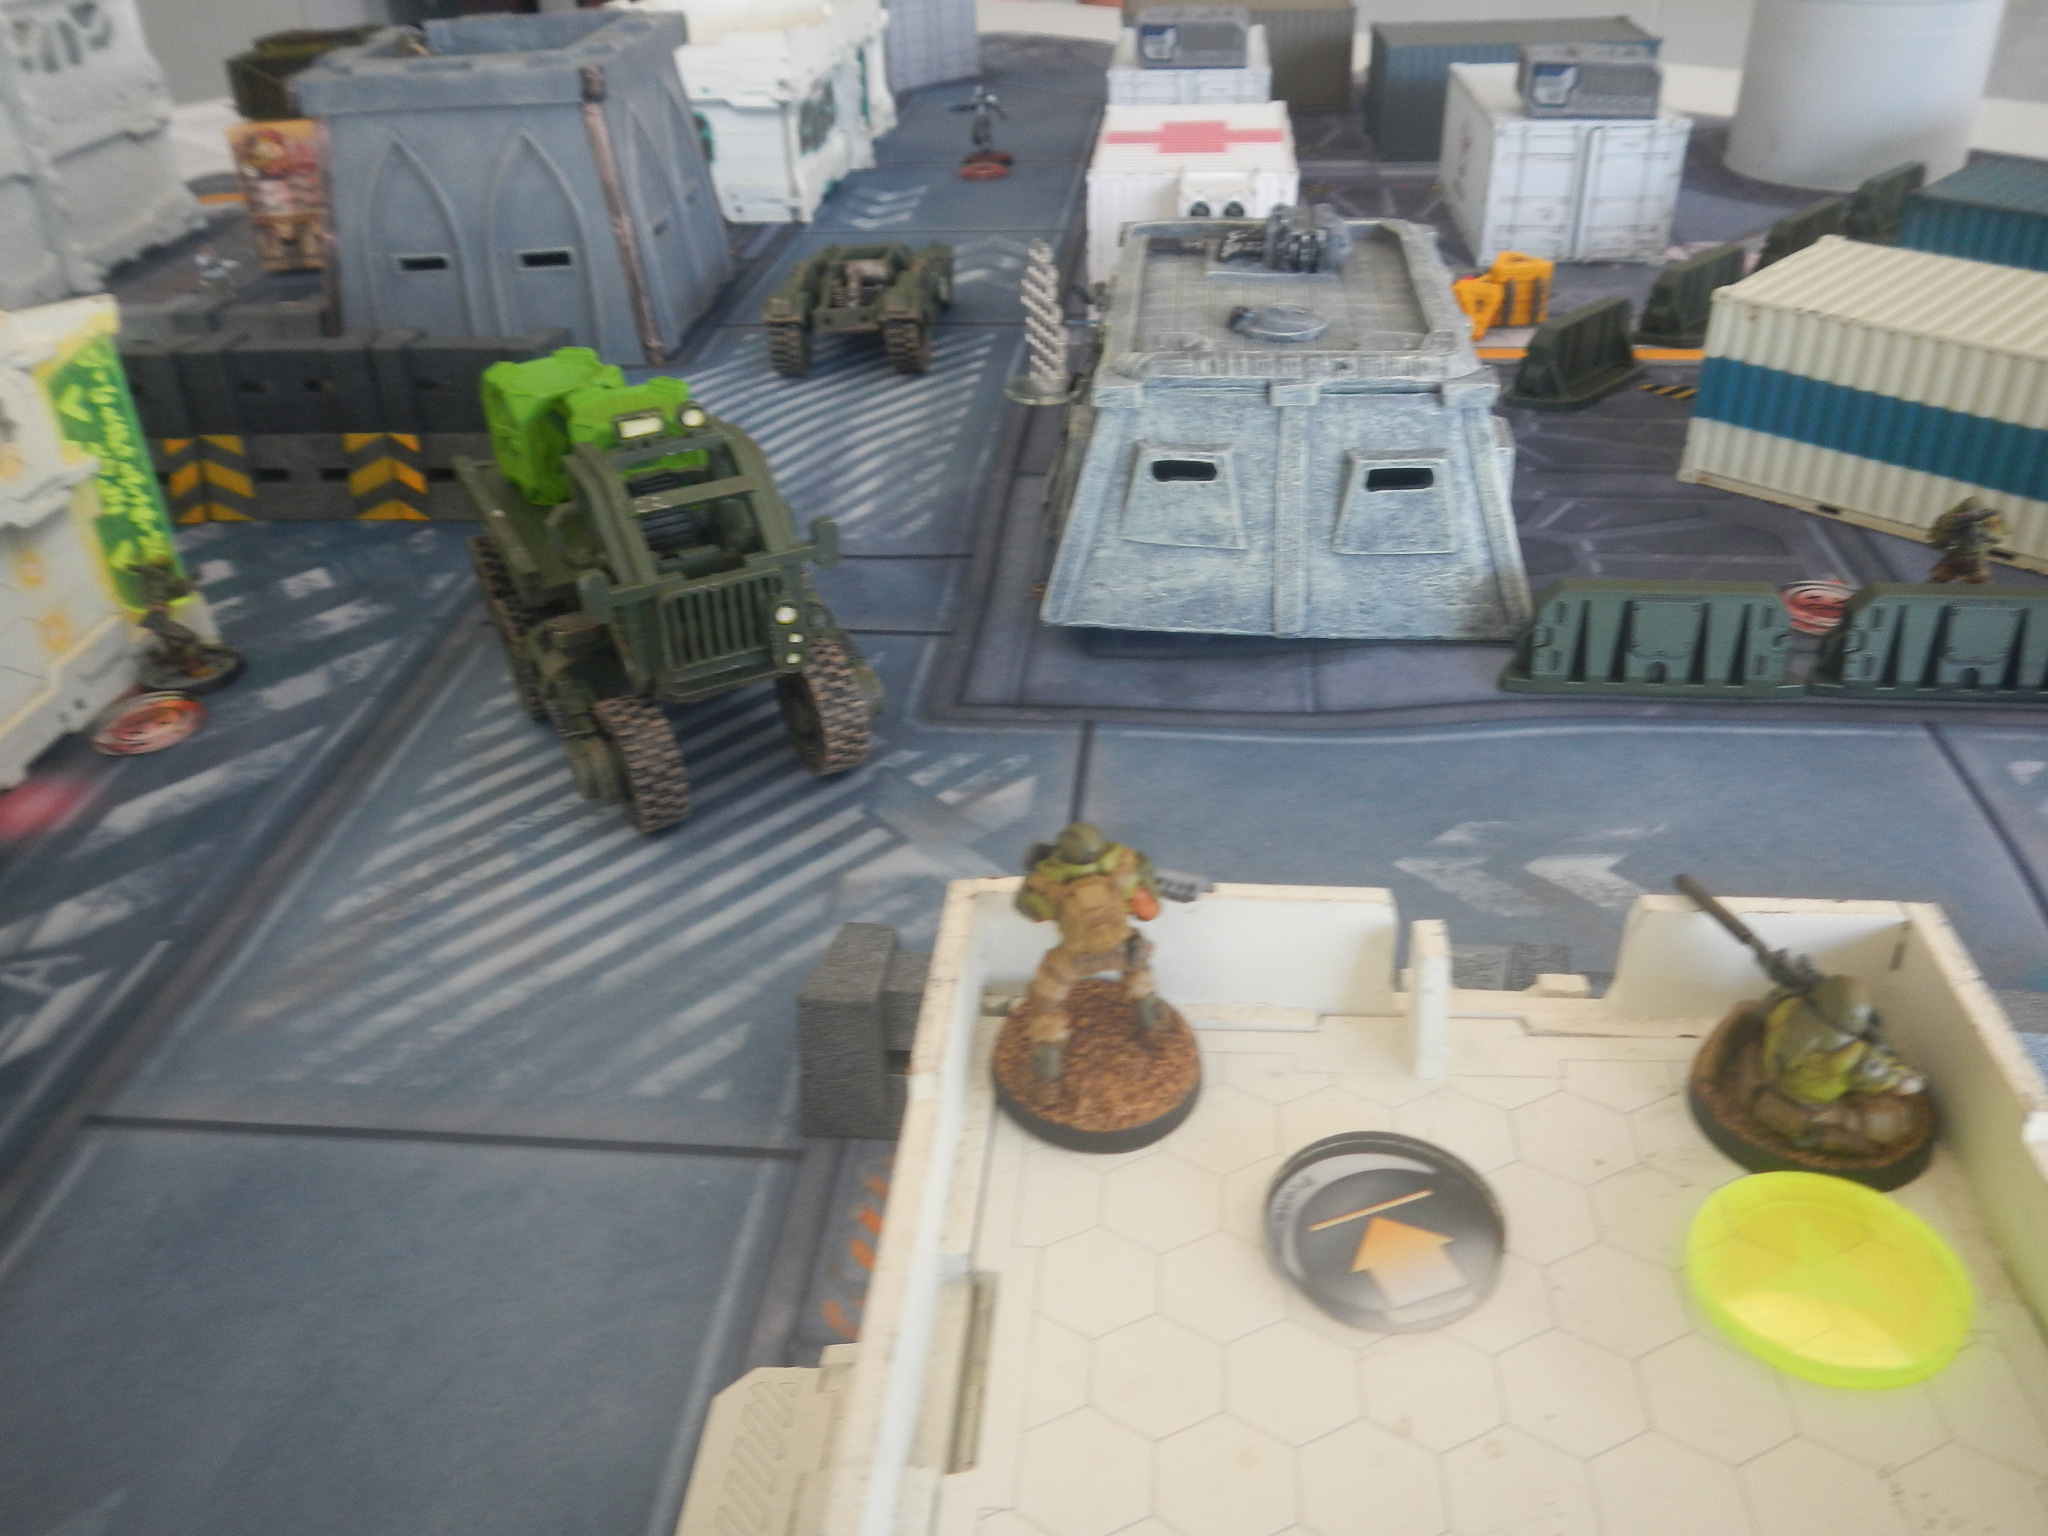
 QK DZ going L to R: Ghulam lass with Rifle+LSG & E-Maulers; Hawa sniper (prone & camo) on 1st floor roof; Hawa assault hacker (prone & camo) on top of tall bunker; Sekban link team in roofless building; Djanbazan Harris link in/on far right white building; Hawa FO (prone & camo) on far left flank just below the scaffolding (there's a prone & camo Igao just the other side of the hatchway)..
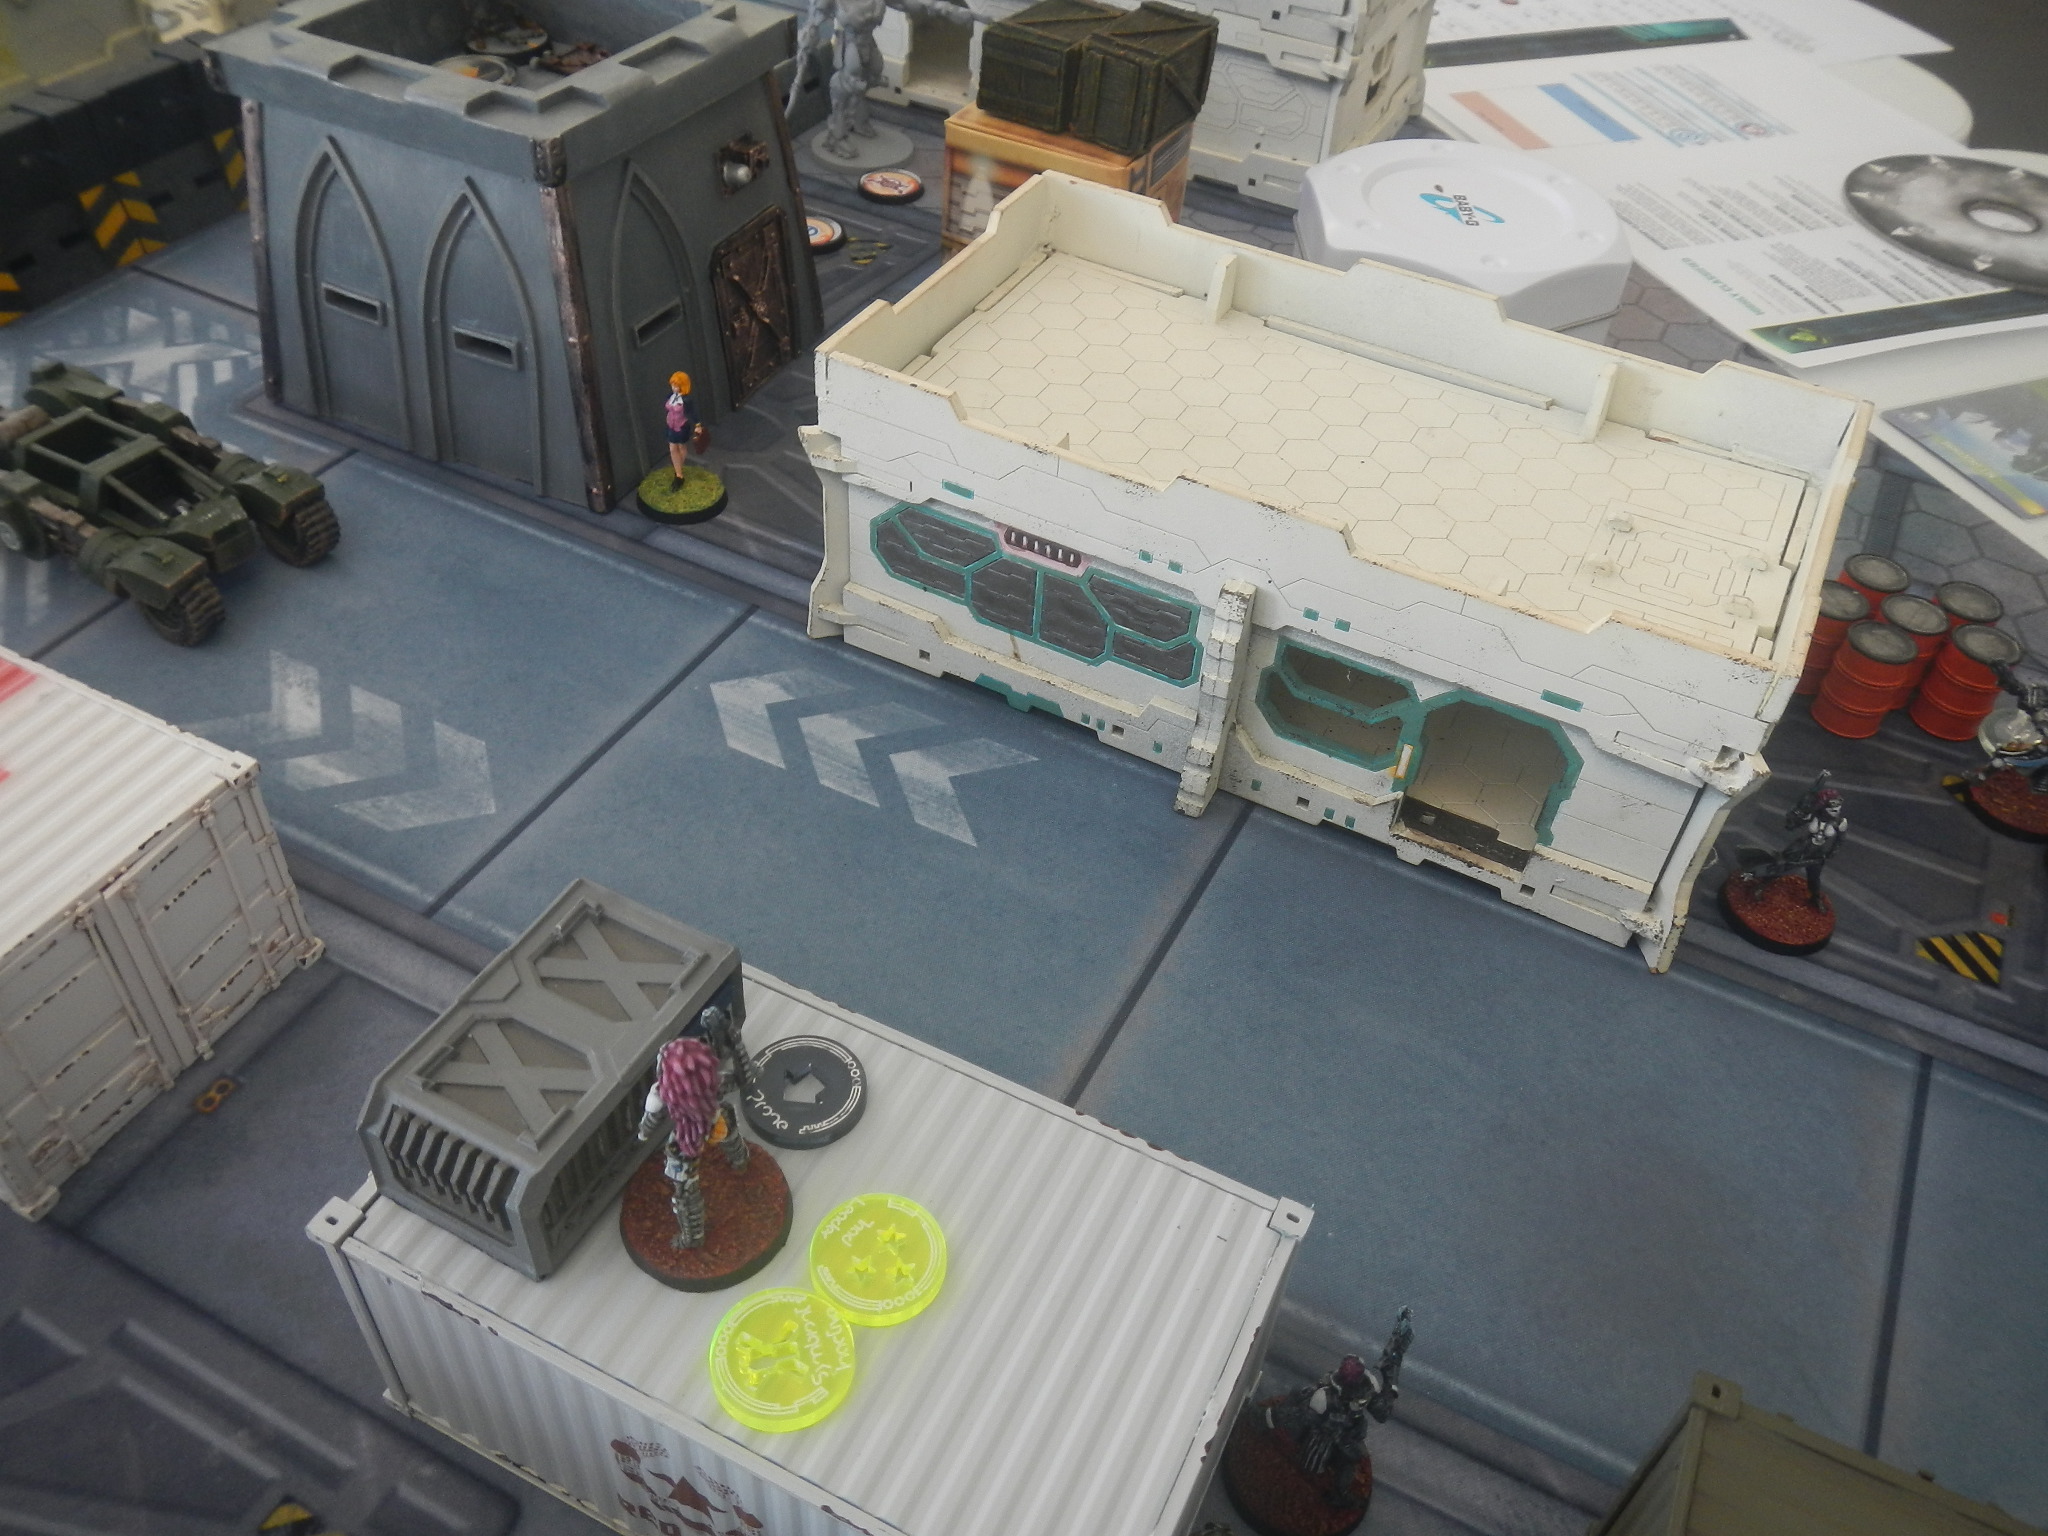
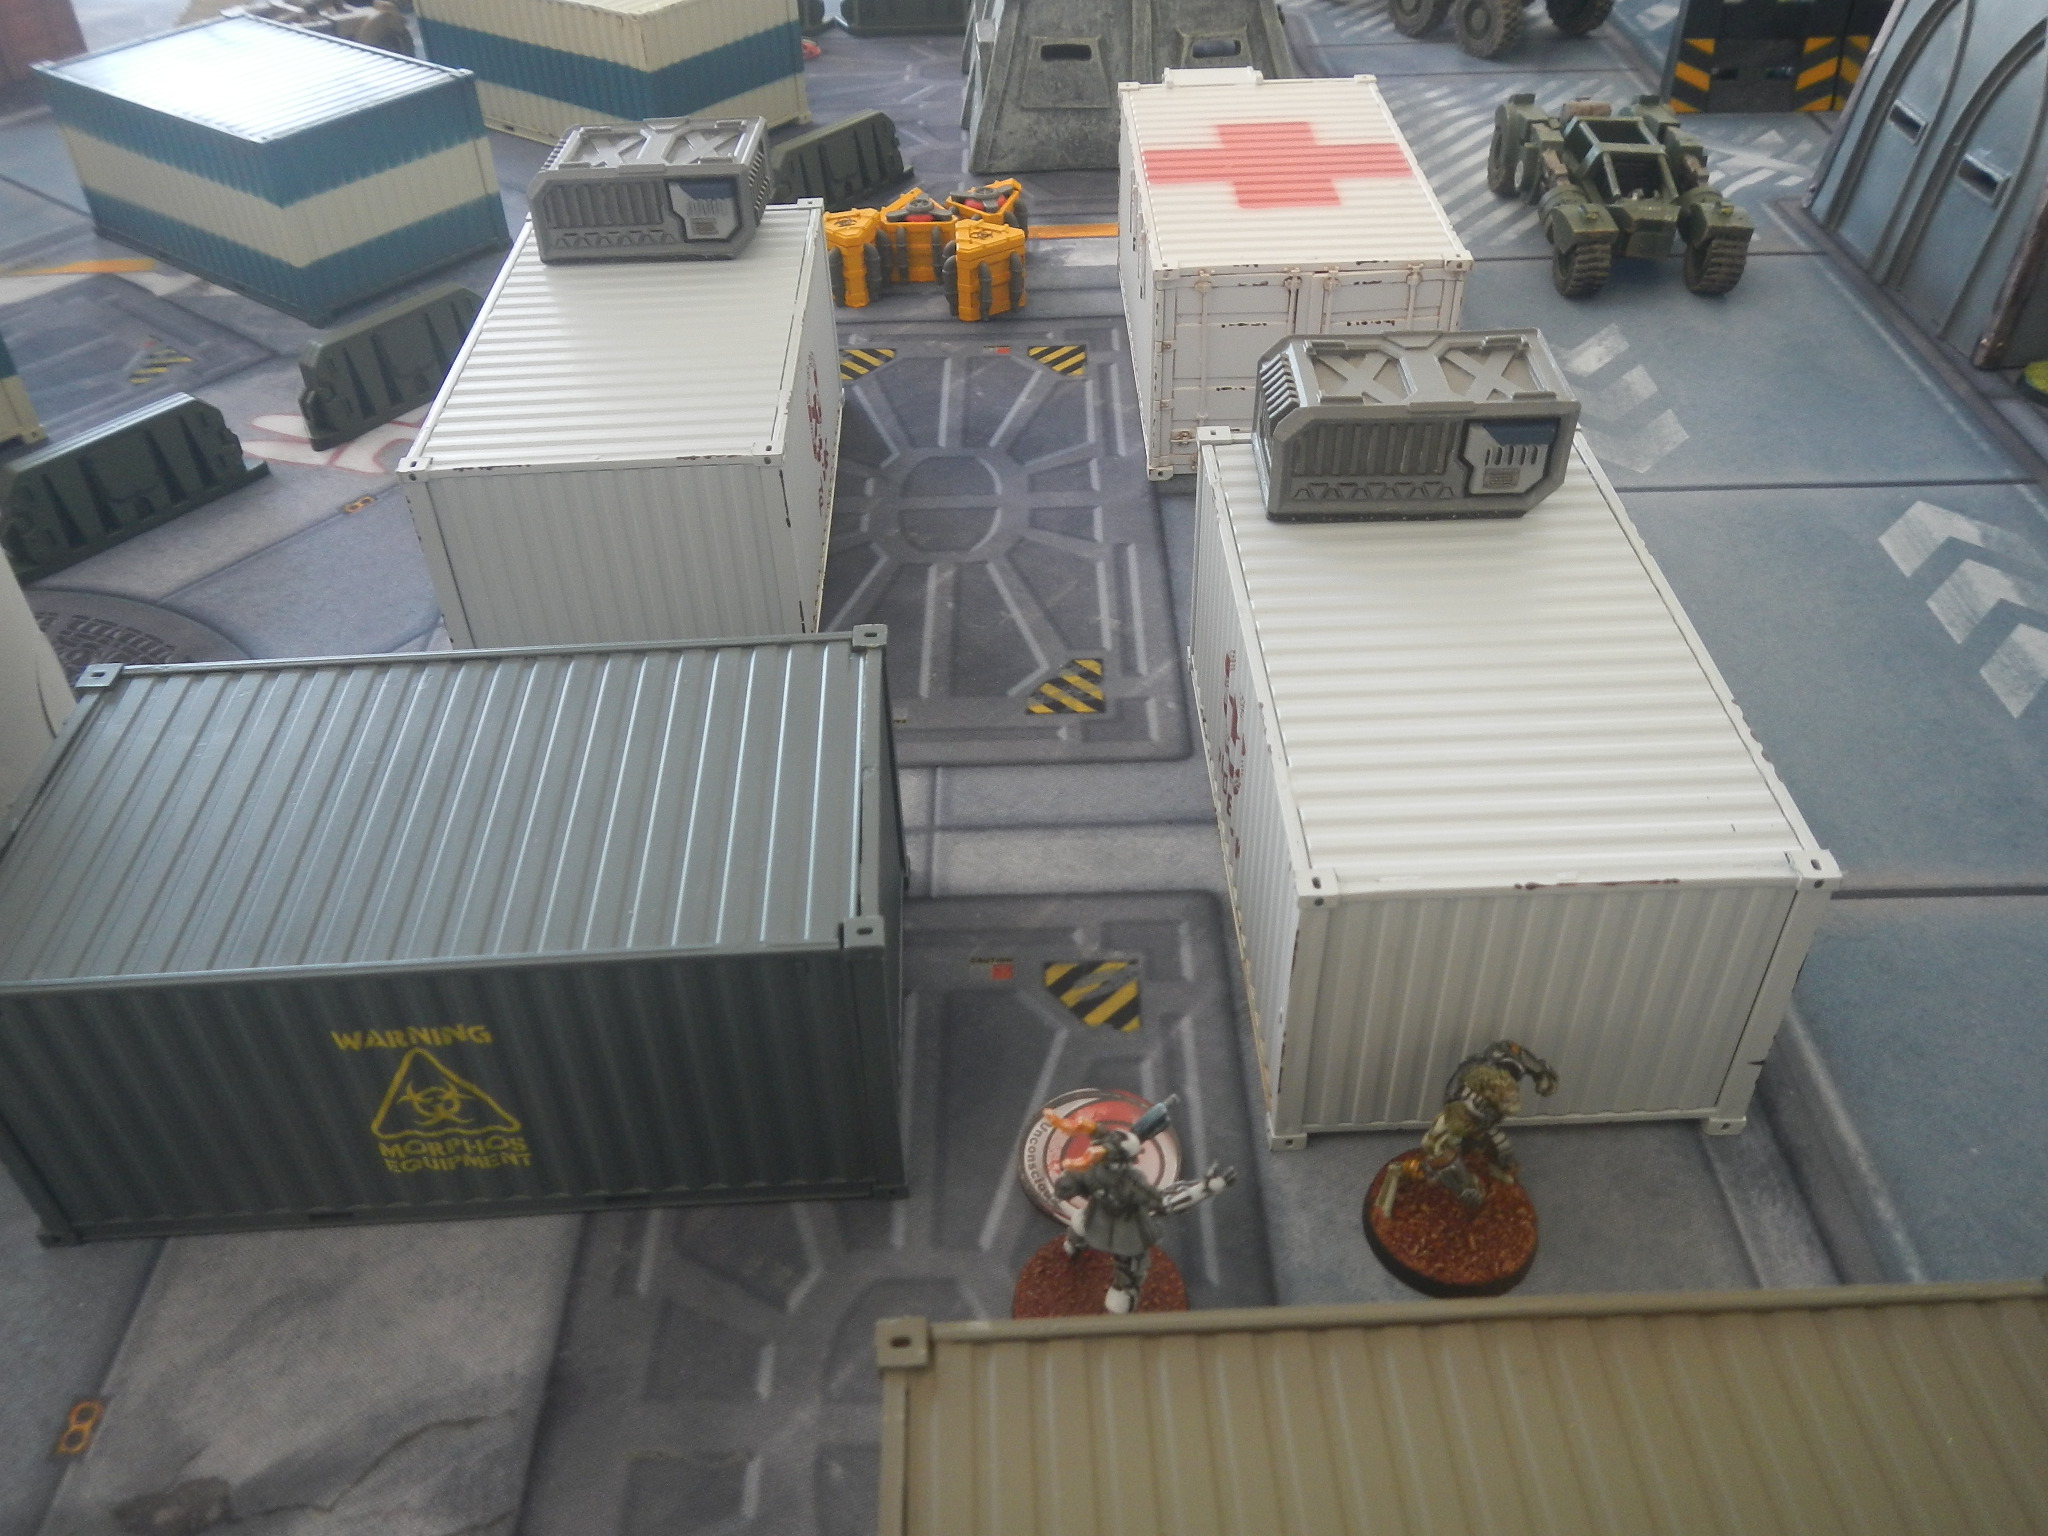
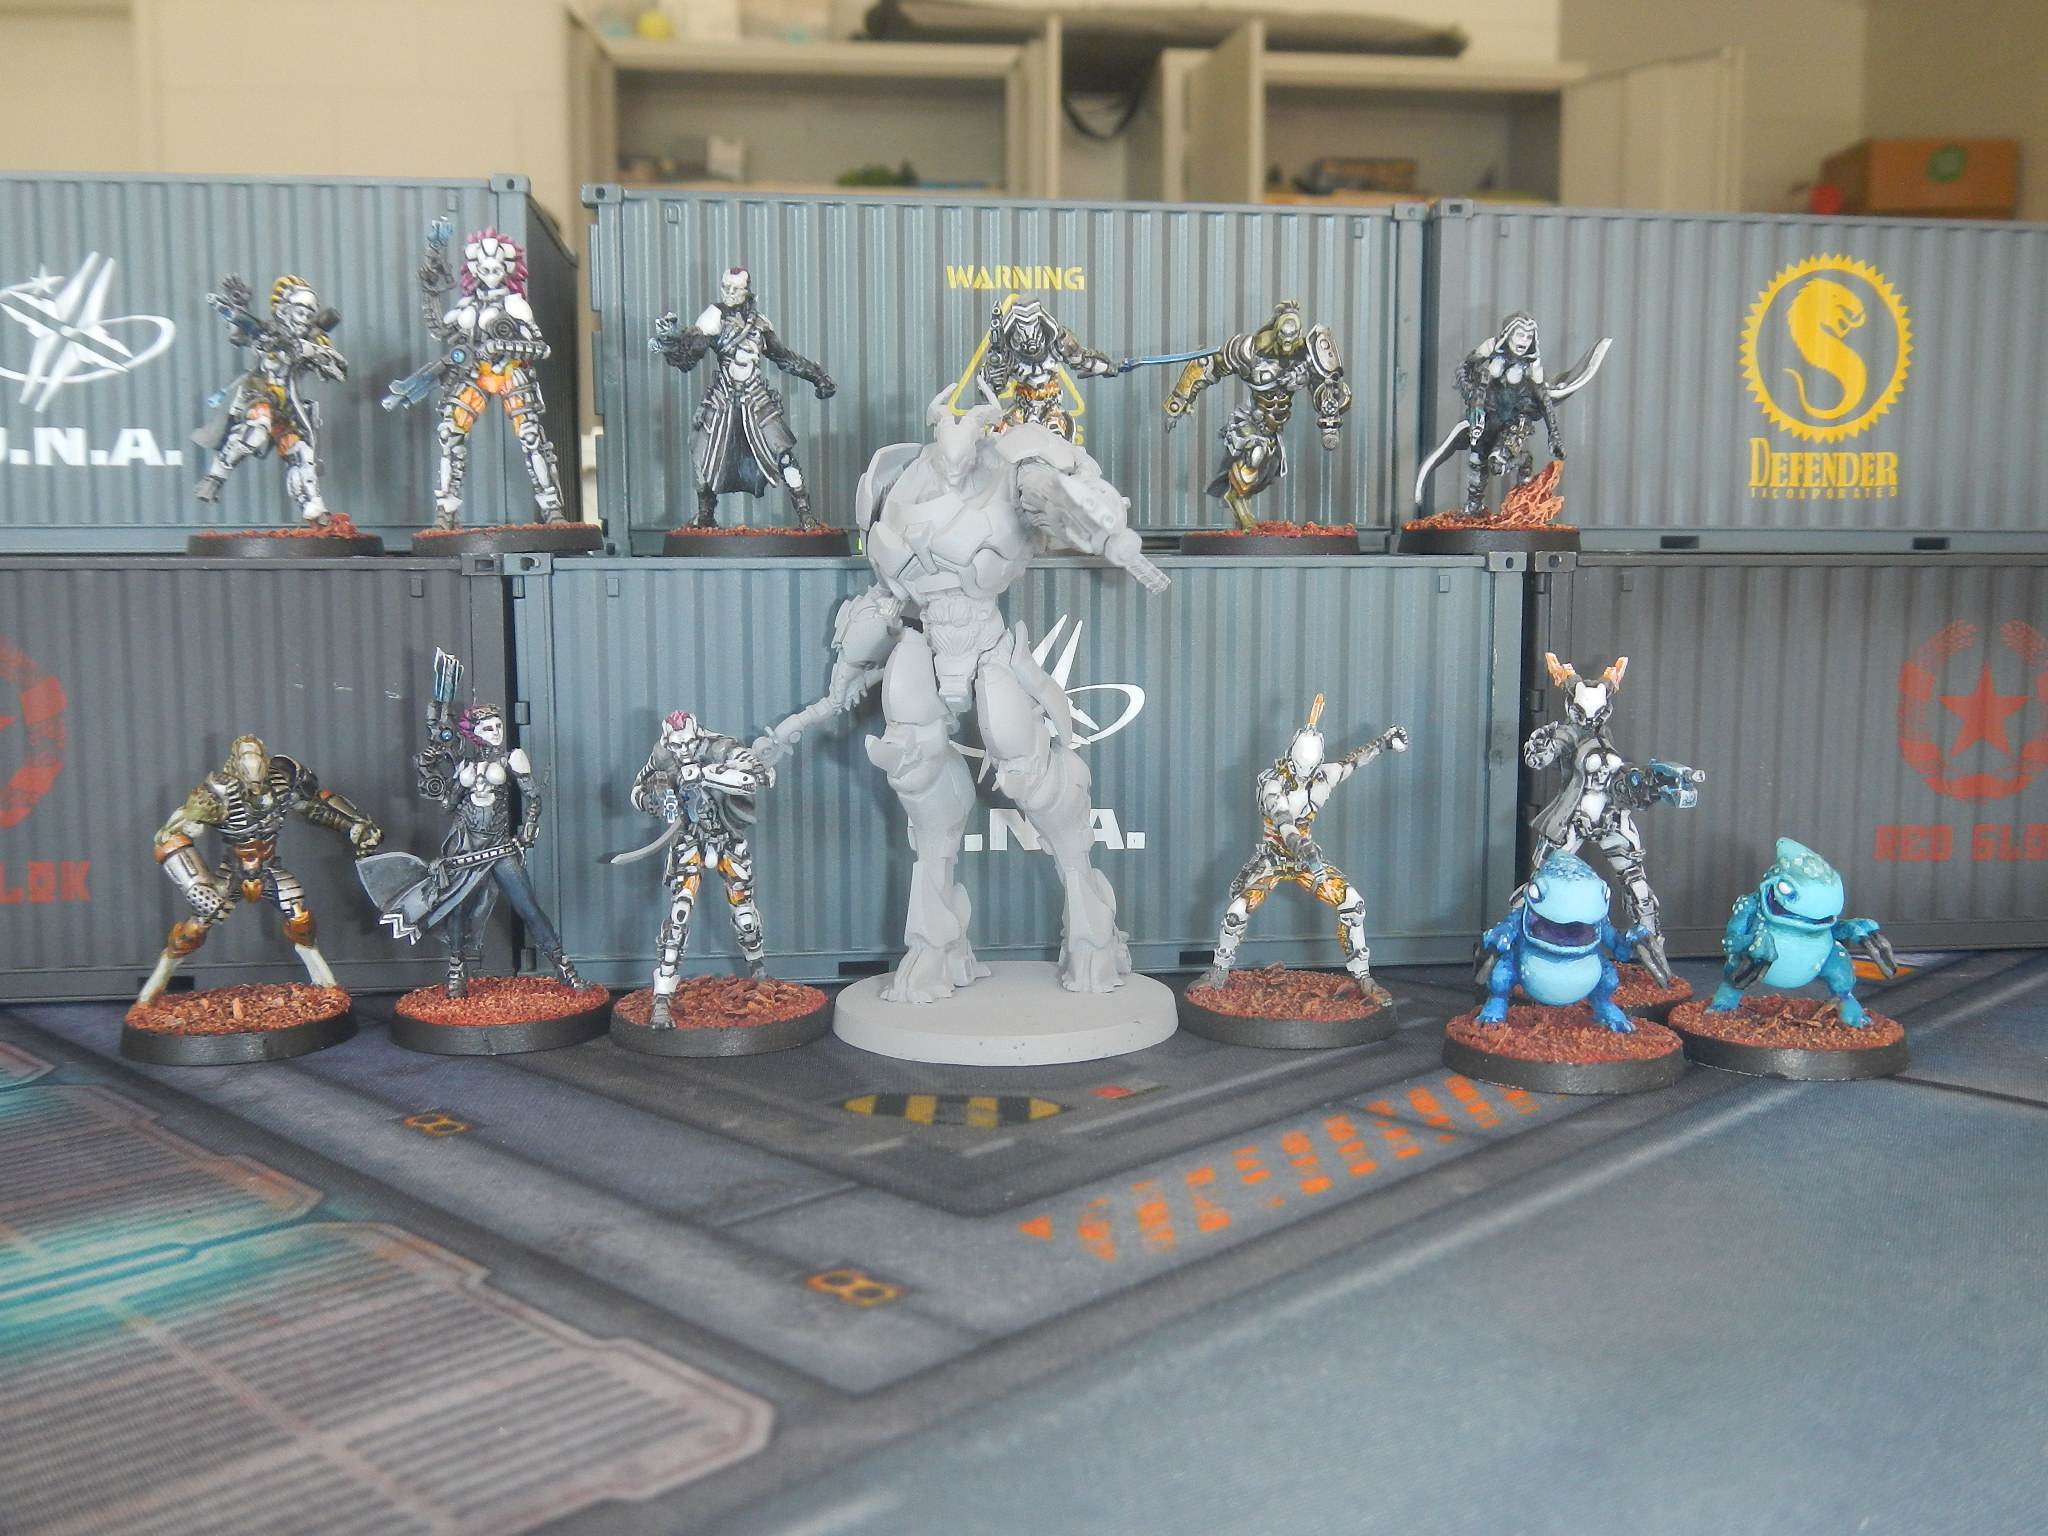
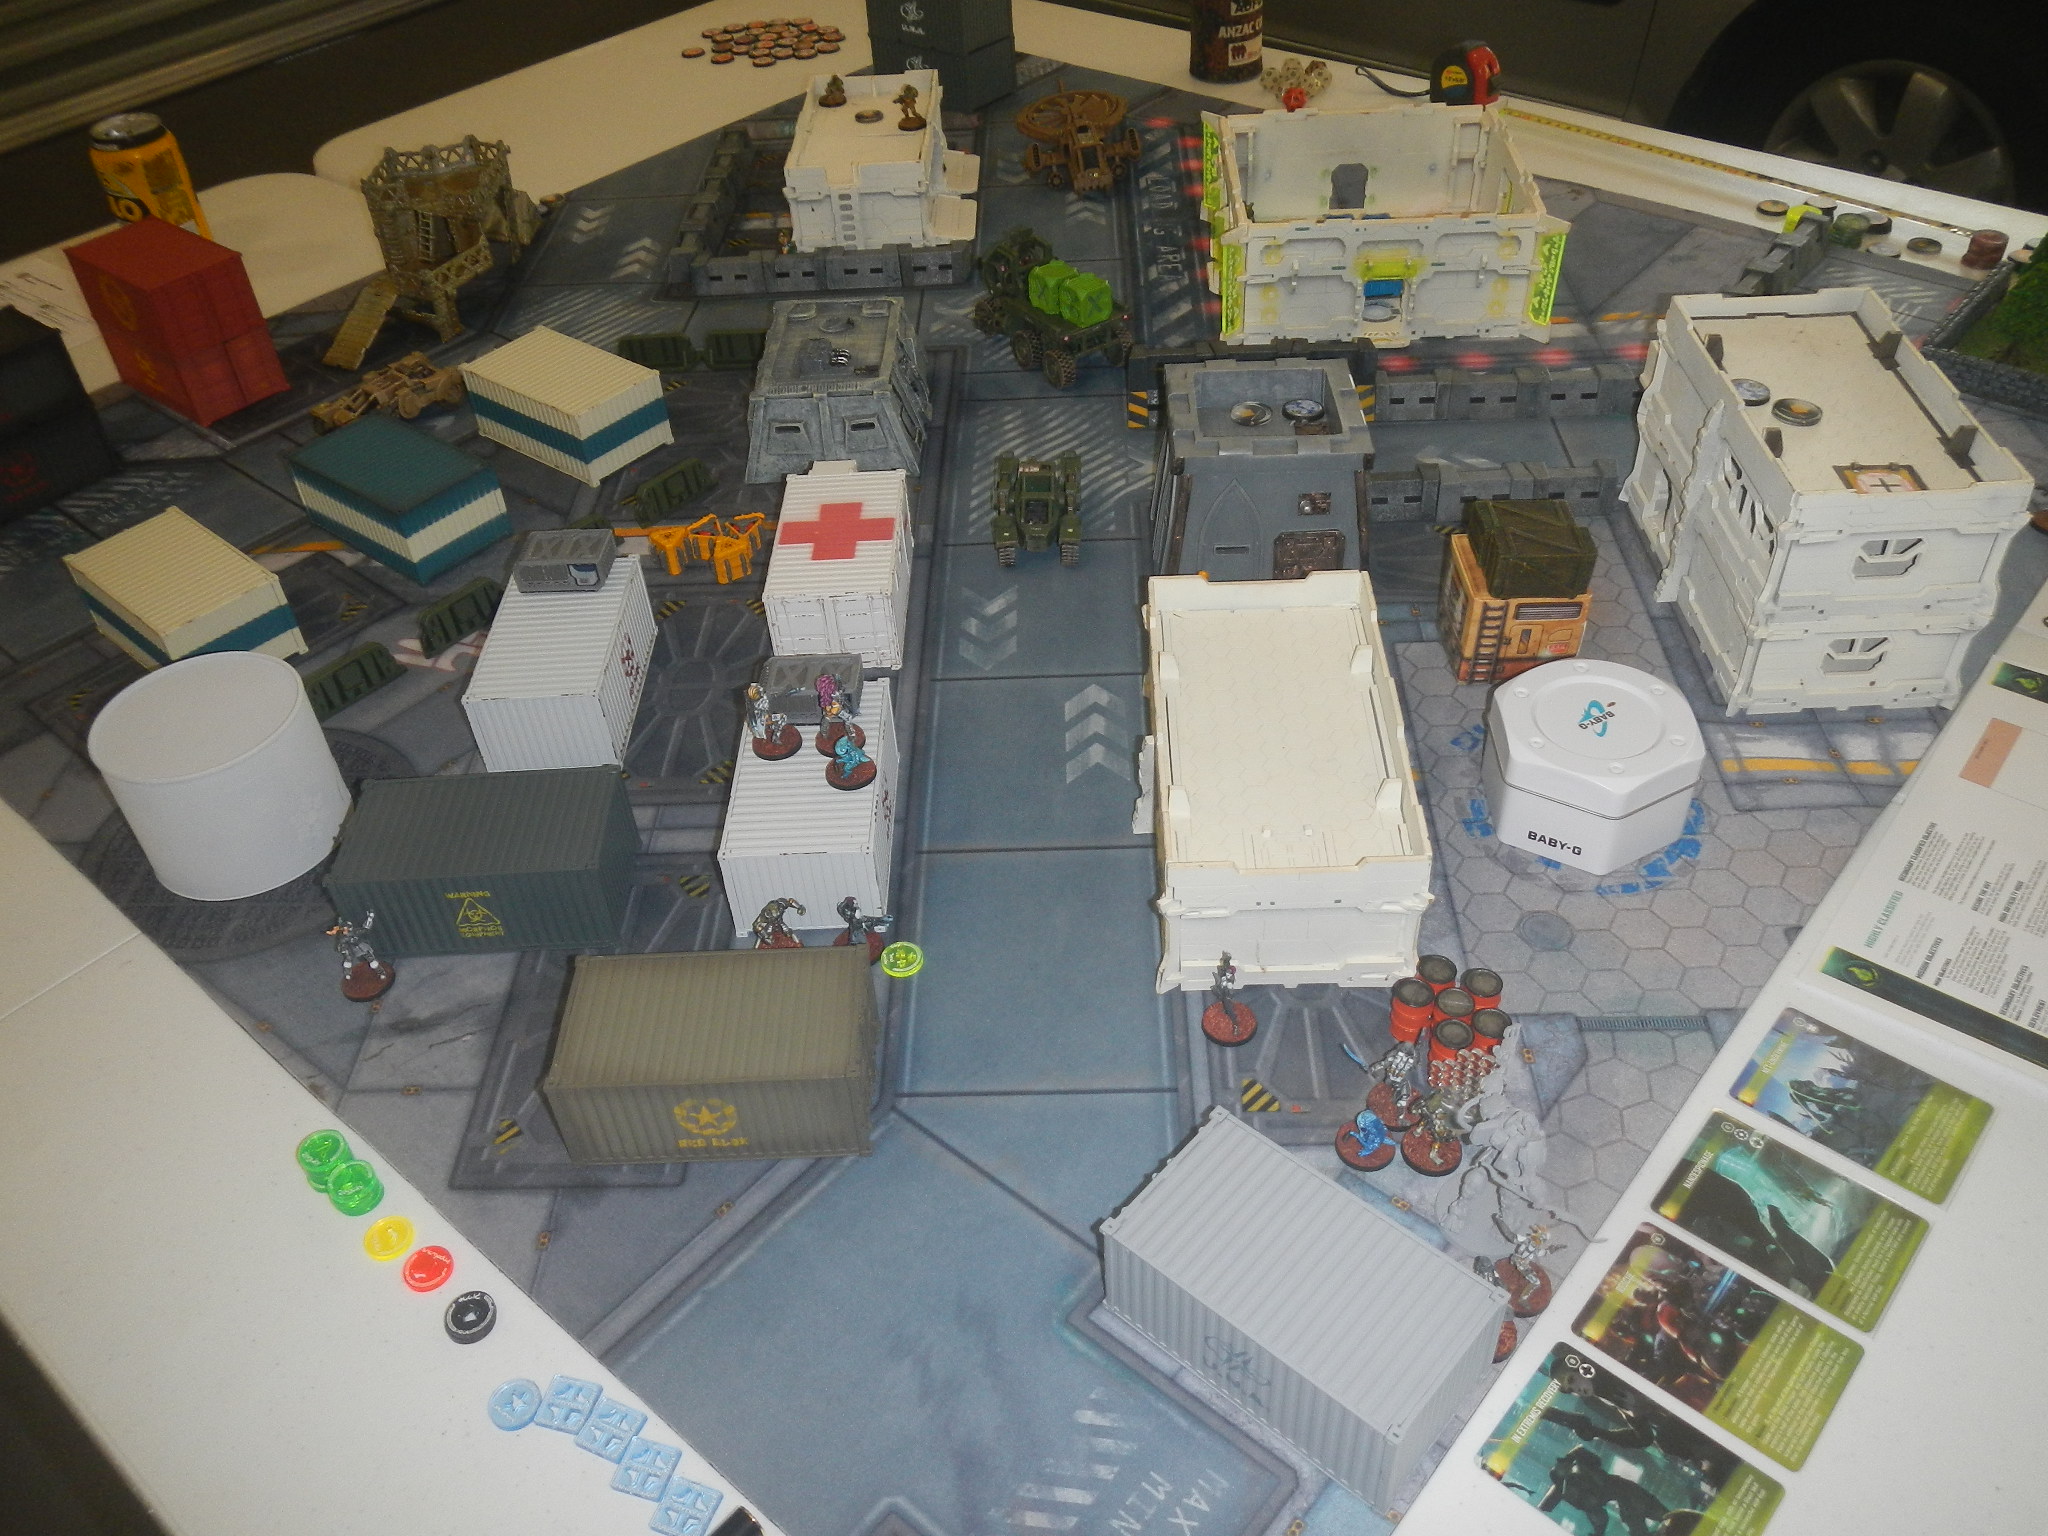 Tohaa DZ going L to R: Kaeltar behind dark grey container; Sukeul triad with Sukeul HMG & ML + Symbiomate on top of white container and Makaul on ground to rear, there is a Chaksa servant next to him; Kumotail bio-engineer behind white building; Rasail + Chaksa HFT + Symbiomate behind orange drums; Gorgos TAG + Chaksa LSG near orange drums; Clipsos to the rear of the Gorgos & Chaksa next to the light grey container. NOTE: The Clipsos wound up here after failing to infiltrate into QK territory.
TRA852 adjusted the display to home in on some of the detail of the deployment. He then proceeded to scan over the dispositions and make some observations.
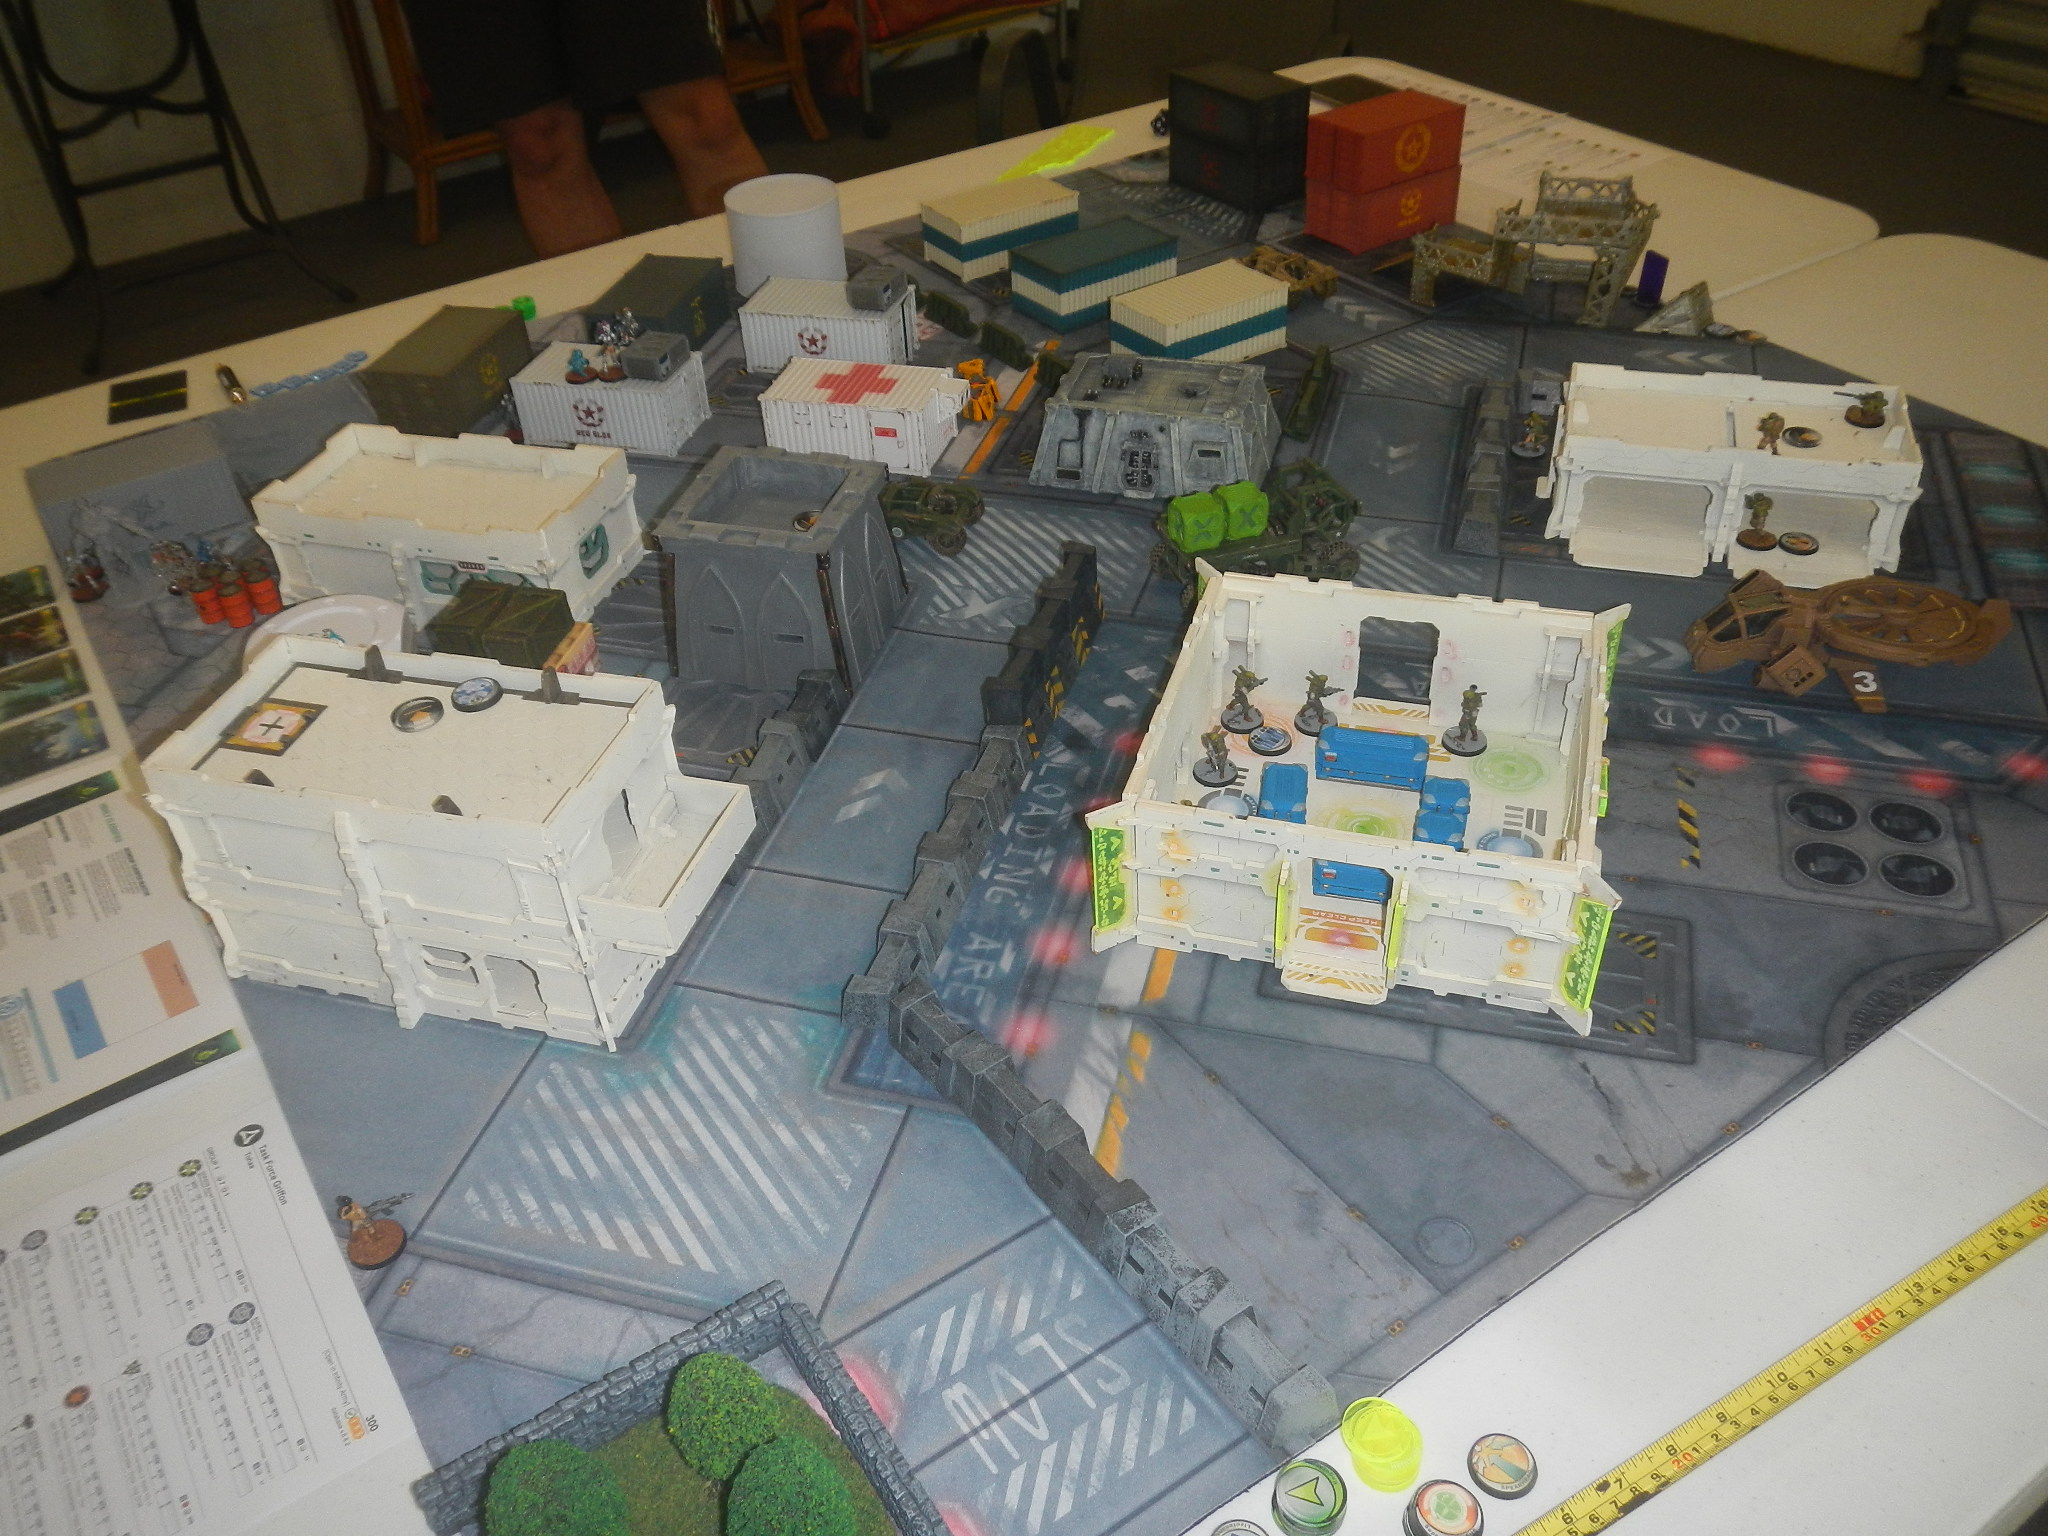
He noted the QK force was split into two combat groups of six, while the Tohaa appeared to be in one group of nine or ten.
 The damned Sukeul heavy weapons team. They dominate the movement corridors and would need to be removed ASAP. Who's that suspicious civilian up there near the tall grey bunker? Need to find out more about her.
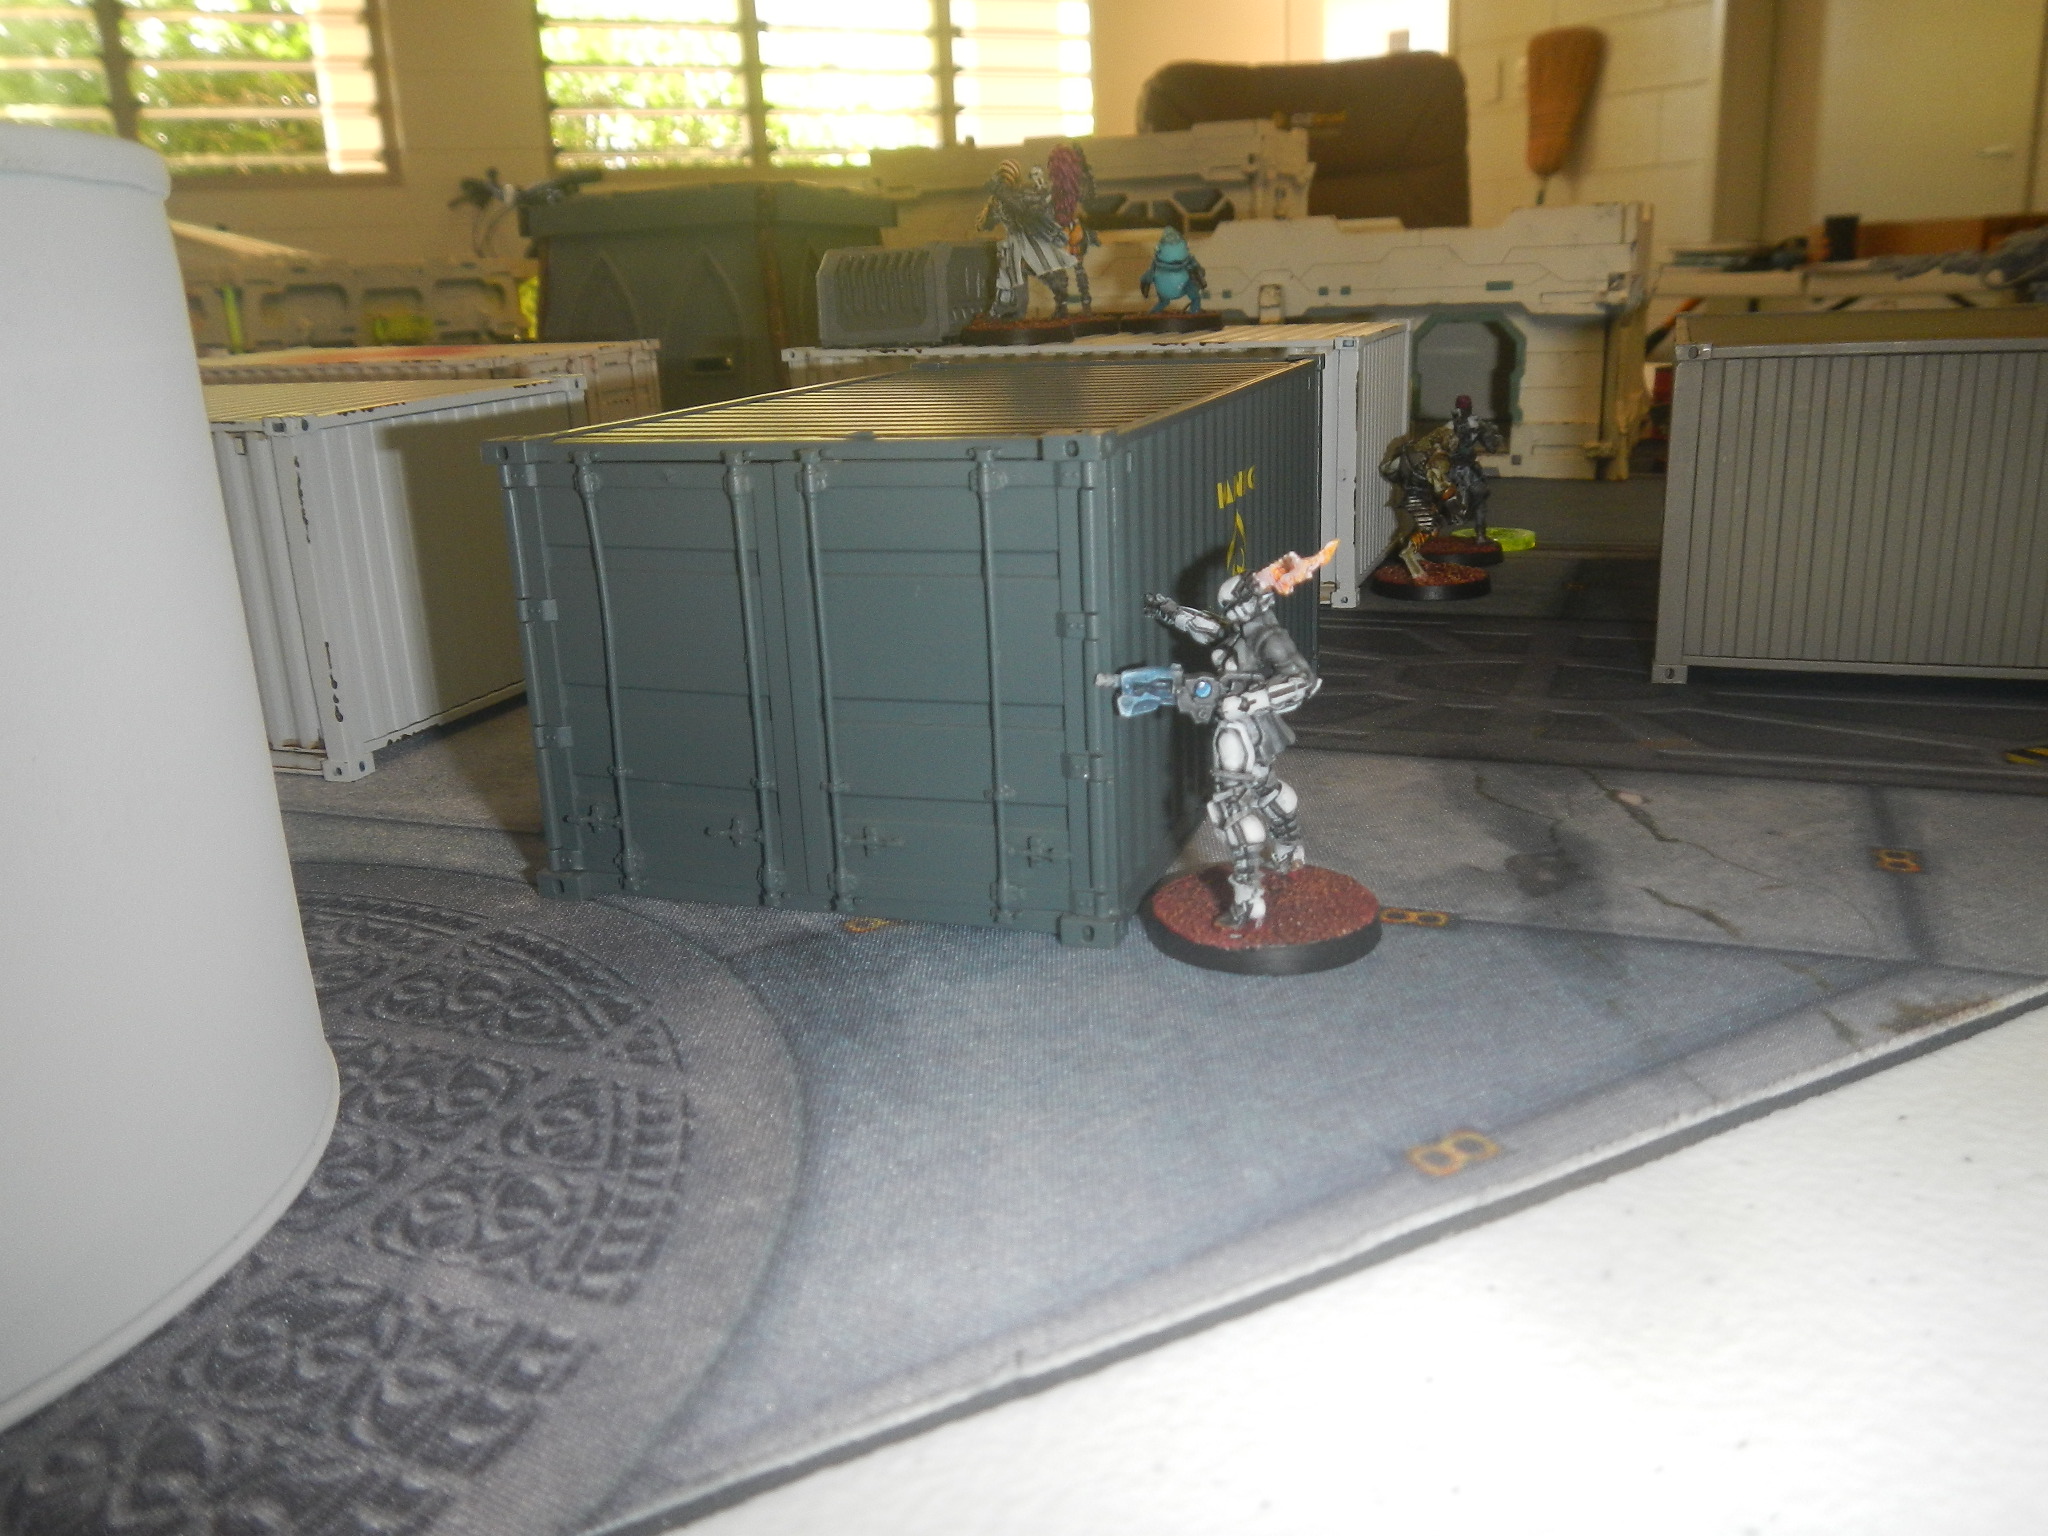 Tohaa left flank seems to held by this Kaeltar. He'll need watching in case he tries to slip around that flank.
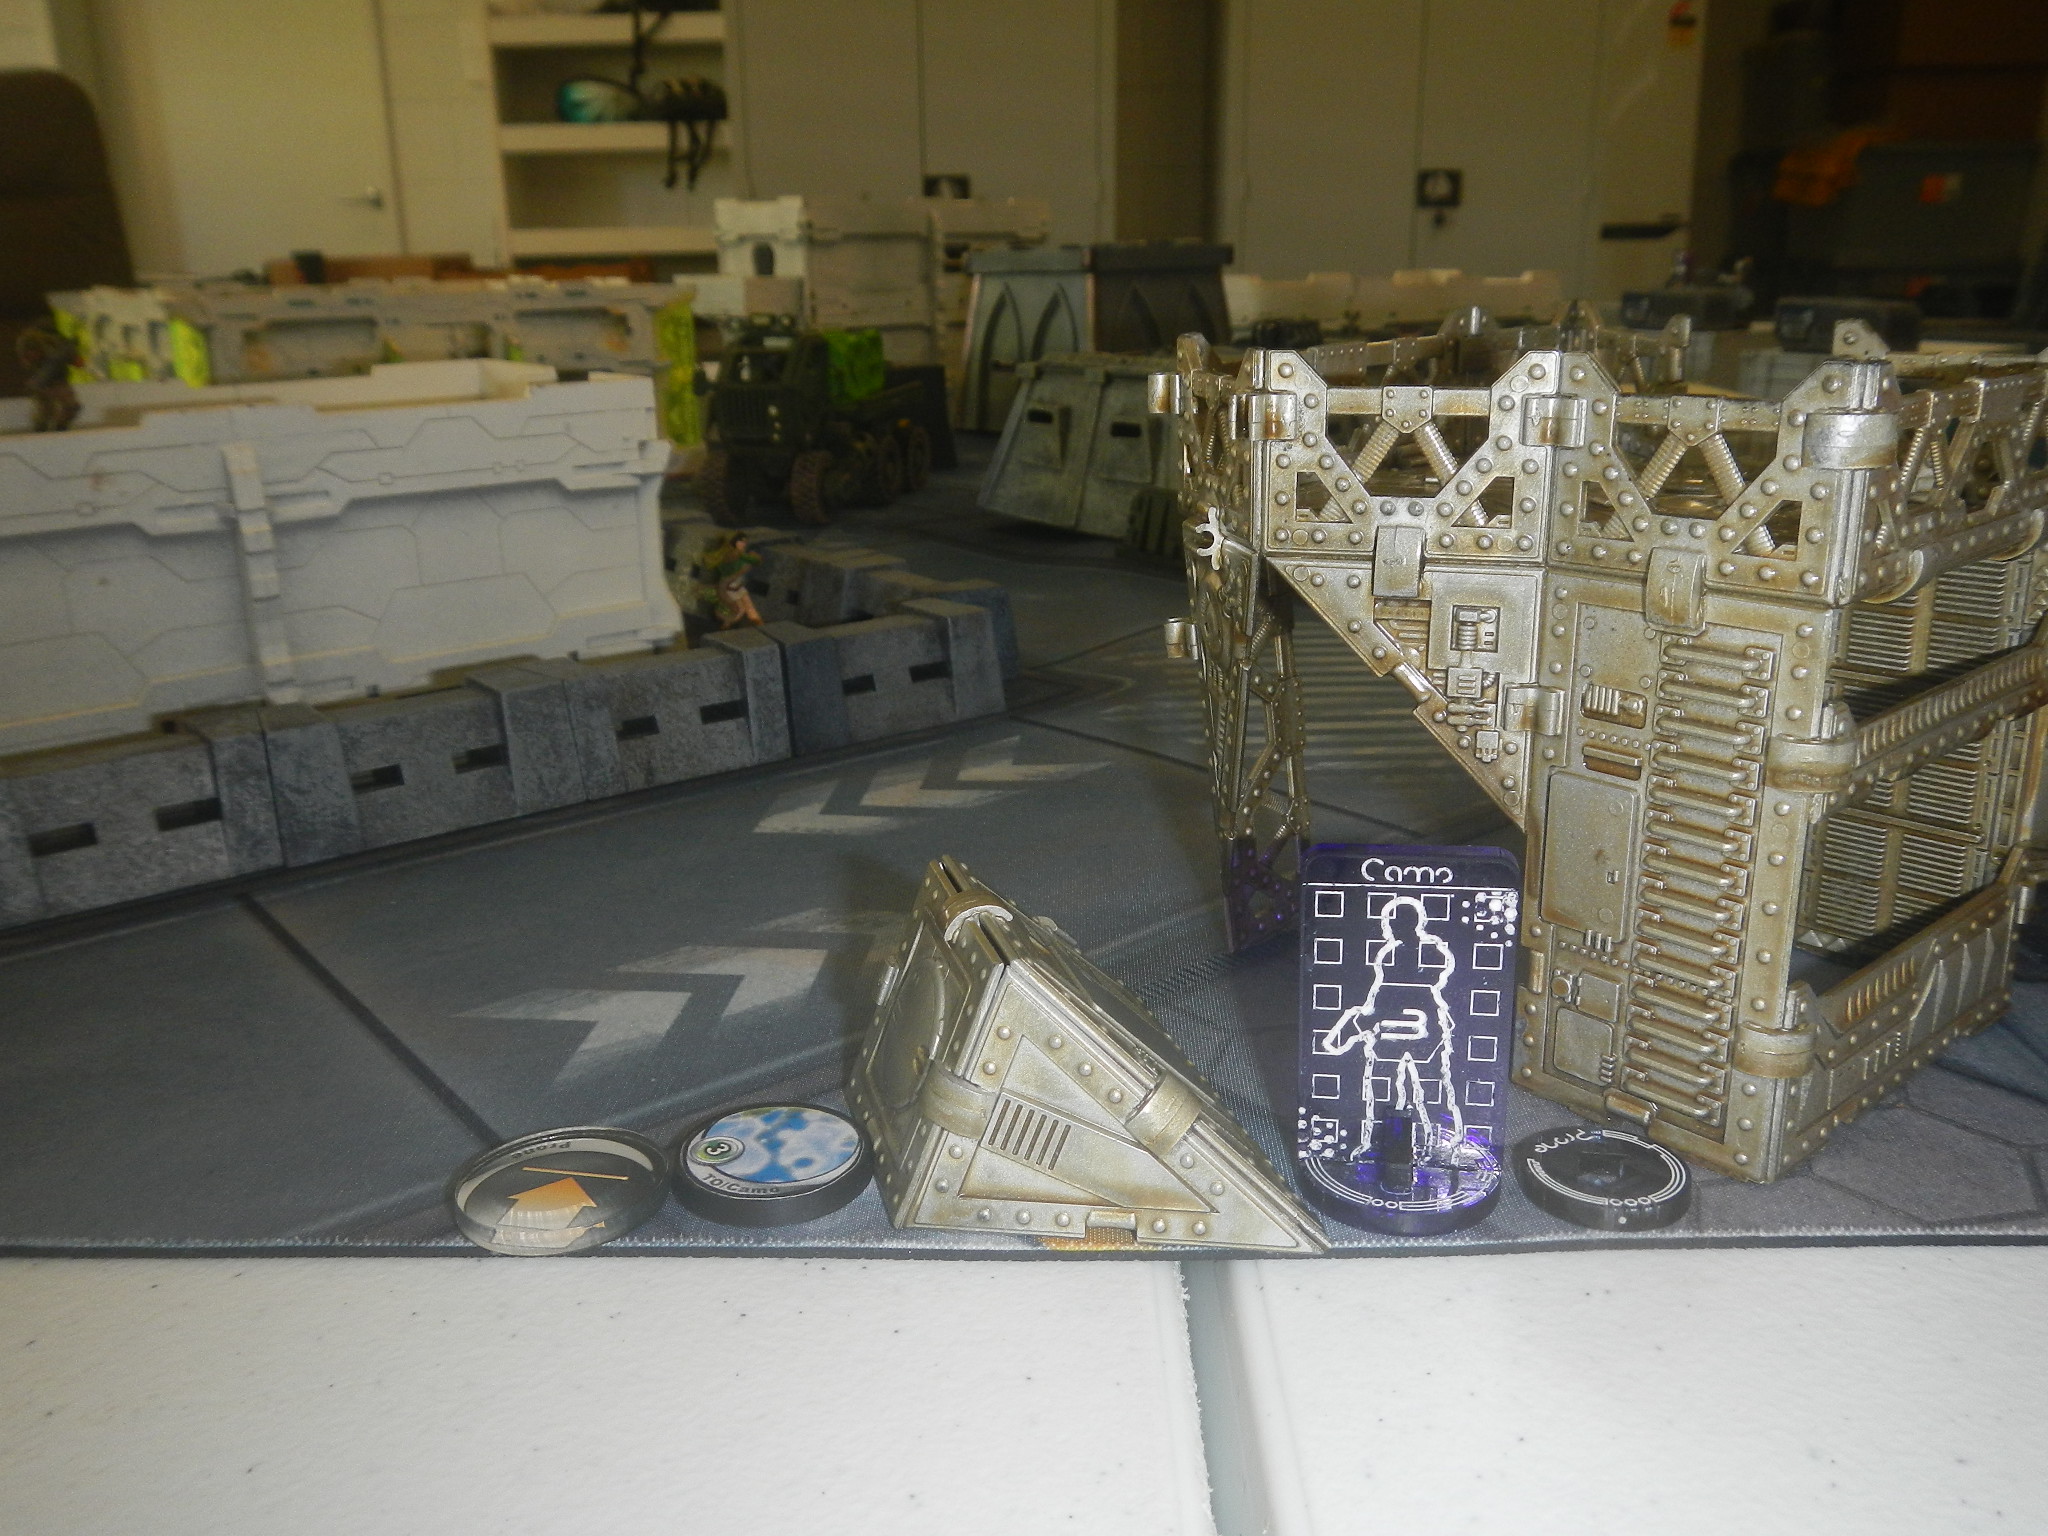 The Hawa FO is hidden forward on Z-21's right flank and has it covered. What's that suspicious shimmer on the other side of her position though?
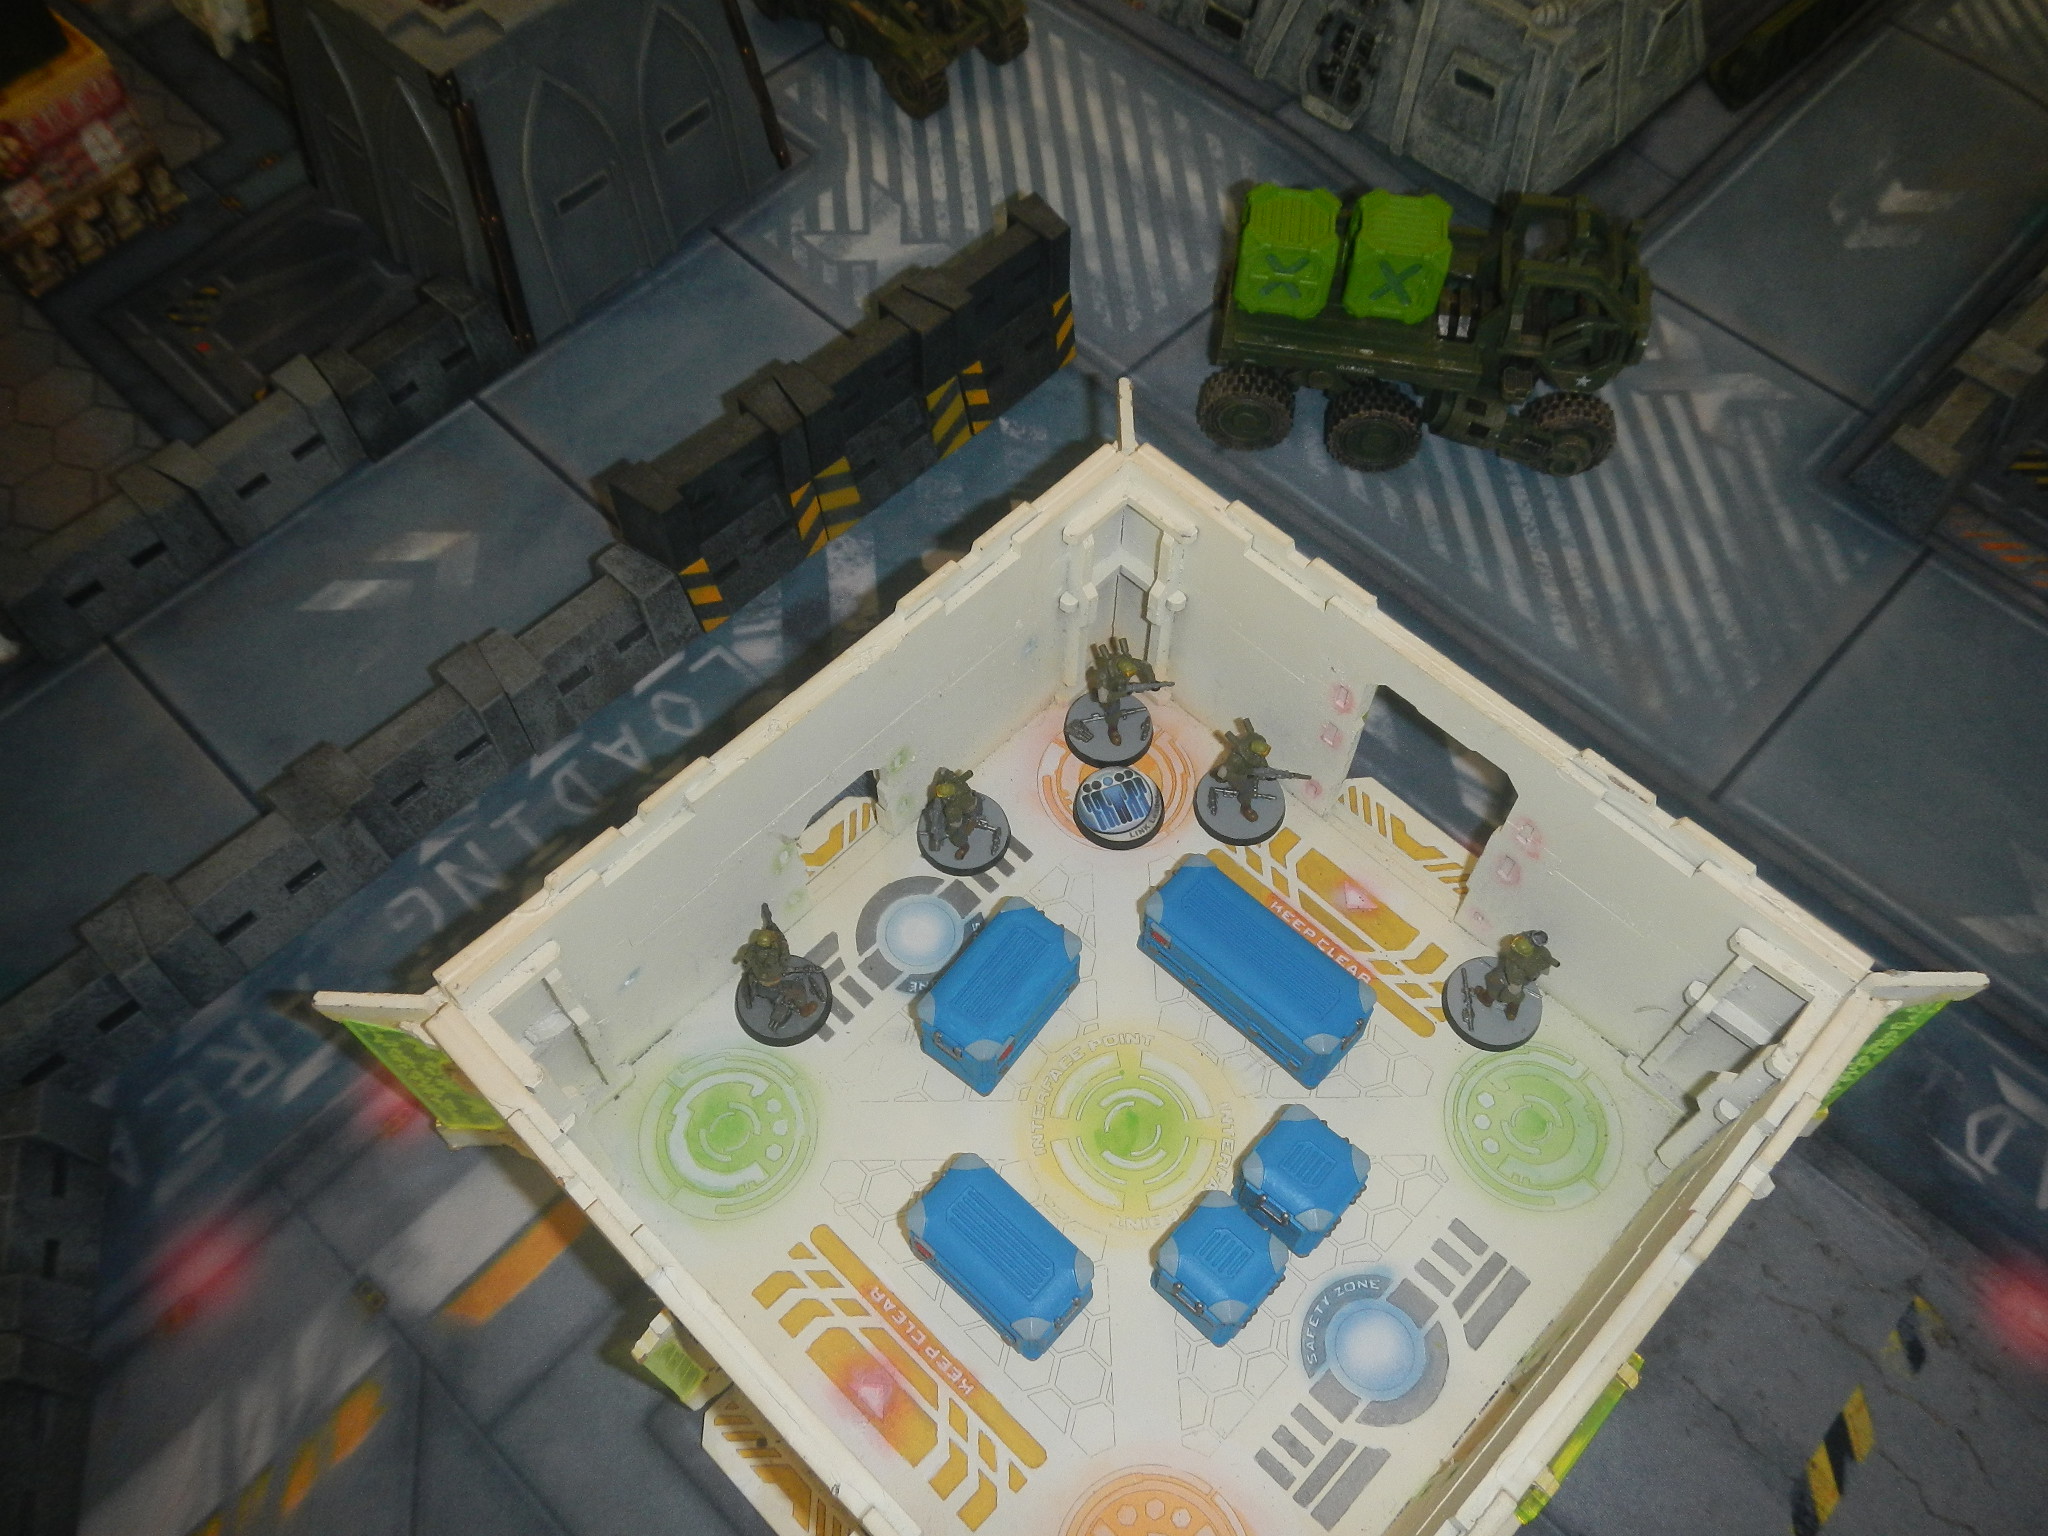 The Sekban LT seems to have his fire-team well positioned to control ground and move up to check that suspicious civilian near the tall bunker. Might even have a shot through the doorway down at the clump of Tohaa near the orange drums.
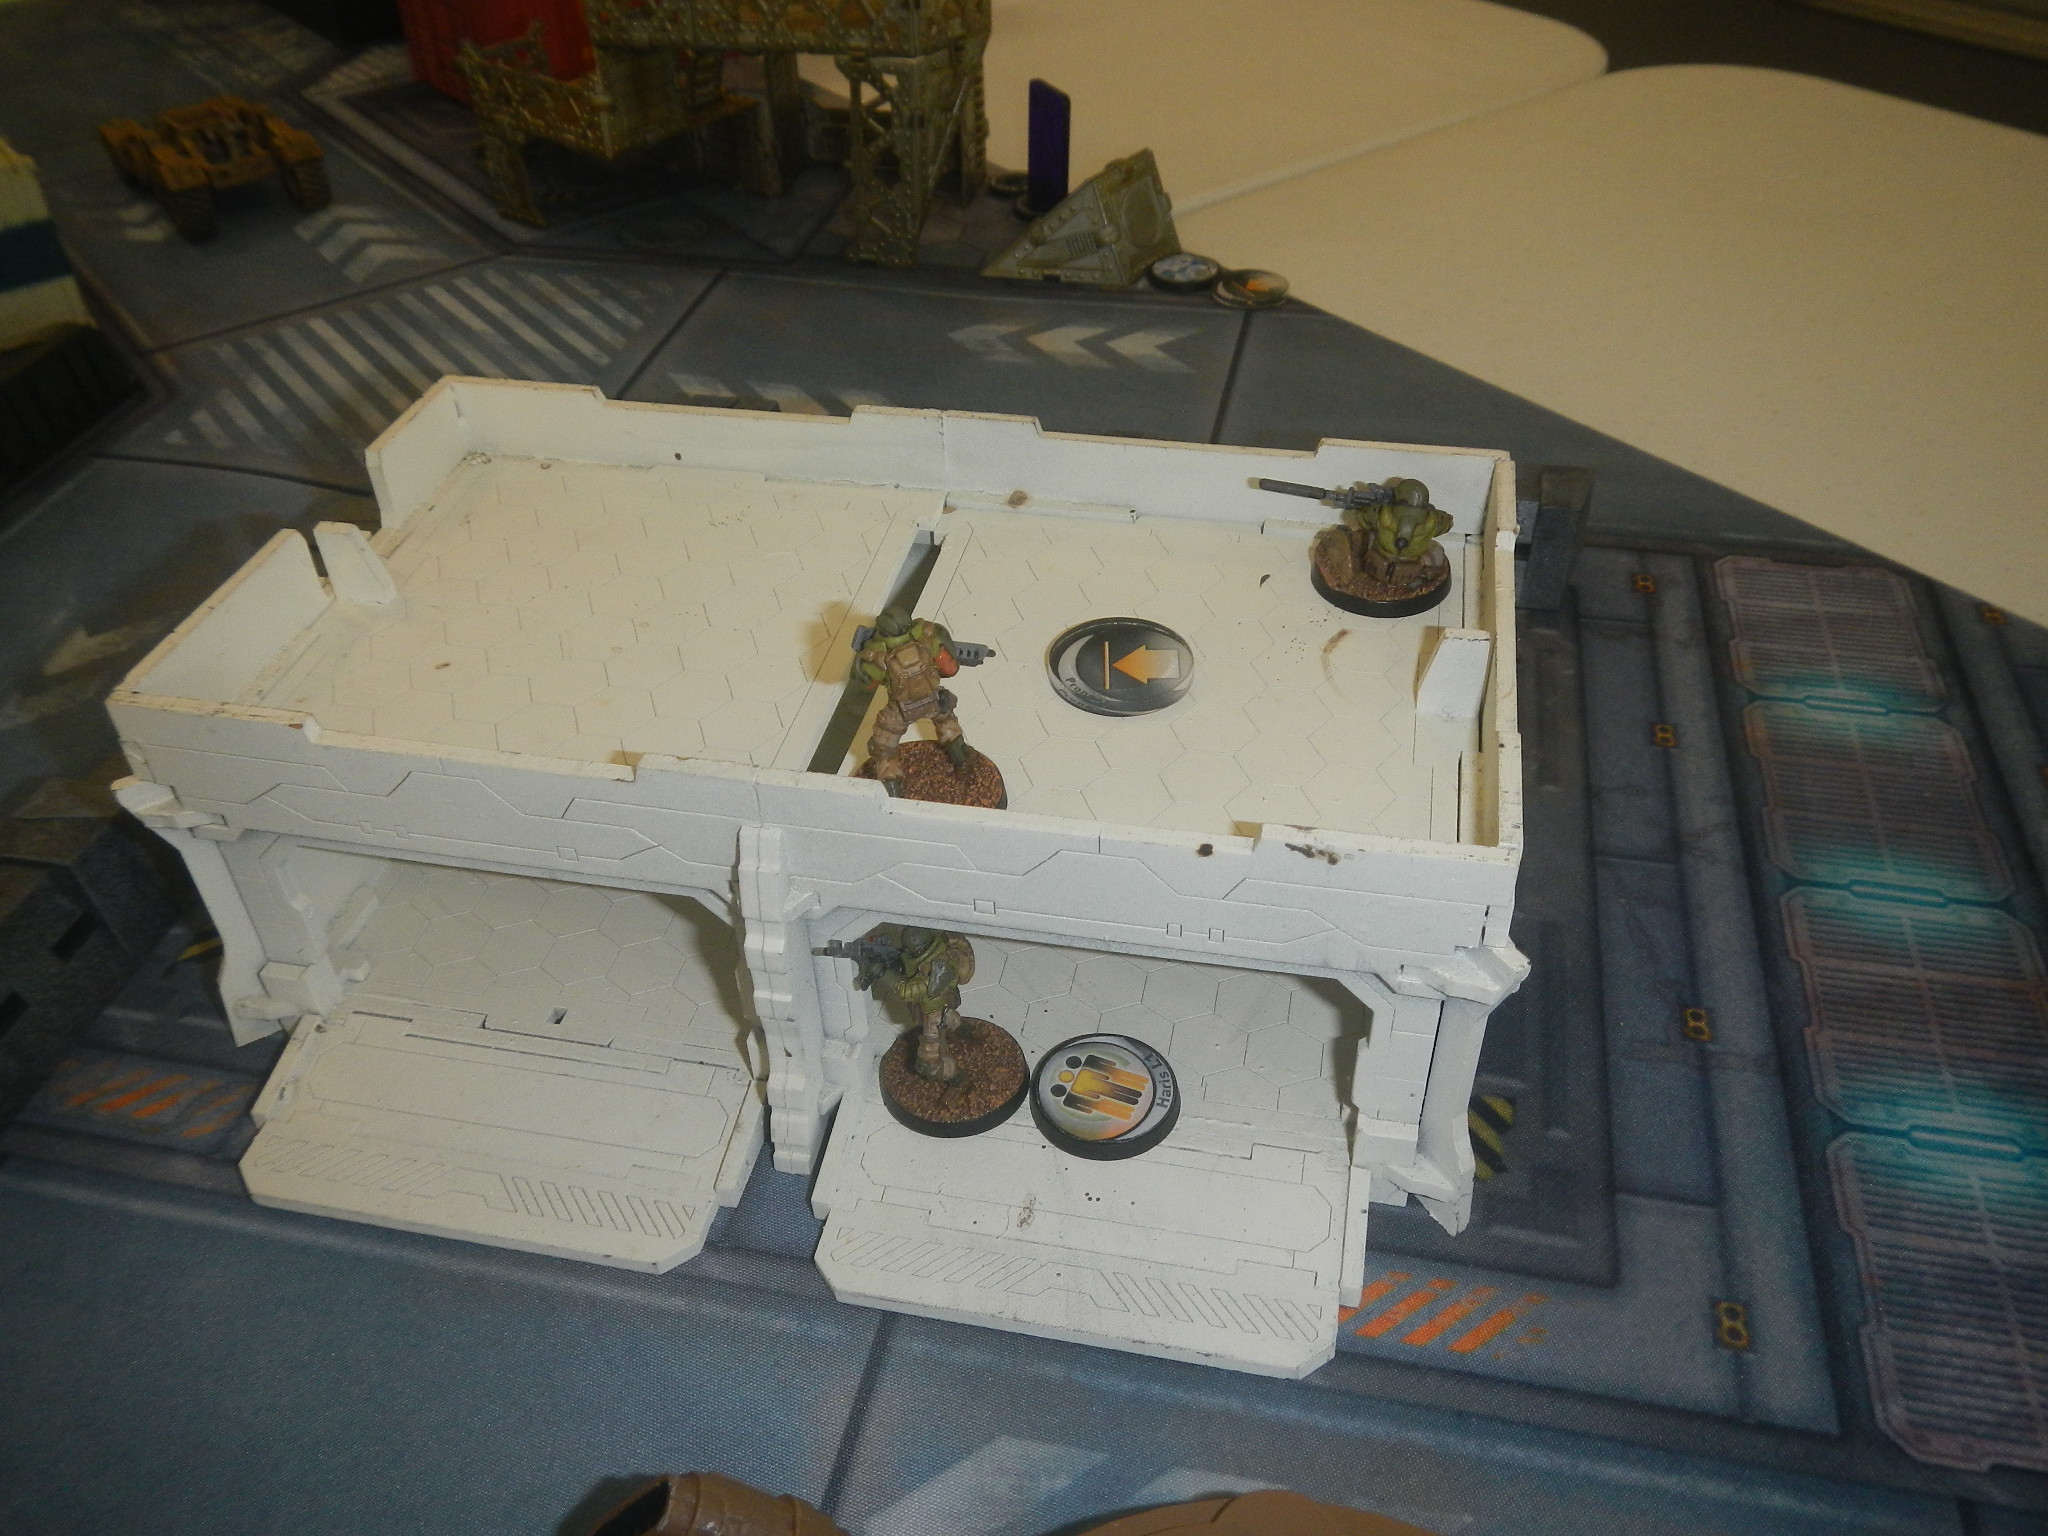 The Djanbazan Harris will need to crawl forward more, but once at the edge of the building will be in a dominant position. Taking out the Sukeul will be a priority.
NOTE: the Tohaa had attempted to infiltrate a Clipsos into the QK side of the board but this had failed.
QK Turn 1: Tohaa use 1 CT to remove two orders from the Sekban group (group 1).
Responding quickly to the attempted ambush, the Sekban LT directs his HRL to attack the Sukeul triad. Sekban HRL eases out of the door to attack the Sukeul ML but the alien is quicker. The Sekban HRL dies in an explosion that misses the remaining troopers. [Sekban rolled crap (1,1,20), took a hit and failed 2/3 ARM).
Use CT to reform link. Sekban Spitfire cautiously slips out of the door and down to the abandoned truck to engage the Sukeul HMG. Misses 4/5 shots and takes a critical to go UNC. Link gone again.
Djanbazan Harris crawl forward to the edge of the building. Djanbazan sniper peeks out and engages the Sukeul HMG. Misses both shots, takes two hits but makes ARM saves. Tries again. The Sukeul must have been expecting this, as it's fire knocks him UNC (Djan rolled a 1, 18 & 19, took a hit and failed ARM). Harris Link broken. At least the Djanbazan made it back into cover before collapsing.
The Ghulam lass runs forward to take cover at the back of the two storey building. End of turn.
A totally frustrating debacle of a turn for QK. Three soldiers down (1 KIA) and both links broken. Also, all remaining troopers are prone, so the way is clear for the Tohaa to advance.
Tohaa Turn 1: Start with full orders and even fuller confidence.
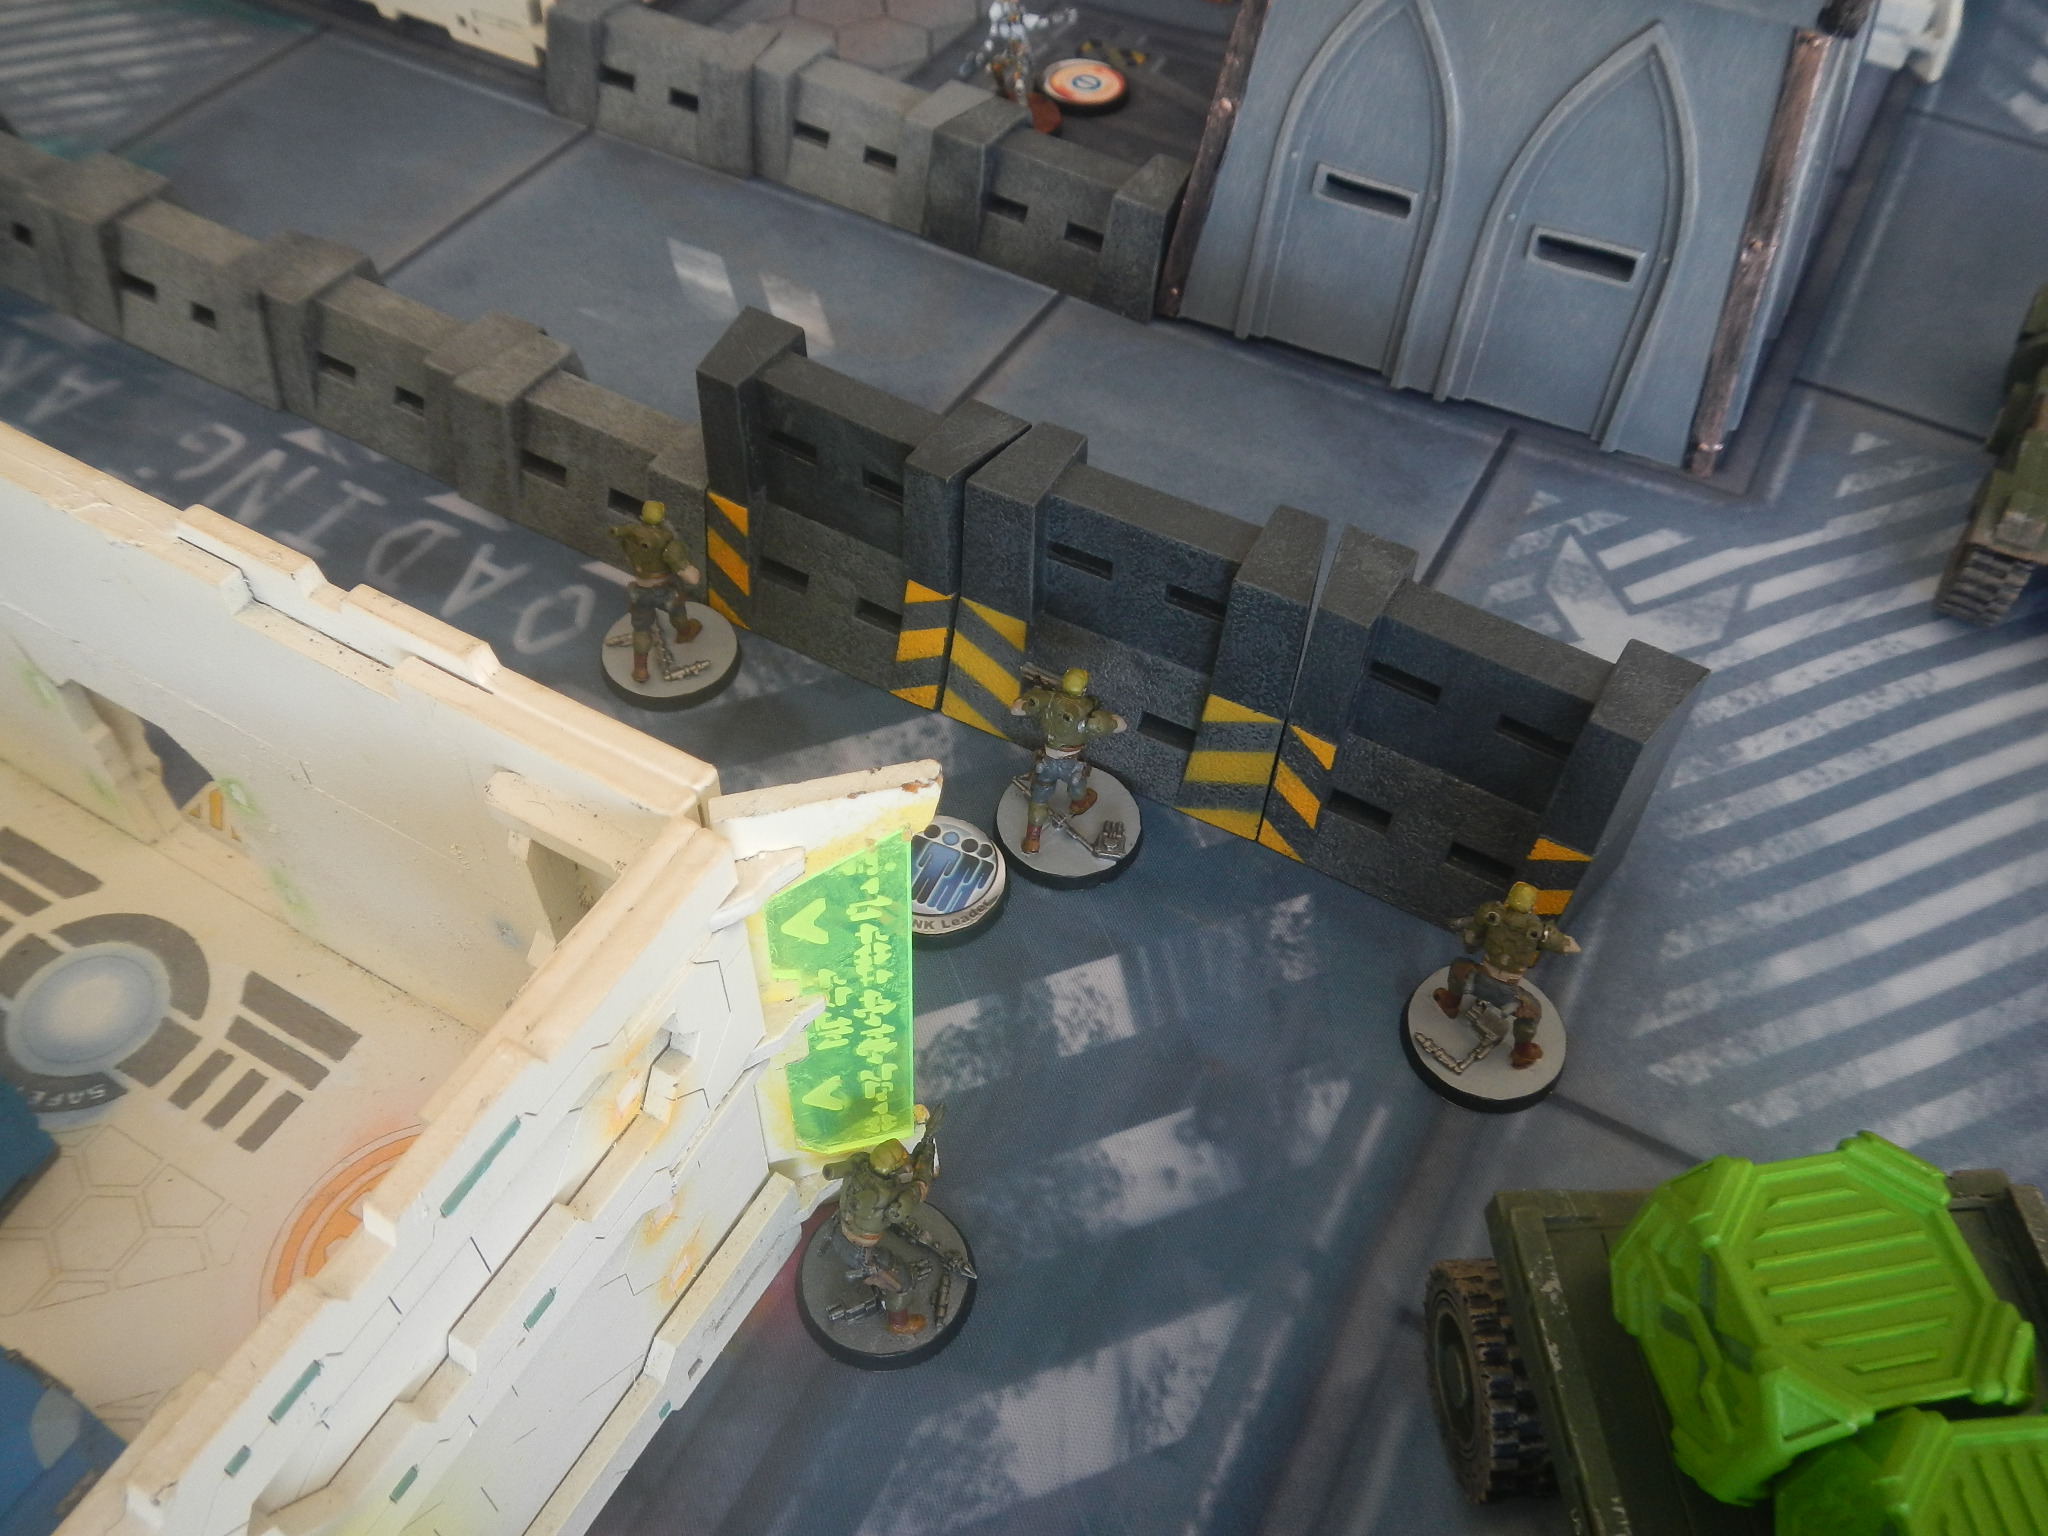
The Gorgos TAG and its Chaksa peripheral (LSG) lead the Tohaa advance by moving unopposed down the Tohaa's right flank. As it draws level with QK's forward troops, the Hawa hacker attempts Oblivion but the TAG passes BTS. The Ghulam lass lays an E-Mauler through the door to cover both TAG and Chaksa.
Realising it is in a bad position, the Gorgos attempts to move out of the area. The E-Mauler goes off, isolating and shutting down the Chaksa, but the Gorgos passes BTS again. The Ghulam lass plants another E-Mauler. At the same time, the Hawa hacker attempts Oblivion again and succeeds in gaining possession of the TAG. Suddenly the Tohaa aren't quite so chirpy.
Recognising the potential threat, the Tohaa commander gives orders to rake down the TAG. The Sukeul triad has LOS, so the ML opens up on the TAG from behind. The Sukeul ML gets one hit which causes only one wound on the TAG. Seems Tohaa armour is still pretty good. The possessed TAG turns and faces its attacker.
The Sukeul HMG with the symbiomate steps into the attack, firing on the possessed TAG. The controlling Hawa elects to ARO with the TAG's Flammenspear and miraculously gets a hit. The fiery template blows the symbiomate, kills the ML, and deactivates the HMG's symbiont armour. The Sukeul HMG decides to go prone out of sight. The triad is broken.
The aliens can't afford to have a possessed TAG attacking them, so the Sukeul HMG stands up and opens fire. The possessed TAG misses with the Flammenspear and takes 4 hits, fails 2 ARM and ejects the pilot. The Sukeul HMG fires again, eliminating the pilot who fails to dodge.
The Igao over near the scaffolding attempts to sneak behind the Djanbazan position but is discovered by the Hawa FO. This initiates a BSG duel that the Hawa loses to go UNC. (she hit but takes a critical in return). The Igao re-camos to end the turn.
Well, it turned out to be not much of a turn for the Tohaa either. They suffered 2 casualties (both KIA), three if you count the Chaksa. More importantly, they lost their TAG and the Sukeul triad. This makes the Makaul extremely impetuous. They did manage to knock-out the Hawa FO though and open up opportunities on that flank for the Igao.
 The Sekban link attempts to eliminate the Sukeul triad - and fails! The HRL gunner was killed near the doorway and the Spitfire gunner felled near the truck.
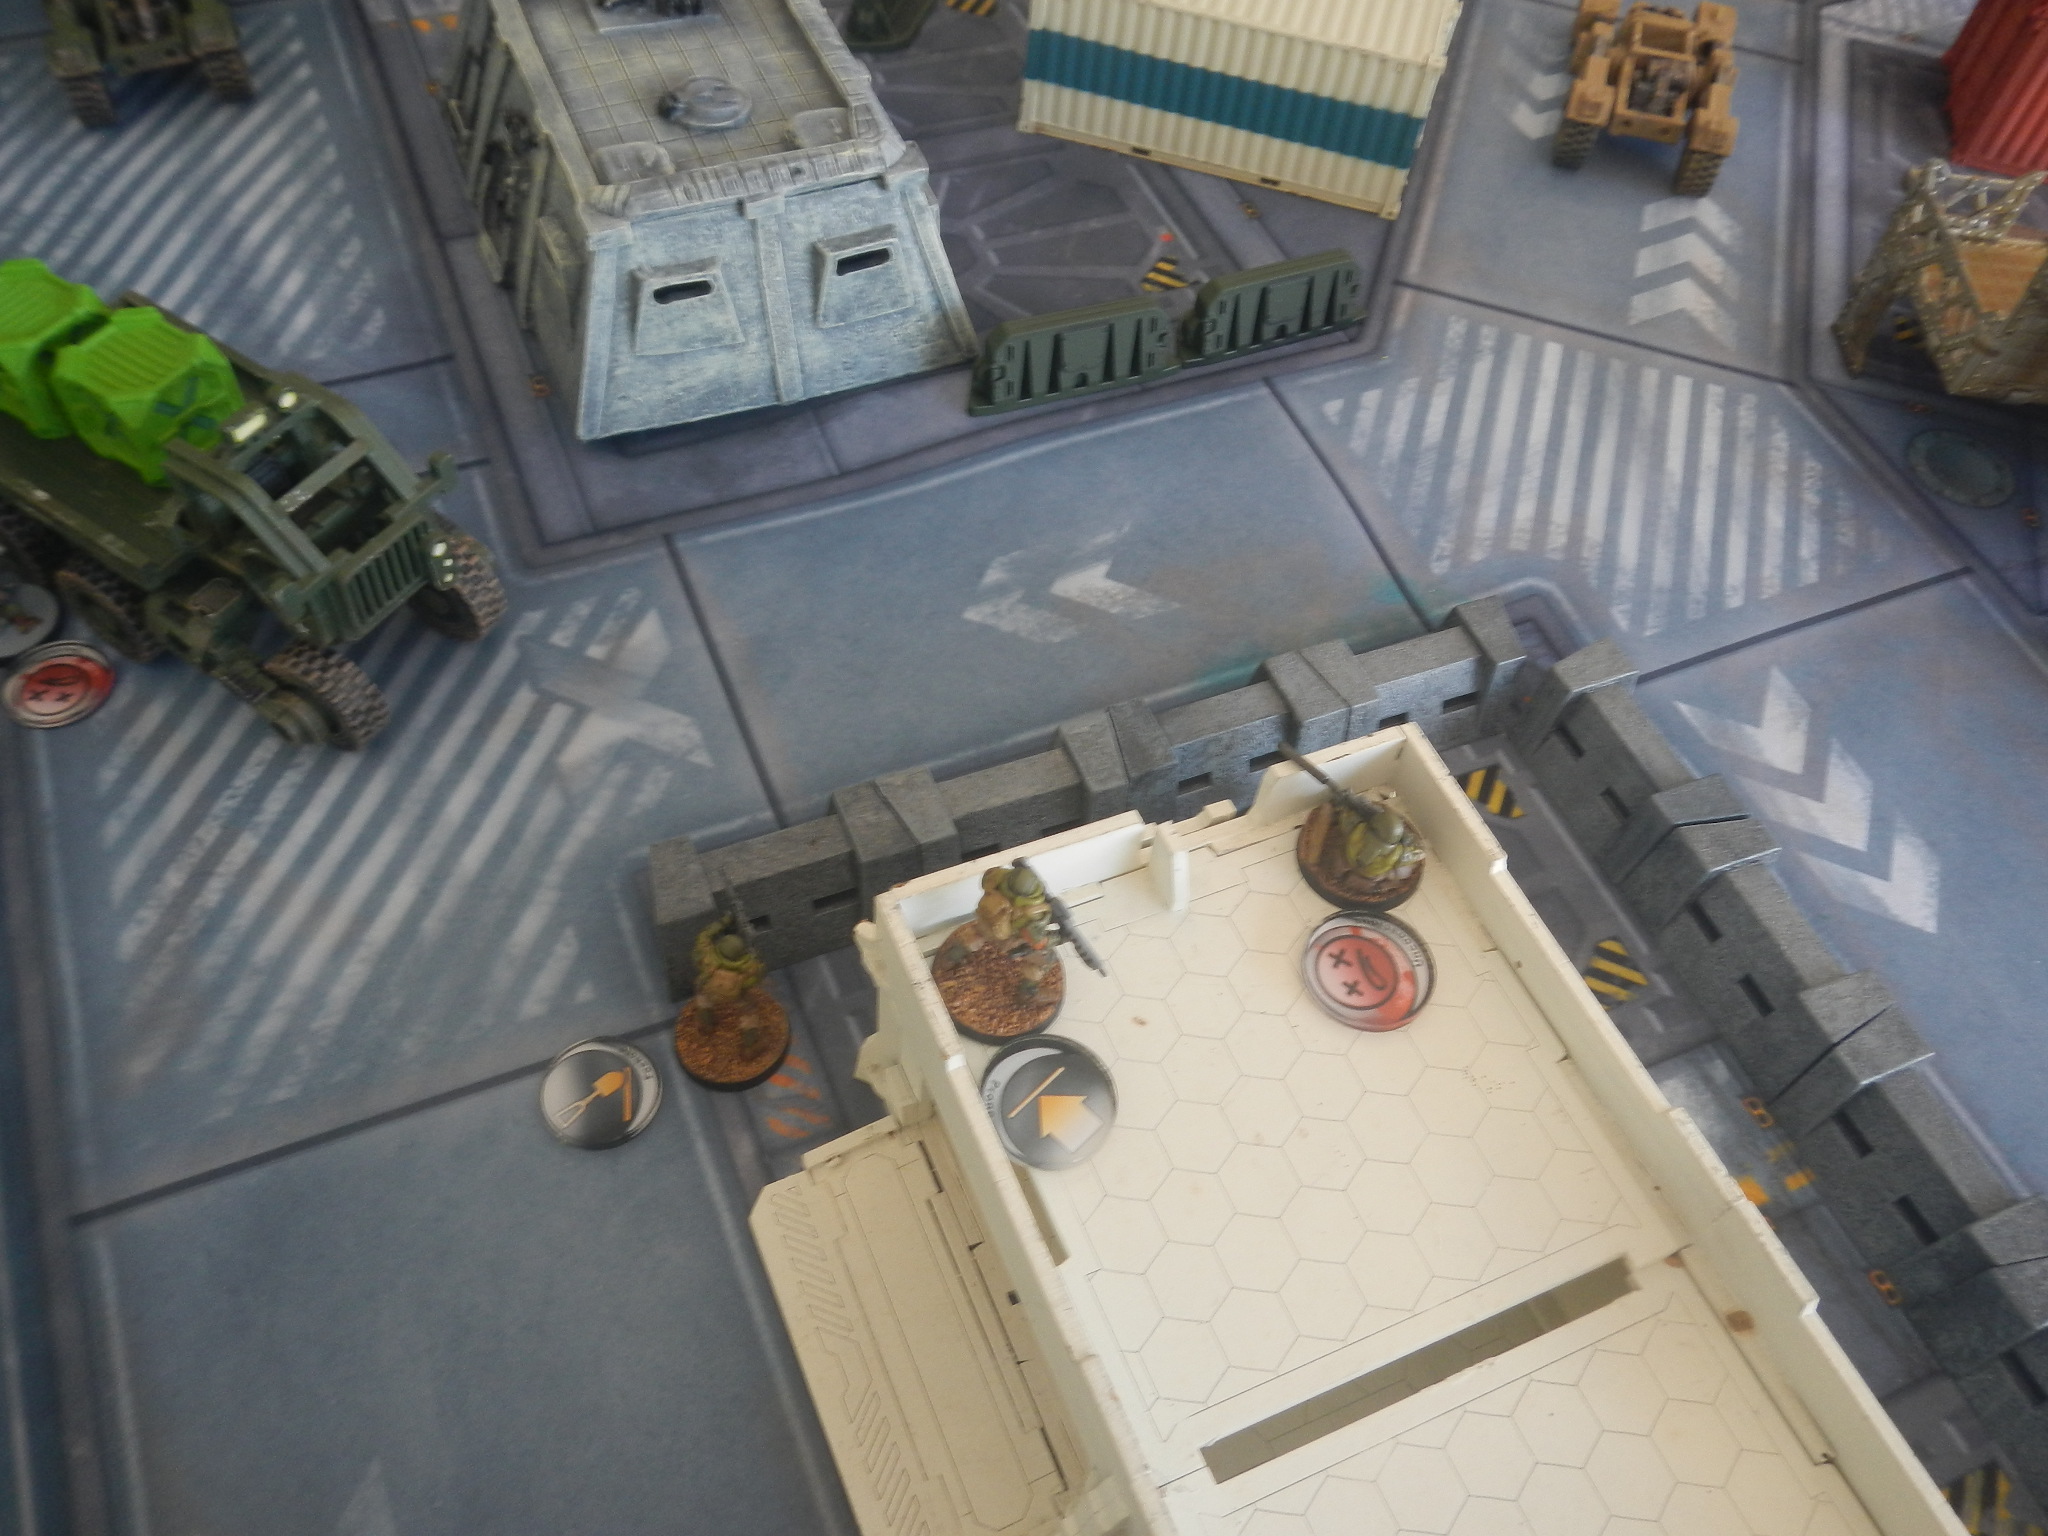 The Djanbazan Harris crawl forward and the sniper has a go at the Sukeul triad - also fails! At leas the Djanbazan sniper was able to get to cover before collapsing.
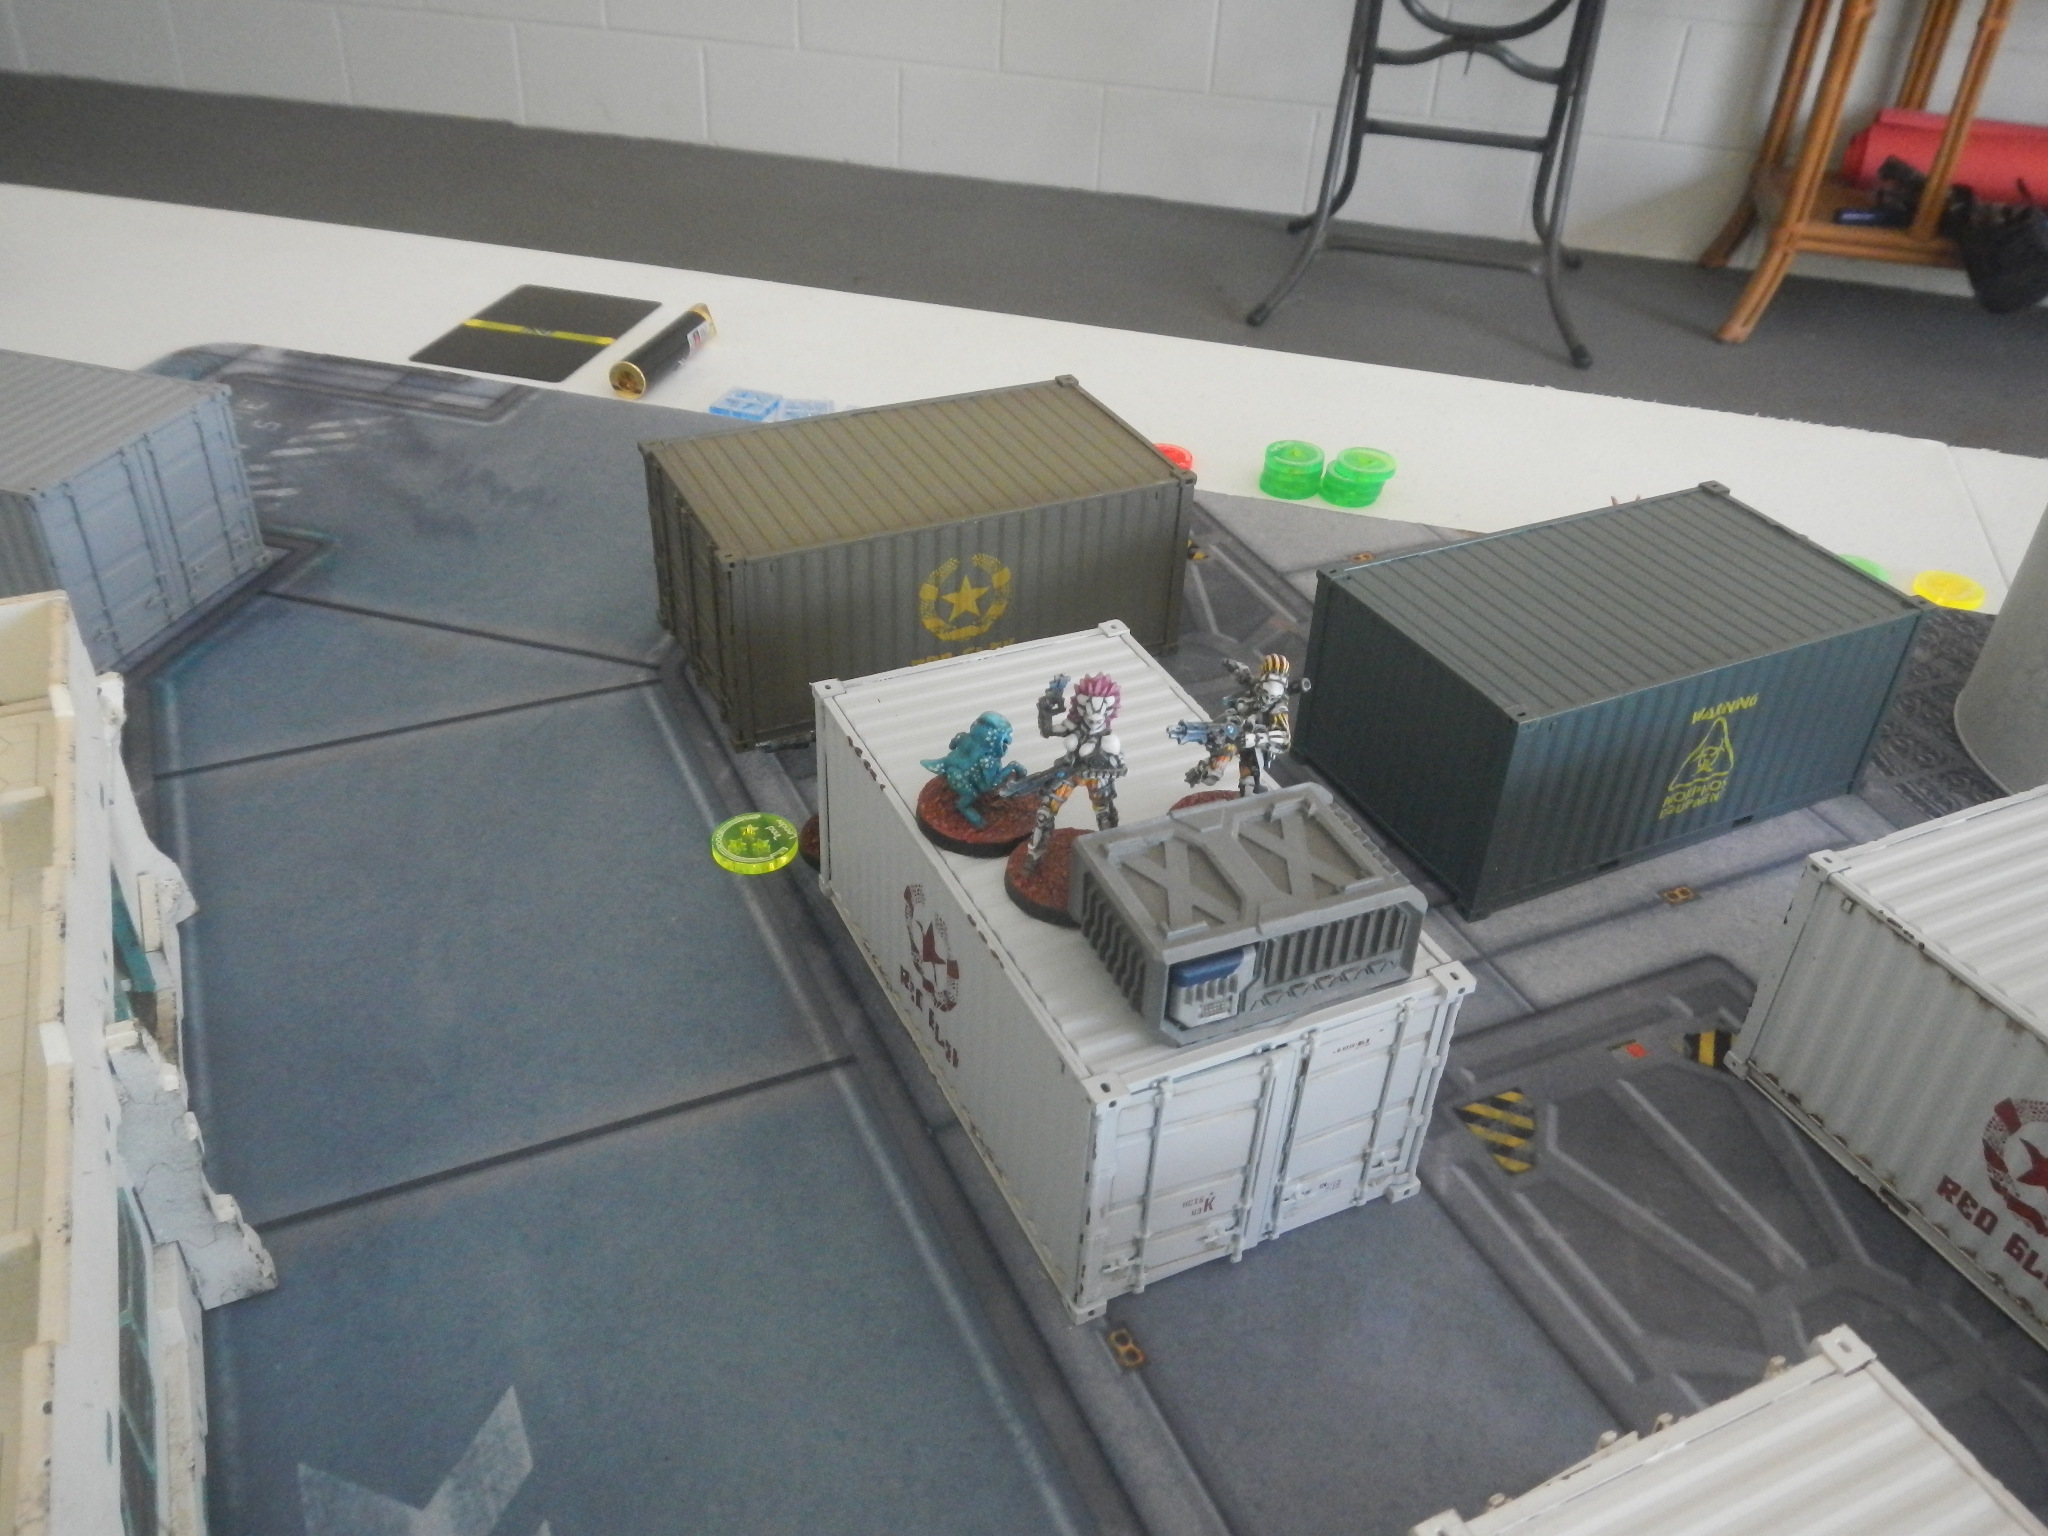
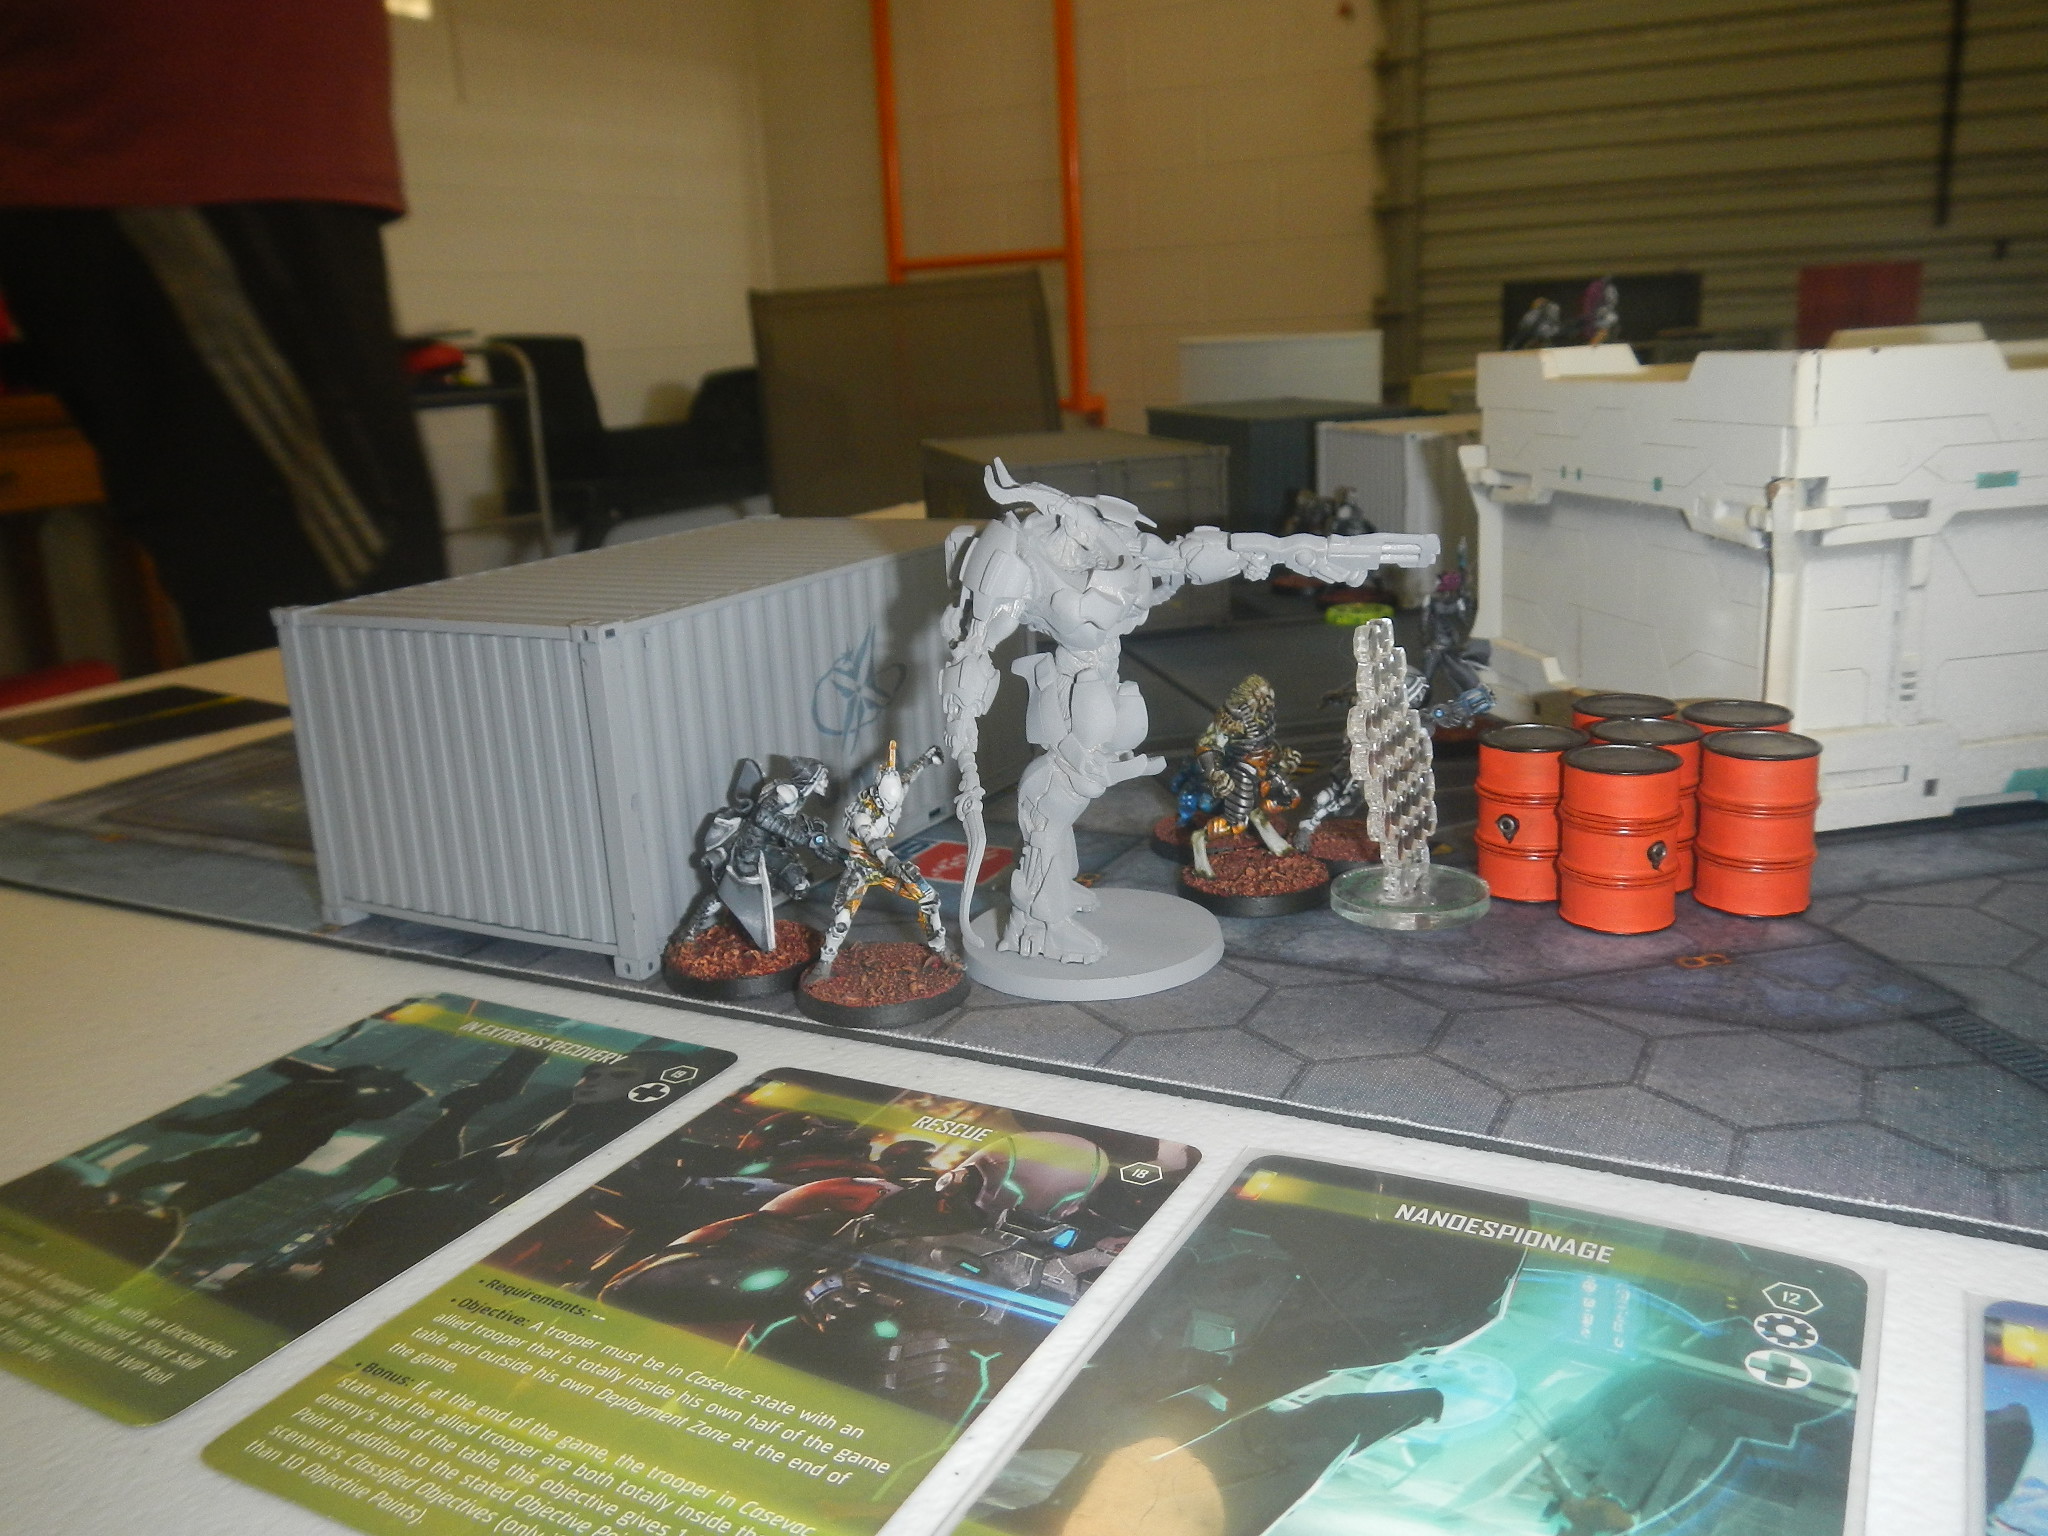
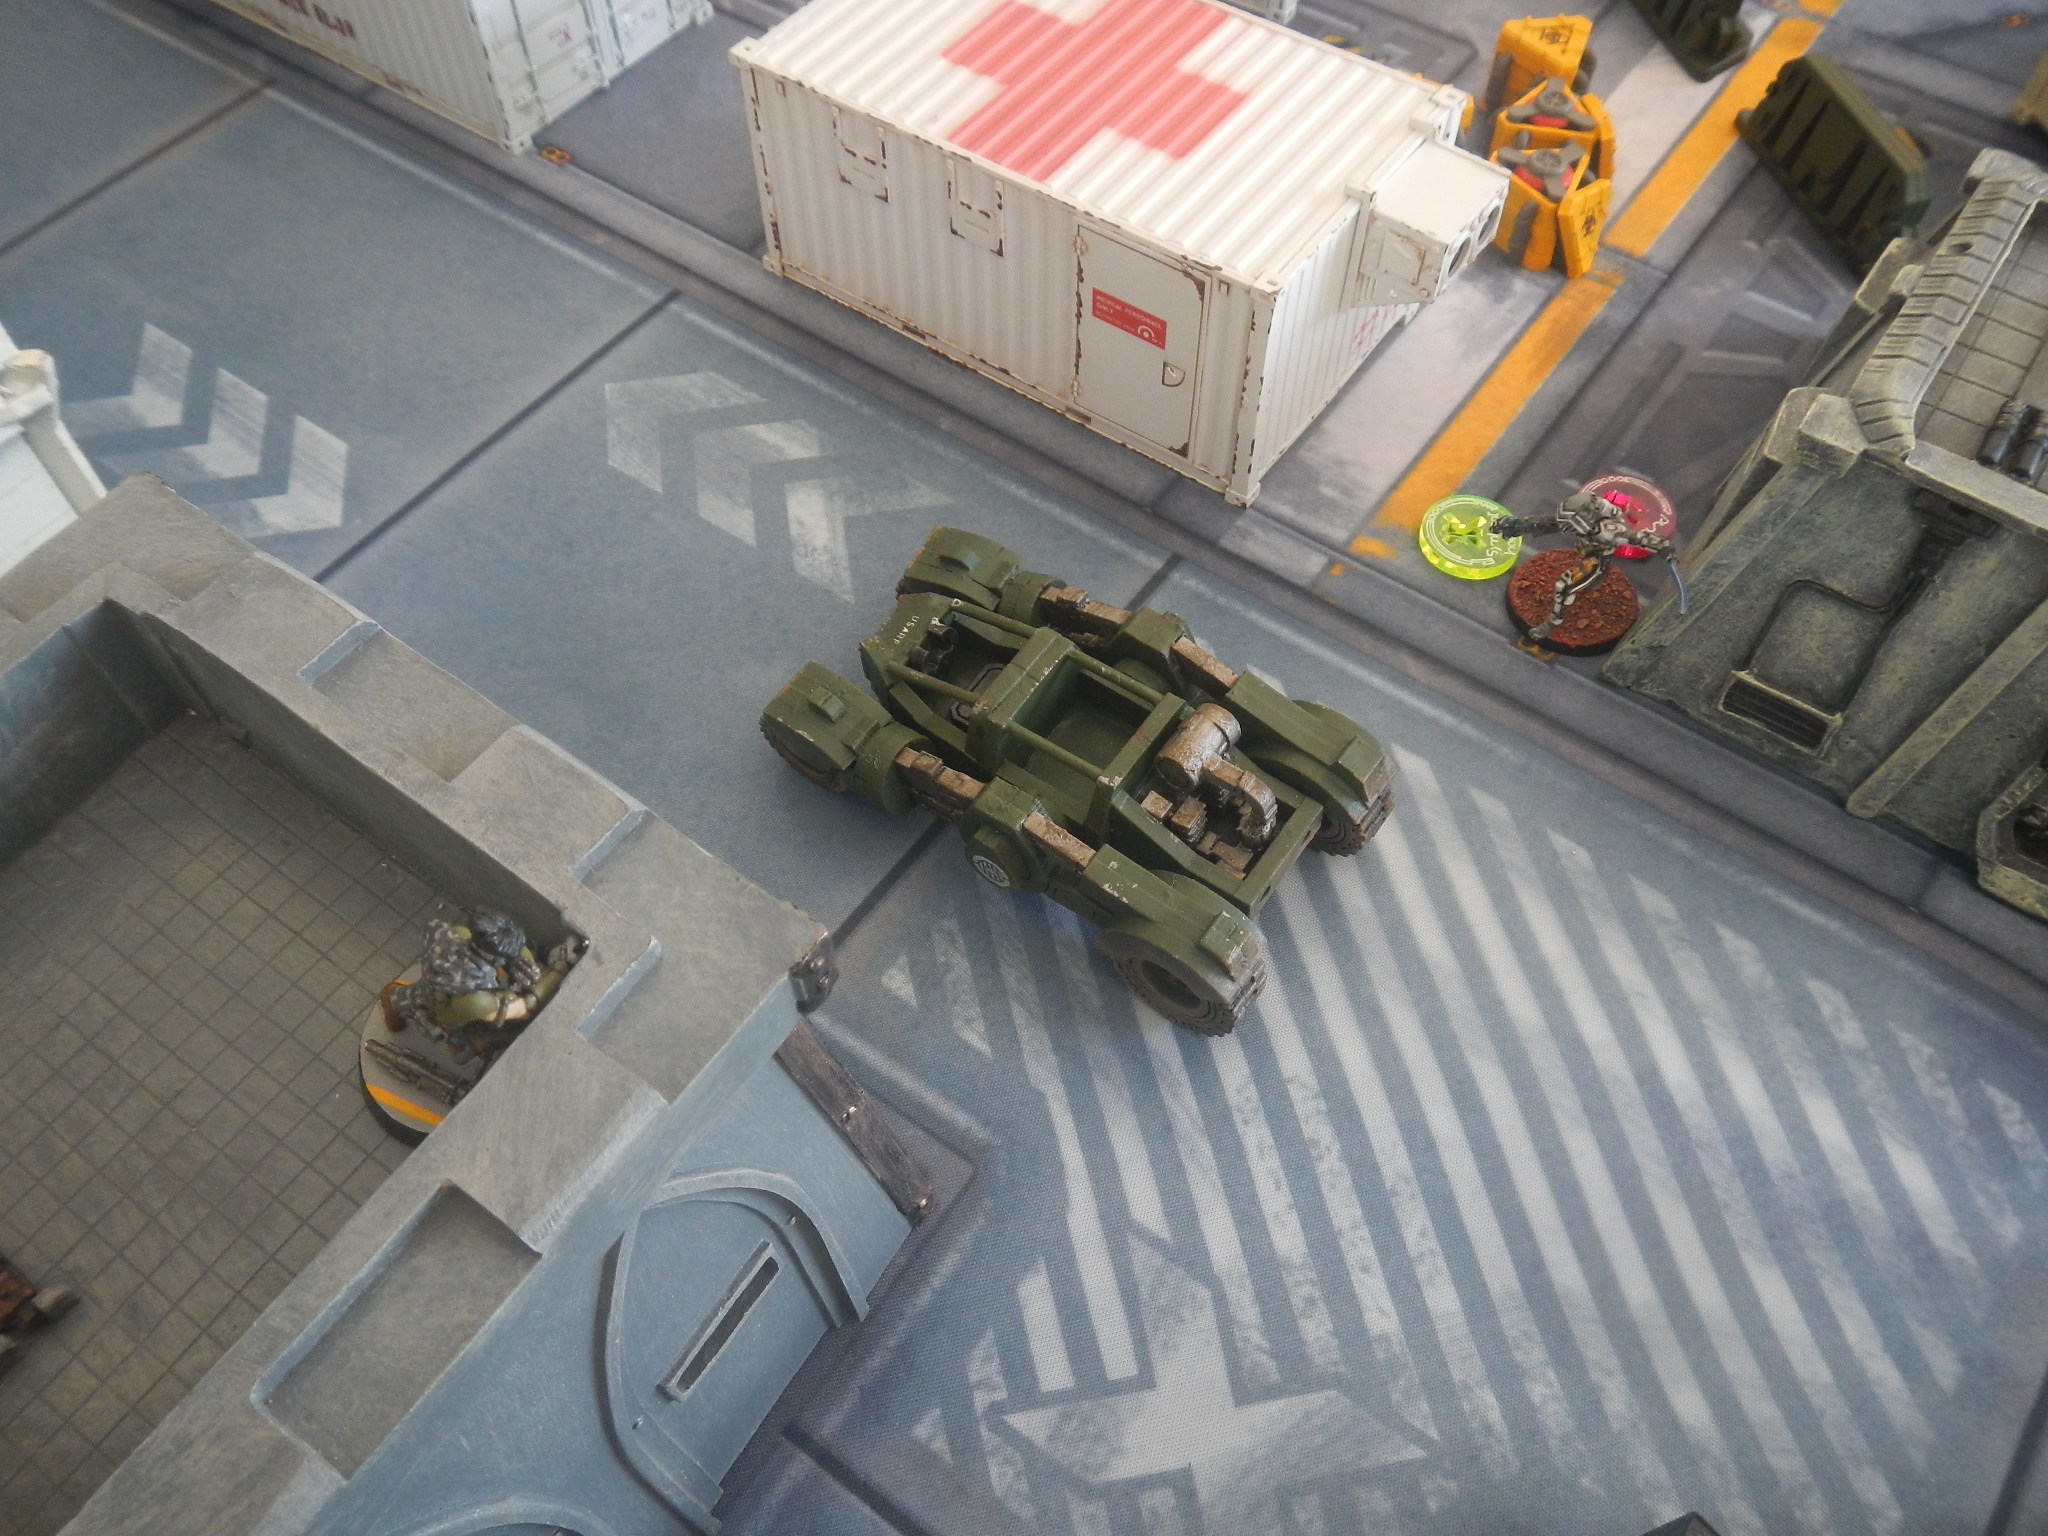
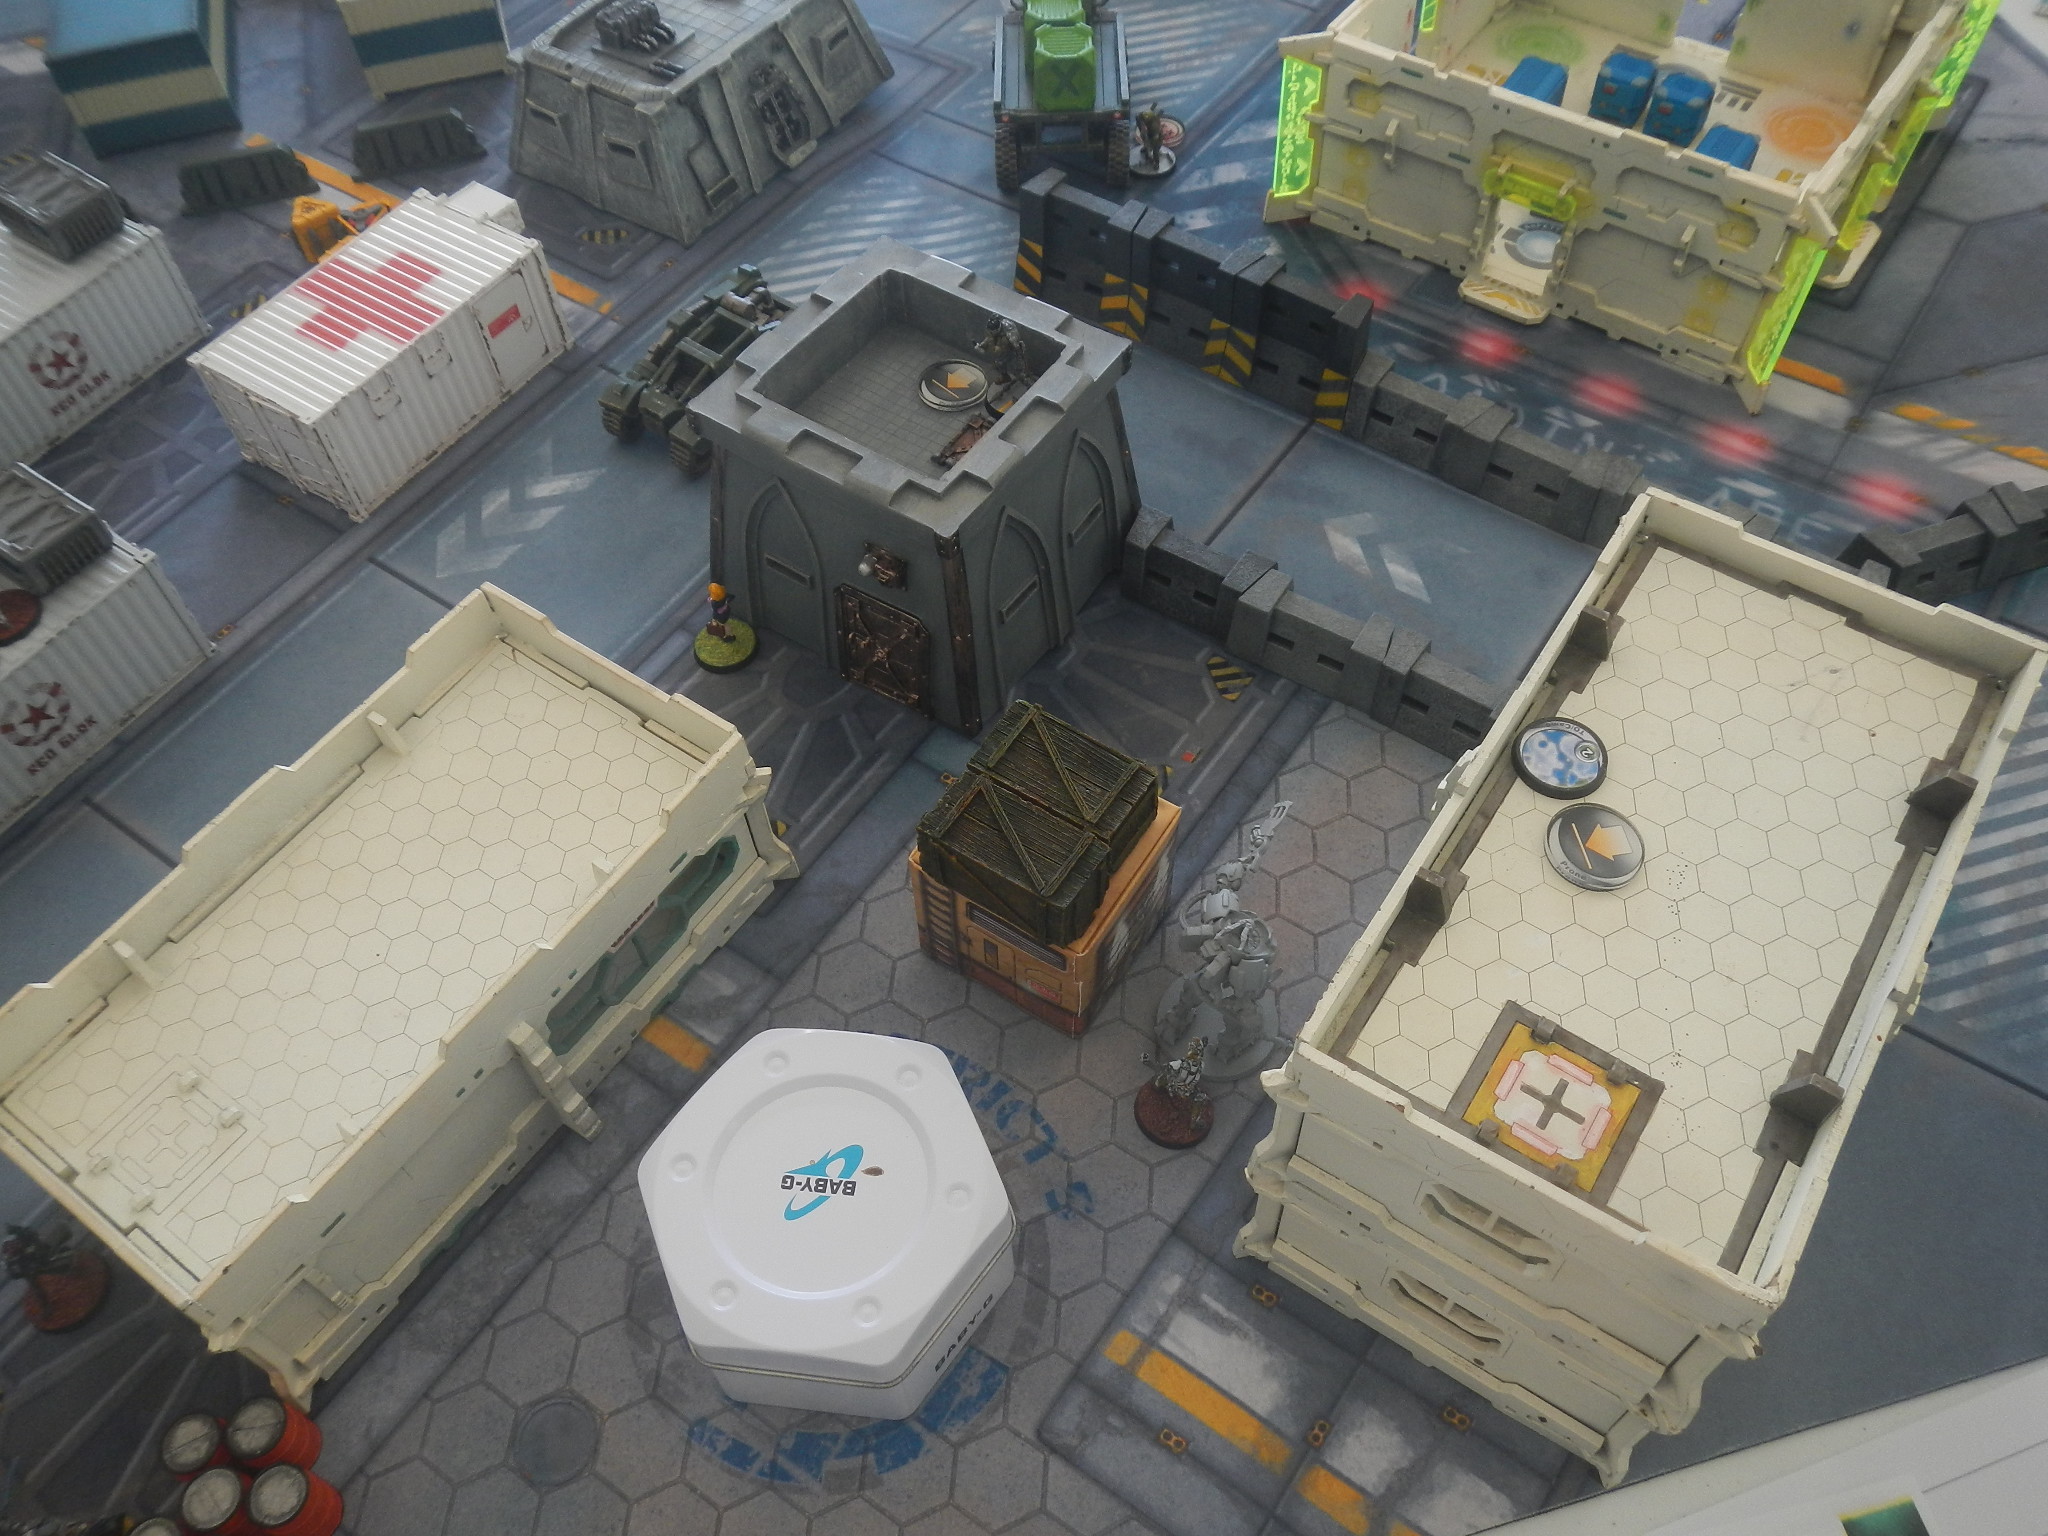 The Gorgos TAG advances with Chaksa peripheral in tow. It gets to this point then triggers an E-Mauler to lose its Chaksa peripheral, then gets possessed by the Hawa hacker hidden up on top of the tall bunker.
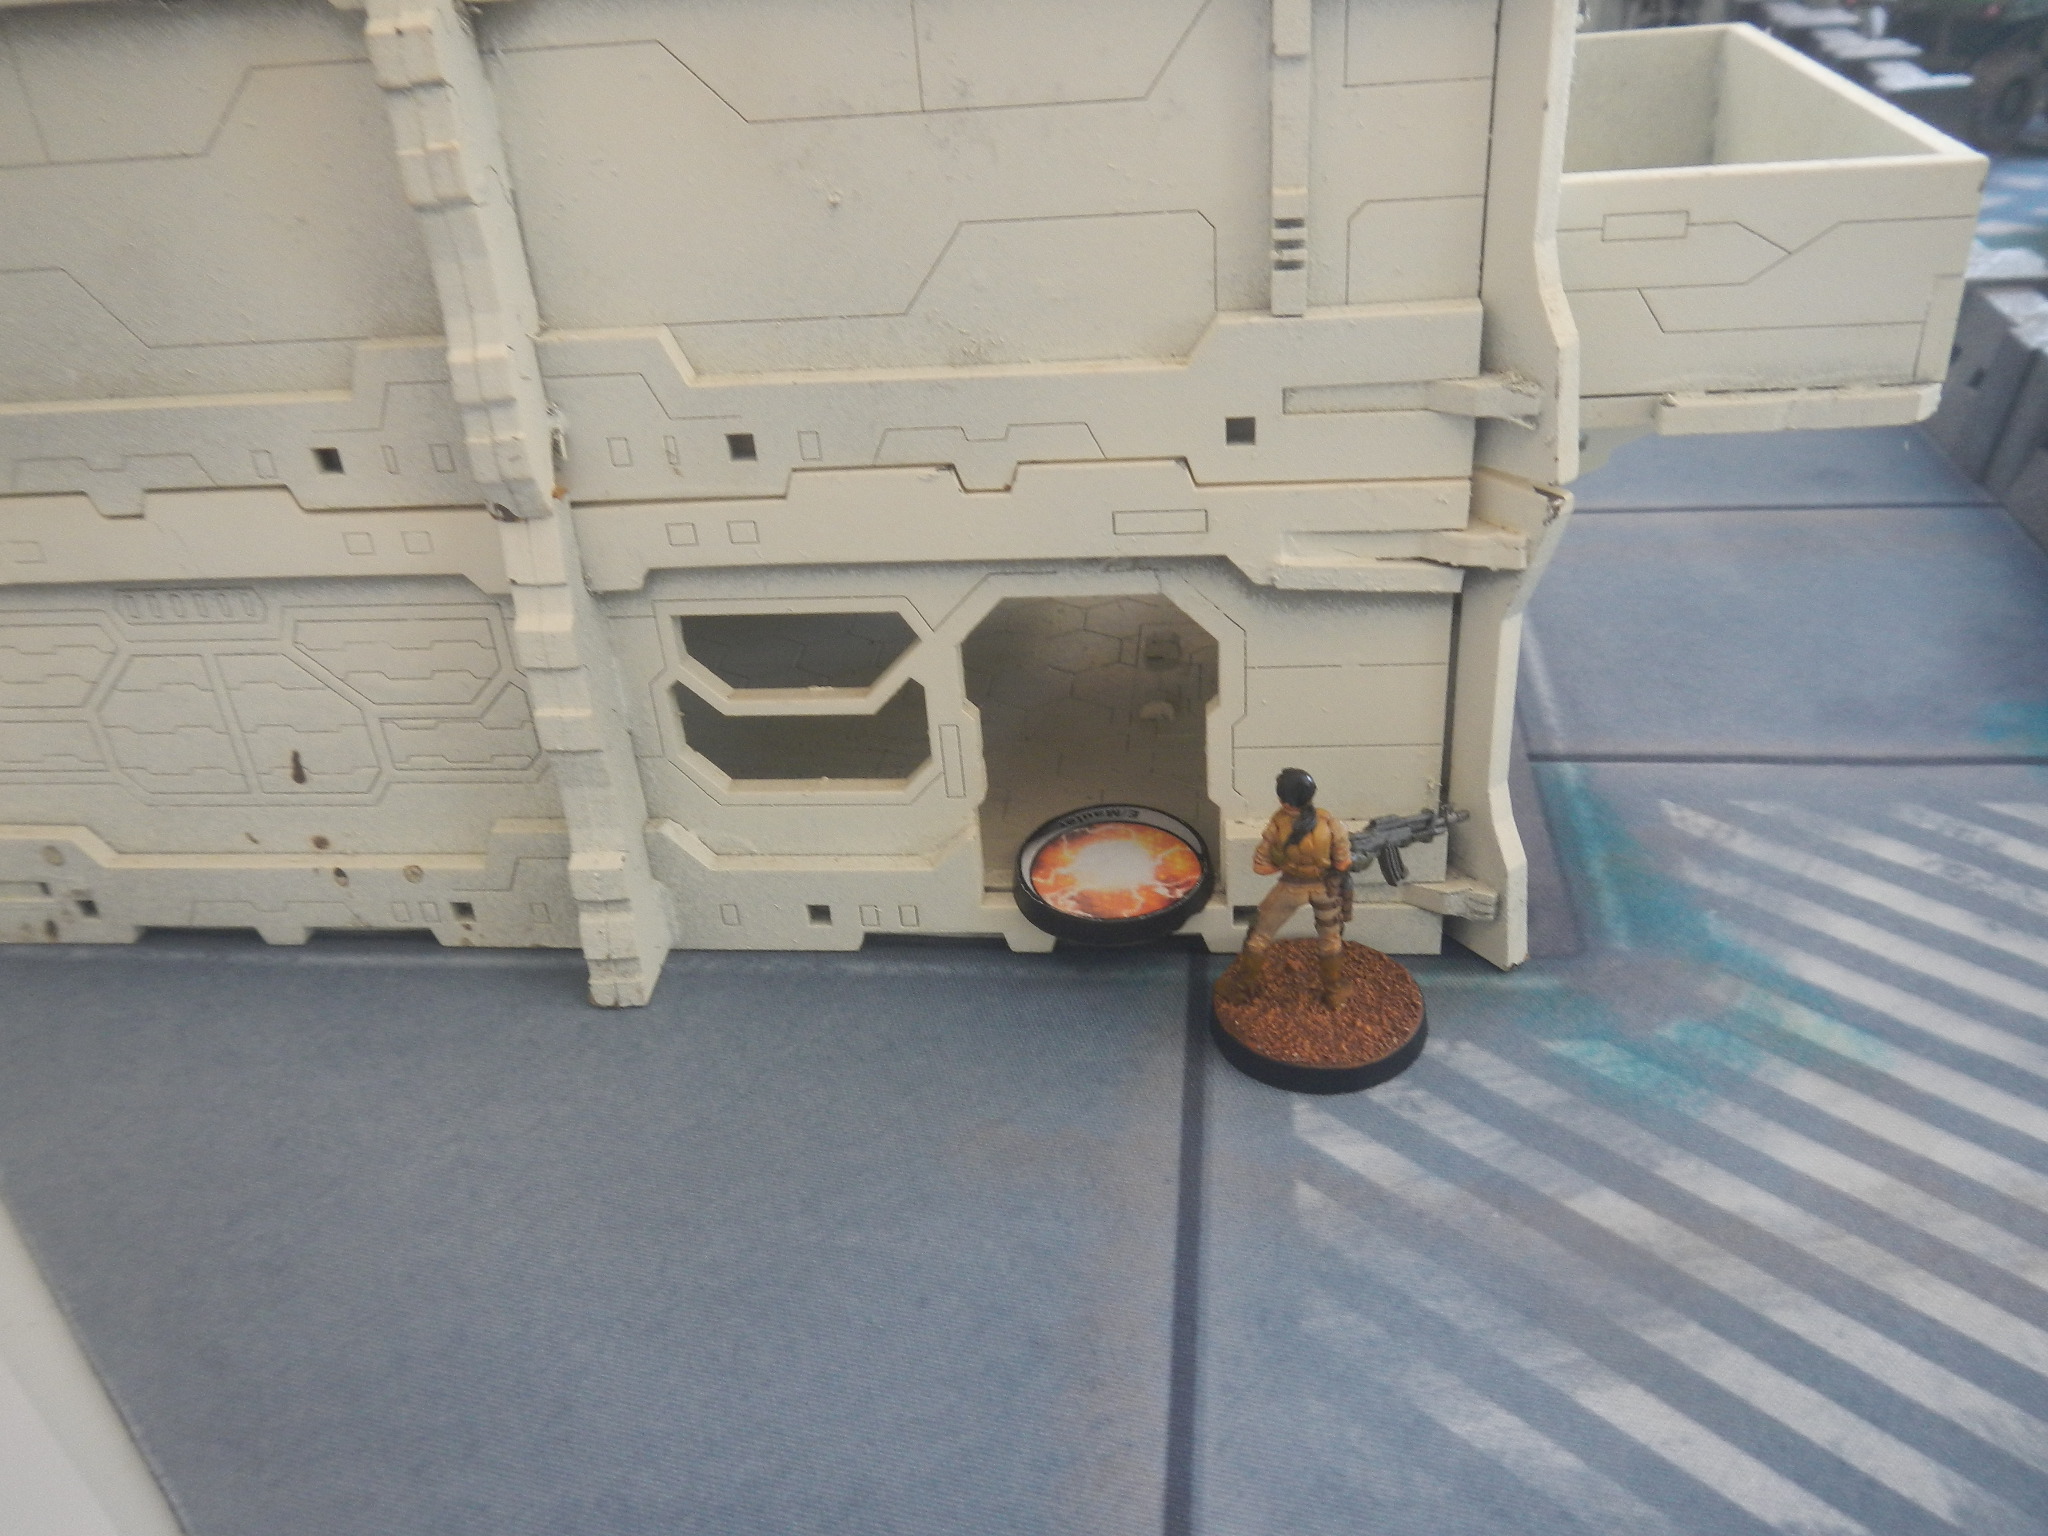
 The Sukeul triad and the (Hawa controlled) Gorgos TAG engage in a lethal firefight. Not much left of either at the end
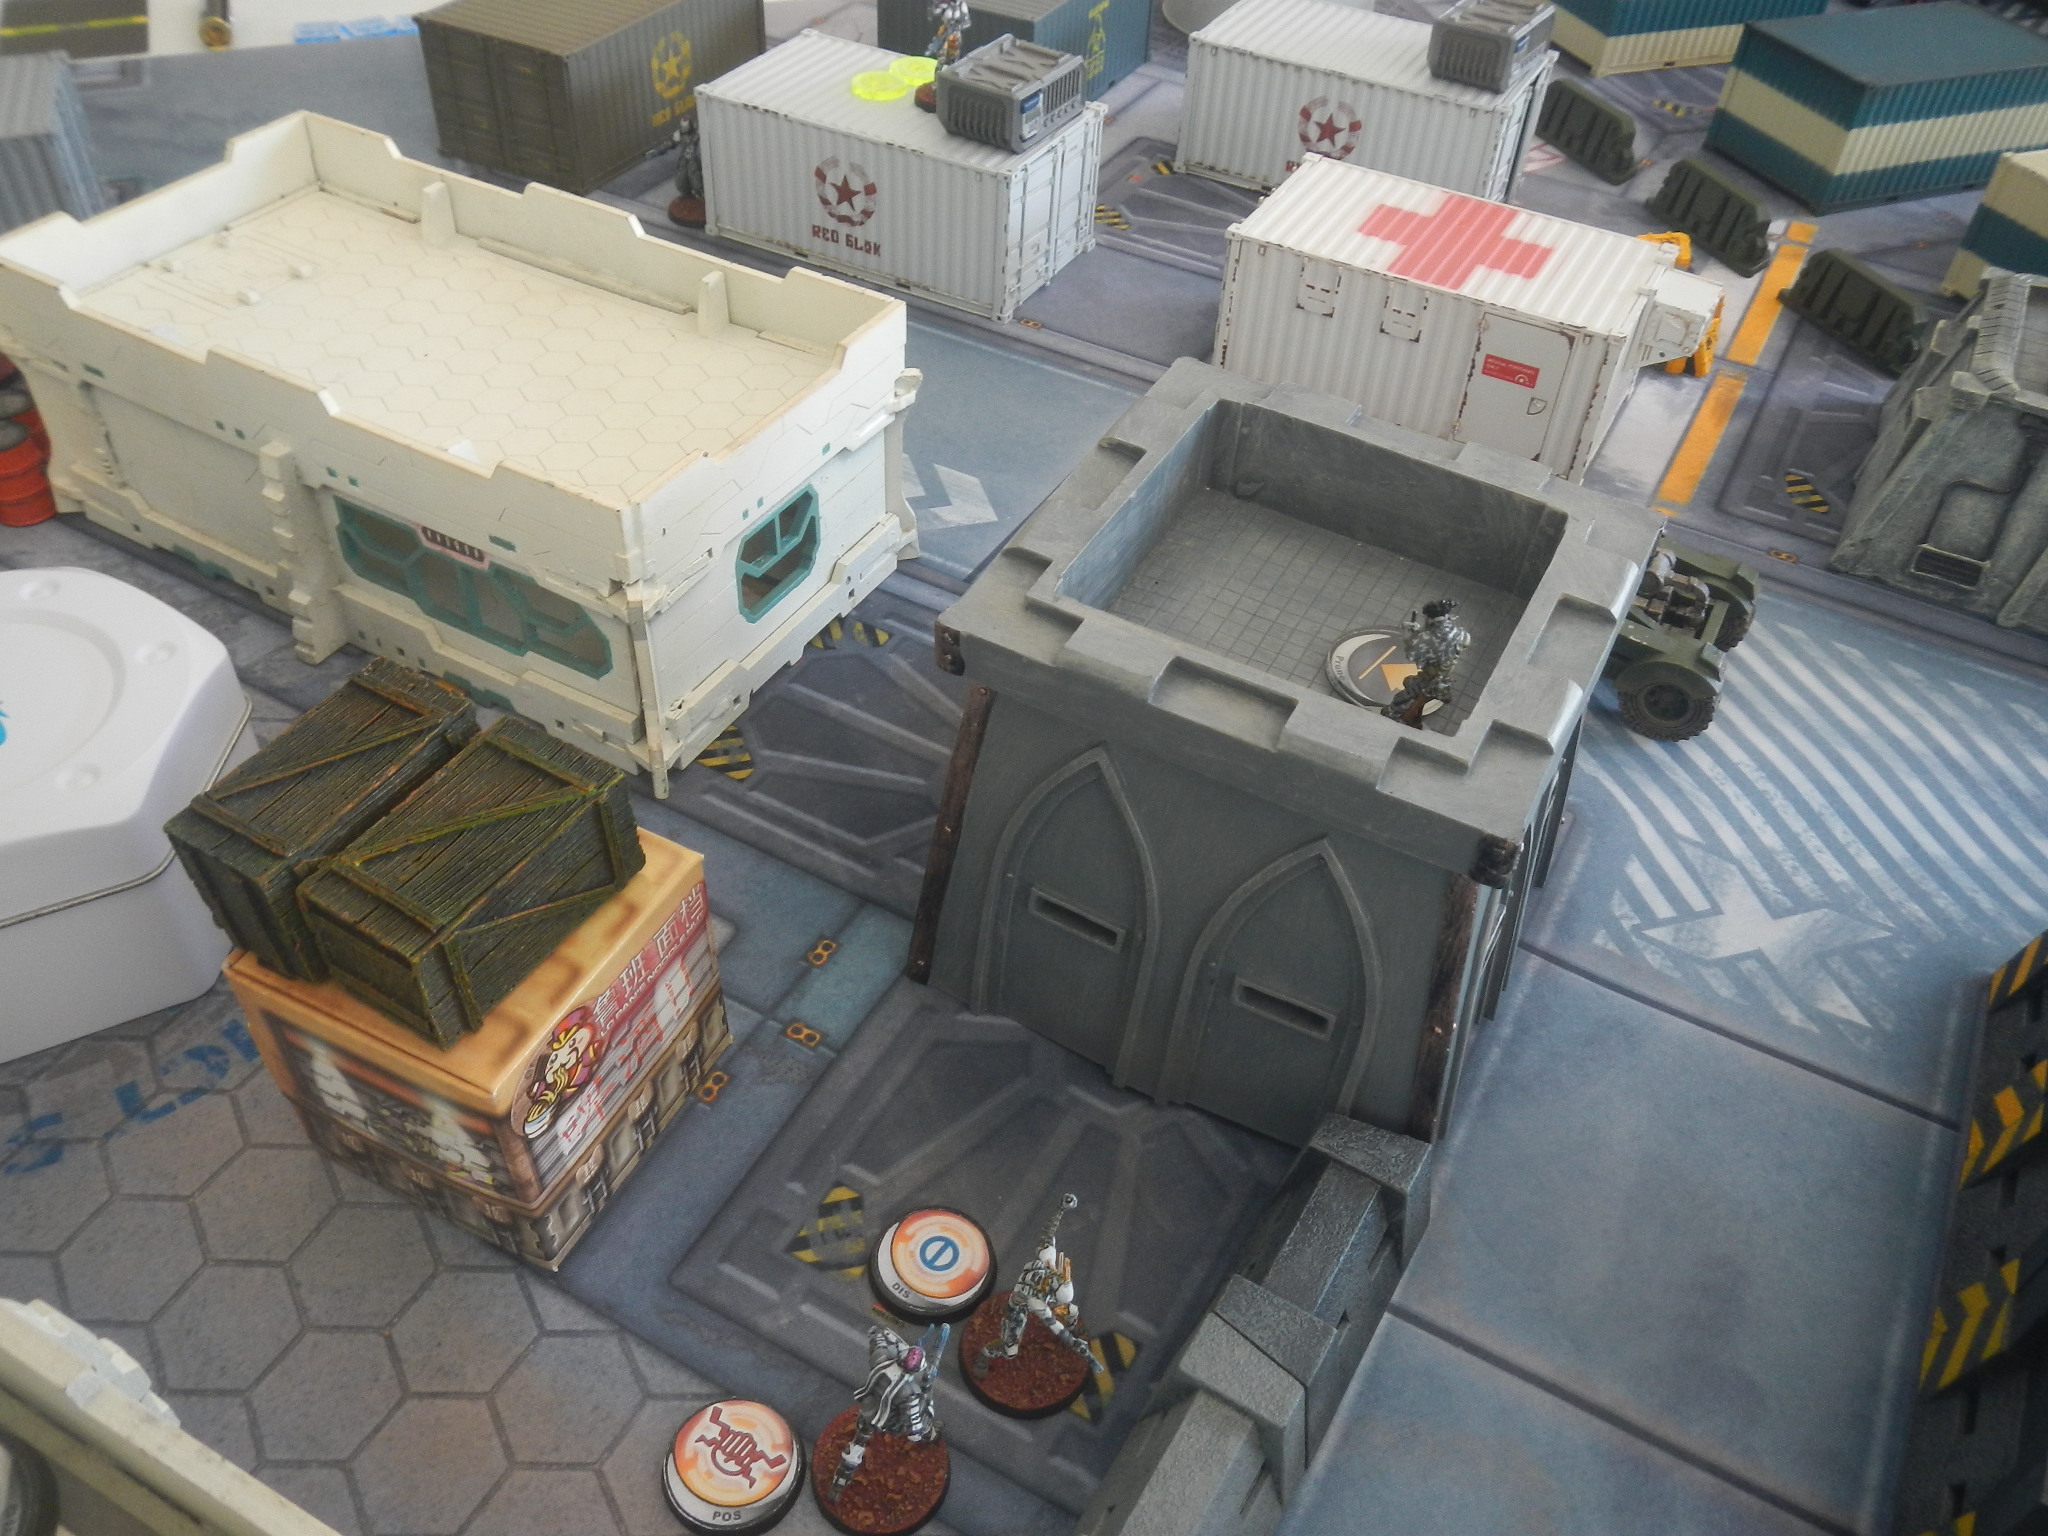
QK Turn 2: QK start with 4 orders in each group and two CT.
The Djanbazan sniper succeeds with his regeneration while out of LOS from the Tohaa. Use a CT to reform the Harris link.
Djanbazan sniper peers out and fires on Sukeul HMG. Gets 3 hits and Sukeul fails all ARM to go KIA.
The lurking Igao is a major threat and has to go. The Djanbazan SMR leaves the link and moves forward to circle the camouflaged Igao. Knowing the Djanbazan have MSV2, the Igao breaks camo and dodges but can't quite make it to total cover. The Djanbazan SMR circles further and opens fire on the Igao, who fails dodge and takes 2 hits and a critical to go KIA. Threat removed. Unfortunately, the Djanbazan SMR is now forward, exposed and facing backwards, with no orders to correct this.
The Sekban Doc+ now moves out and successfully heals the Spitfire gunner. Spend last CT to reform the Sekban link. The Sekban now all move forward to the tall wall. From here the Spitfire gunner can cover the road that the impetuous Makaul will charge down. The rest of the team is in position to check out that suspicious civilian near the tall bunker (my classified objective).
This ends the QK turn.
Not a bad turn for QK. They have recovered two of their casualties, reformed both links, and eliminated the Igao threat to their flank. They are also well positioned to achieve several classifieds. The concern is that they are now somewhat extended and exposed.
Tohaa turn 2: Start with 5 orders & the Makaul's Extremely Impetuous order.
With no alternative, the Makaul charges out from behind the container and down the main road towards the Sekban. The Sekban spitfire immediately opens fire but the Makaul manages to smoke-dodge, covering himself in eclipse smoke. He decides to stay where he is.
The bright opportunities that shone at the beginning of the Tohaa's first turn are now a faded memory. The Rasail LT decides to put his big-boy pants on and take charge.
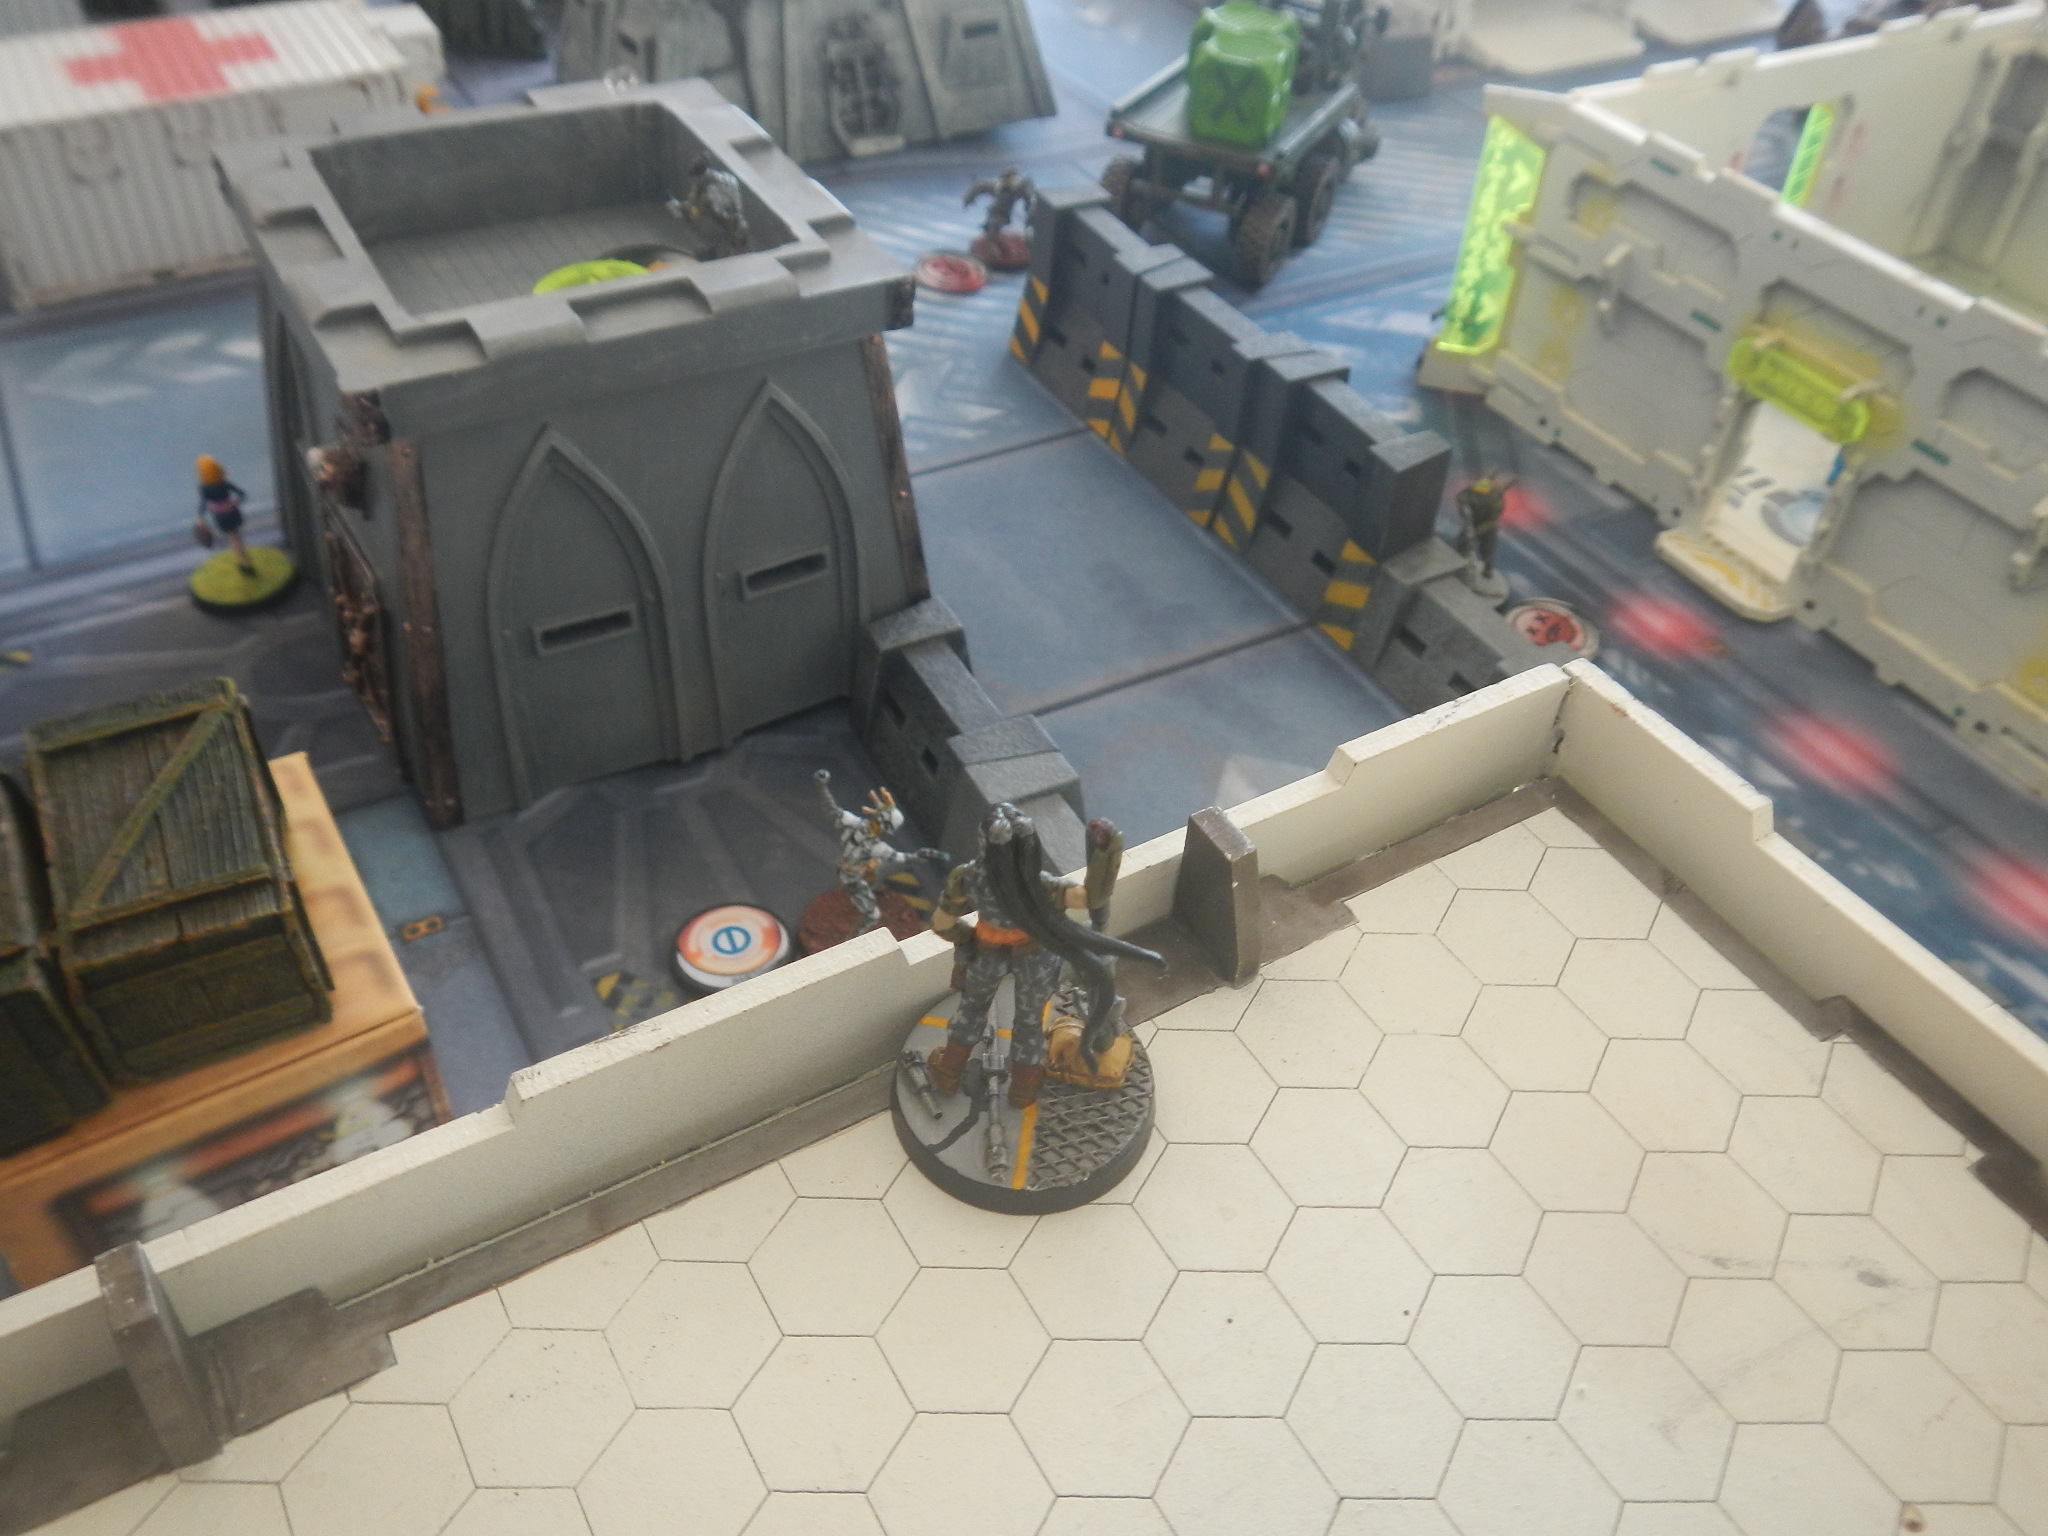
The Rasail (+Chaksa & symbiomate) dashes across the main road behind the eclipse smoke then advances down between the containers. He draws LOS to the back of the Djanbazan SMR and opens fire. The Djanbazan takes one hit, then fails ARM to go UNC.
The Rasail then advances to the corner of the medical building and opens fire on both the Sekban spitfire and LT, while his Chaksa attacks them with its HFT. Both Sekban dodge the flames, but the combi-rifle fire knocks the LT UNC (the spitfire passes ARM).
The Rasail then uses his LT order to push his Chaksa further forward so it can bracket the remaining Sekban with its HFT. He opens fire on the Sekban spitfire gunner. This combined attack is devastating. Both the spitfire gunner and Doc+ are KIA to fire and rifle hits, while the remaining Sekban rifleman is left burnt and UNC. The Sekban team is gone and QK are in loss of lieutenant. [I rolled total garbage in that F-t-F contest. Spitfire missed both shots and remaining Sekban all failed dodge.]
Turn over.
A great recovery by the Tohaa thanks to sound tactical play and a bit of luck. They suffered no casualties and inflicted 5 on QK (2 KIA including the doctor), putting them in loss of lieutenant for turn 3.
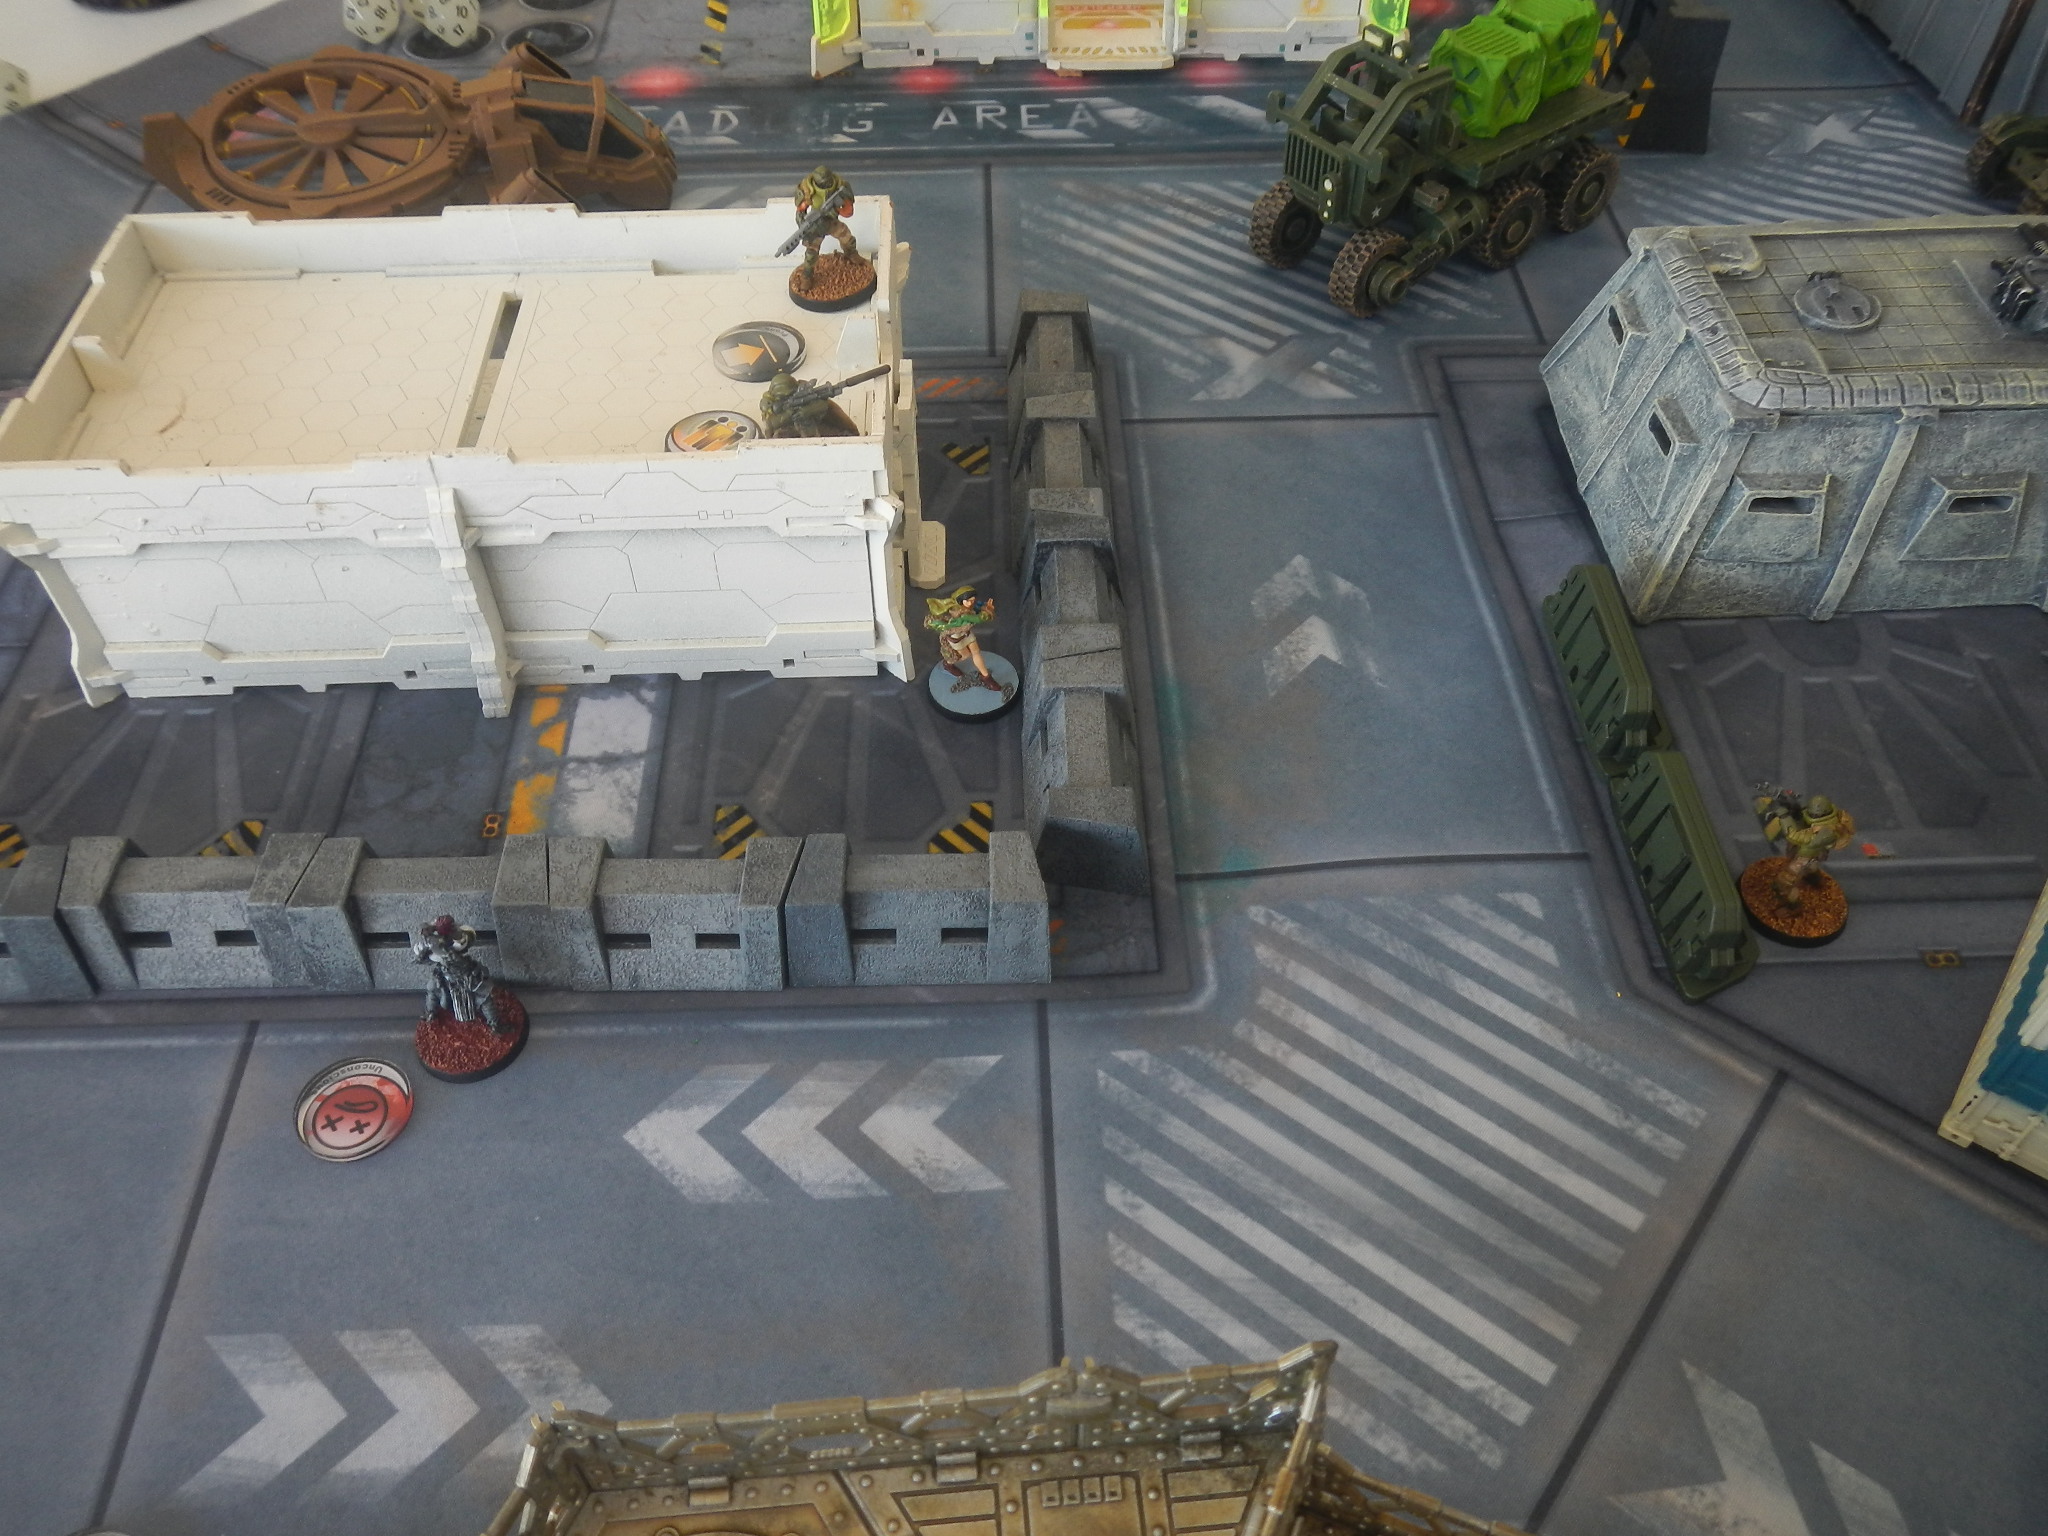 The Djanbazan SMR circles around and eliminates the Igao. MSV2 is a good thing. Pity he's now facing the wrong way with his back exposed.
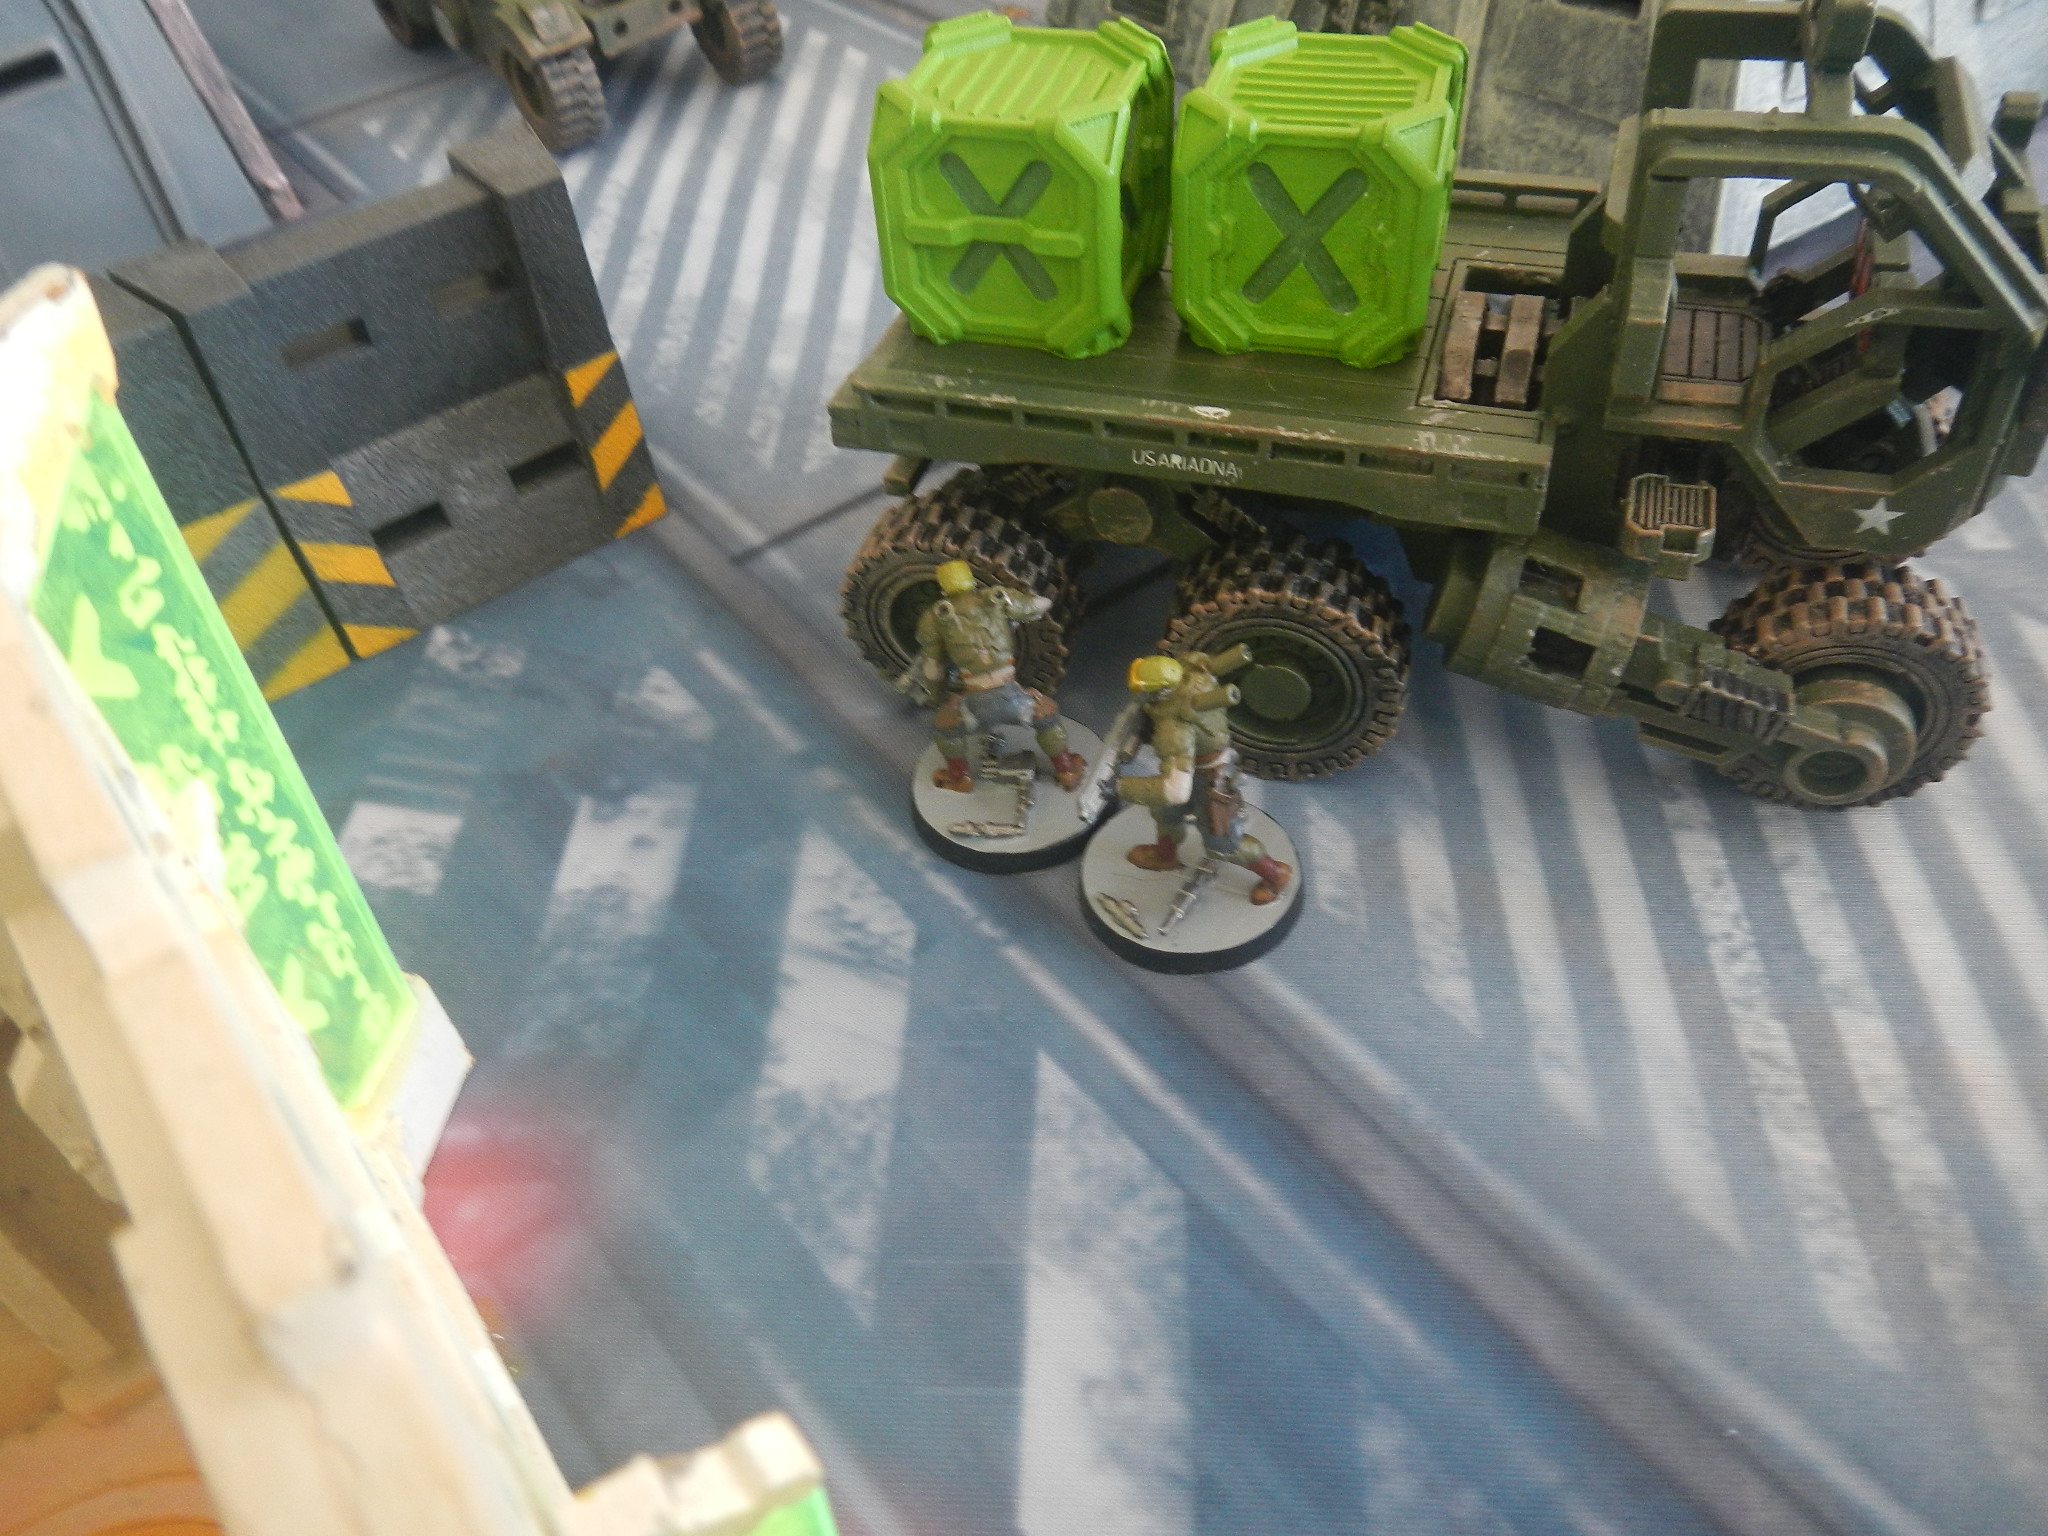
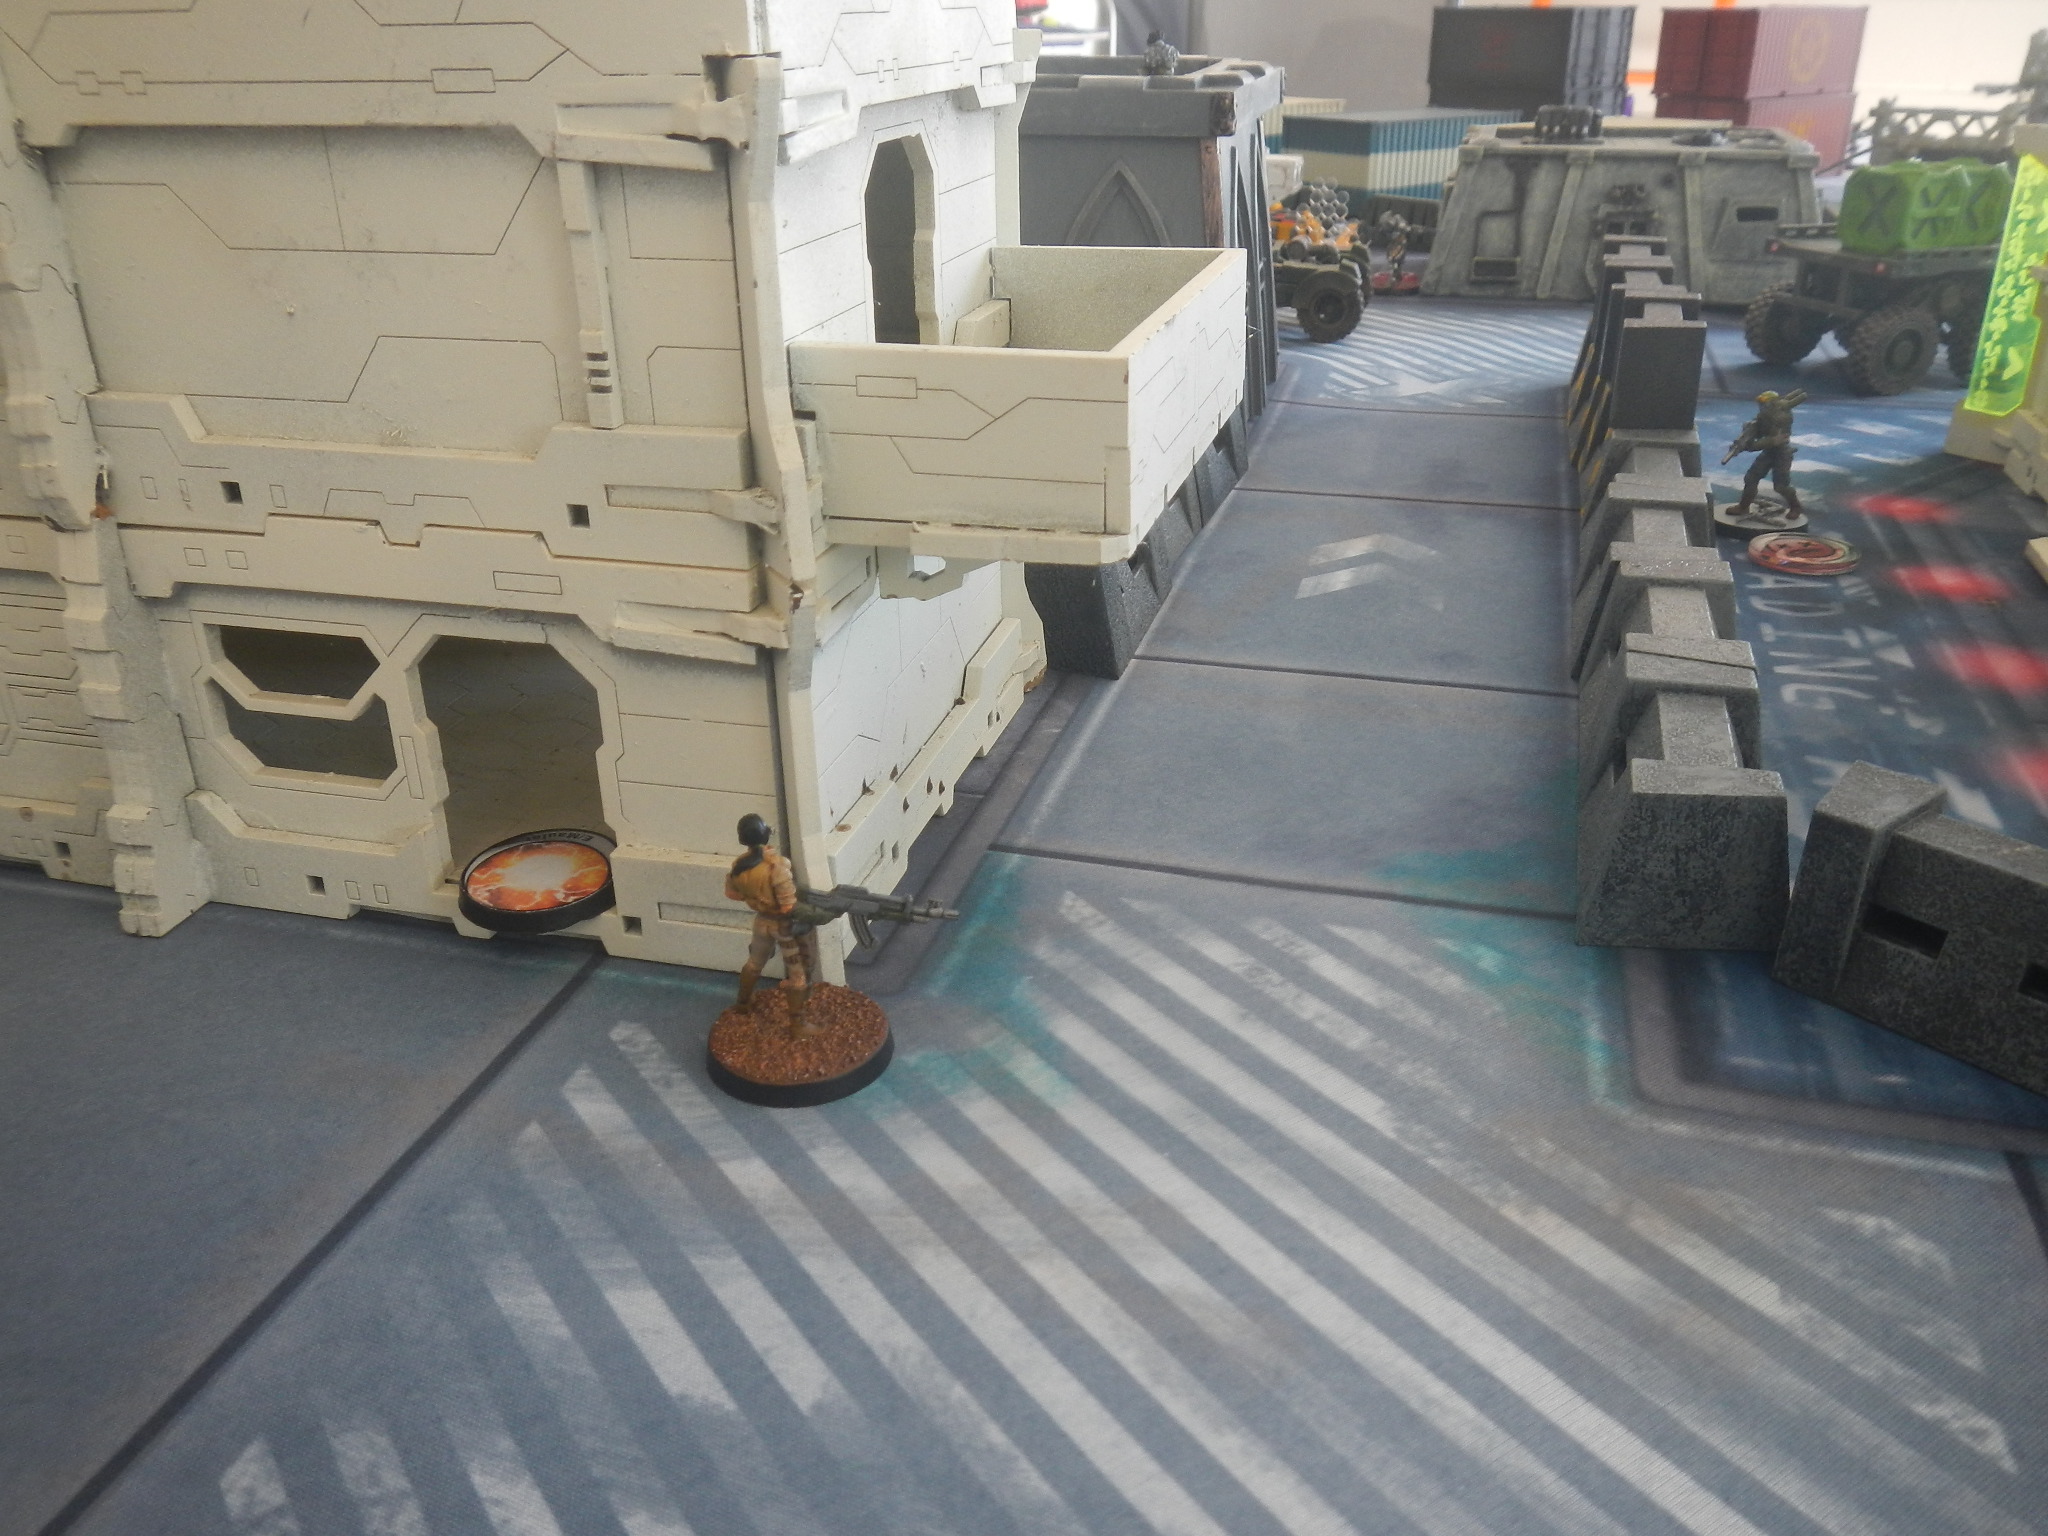
 The Sekban link moves up to the cover of the tall wall, ready to exploit next turn. Seemed like a good idea at the time.
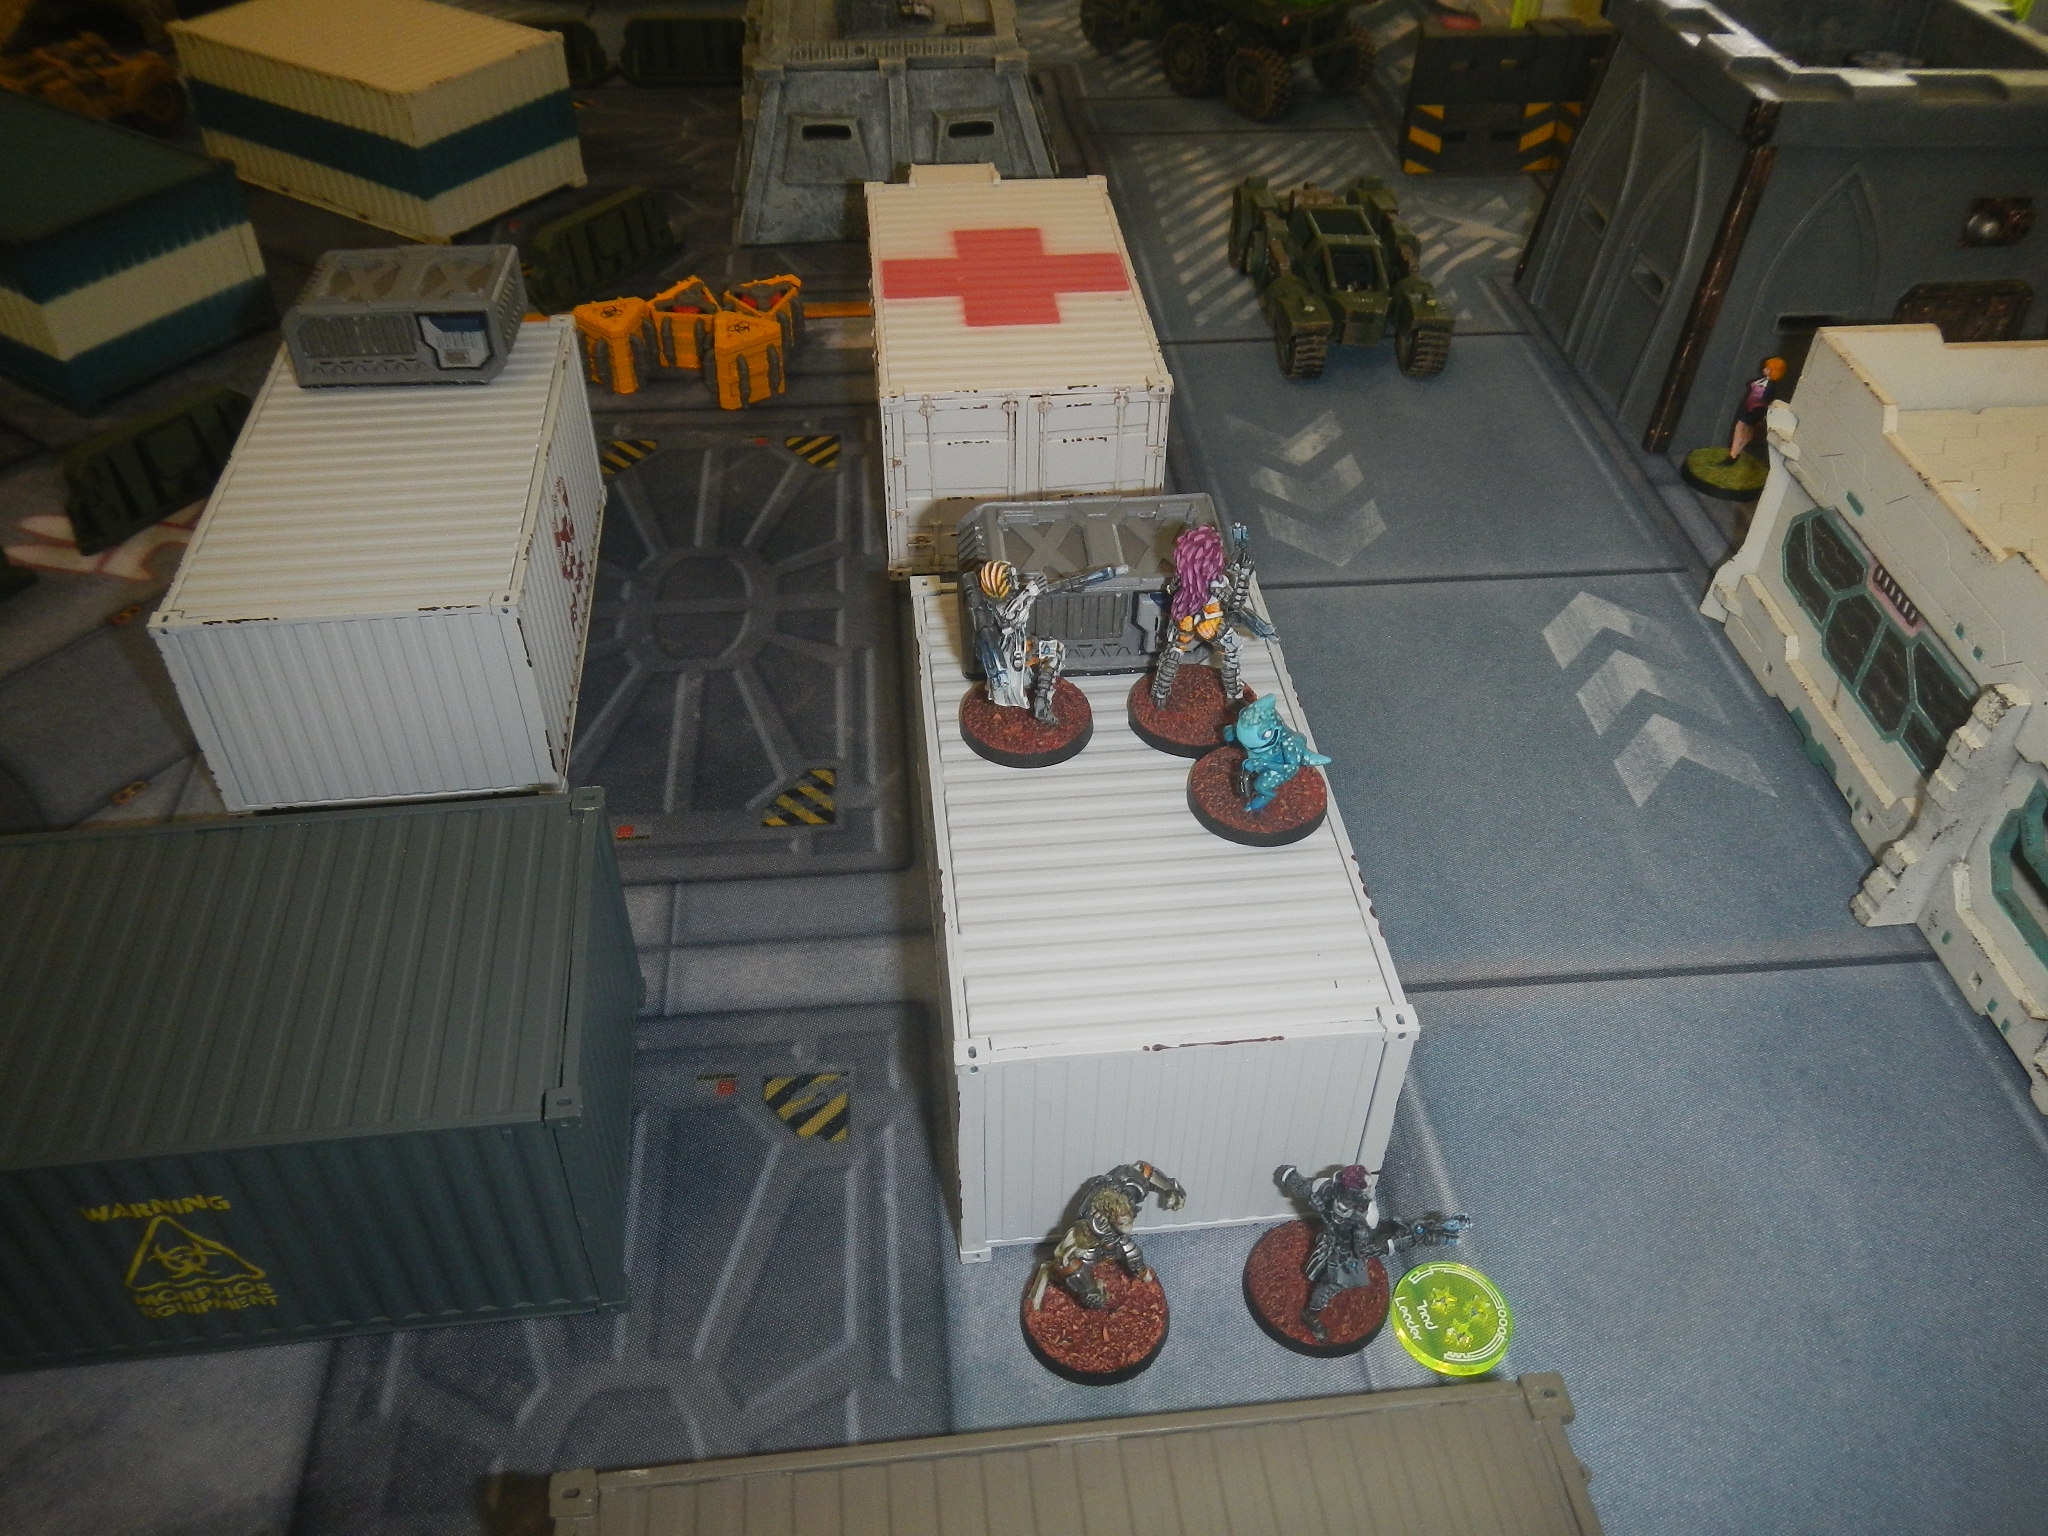
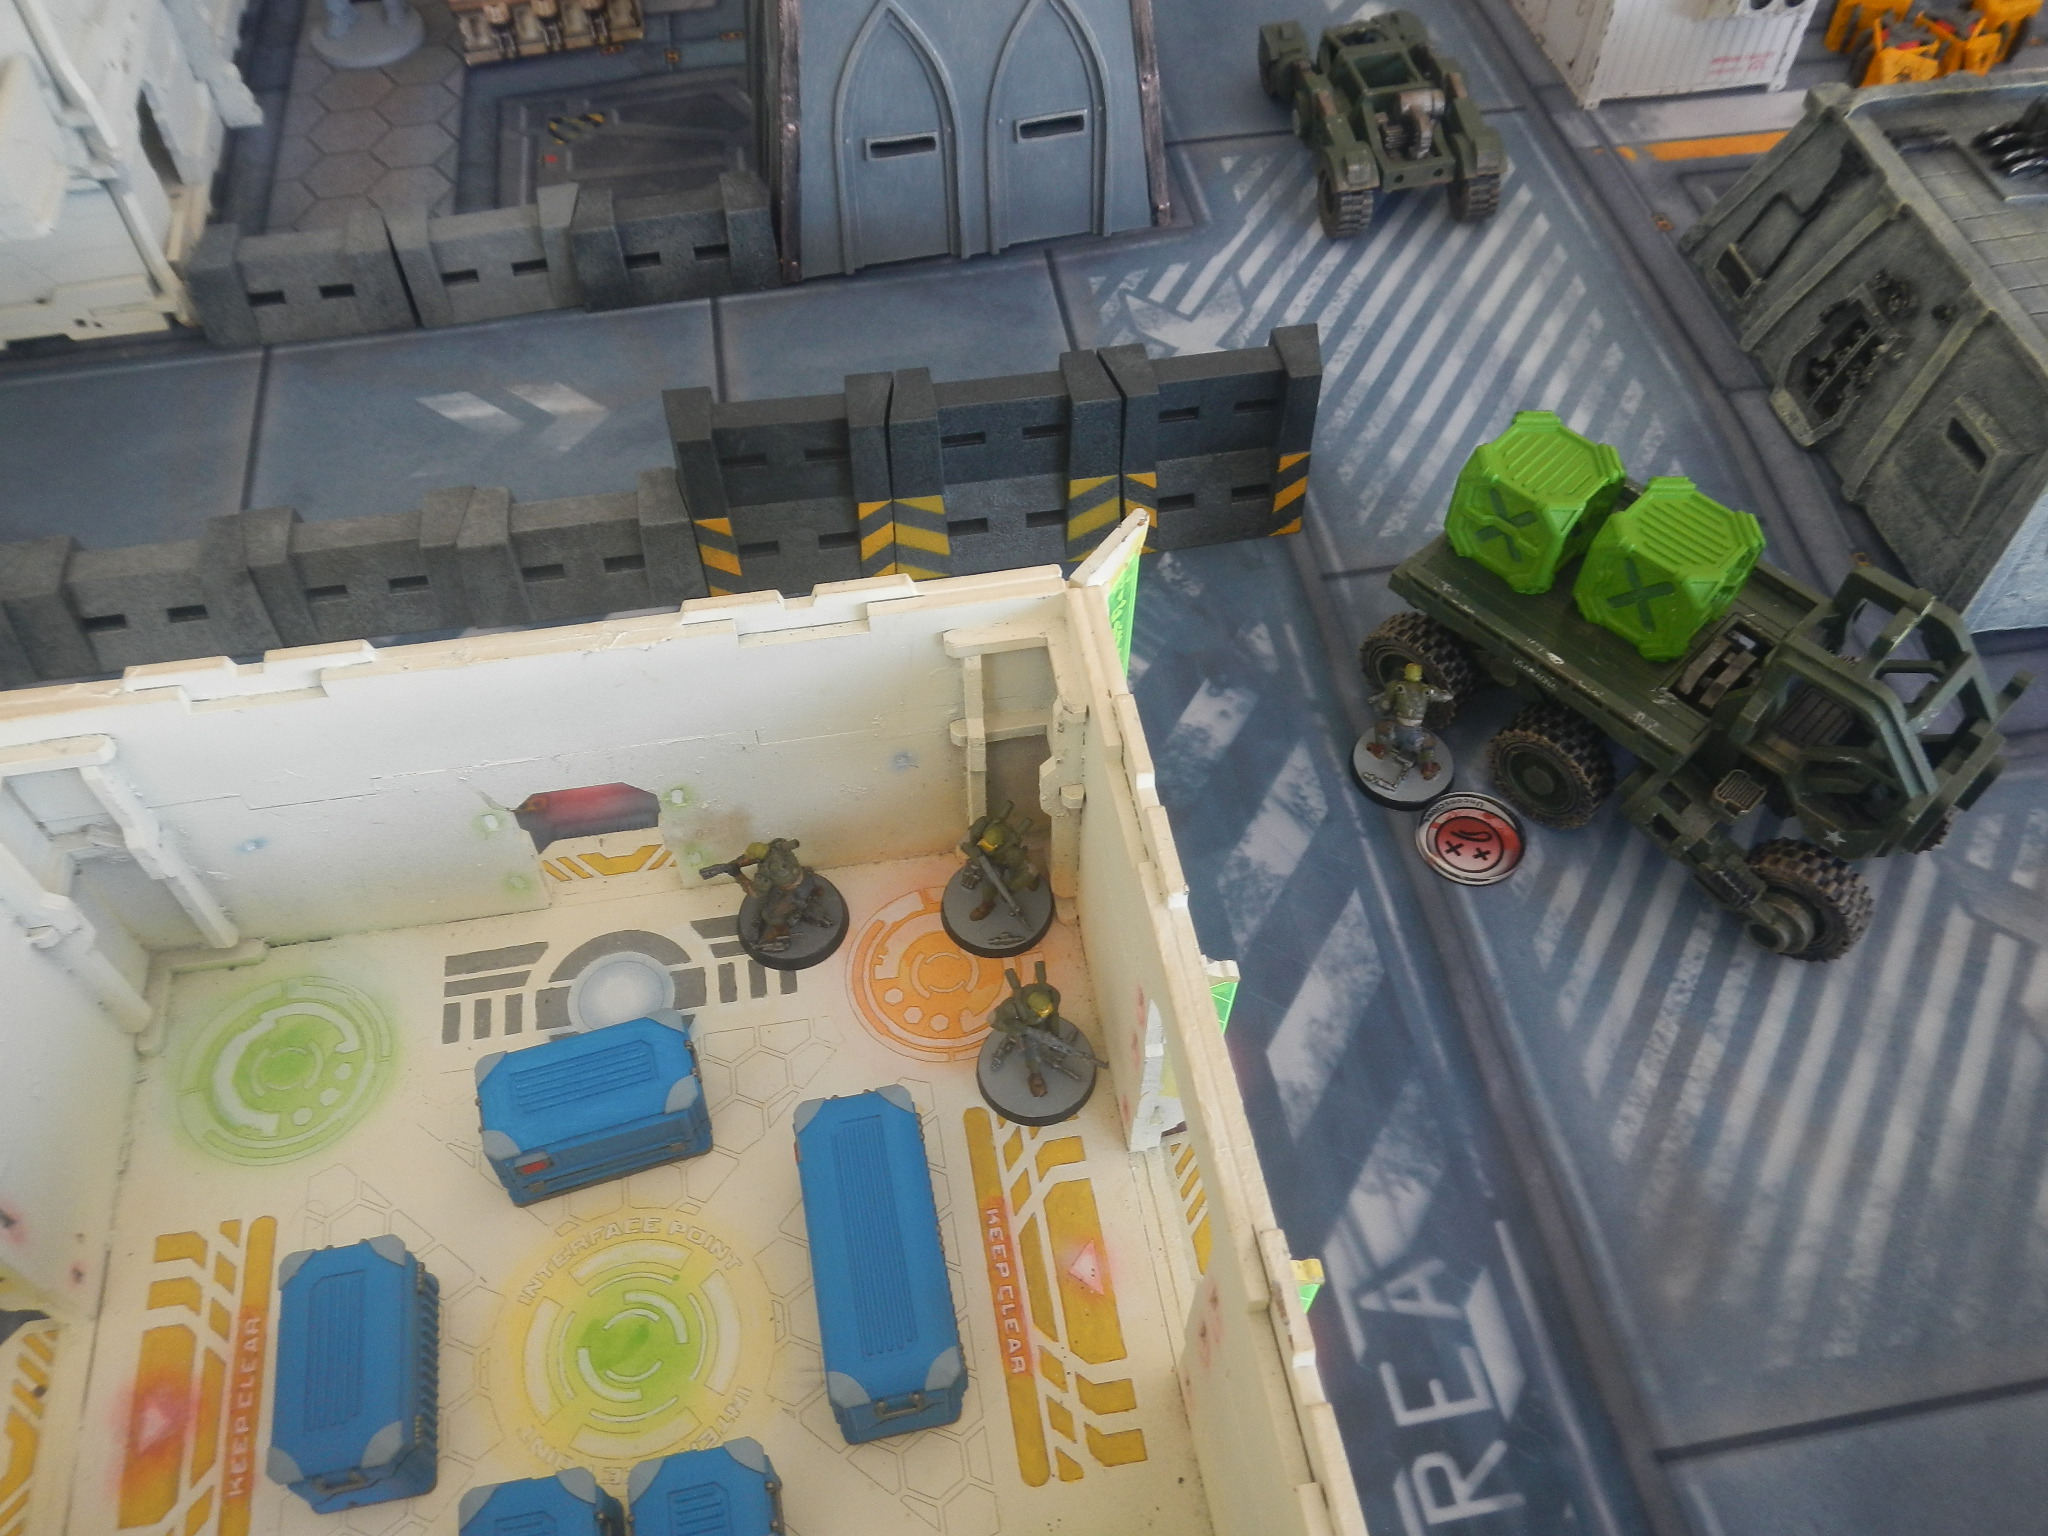
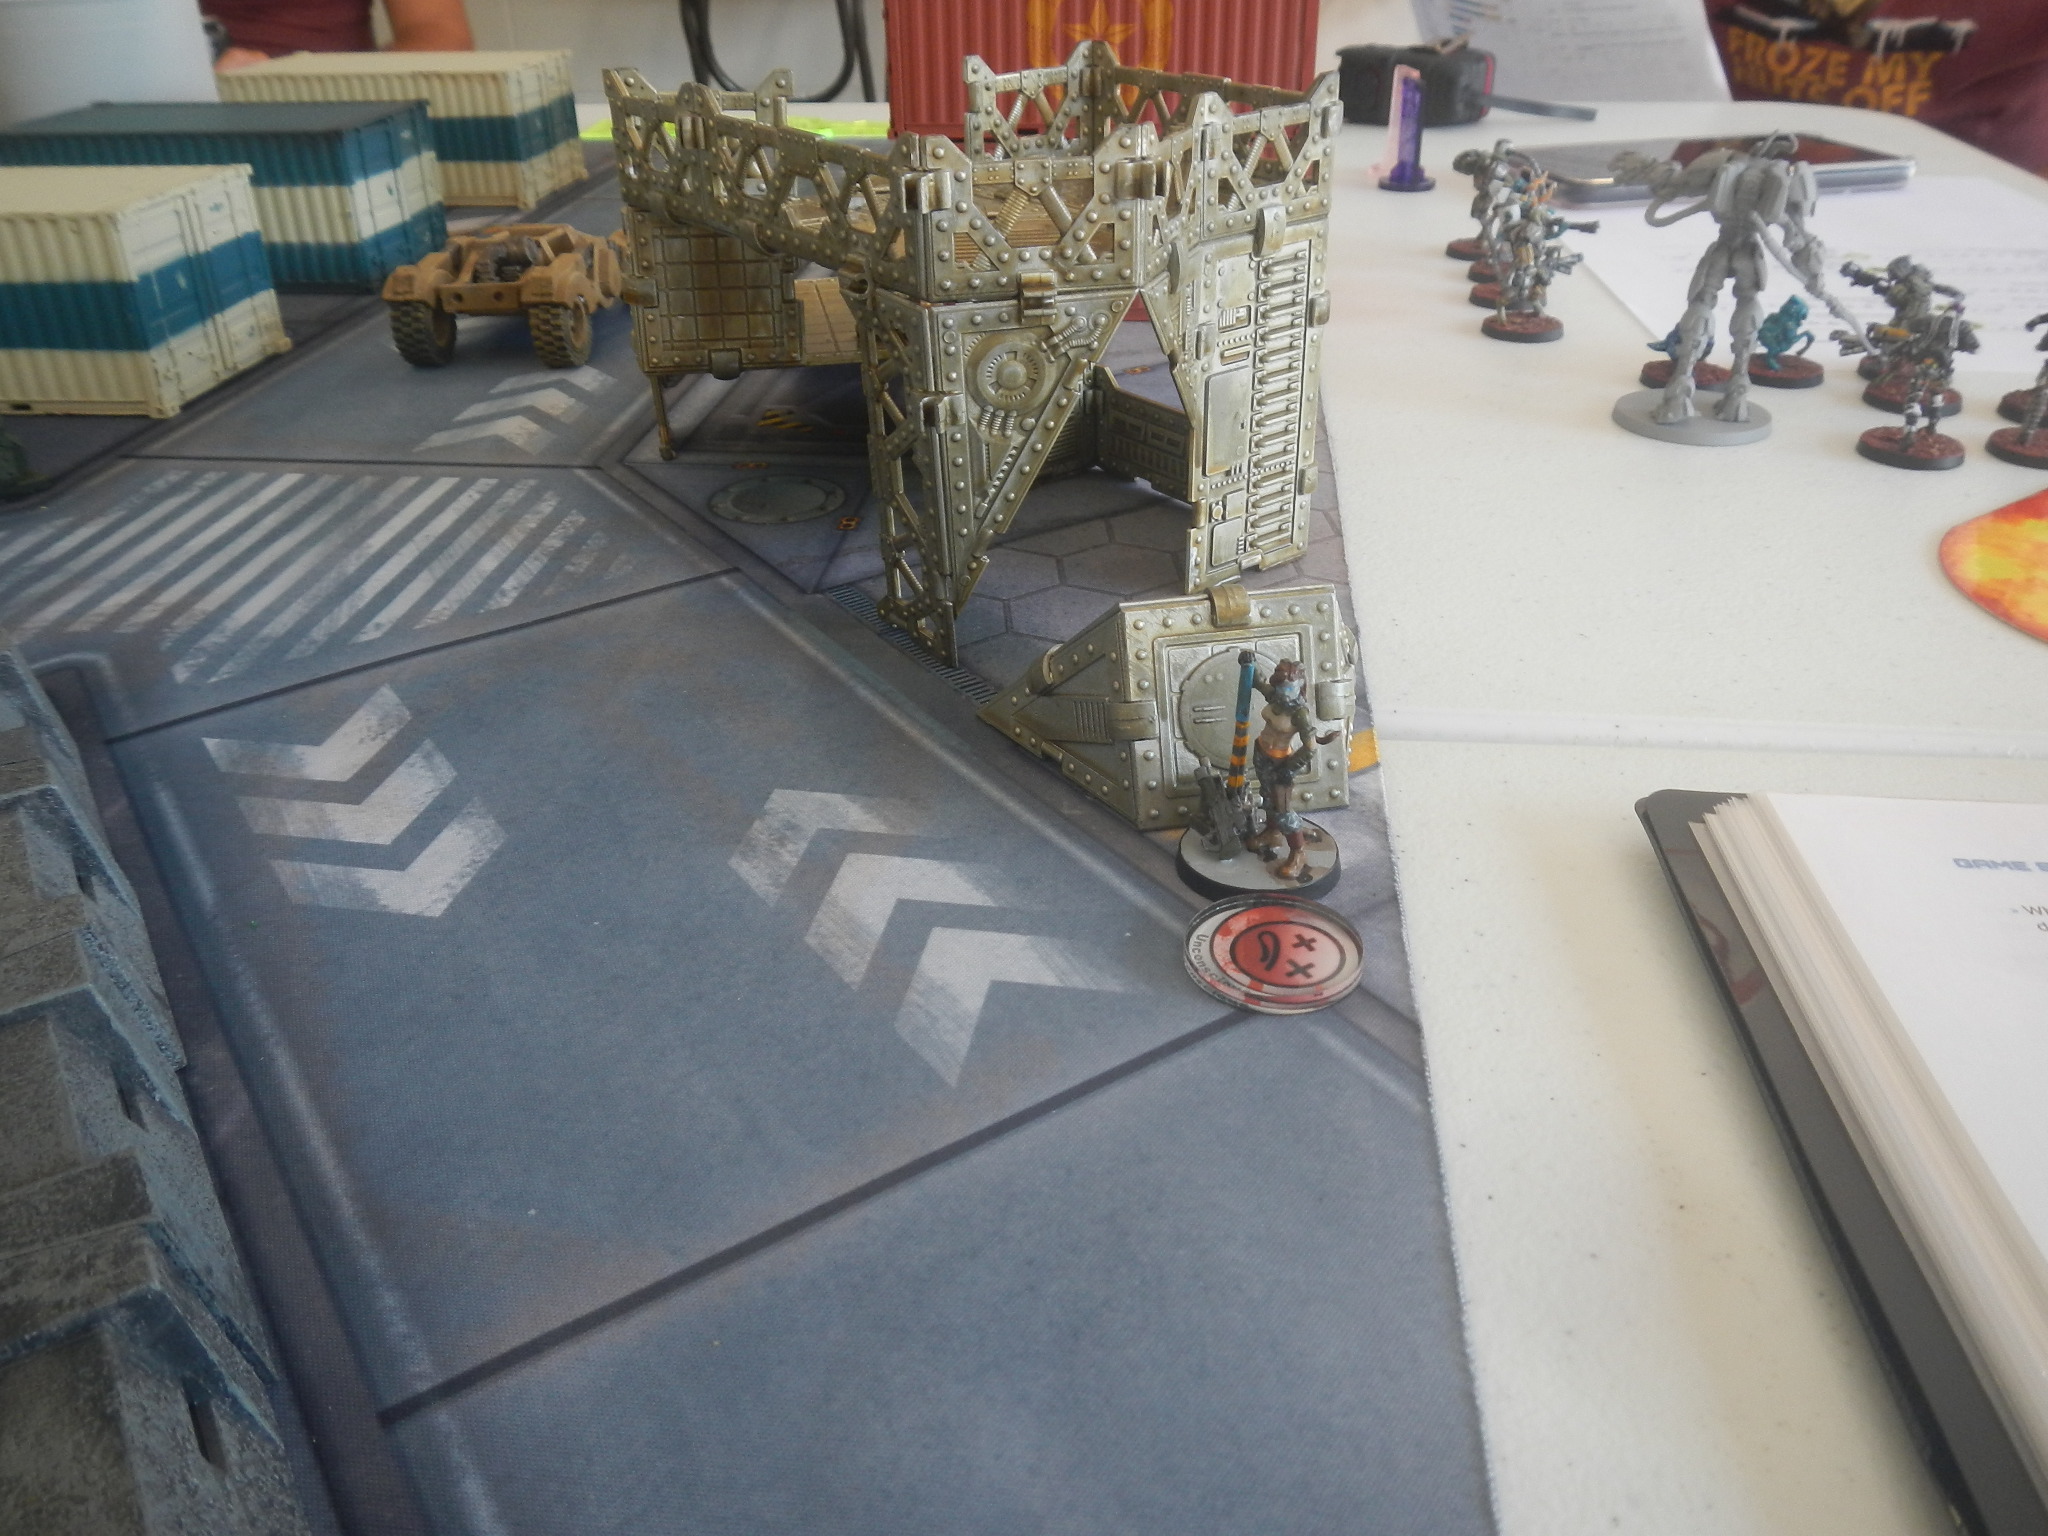
 The extremely impertuous Makaul charges down the main road and succeeds in smoke-dodging the Sekban spitfire's ARO. This turned out to have huge implications. Note the Rasail & entourage crossing the road behind the smoke cloud (you can see his nano-screen).
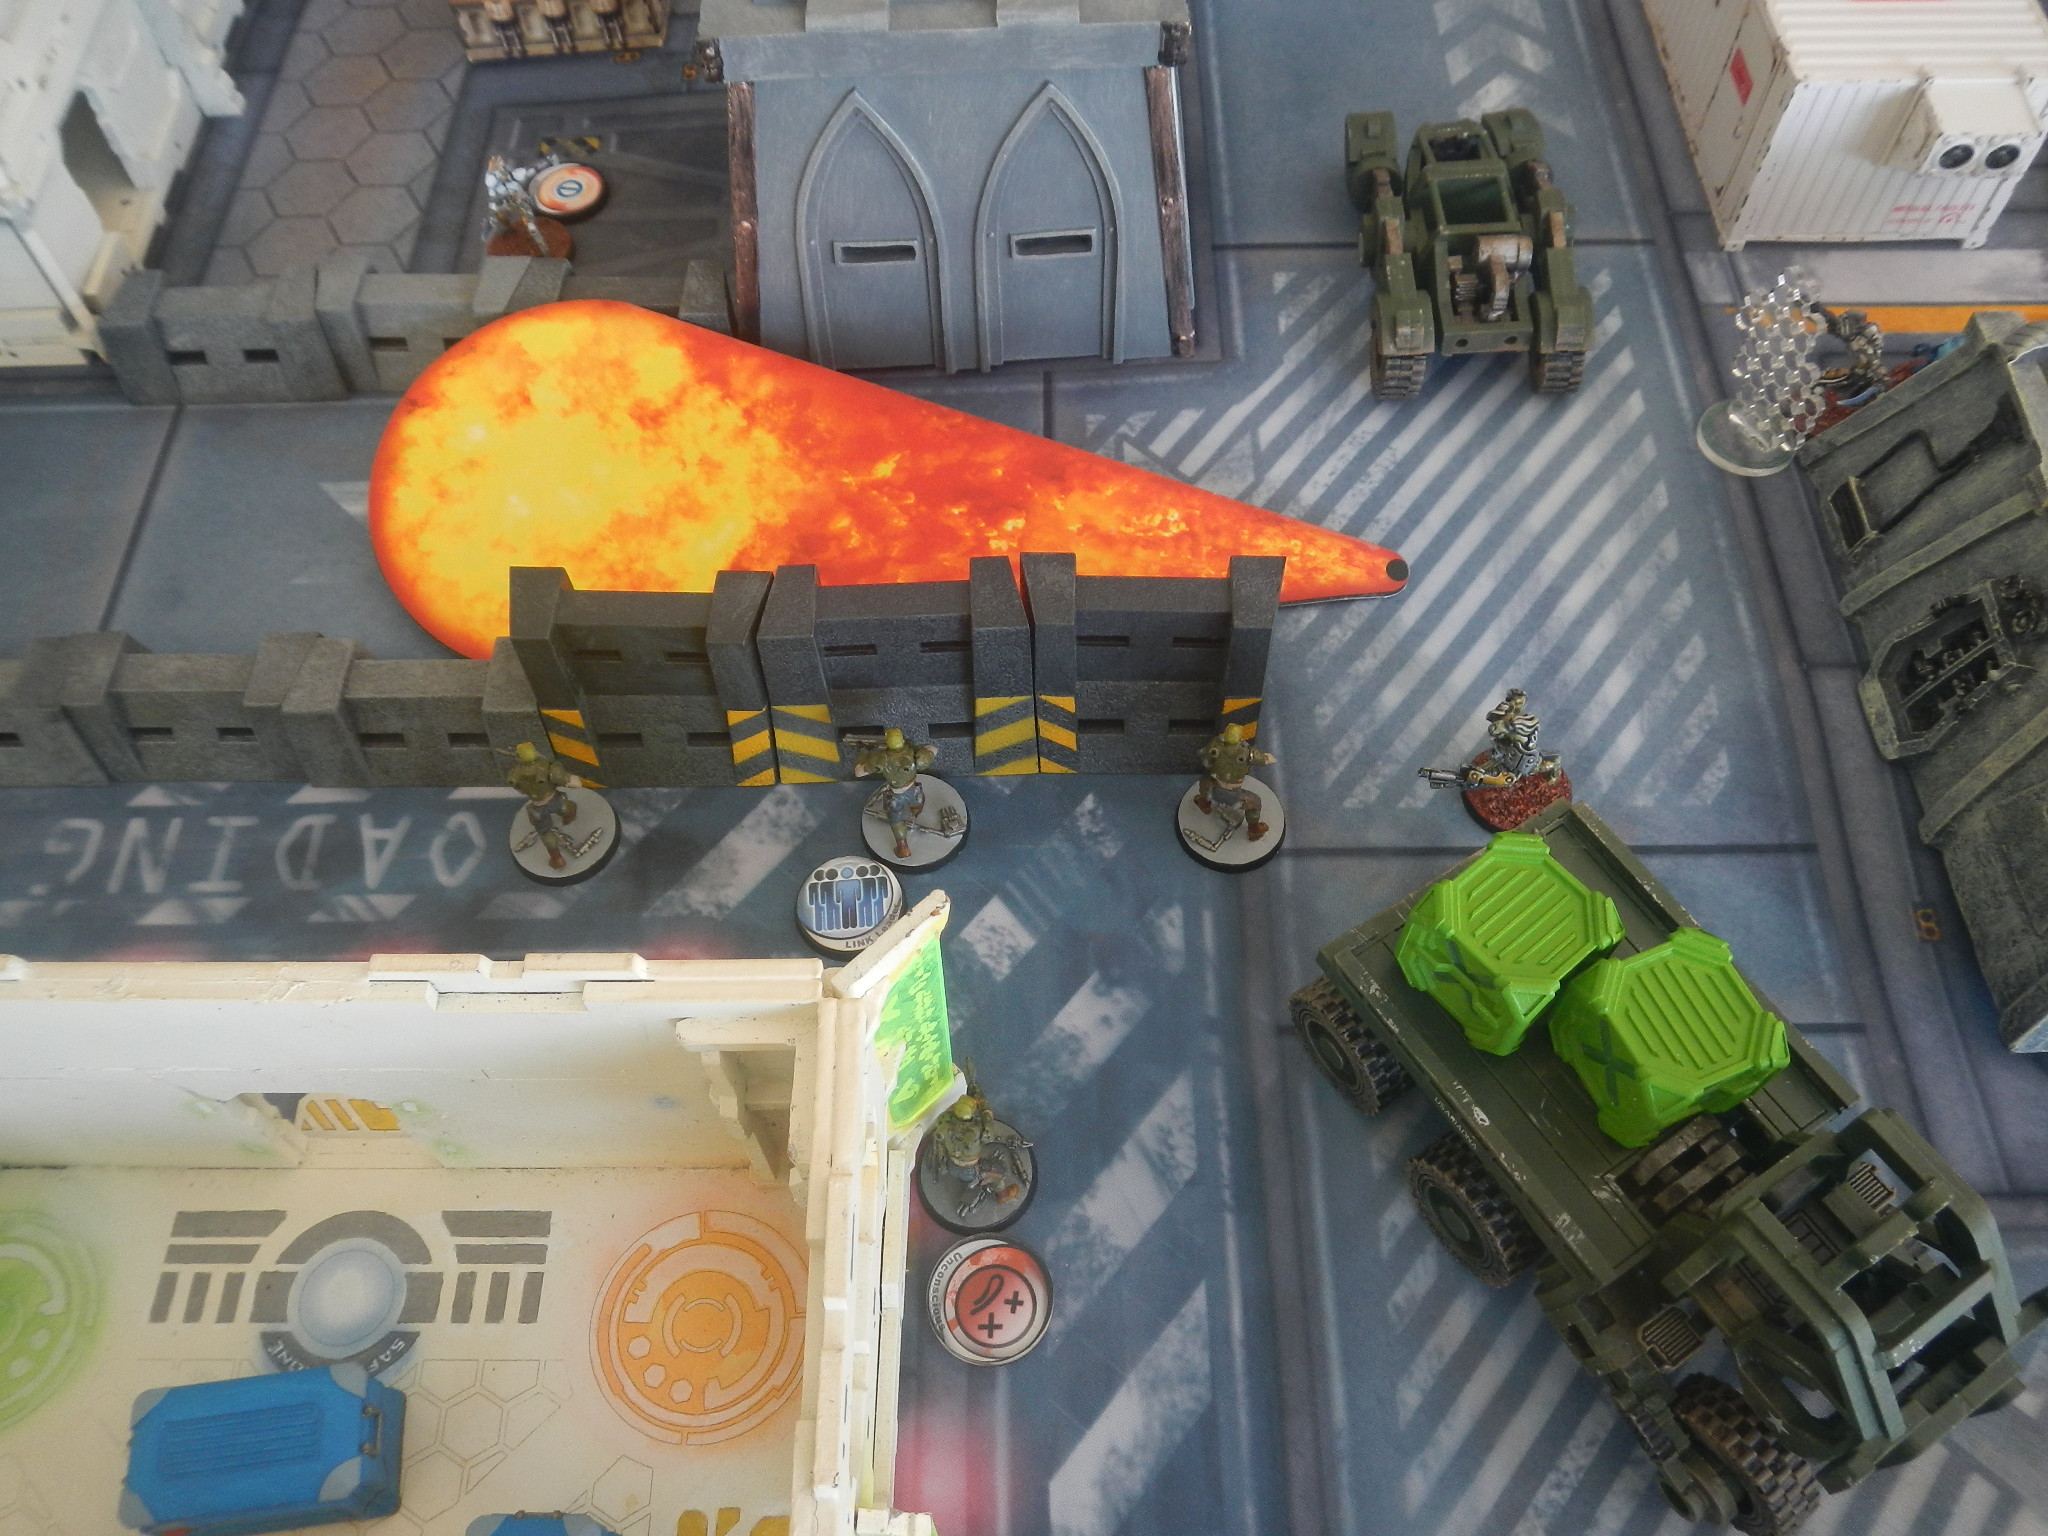 Thanks to the Makaul's smoke, the Rasail (& Chaksa HFT) were able to slip around the flank, take out the Djanbazan SMR, then totally wreck the Sekban link, eliminating all members.
QK turn 3: Start in loss of lieutenant with 5 troopers left (1 in group 1 & 4 in group 2). No CT left.
Thanks to the Rasail's Rambo-run, Z-21 has lost C2 and cannot achieve any classifieds. All it can do is try and prevent a loss. Fortunately, the remaining troopers rise to the occasion.
The Hawa sniper leads the way by standing up and surprise shooting the Chaksa HFT, getting 2 hits and killing it. The Clipsos attempts a very long ranged ARO but misses by miles.
The Djanbazan stands up and opens fire on the now exposed Makaul in the middle of the main road. The Makaul fails dodge, takes 4 hits, fails 3 ARM and goes KIA.
The Djanbazan sniper also stands up to cover forward.
The Ghulam lass peers around the corner of the building, spots the Rasail in the distance and decides to take a pot-shot. The Rasail shoot back but the Ghulam gets a critical which pops the symbiomate and takes a wound off his symbiont armour. Now that's shooting like a big-girl! [bloody miracle!]
The Hawa hacker now appears over the top of the tall bunker and engages the Rasail with his BSG. The Rasail fails dodge, takes a hit and fails ARM to loose symbiont armour and nano-screen.
End of QK turn.
This was about as good a turn as QK could reasonably expect. They had eliminated the Makaul and stripped the Rasail of its Symbiomate, Chaksa & armour, leaving him exposed in the open to ARO next turn. All troopers were now in reasonable ARO positions, but would it be enough to avoid defeat?
Tohaa turn 3: Start with 4 orders and the Rasail's LT order.
The Rasail needs to get into cover, so uses his LT order to move back behind the medical facility while splitting his fire 2/1 between the Hawa hacker and Ghulam trooper. Unfortunately for him, he misses all shots and both the Hawa and Ghulam (amazingly) get hits. The Rasail fails both ARM to go KIA.
The Tohaa need to get at least one classified to eek out a win. How to do this with the remaining 4 orders is the trick.
It comes down to the Kaeltar making a dash forward towards QK territory. Unfortunately, as he crosses the Djanbazan sniper's fire-lane, the sniper takes him out with a critical hit - straight to KIA thanks to Shock ammo.
At this point, with no way to achieve any classifieds, the last two Tohaa raiders (Kumotail & Clipsos) withdraw. Turn ends & game over.
After losing the Rasail, the Tohaa really had no option other than an extreme Hail-Mary dash for a classified with the Kaeltar. Unfortunately for them, he copped a critical on his first move from the Djanbazan sniper.
 The Djanbazan HMG makes short work of the Makaul out in the middle of the road. The sniper also stands up to cover forward.
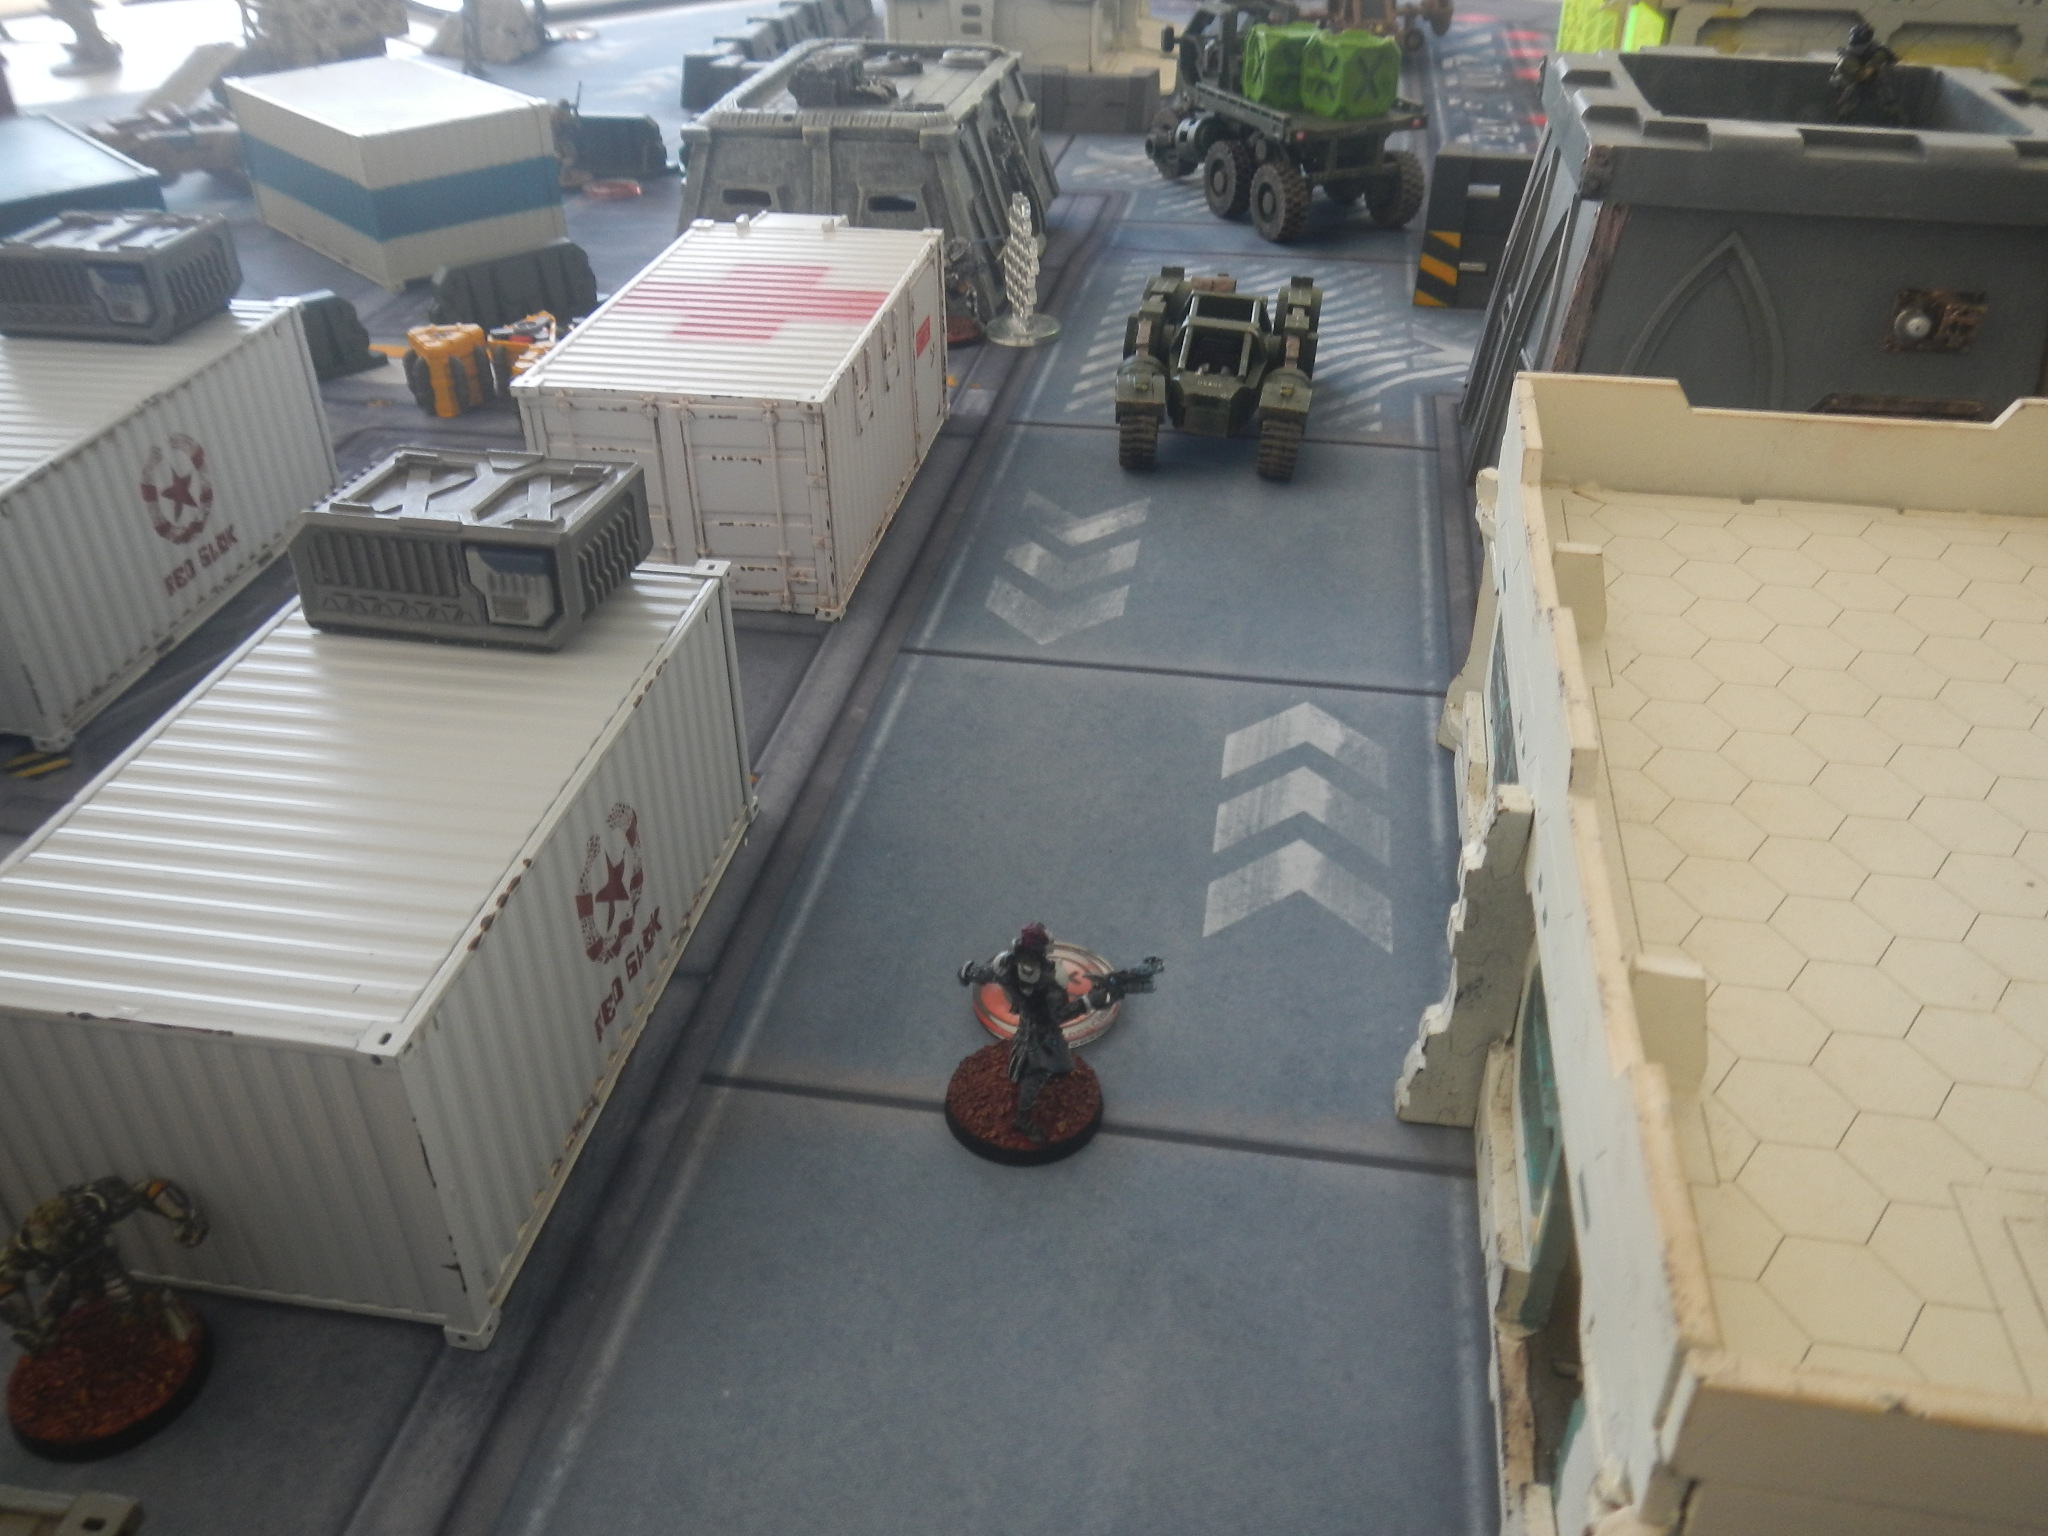
 The Hawa hacker applies some BSG firepower to the Rasail, leaving him feeling rather naked and in the open.
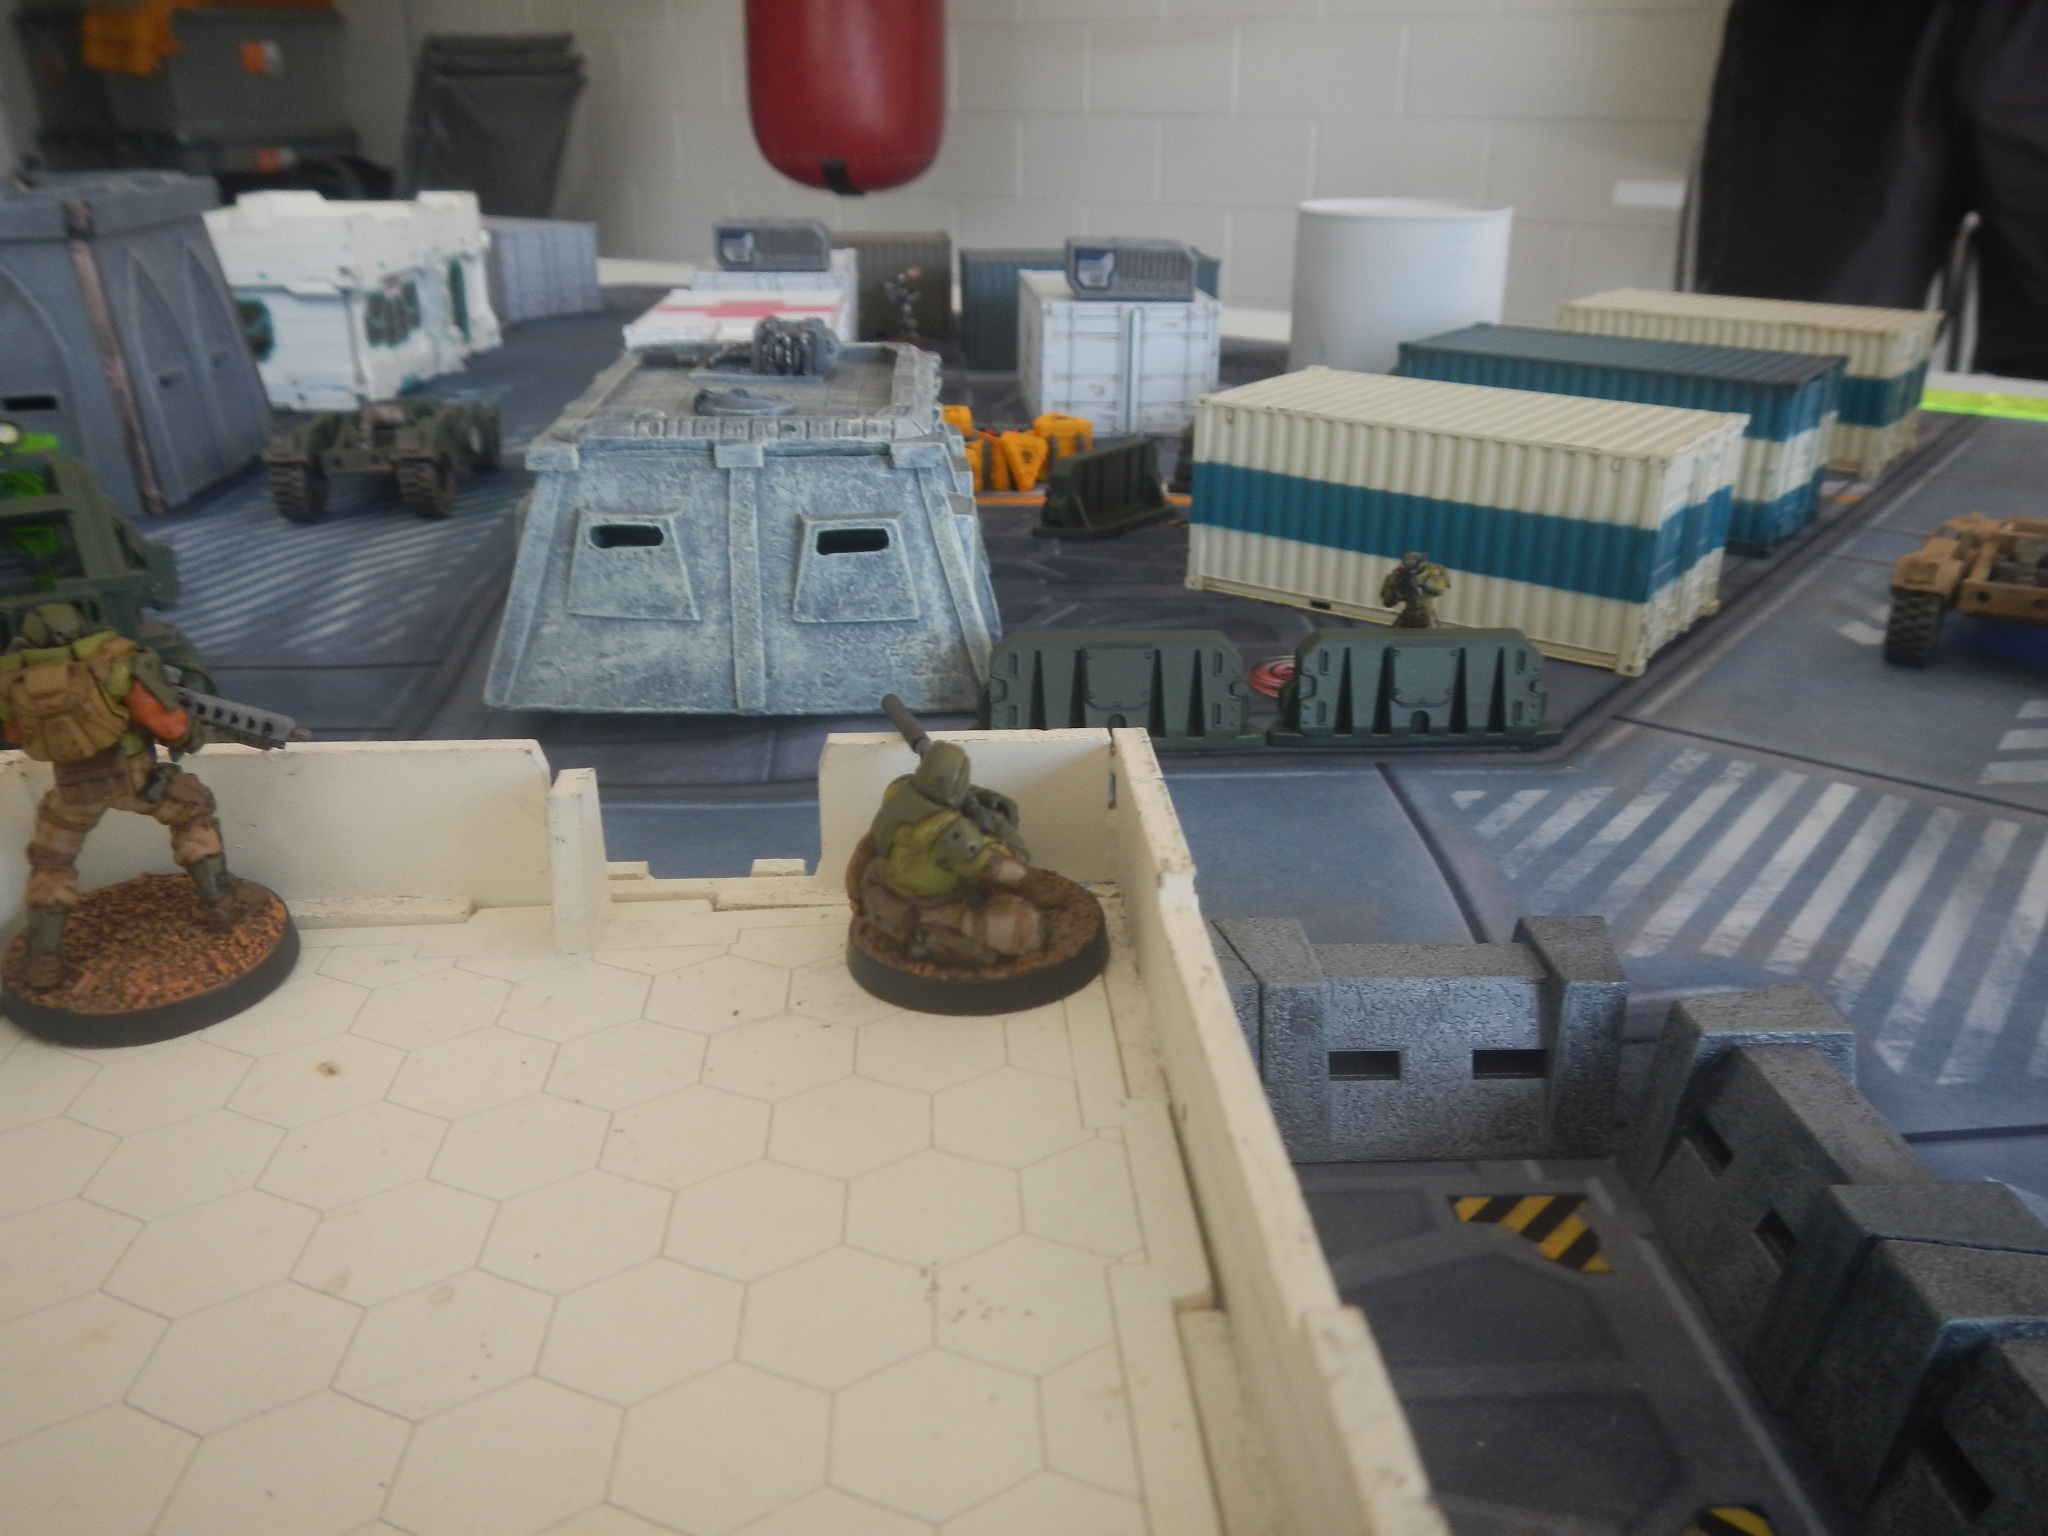
EPILOGUE: TRA852 thoughtfully finished his review of the tactical data as the Sekban LT and his team watched on silently and expectantly.
"That's one serious ambush you walked into," TRA852 commented, "You did well to fight your way out of it."
"Nice shooting, by the way", he indicated towards the fresh-face Ghulam trooper who'd just been assigned to the team. The young woman blushed at the compliment and one of the Djanbazan gave her a hearty pat on the back.
The assembled troopers seemed to relax a little. TRA852 remembered his previous comment to Zulu-21 at the end of the last battle with the Tohaa; admonishing the team to "make them pay in the next encounter". Well, they'd certainly done that.
"You certainly drove the raiders away from the area", mused TRA852 out aloud.
"Only two of the aliens got away from us, sir," ventured the Djanbazan sniper.
TRA852 nodded with a smile in acknowledgement, "Yes, well done on that. Payback is always good."
"We'll try and do better next time, sir" quipped the Djanbazan HMG gunner with a feral smirk.
"Well, we mightn't have achieved what we set out to do", said TRA852 more officially, "but I'll take the elimination of an alien raider group as a win."
There were some fist-pumps and cheers at this. Revenge had been achieved, even if at some cost; but that was war.
"Come, let's drink to fallen comrades and their memory." TRA852 led the Zulu-21 survivors to the bar.
RESULT: 0 - 0 draw
Jack couldn't achieve his personal classified (Experimental Medicine) as my troops kept killing their targets, leaving him no wounded for the Kumotail to doctor.
I was actually in good position at close of turn 2 to achieve my personal classified (Follow Up) and the Rescue classified on the wounded Hawa FO. The Rambo run of the Rasail took care of that!
This was also a very bloody fight. The Tohaa had all bar two troopers killed in action (Kumotail & Clipsos) of the nine committed (plus three Chaksa in various configuration - of which two were destroyed). In return, QK lost three Sekban KIA and another four wounded (Sekban LT, Sekban Rifleman, Hawa FO, Djanbazan SMR). Keep in mind that QK also healed two other wounded (Sekban spitfire & Djanbazan sniper) and you can see how bloody it was.
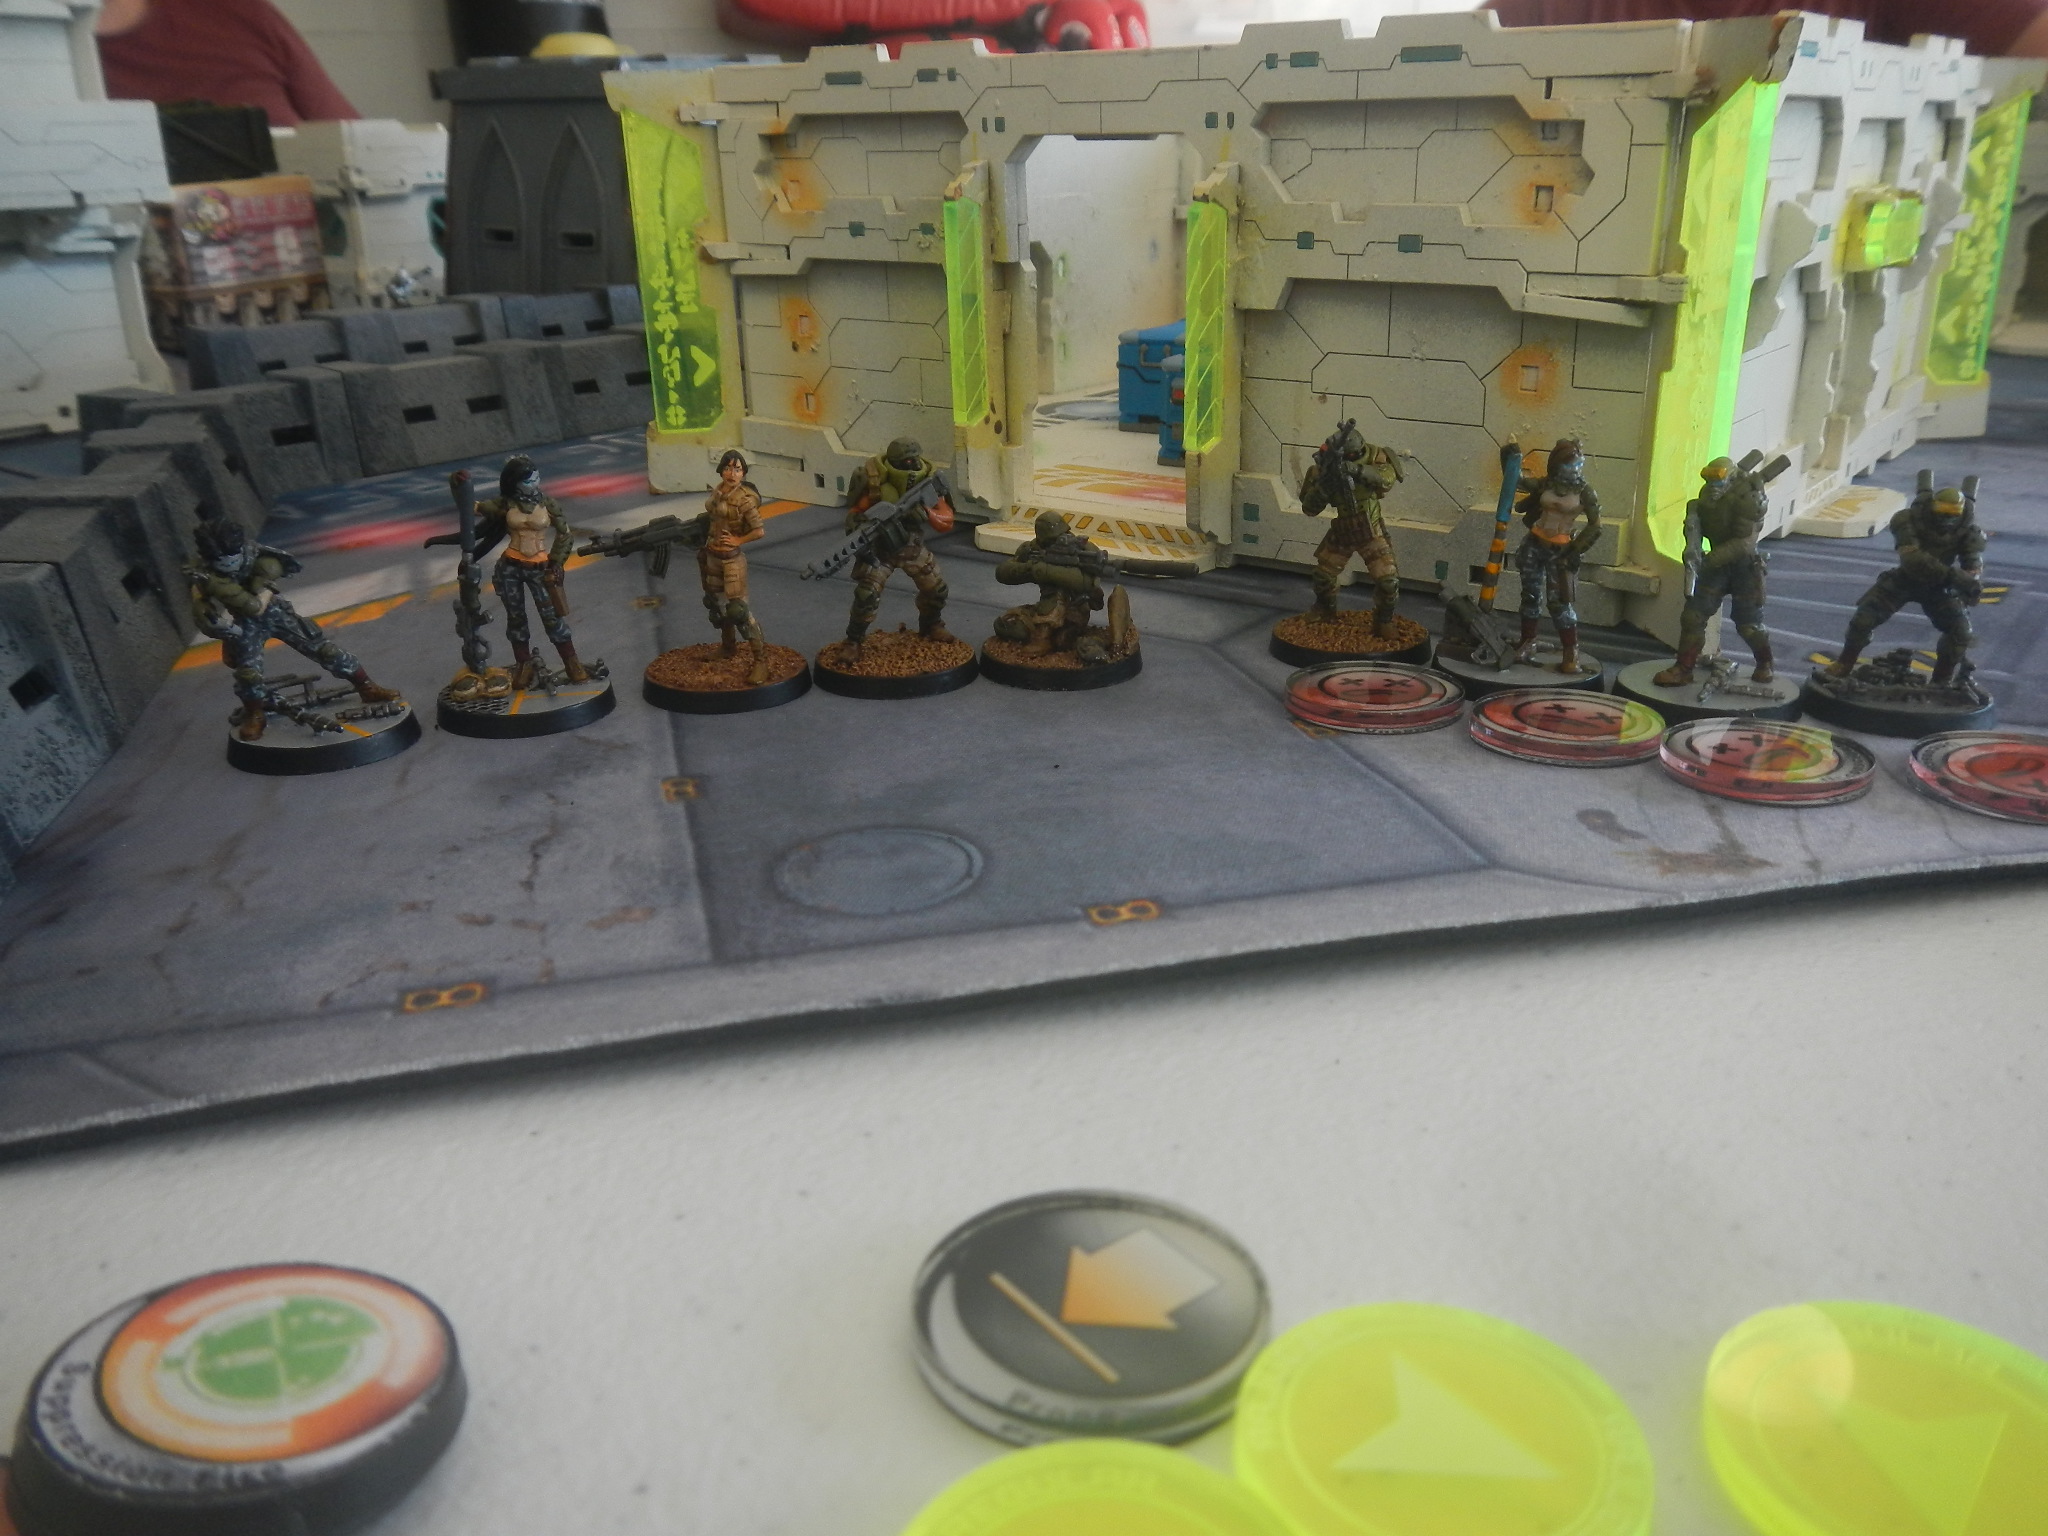 The surviving members of Zulu-21, the wounded are on the right marked with counters. All made a full, fast recovery thanks to Haqqislam medical technology.
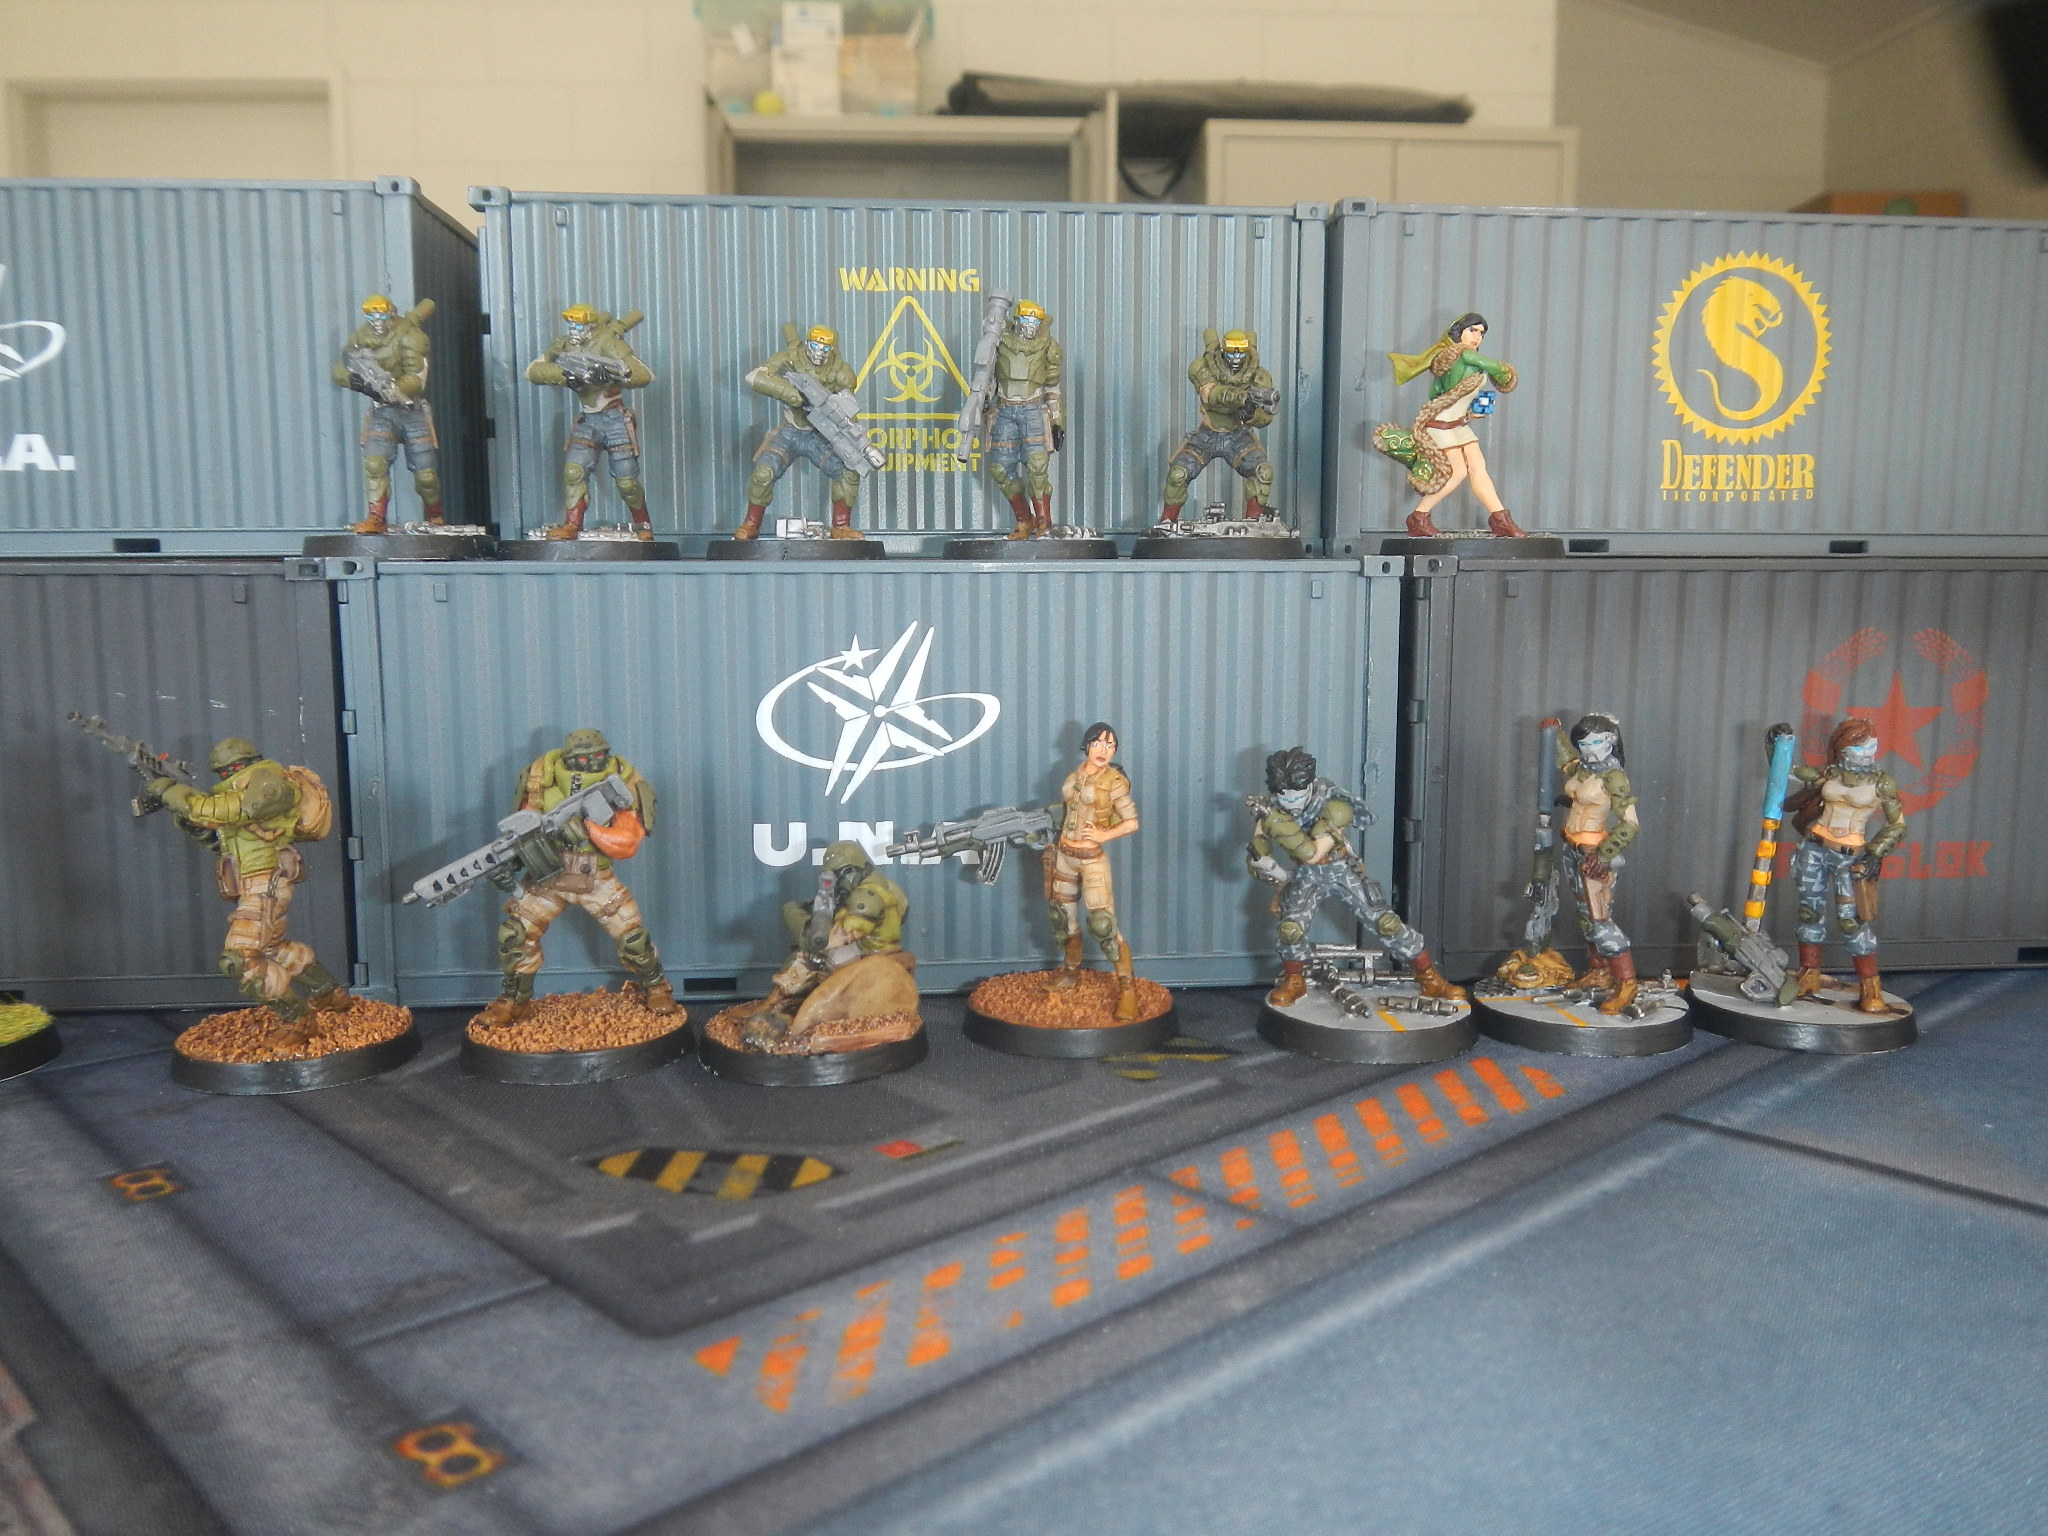
This was an "interesting" game to say the least. Again, I want to thank Jack, my opponent, for being a great sport and playing a great game. We both suffered the tribulations of fickle fate.
I couldn't believe how bad my first turn went; and the childish part of my brain was almost ready to rage-quit at that point. However, I'm a big believer in fighting on and see quitting as somewhat disrespectful of my opponent. I'm glad I did as the game went on to produce a good story.
Turn 1 was a disaster for me, especially as I had identified good options for thinning out the Tohaa from the outset. Jack realised, as I did, that his bunched up group near the orange barrels was a great target for the Sekban HRL in the 5-man link. I had a clear shot from the cover of the doorway straight to them. I decided to shoot the Sukeul on my way to taking up that position. Then it all fell apart on dice rolls for attacks that were in my favour. Spending all your orders to take out three of your own troops for no loss to the enemy really dampens morale. With no troopers in ARO positions, I honestly thought it was going to be a 1 turn game.
Jack couldn't believe his luck and I think started his turn a little too confidently. He advanced his Gorgos TAG aggressively, not really considering what my camo markers could be. The Ghulam trooper with Repeaters & E-Maulers had been my reserve and had been placed to counter his TAG.
[Jack's reserve had been his Clipsos, who failed her daring bid to infiltrate into QK territory and wound up in the back line where she did nothing for the rest of the game.]
The shock of unexpectedly coming under hacking and E-Mauler attack seemed to have rattled him into hasty action. Instead of leaving the Gorgos and clearing the area with other troops, he tried to move it away. This opened it up to more hacking ARO and eventual possession. This was a game changer.
From there he had to eliminate the TAG as his forces were too vulnerable to its attacks. Although he succeeded in this, it used up a lot of his orders and cost him the Sukeul triad. Although he achieved some positive results, QK were now back in the game.
As an aside, we joked about the Hawa hacker, nestled up in the tall bunker, playing with his game-boy to direct the possessed TAG.
Turn 2 for QK was fairly positive, all things considered, and I thought I finished in good position to achieve a narrow win in turn 3. I'd recovered two wounded, rebuilt both links, and had troops in some decent ARO positions. The serious threats from the Sukeul and Igao had been eliminated. The exposed Djanbazan SMR was a risk I accepted to get rid of the Igao.
Jack turned all this around in his turn 2 with some good play that exploited some luck. When the Makaul charged, I'd confidently expected the Sekban spitfire to take him out. Instead, the Makaul pulled off a smoke-dodge and blocked the fire-lane with eclipse smoke. This may have saved the Makaul, but more importantly, it allowed the Rasail and its entourage to get across the road without being interdicted by the Sekban spitfire or Djanbazan HMG. From there he went on to rip my force apart, put me in loss of lieutenant, and eliminate any chance I had of winning the game. All I could do now was try and avoid defeat.
Turn 3 went well for me, with a bit of luck coming my way. All my shots worked and the results really limited Jack's options (and orders). Losing his Rasail if it activated was always on the cards and his use of the LT order to try and extricate him was a good move. If that had worked, he could have used it to achieve classifieds. As it was, my shooting continued to work and the Rasail was eliminated. After that Jack really had no good options. He tried the Hail-Mary rush with the Kaeltar, but this was always a very long odds gambit. It was no surprise to either of us that it didn't work. Once the Kaeltar was gone, the game was over.
So, a very bloody game for no result - but a great story for later telling.


Our local Tohaa player does the double Sukeuls too. So brutal. Tohaa just has so many wounds.
Strong late report! Good job Commander
Well done
Even though it’s a draw, that report is simply a WIN! Well done!
That is one way to play this mission 😀 nice report!
Wow what a game. Also, what a fantastic report! Way to end strong! Thank you for all your contributions, Commander.