Fought At The Gallery Maze: The Passageways
1654 days 12 hours 24 minutes ago
Deadly Dance at the Maze
300 POINTSAfter having secured the Node from greedy PanO hands and after having cleared the Cosmika HQ from filthy Aleph bots we were patrolling the Maze, to clear out Shasvastii and Aleph Sex Bots alike, running into some PanO Troopers that obvioulsy were marionettes of Aleph. This resulted in a Deadly Dance around the Maze.
PanO won the Lieutenant roll and chose deployment, Corregidor chose second turn.
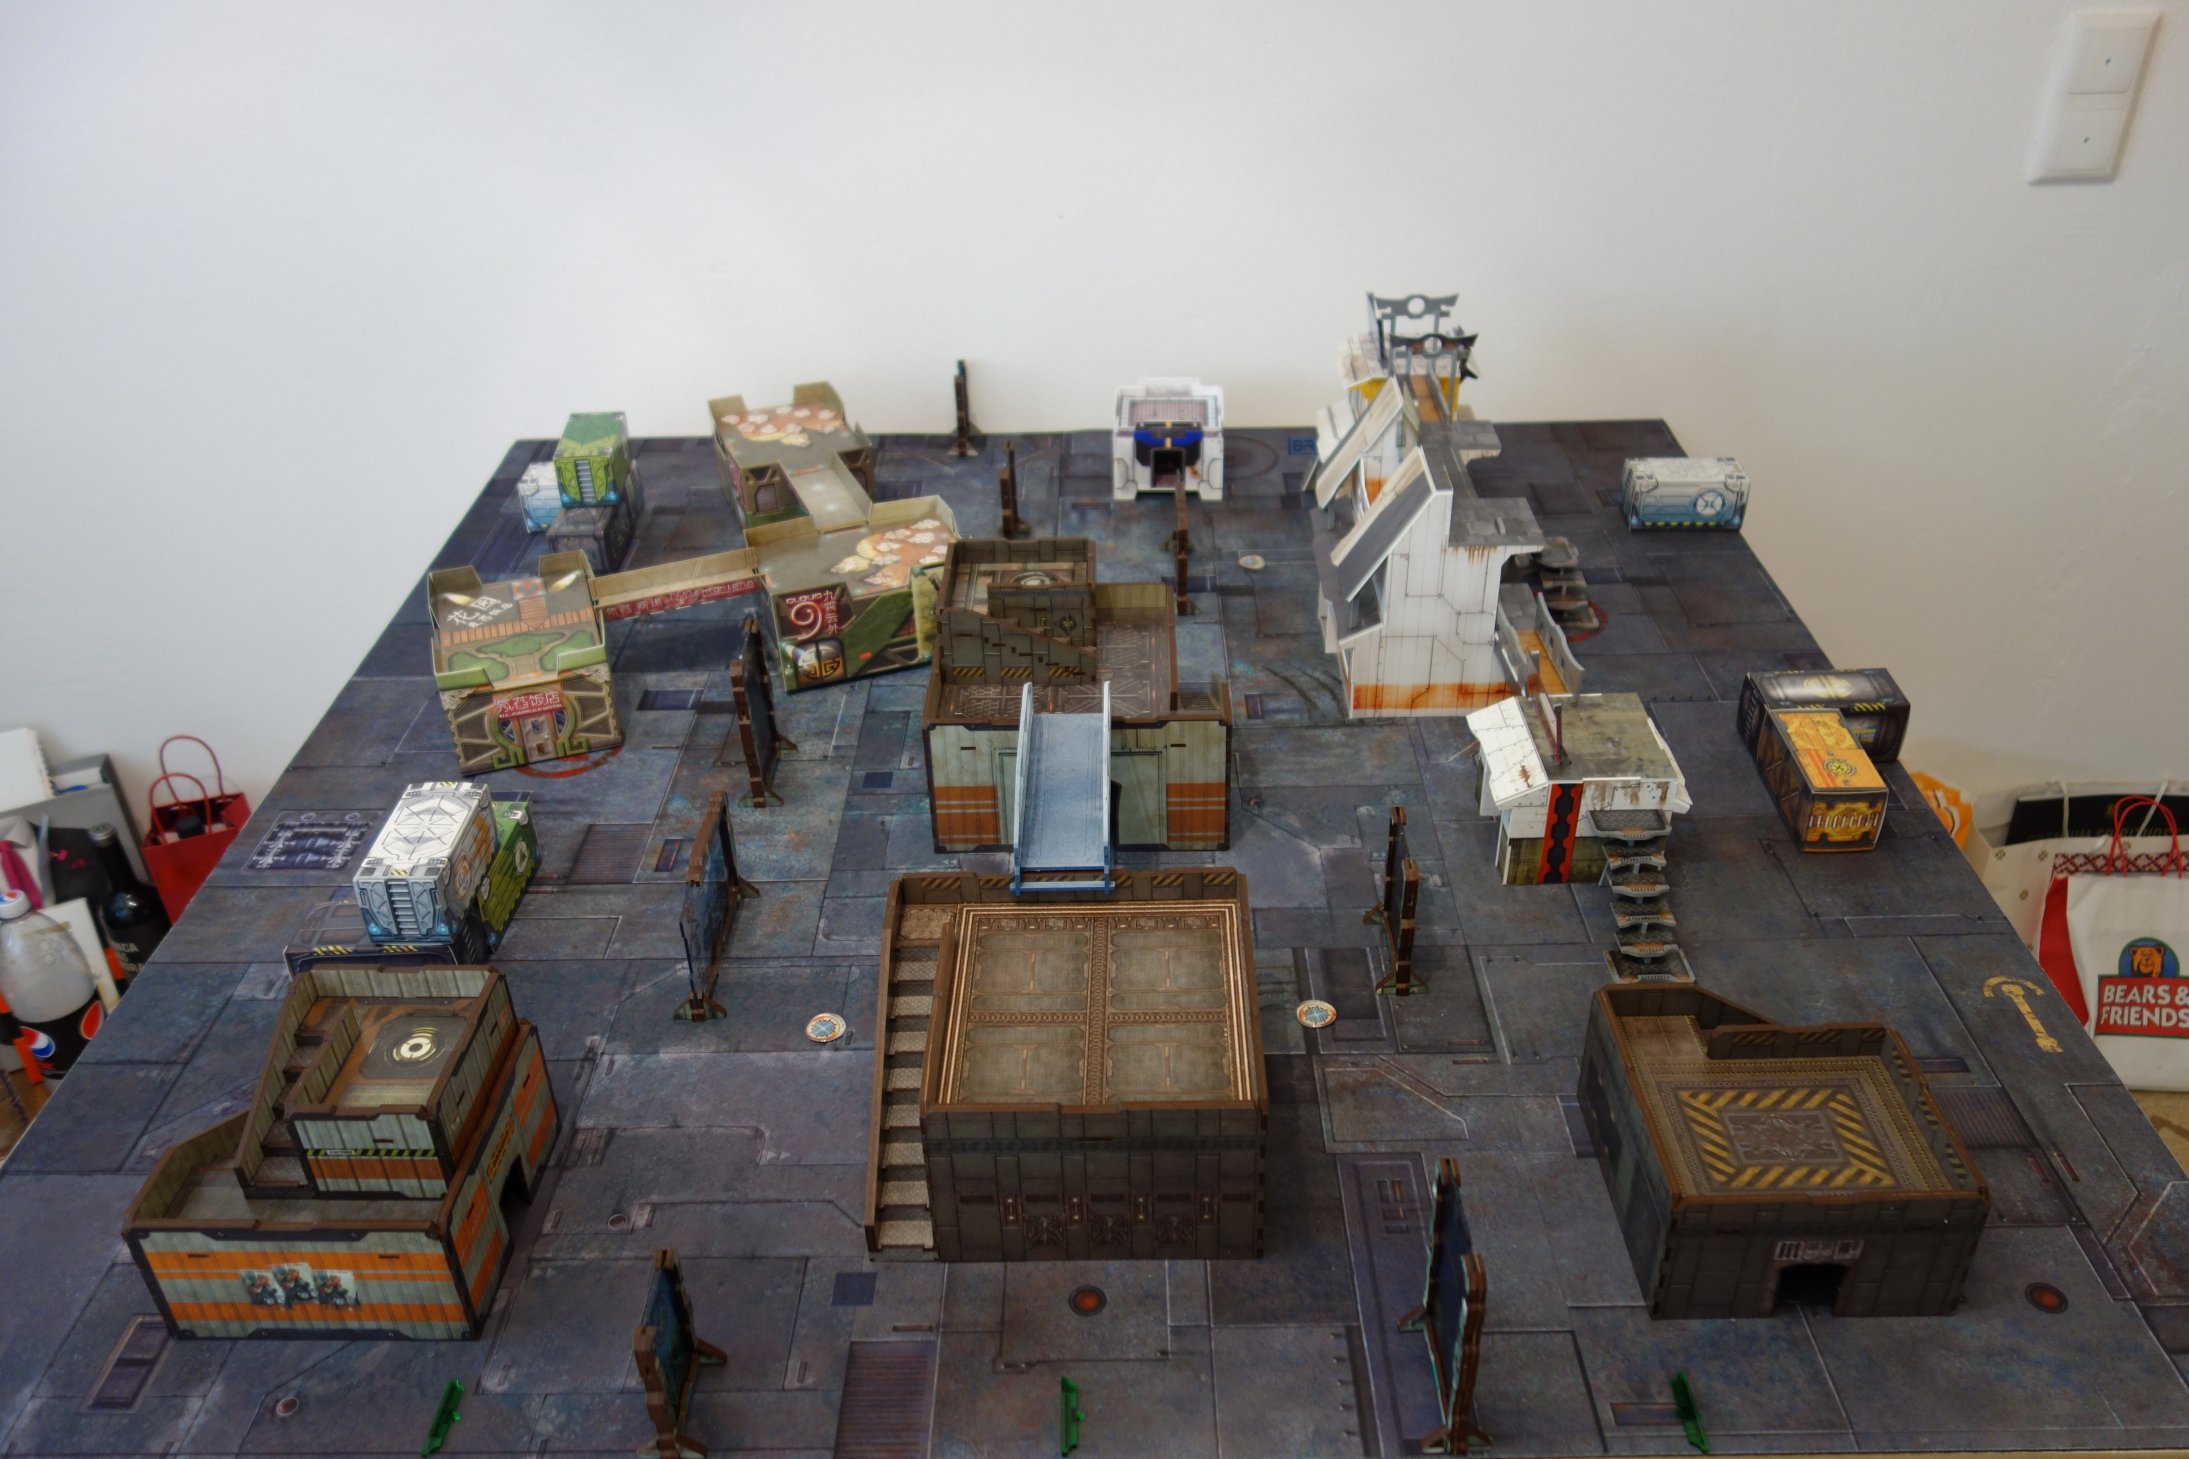
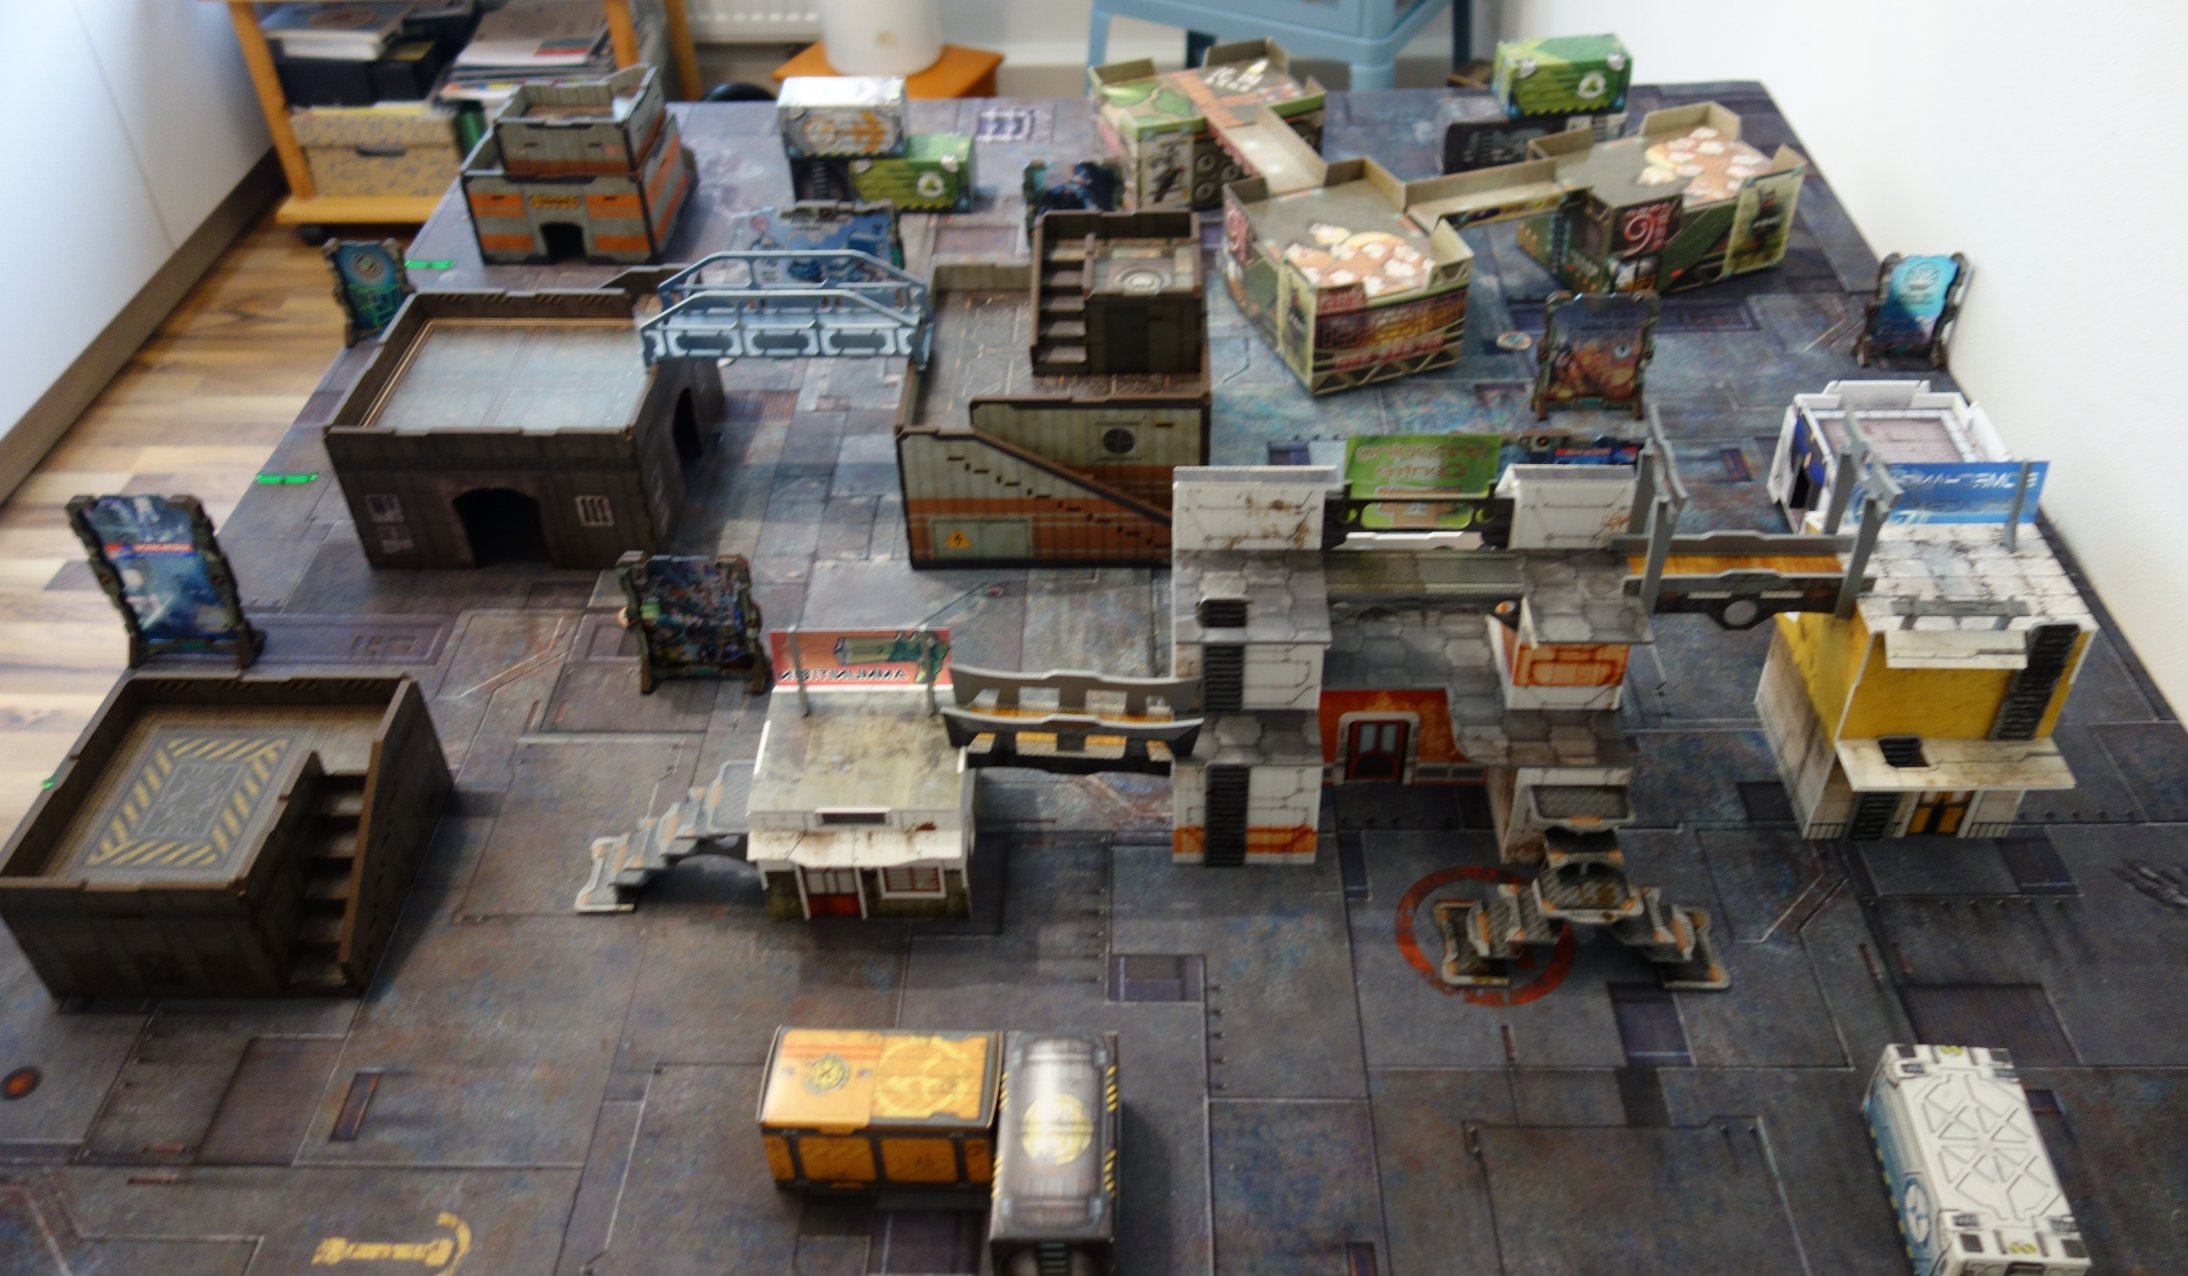
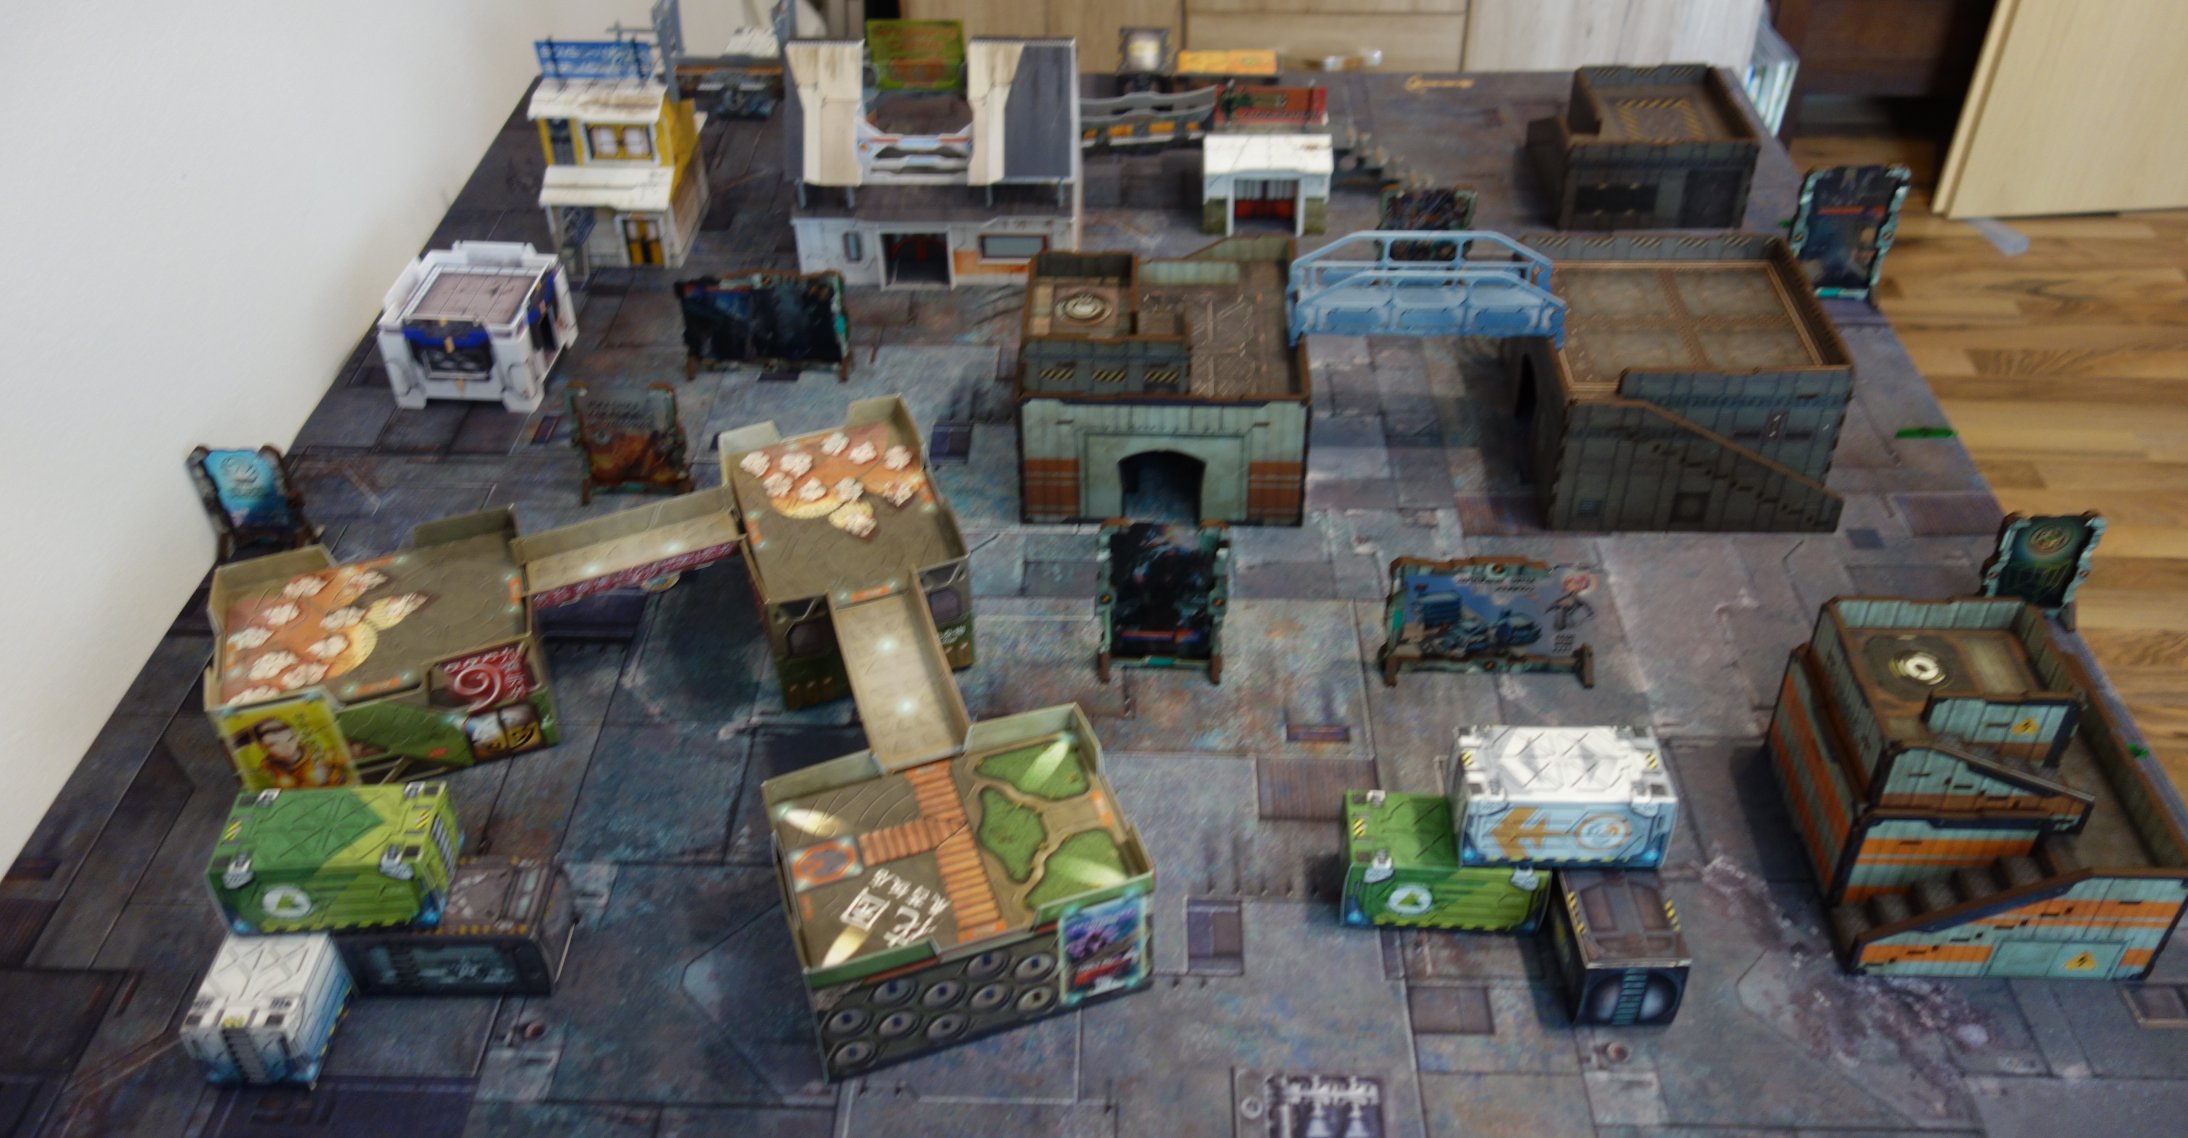
Board
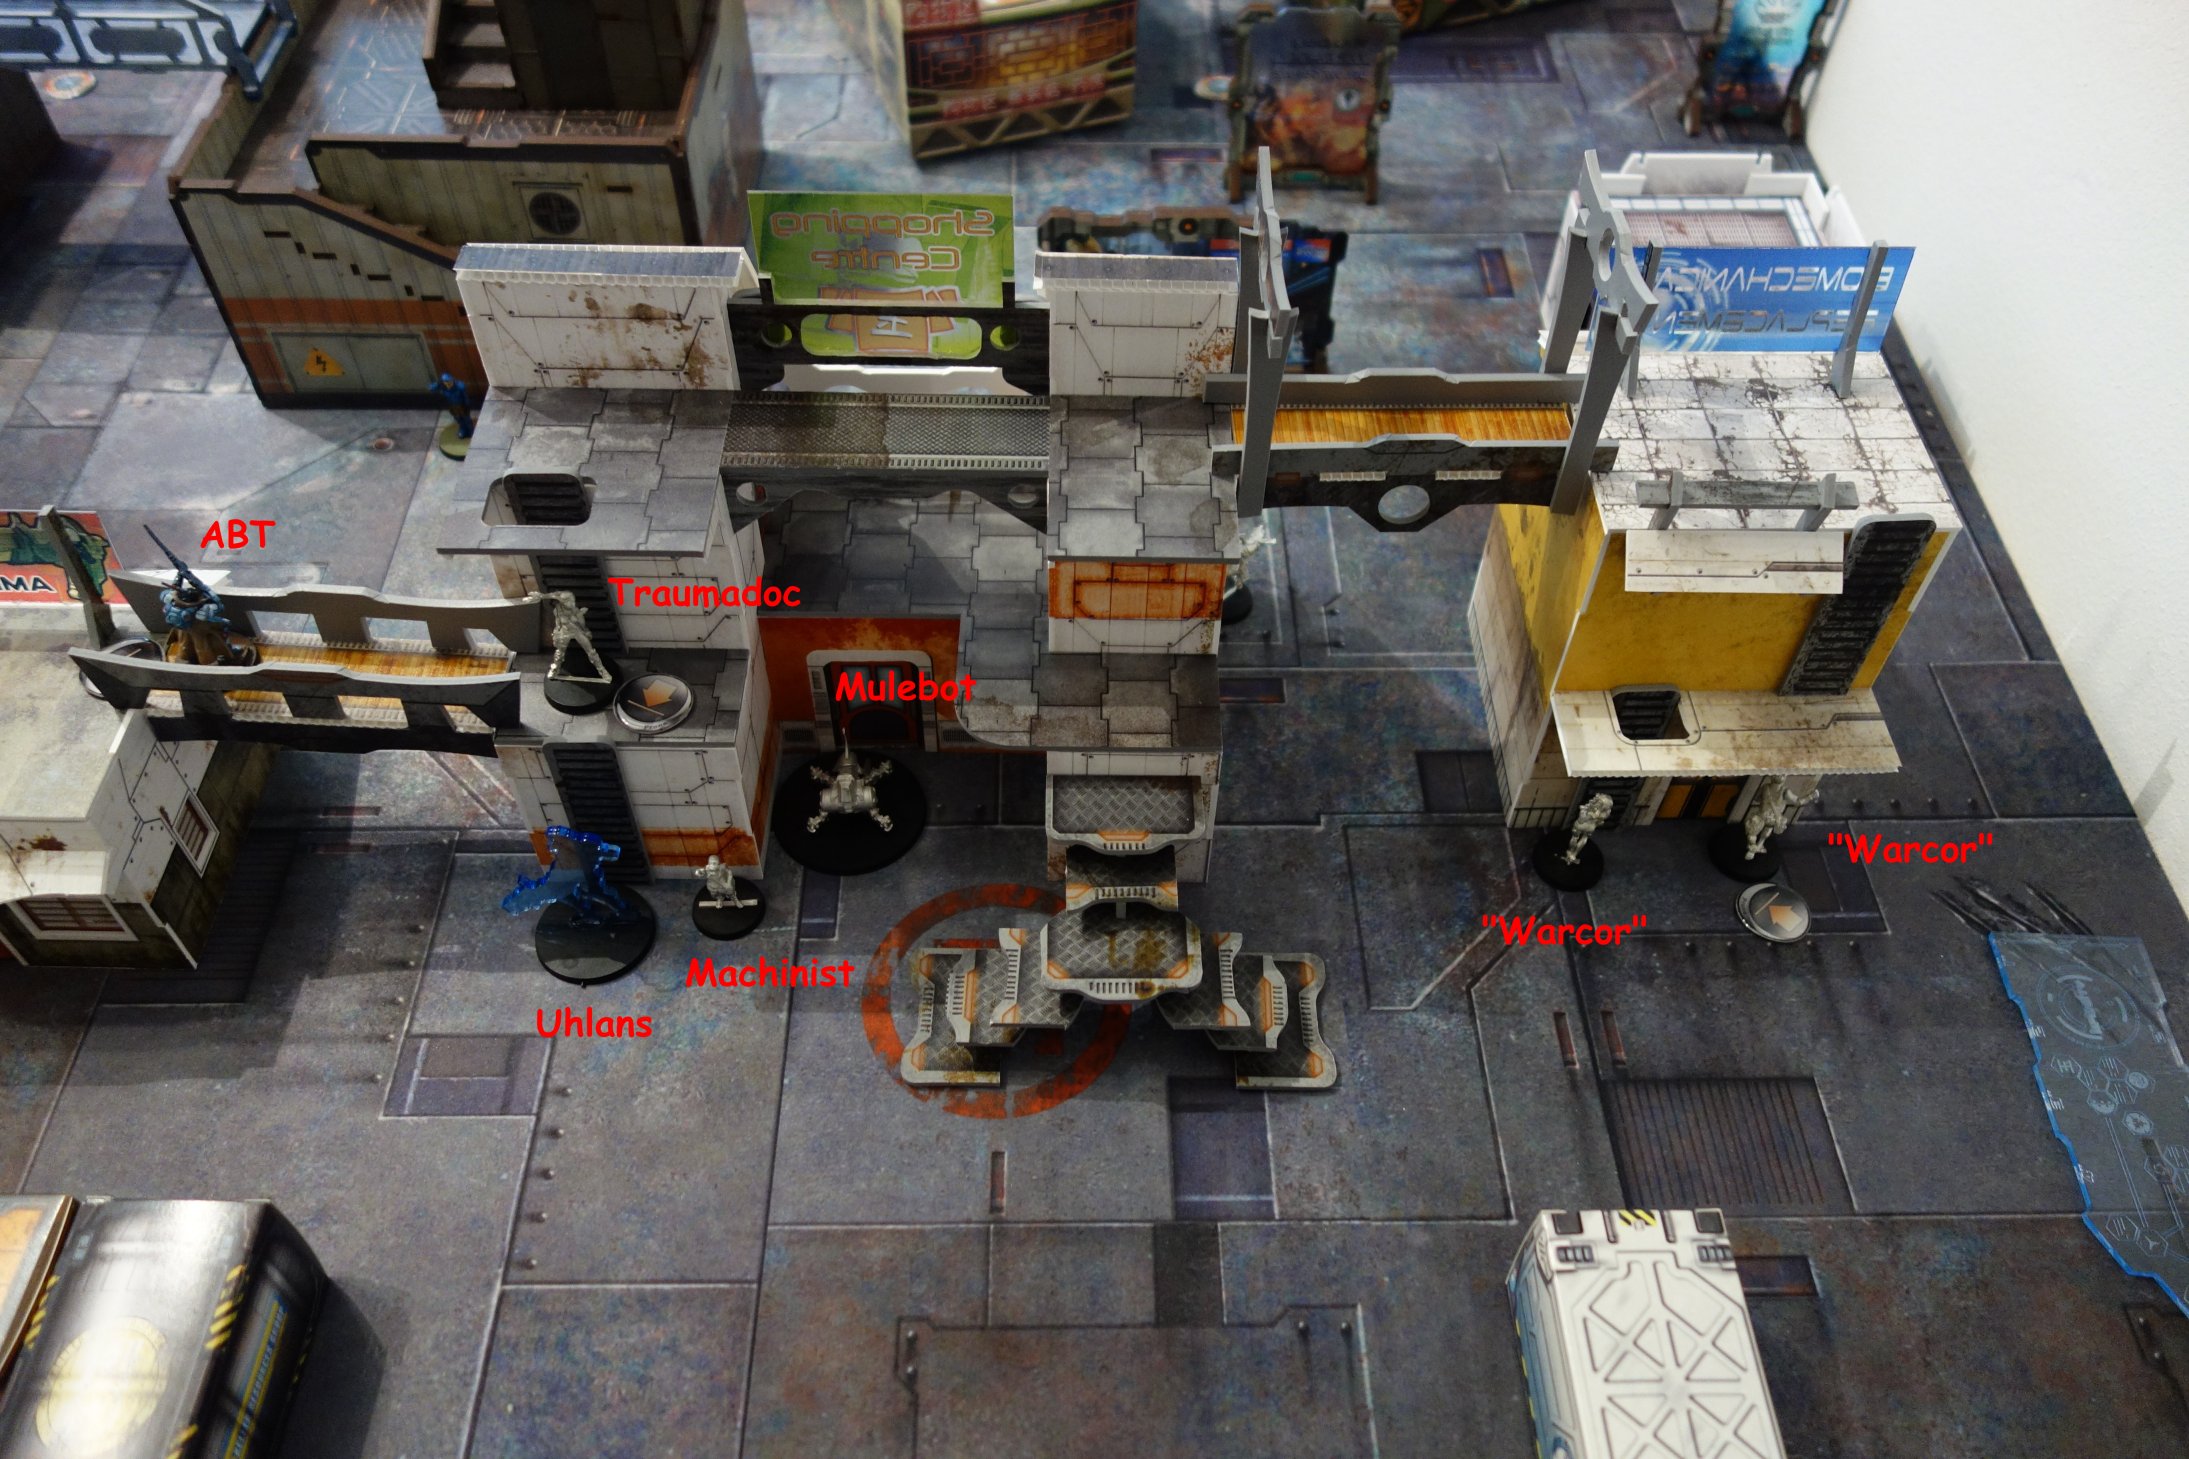
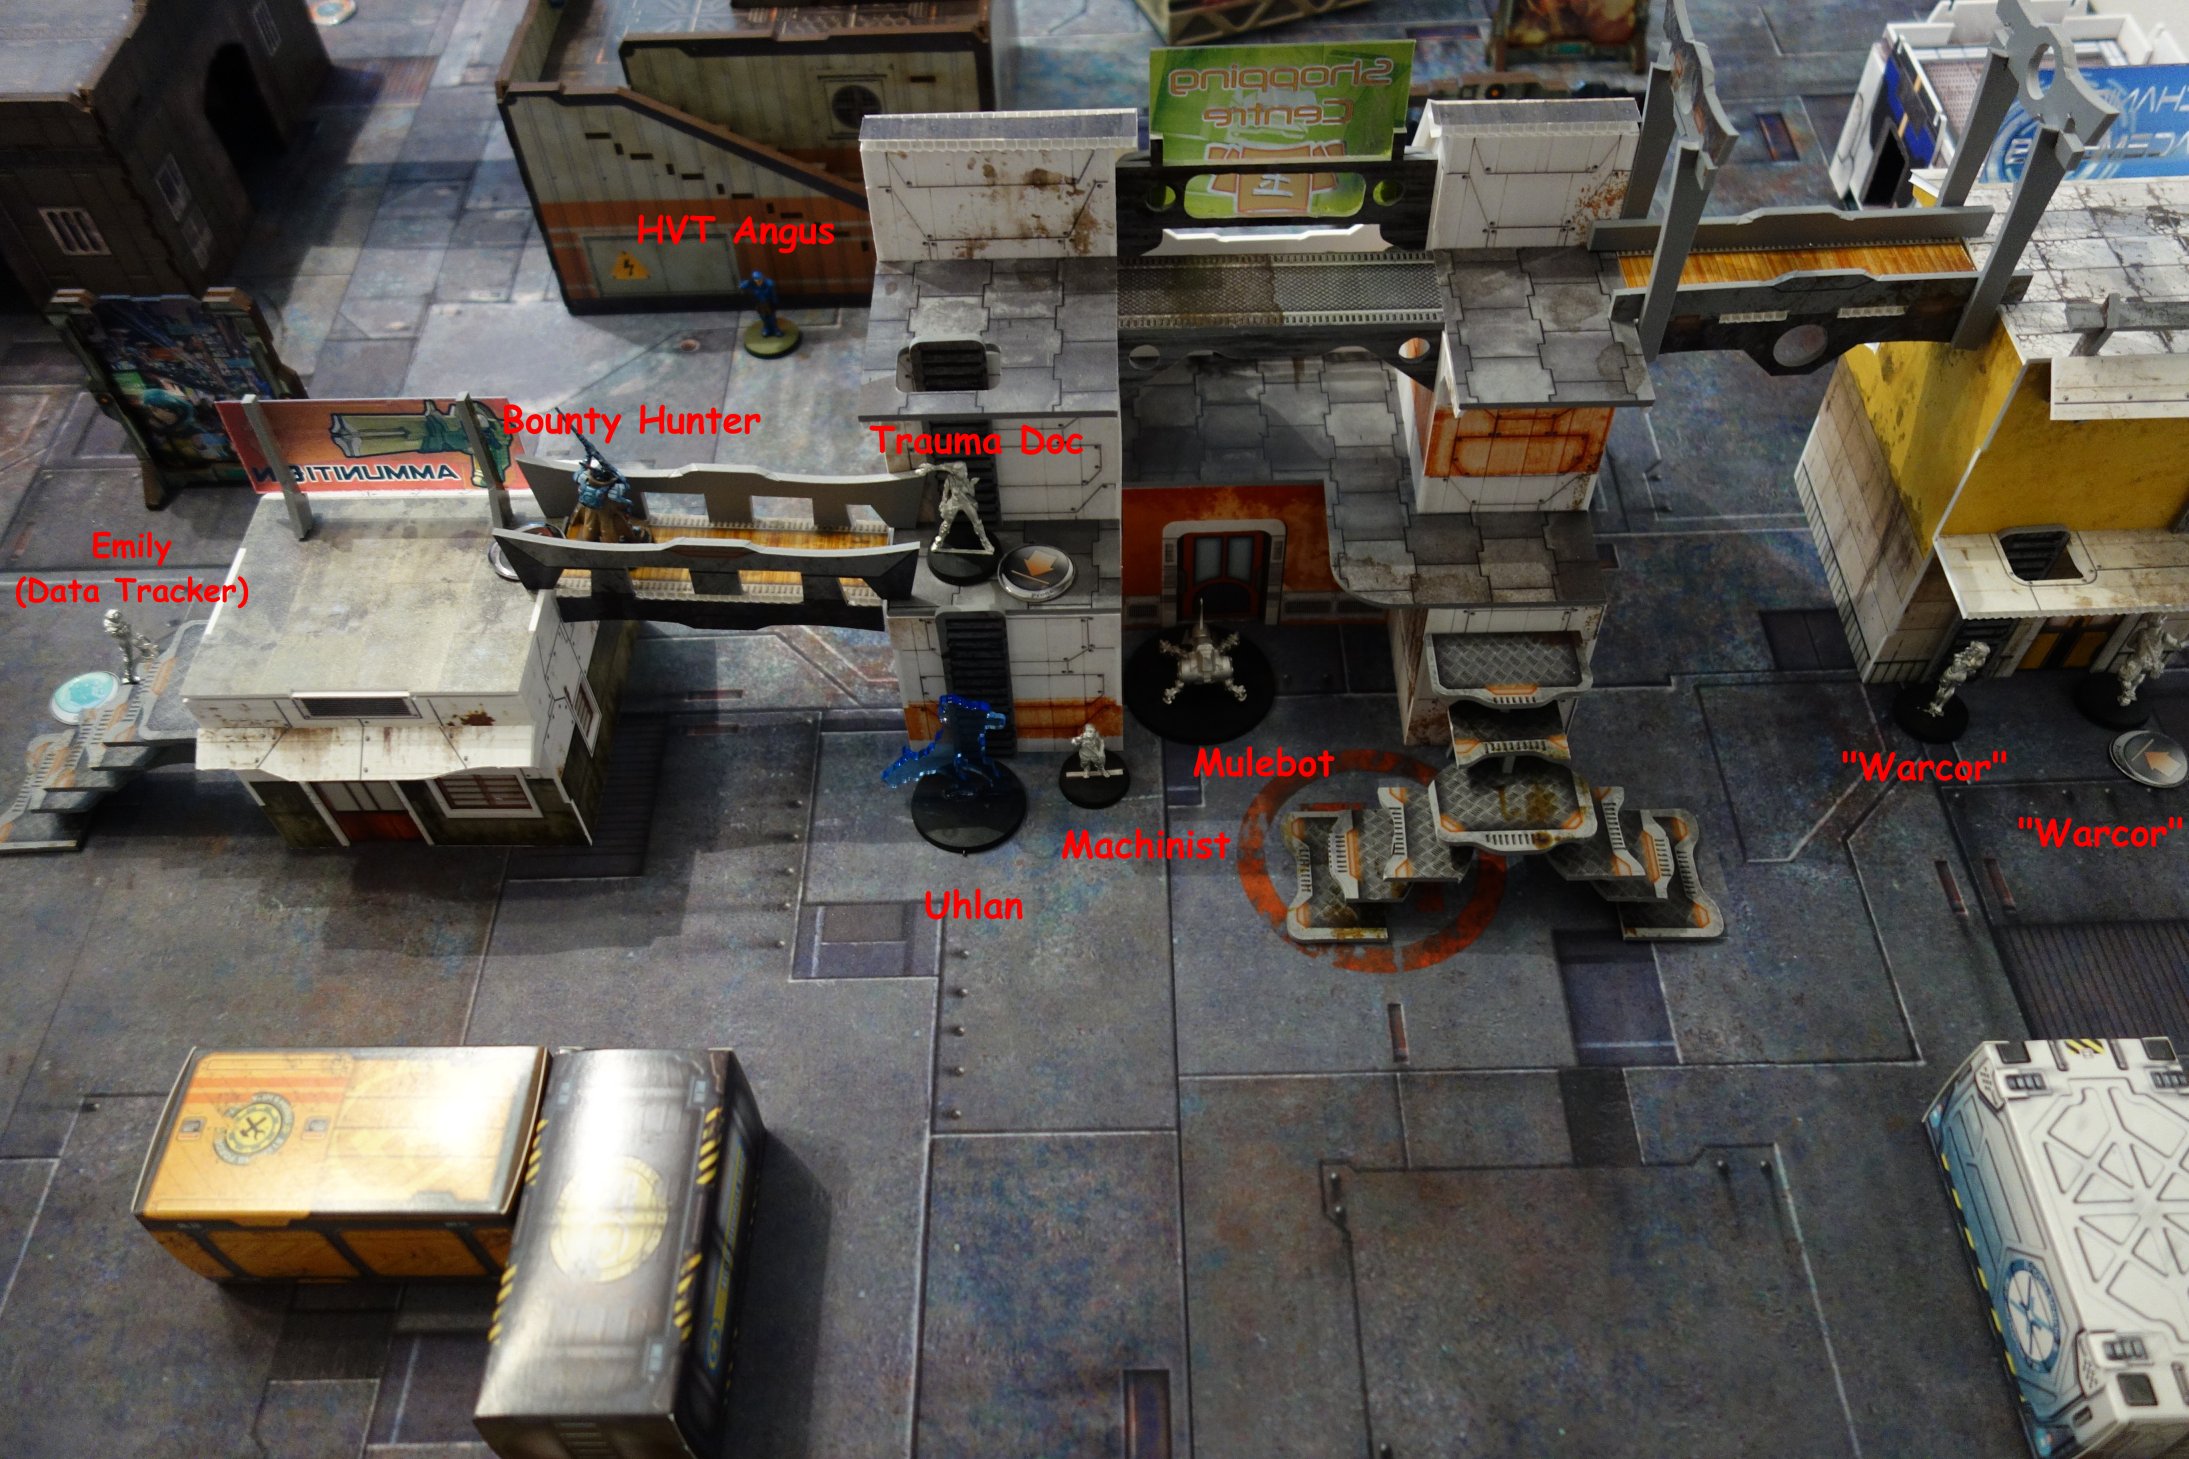
After studying the Courtesy List there was something wrong. Only one Irregular Order and three on the list, so the two Warcors were in question of being Warcors at all. And after the first turn of PanO, it turned out PanO had an irregular order, so Joan was in question as well, since she woud have been the logical lieutenant.
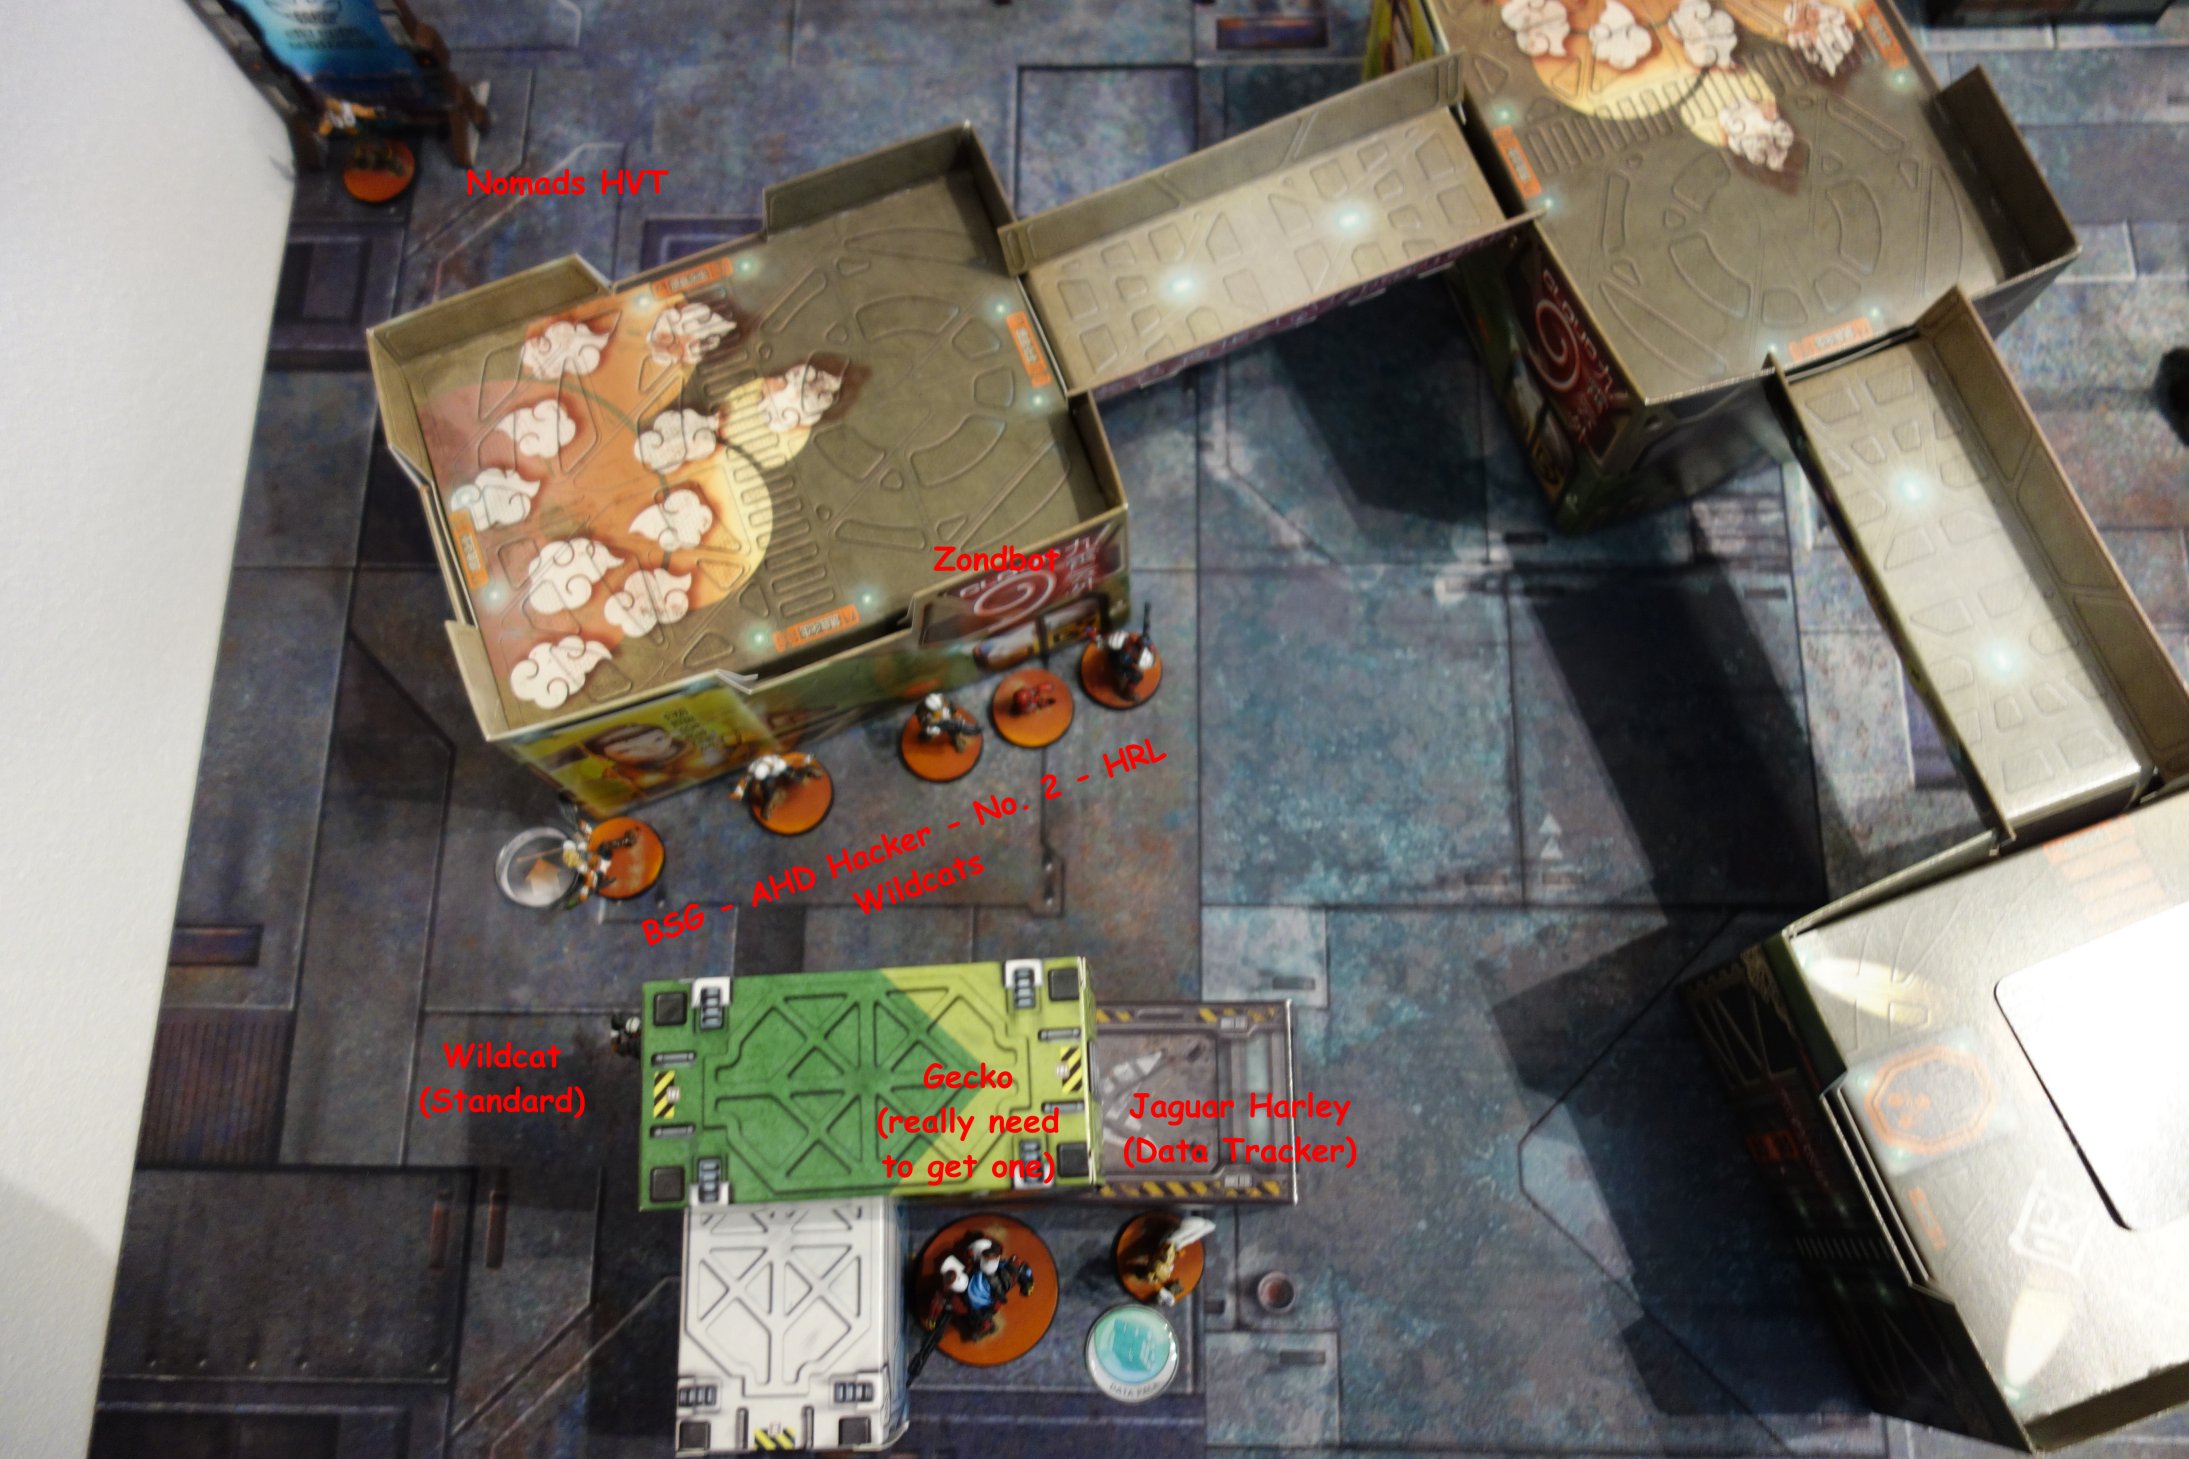
Data Tracker were Emily and Jaguar Harley who got promoted and had now to take on some more responsibility.
After Deployment the Quadrants were rolled. PanO got Quadrant 2, Nomads Quadrant 4, so we both were on the same side and had the Quadrant next to the Deployment Zone of the other.
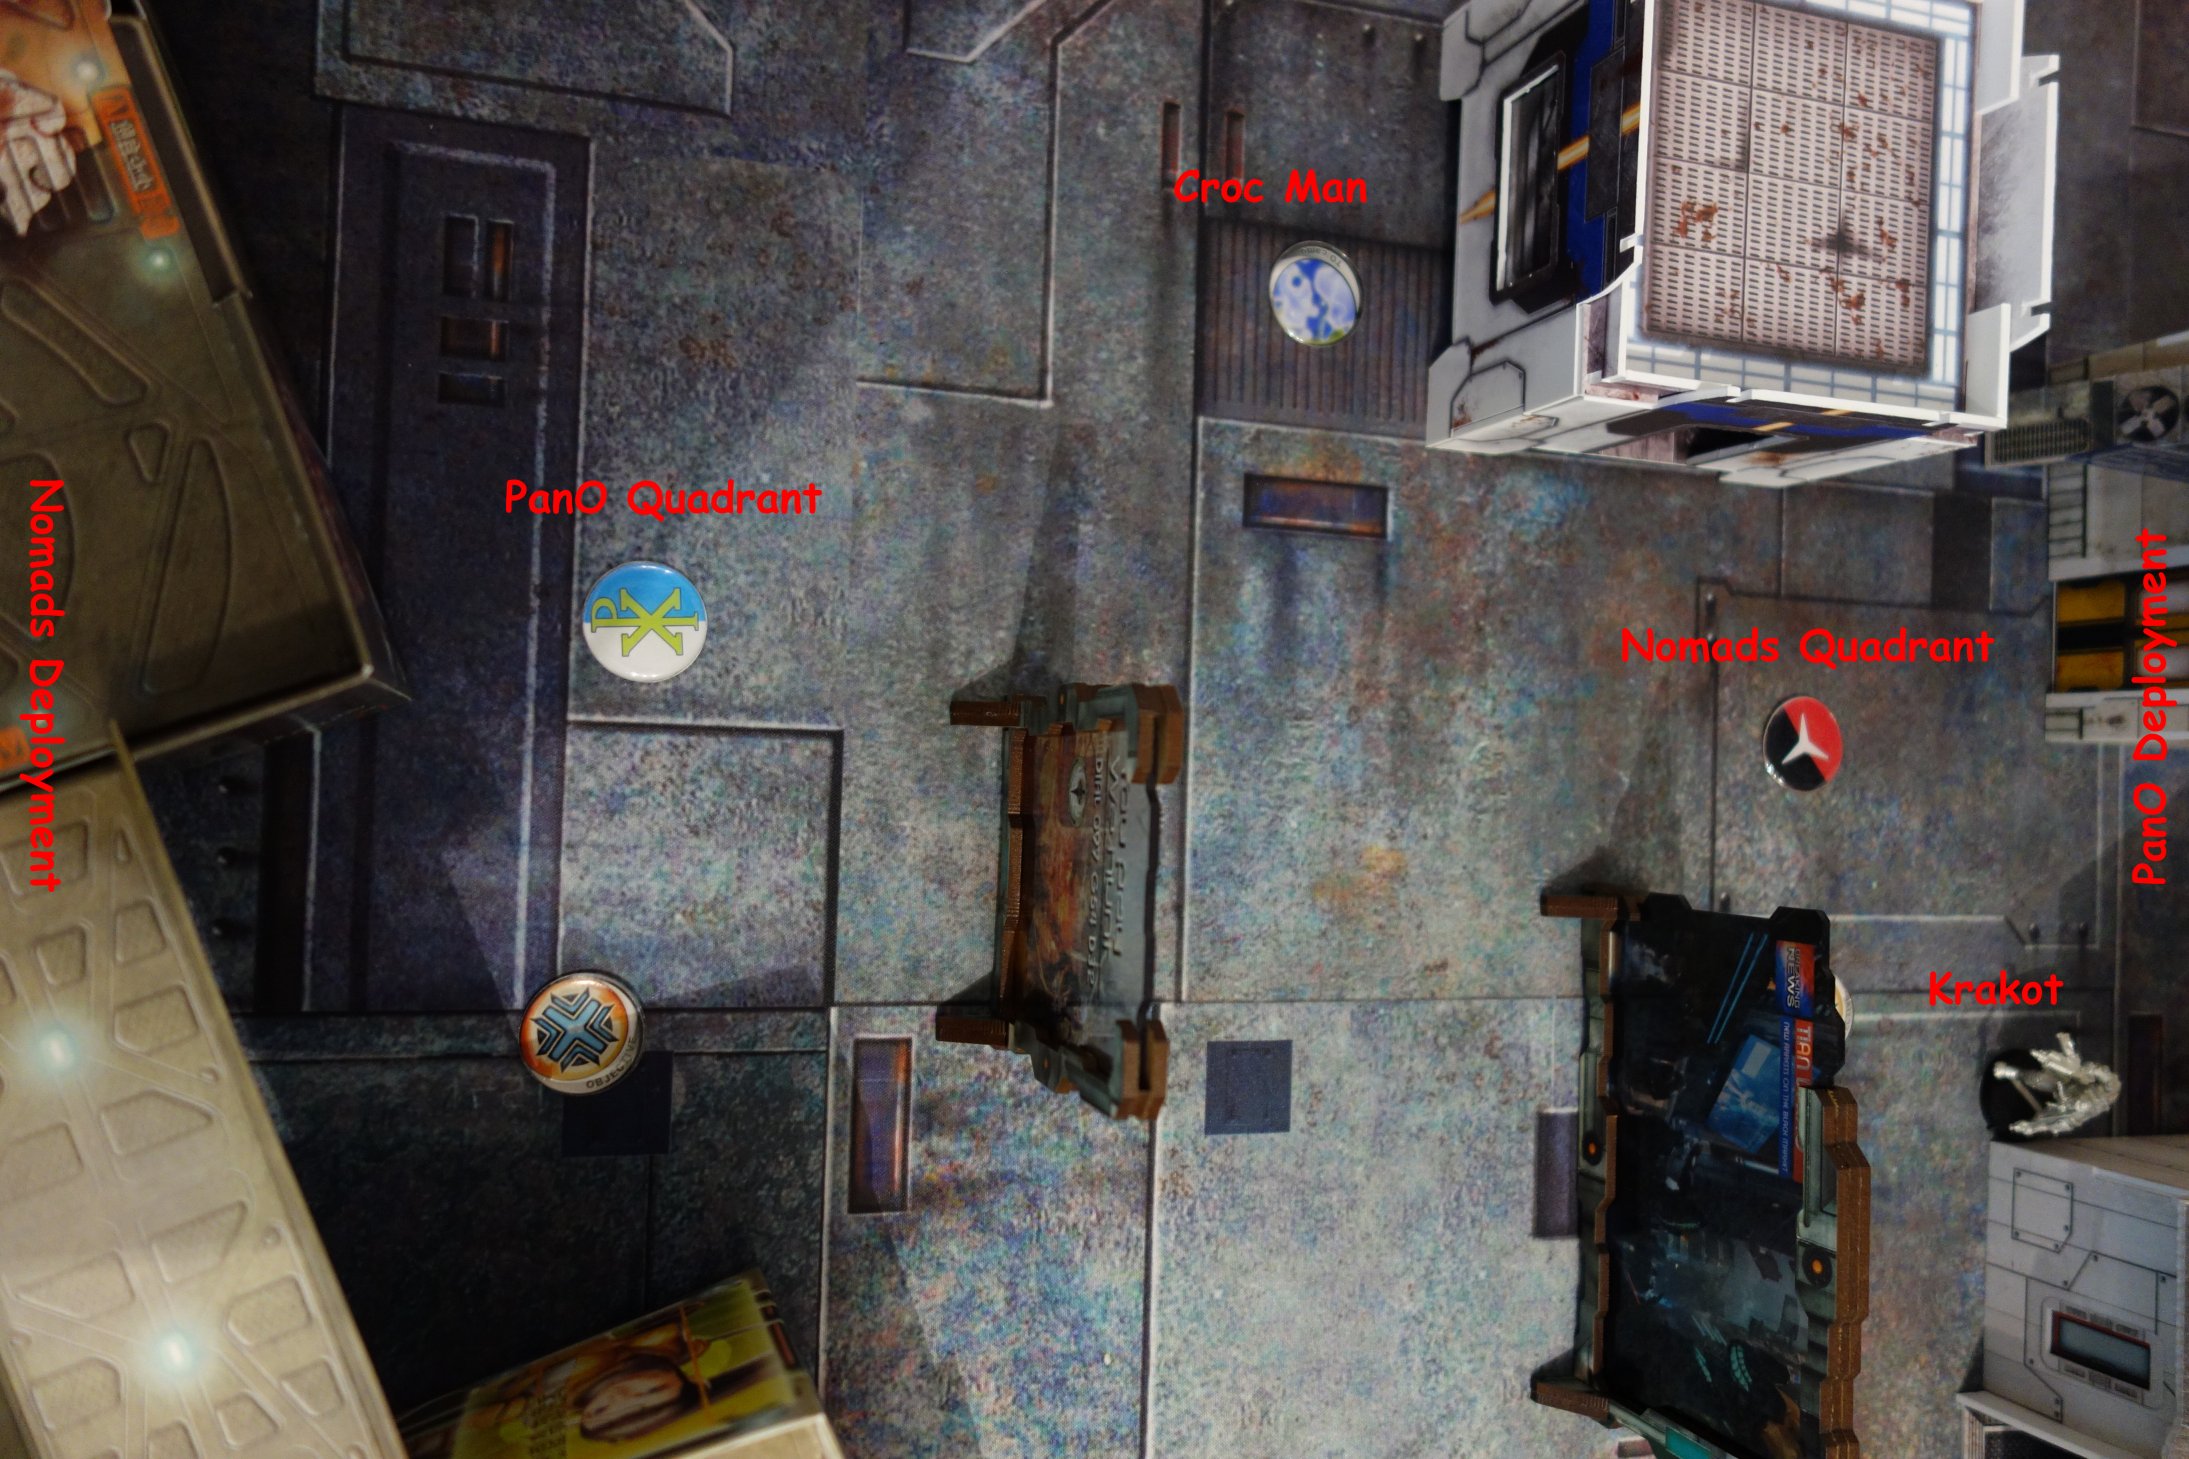
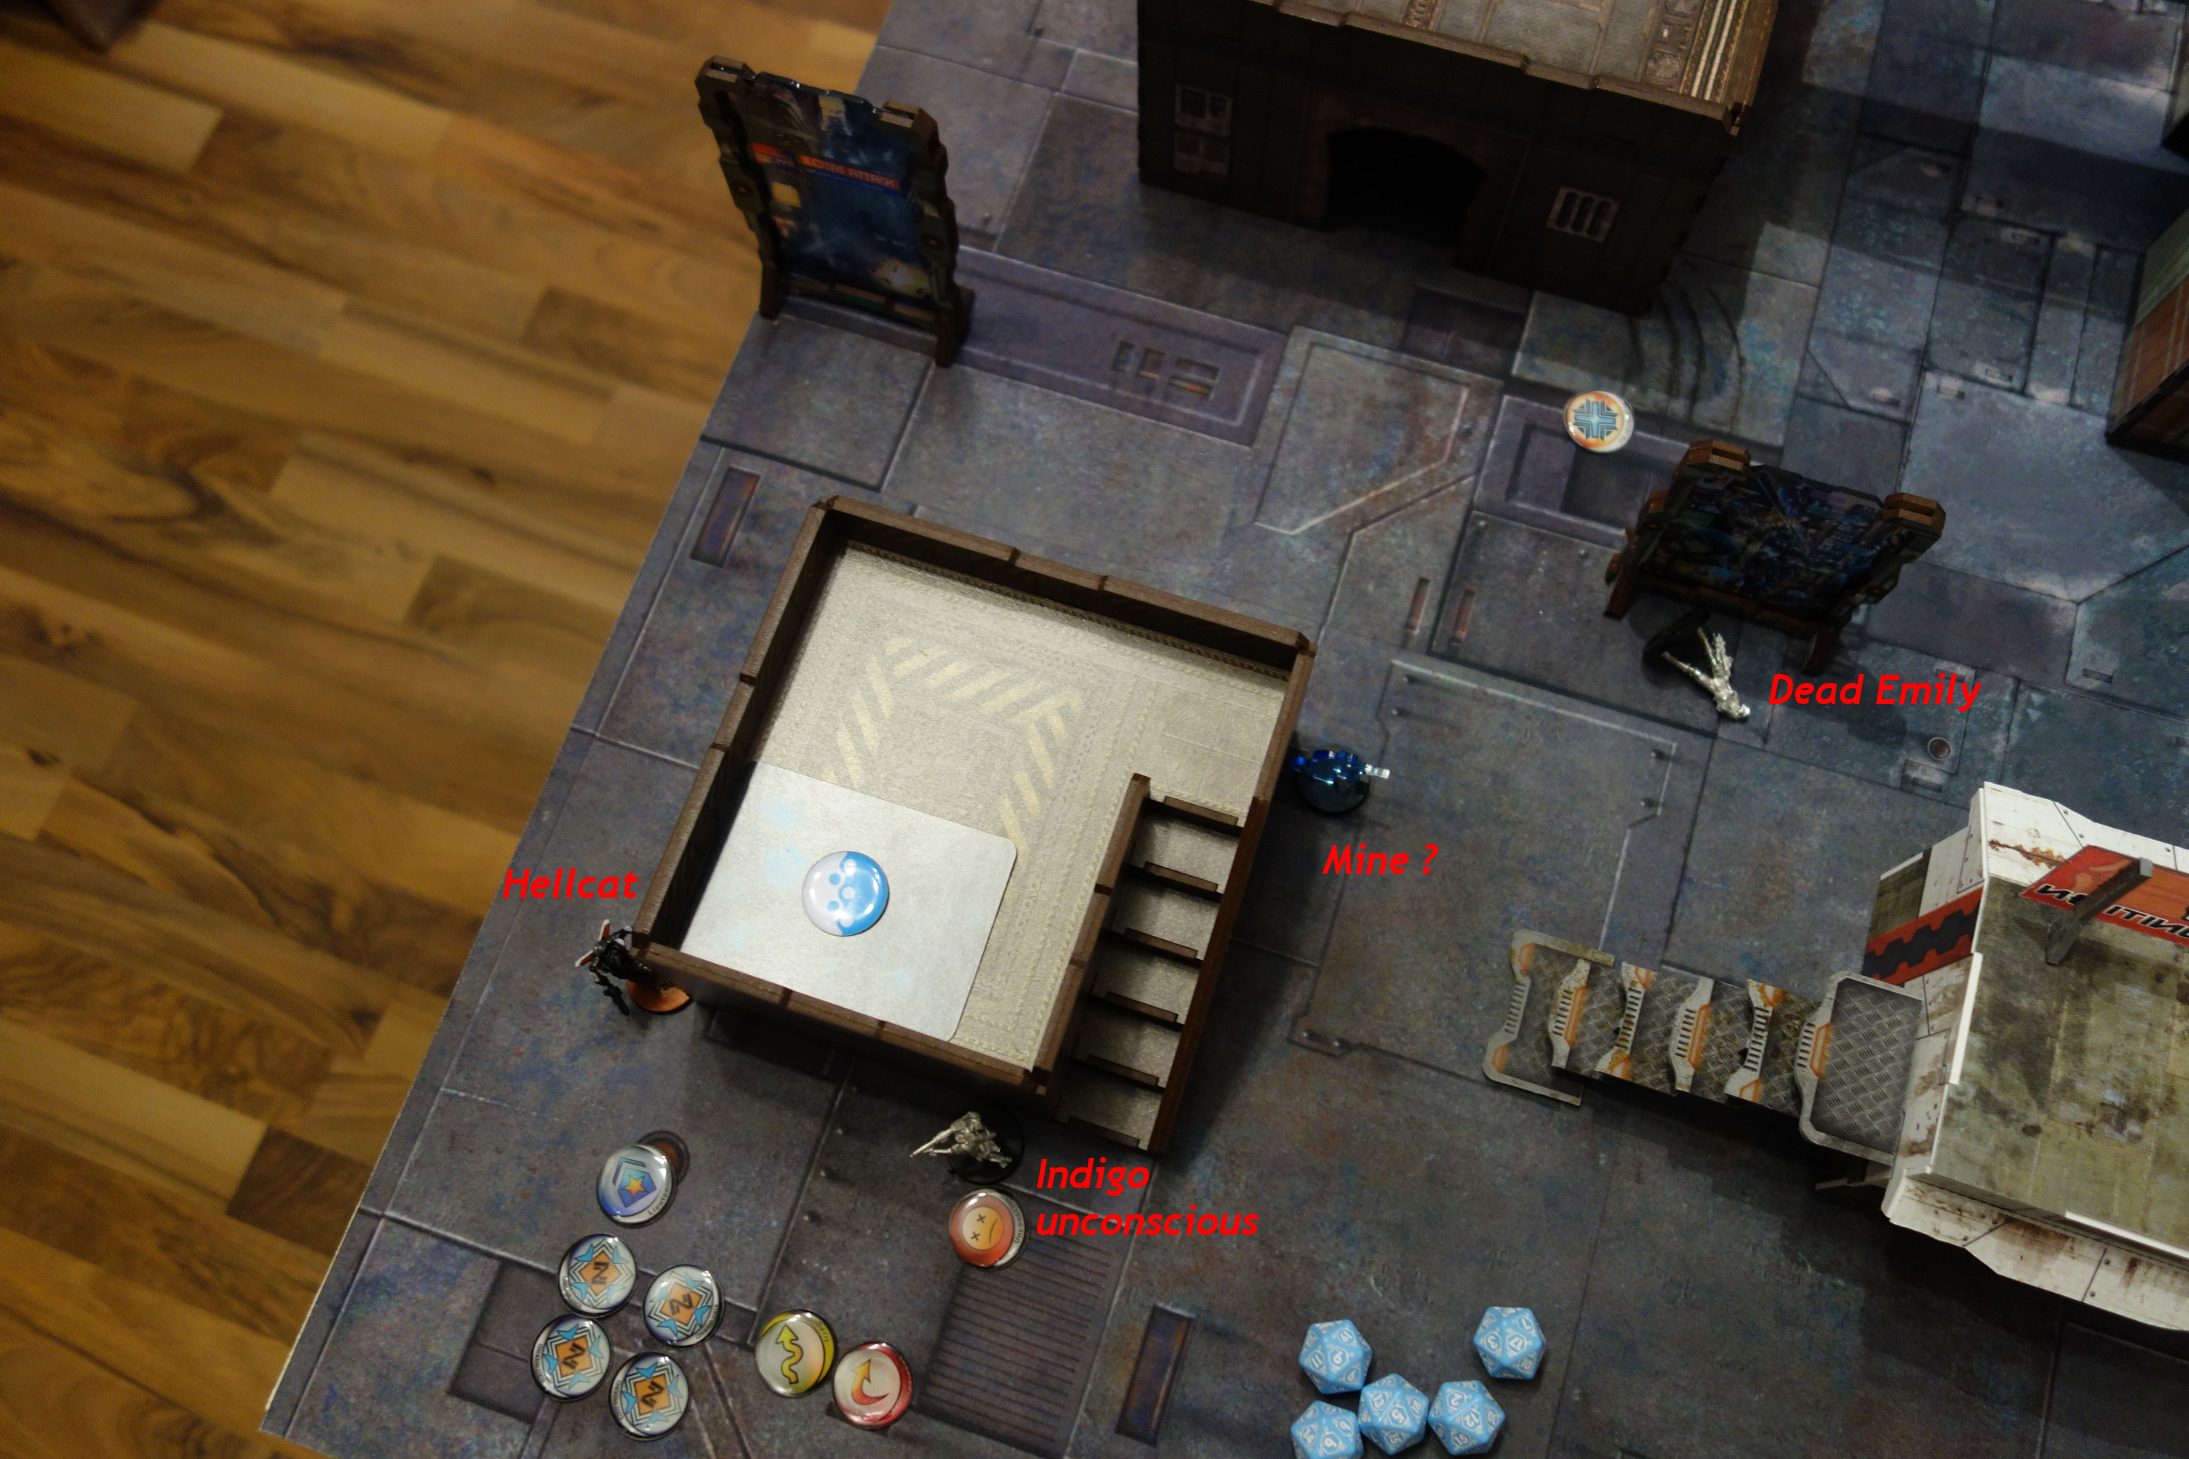
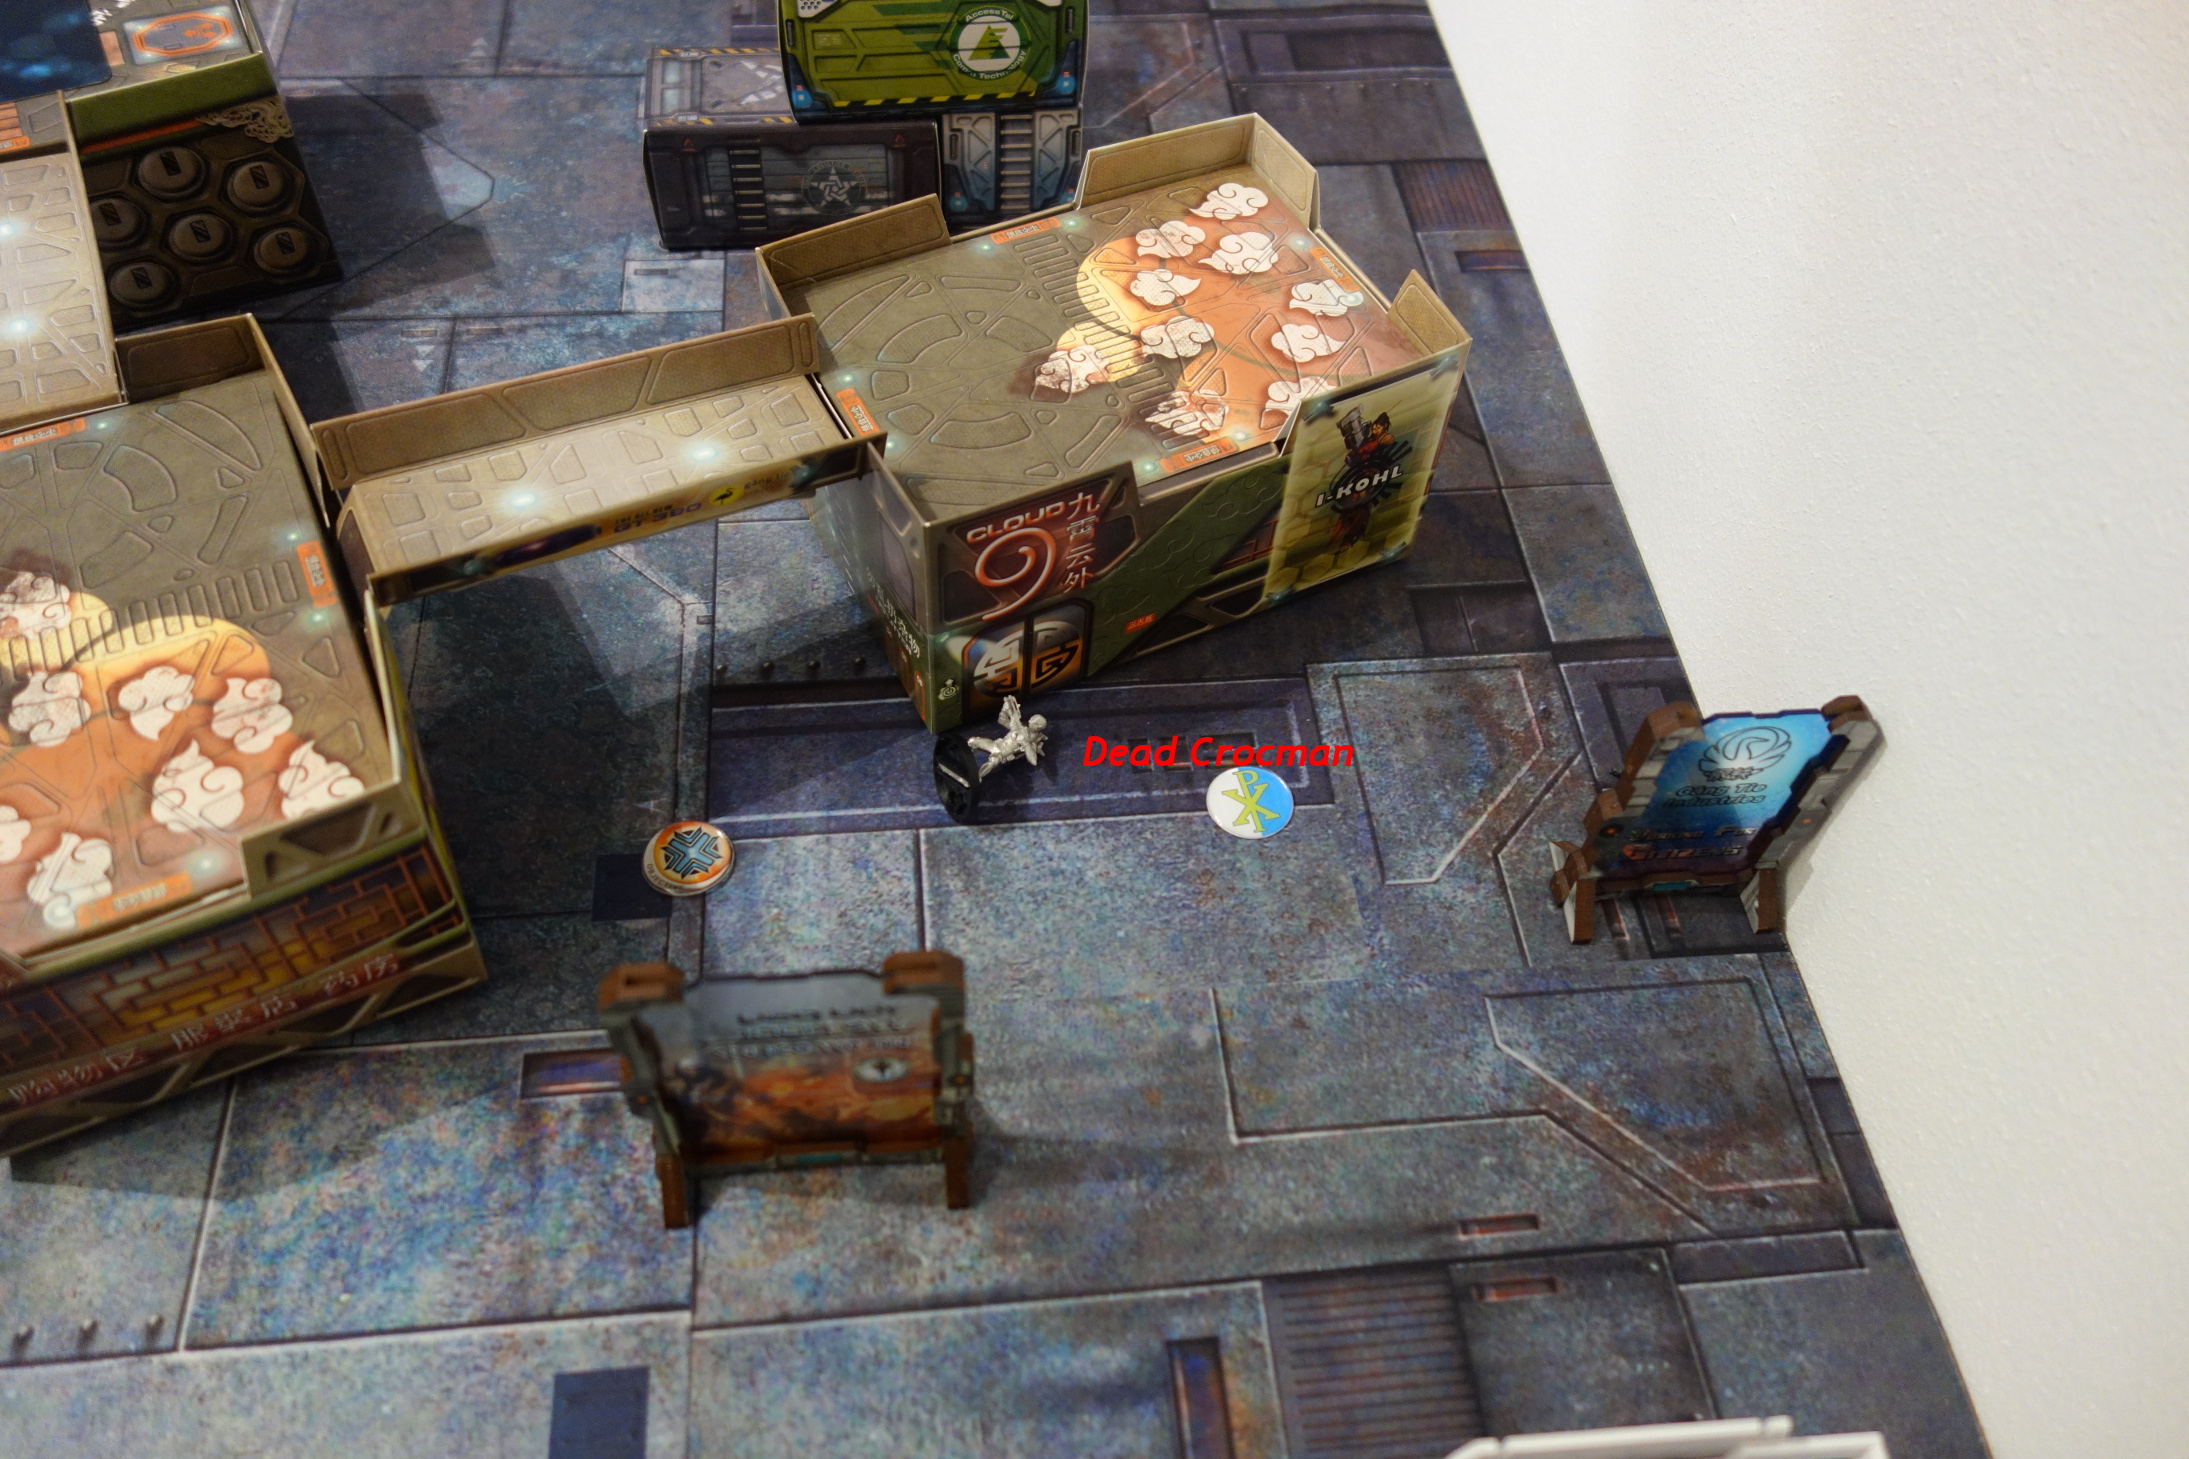
After moving the Krakot forward, PanO startet with the Croc Man and went for the Link Team. Pretty dangerous situation. Luckily after two orders the HRL Wildcat hit the Crocman with his Assault Pistol and the Croc Man went down.
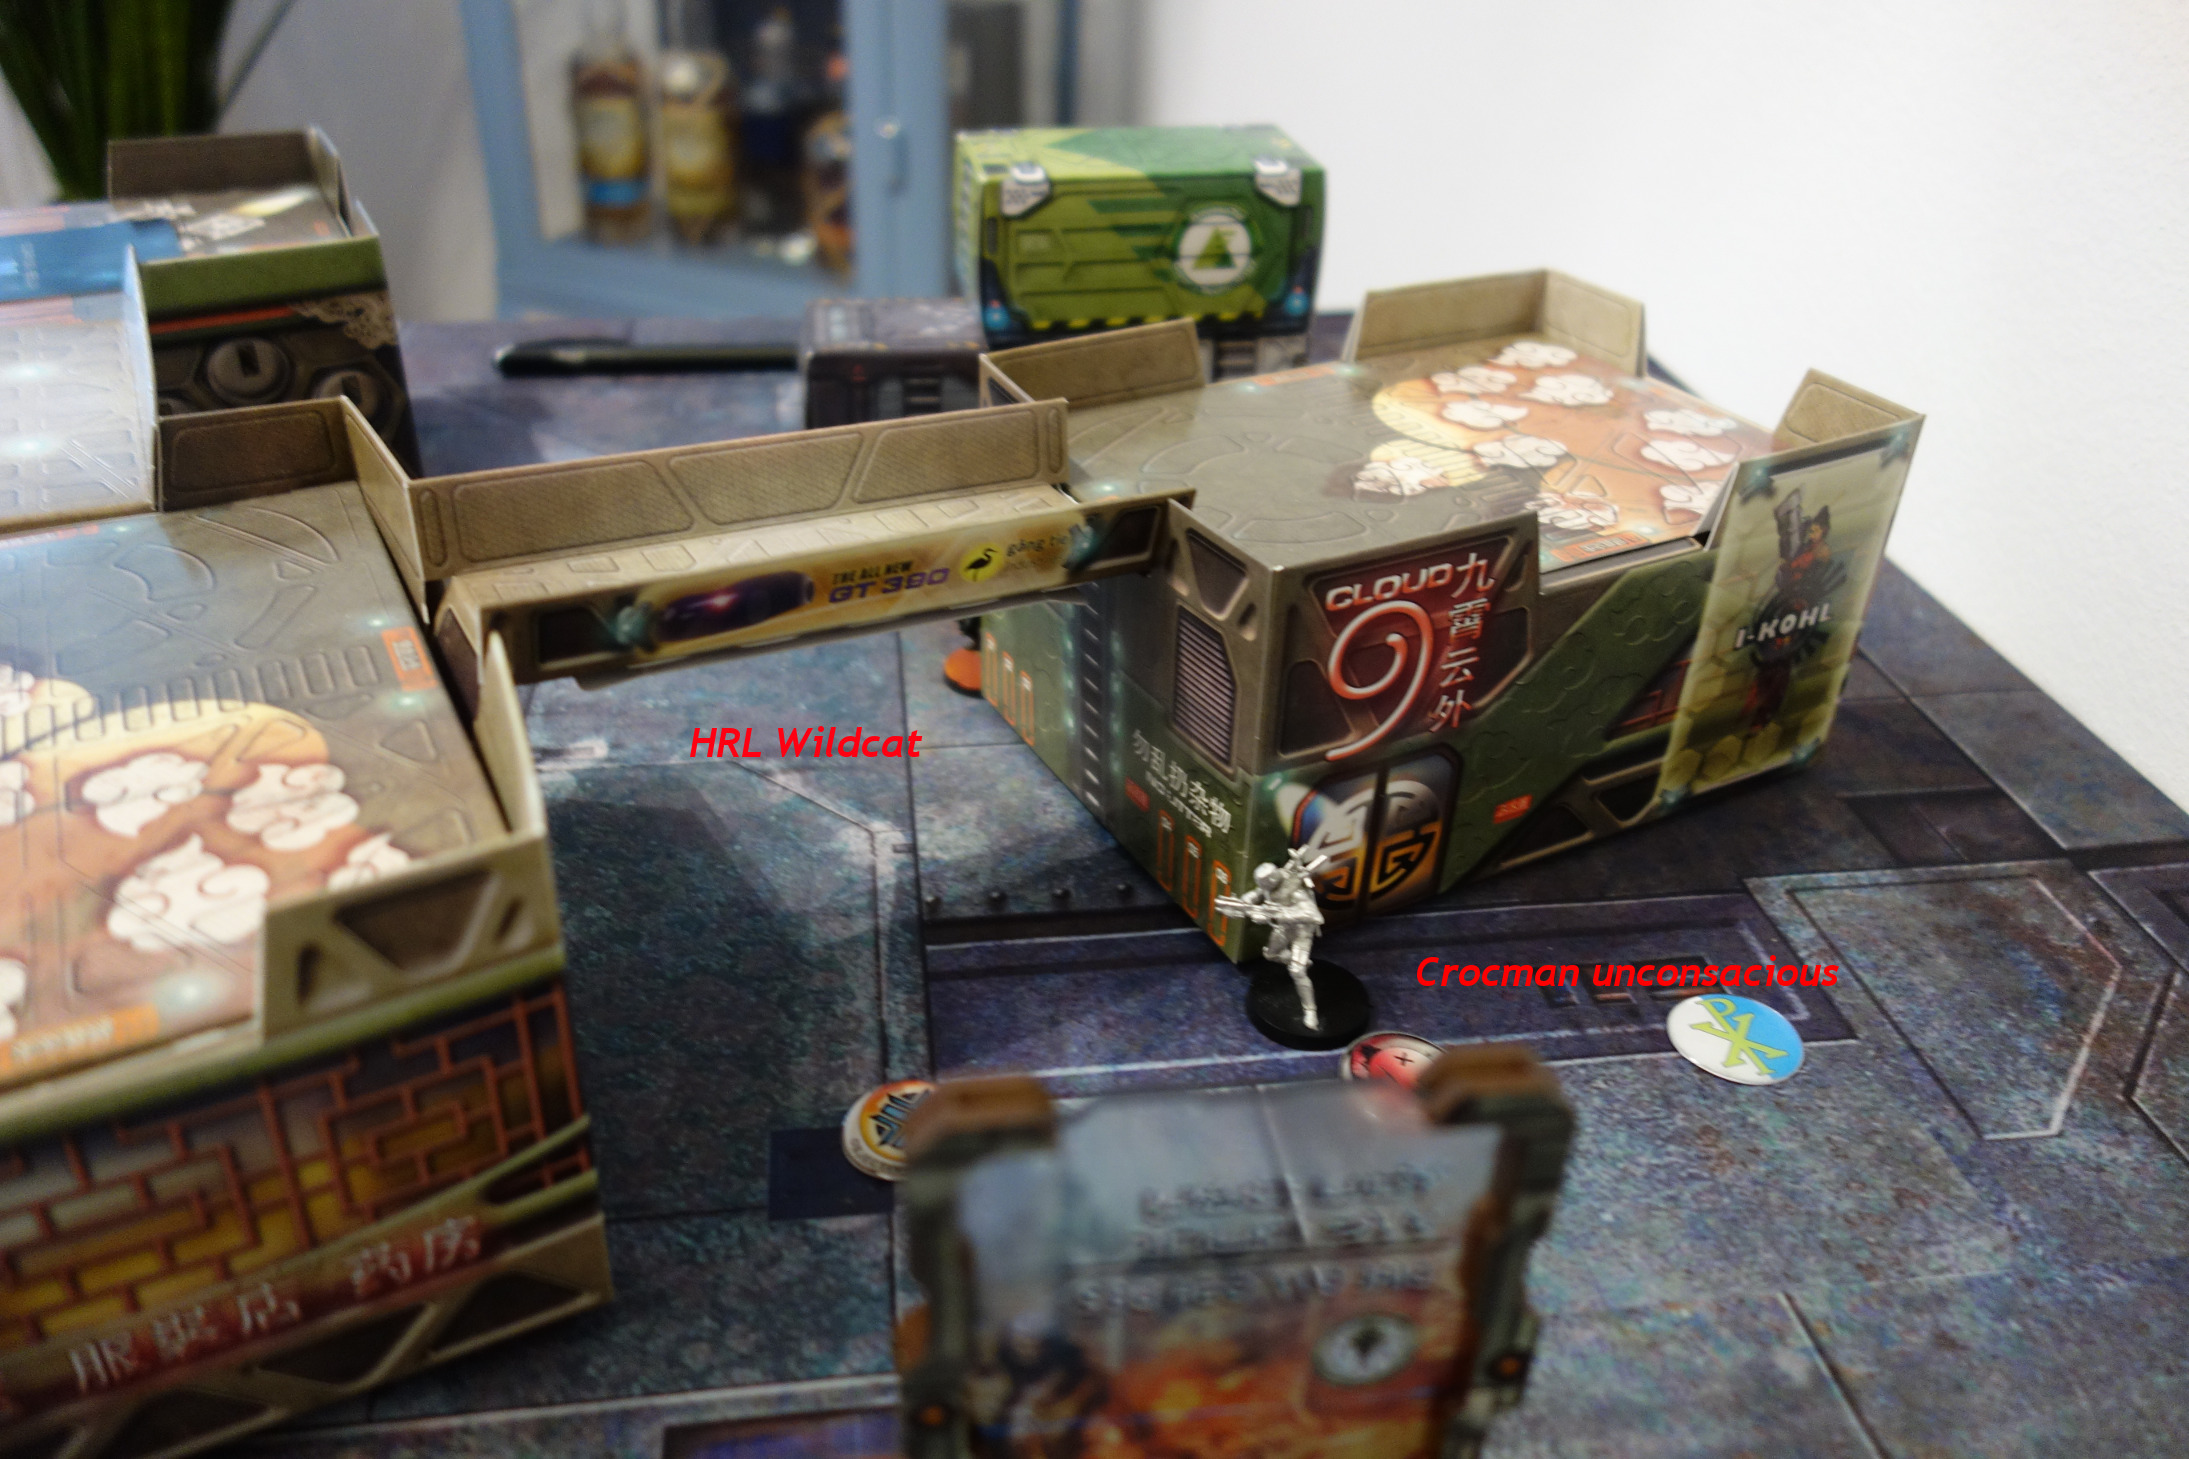
Afterwards PanO didn't know what to do and after lengthy considerations deceided to try to heal the Croc Man using the Medikit of the Traumadoc. After some orders moving and crouching the Trauma Doc was in position and tried to shoot the Croc Man, but failed two times.
First enemy turn was pretty lucky, so Nomads studied the board. After some considerations it was deceided that the Intruder had no targets and so Corregidor deceided to move an AD trooper from Combat Group 1 to Combat Group 2 to have enough orders left for the Gecko to control the Nomads Quandrant.
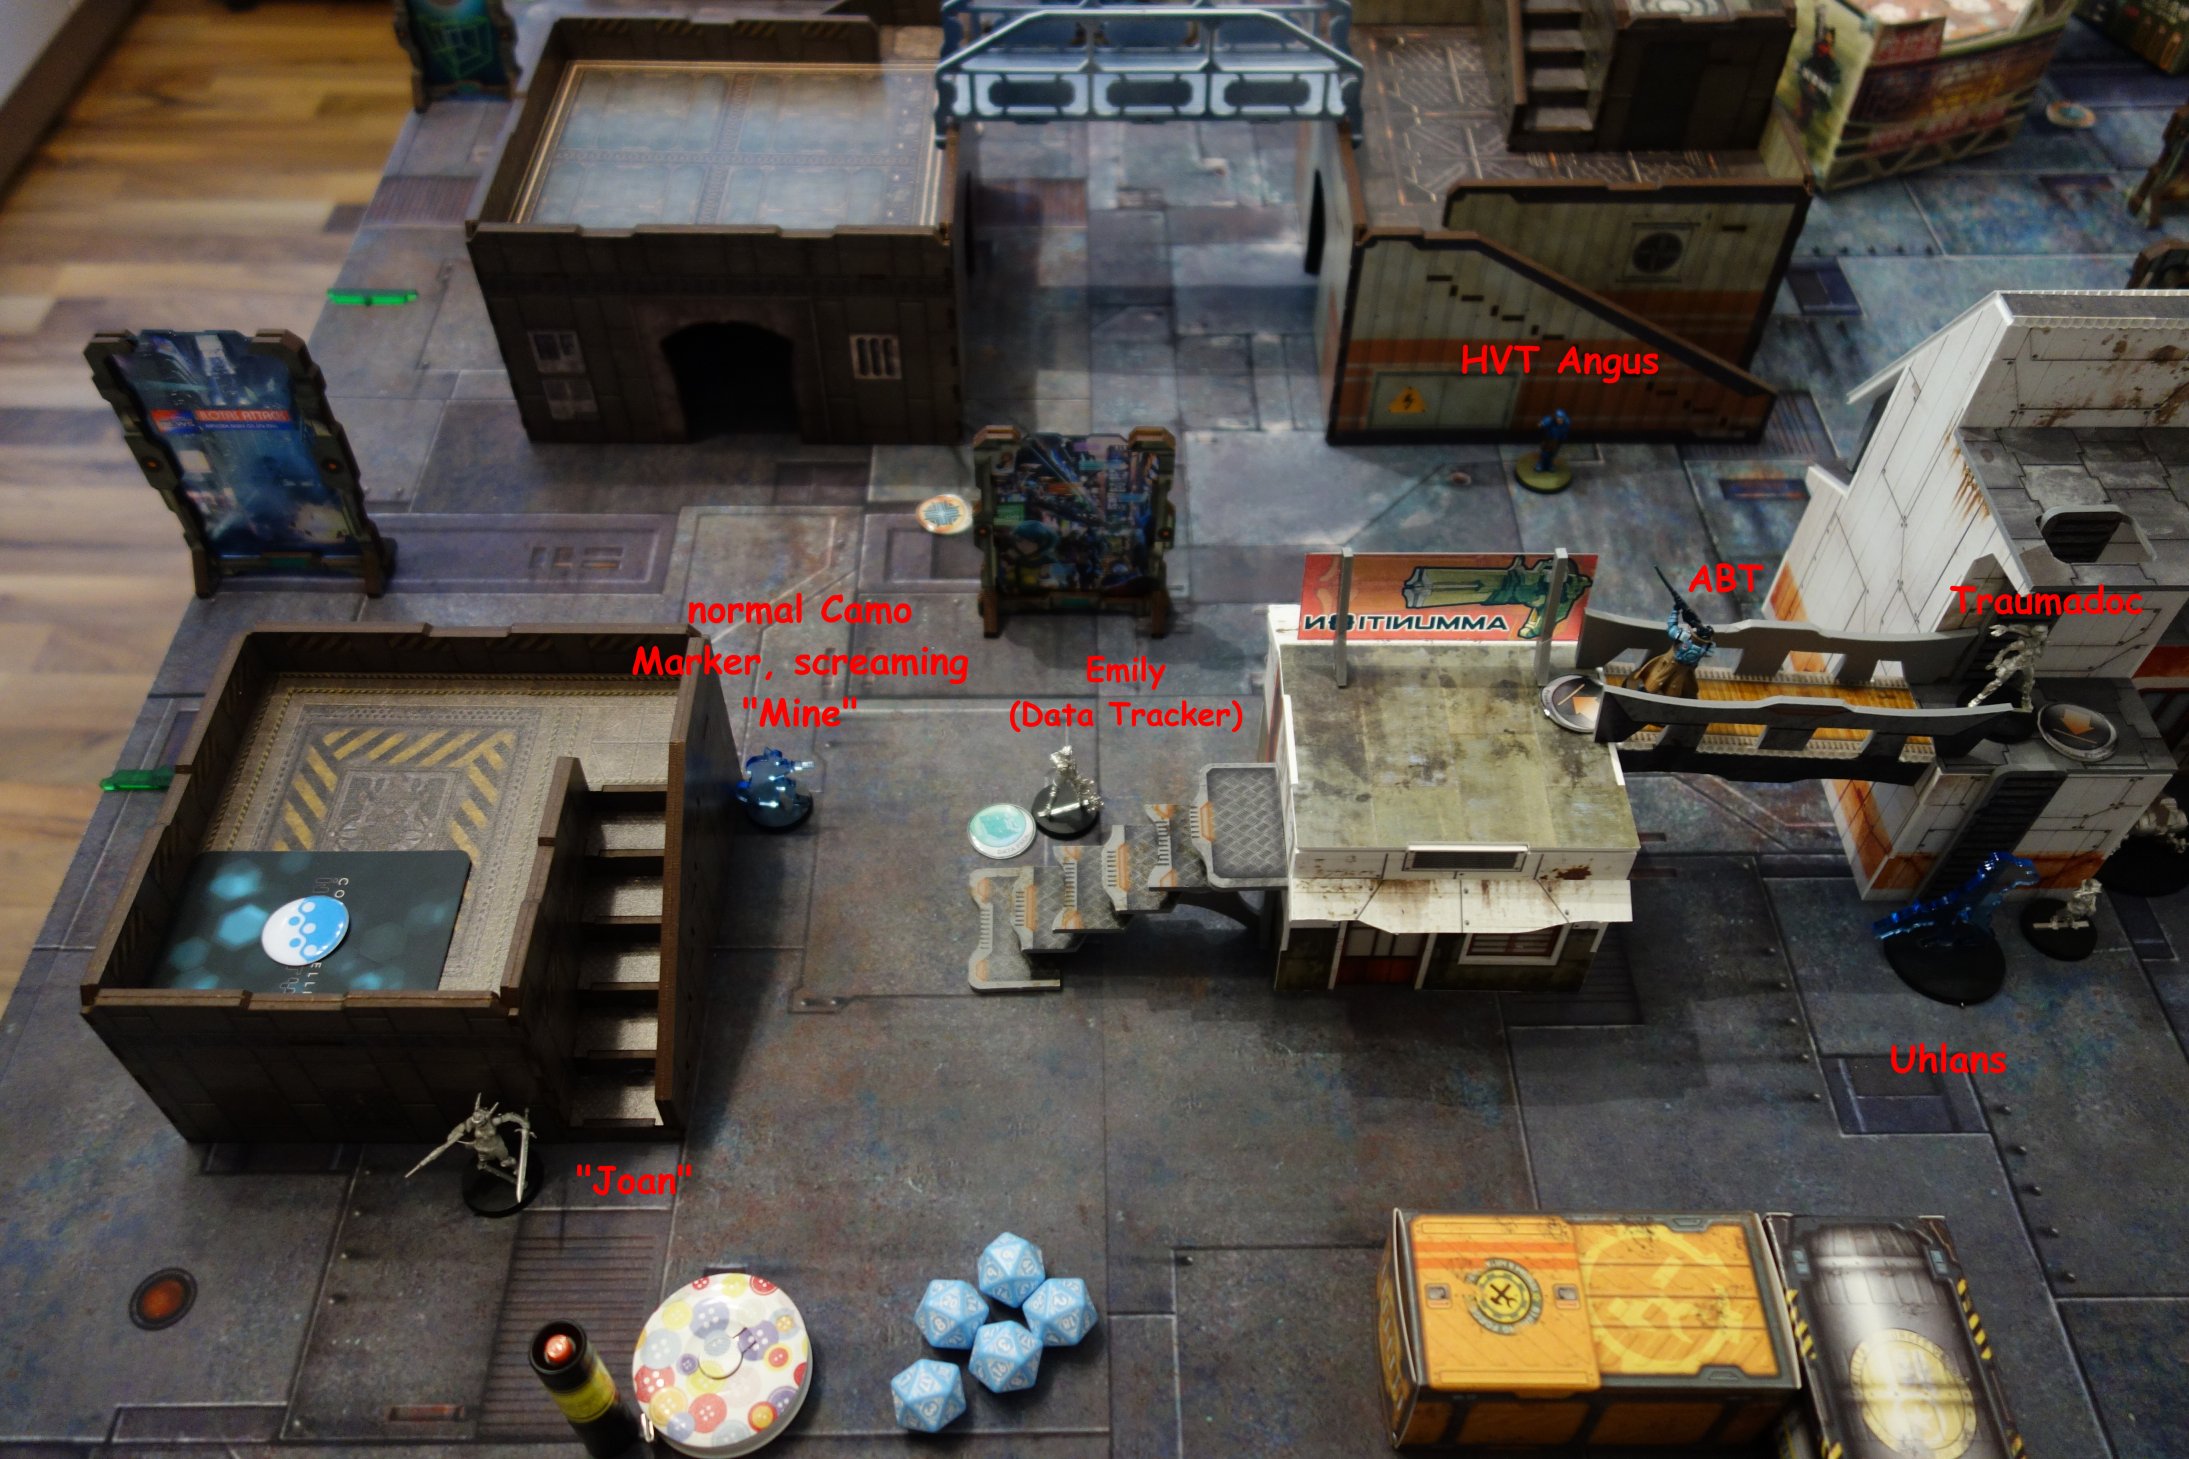
So, Corregidor tried to be agressive this time and landed a Hellcat right out of the Deployment Zone from PanO, behind and out of sight of everyone. To stay out of LoF of everyone, the Hellcat moved only behind the building and went for the Data Tracker. Emily went down after the first shot. But Corregidor wanted to be sure to have the 2 points and used two more orders to finish her completely. Afterwards only two orders were left and so the Hellcat went for "Joan" and shot her. Turned out it was an Indigo that went down thanks to the BSG. Not Joan, but one of the Docs, not bad.
The Transductor went forward trying to hinder the Uhlans in movement or steal an order when shooting it.
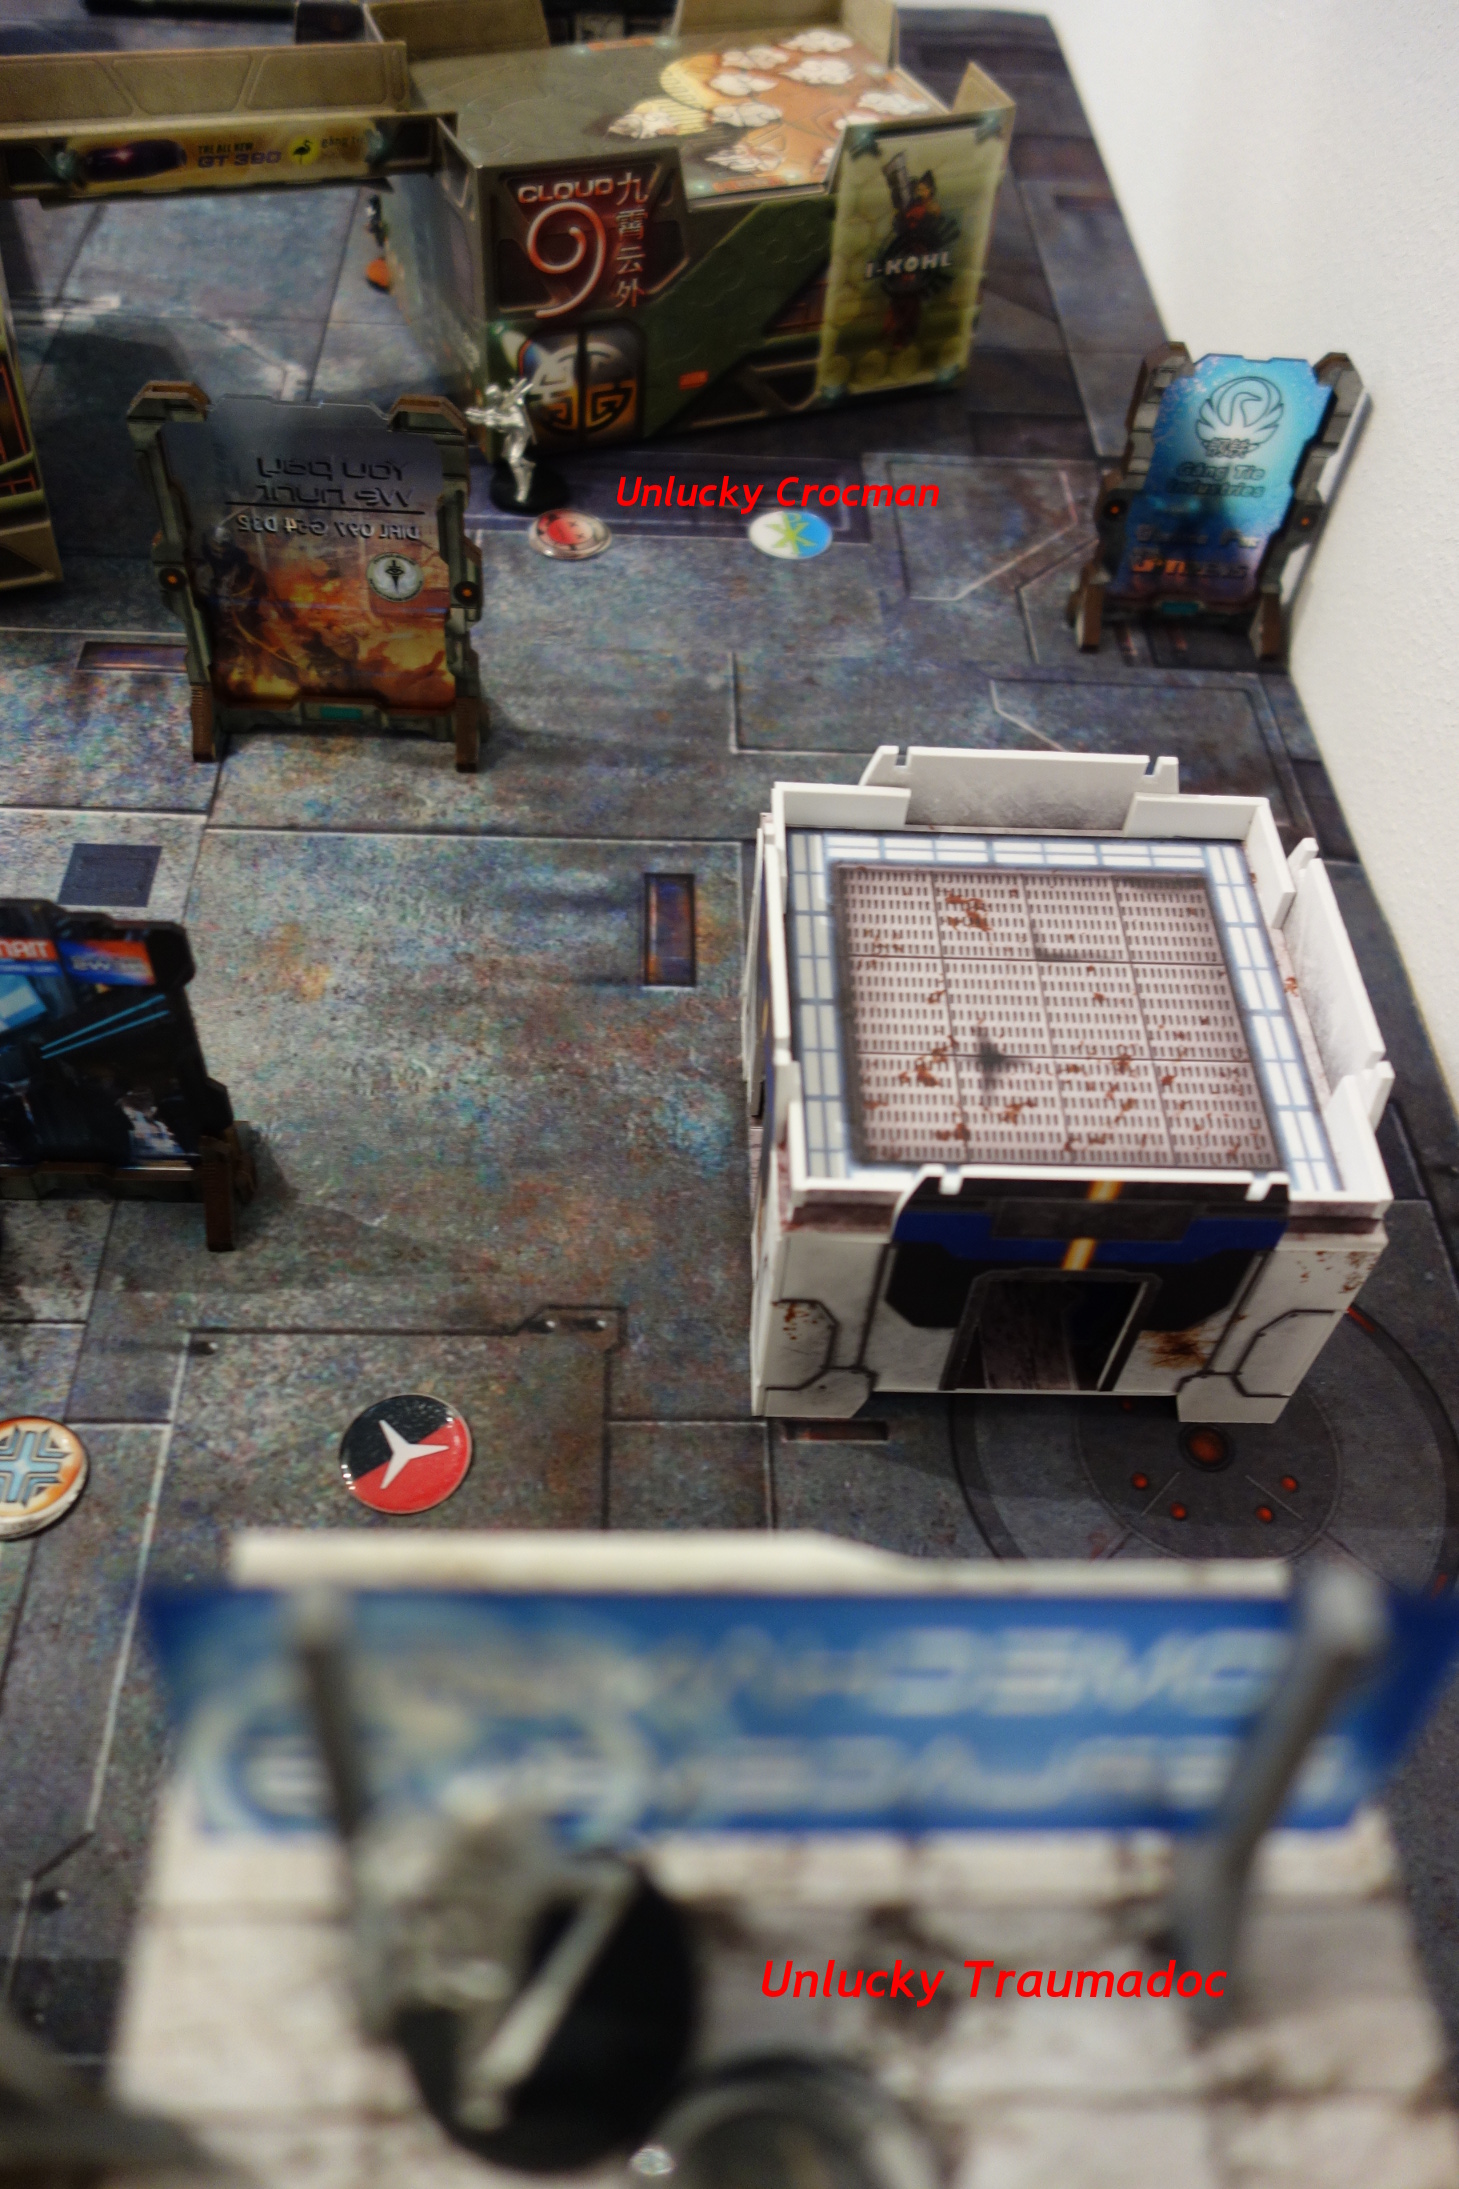
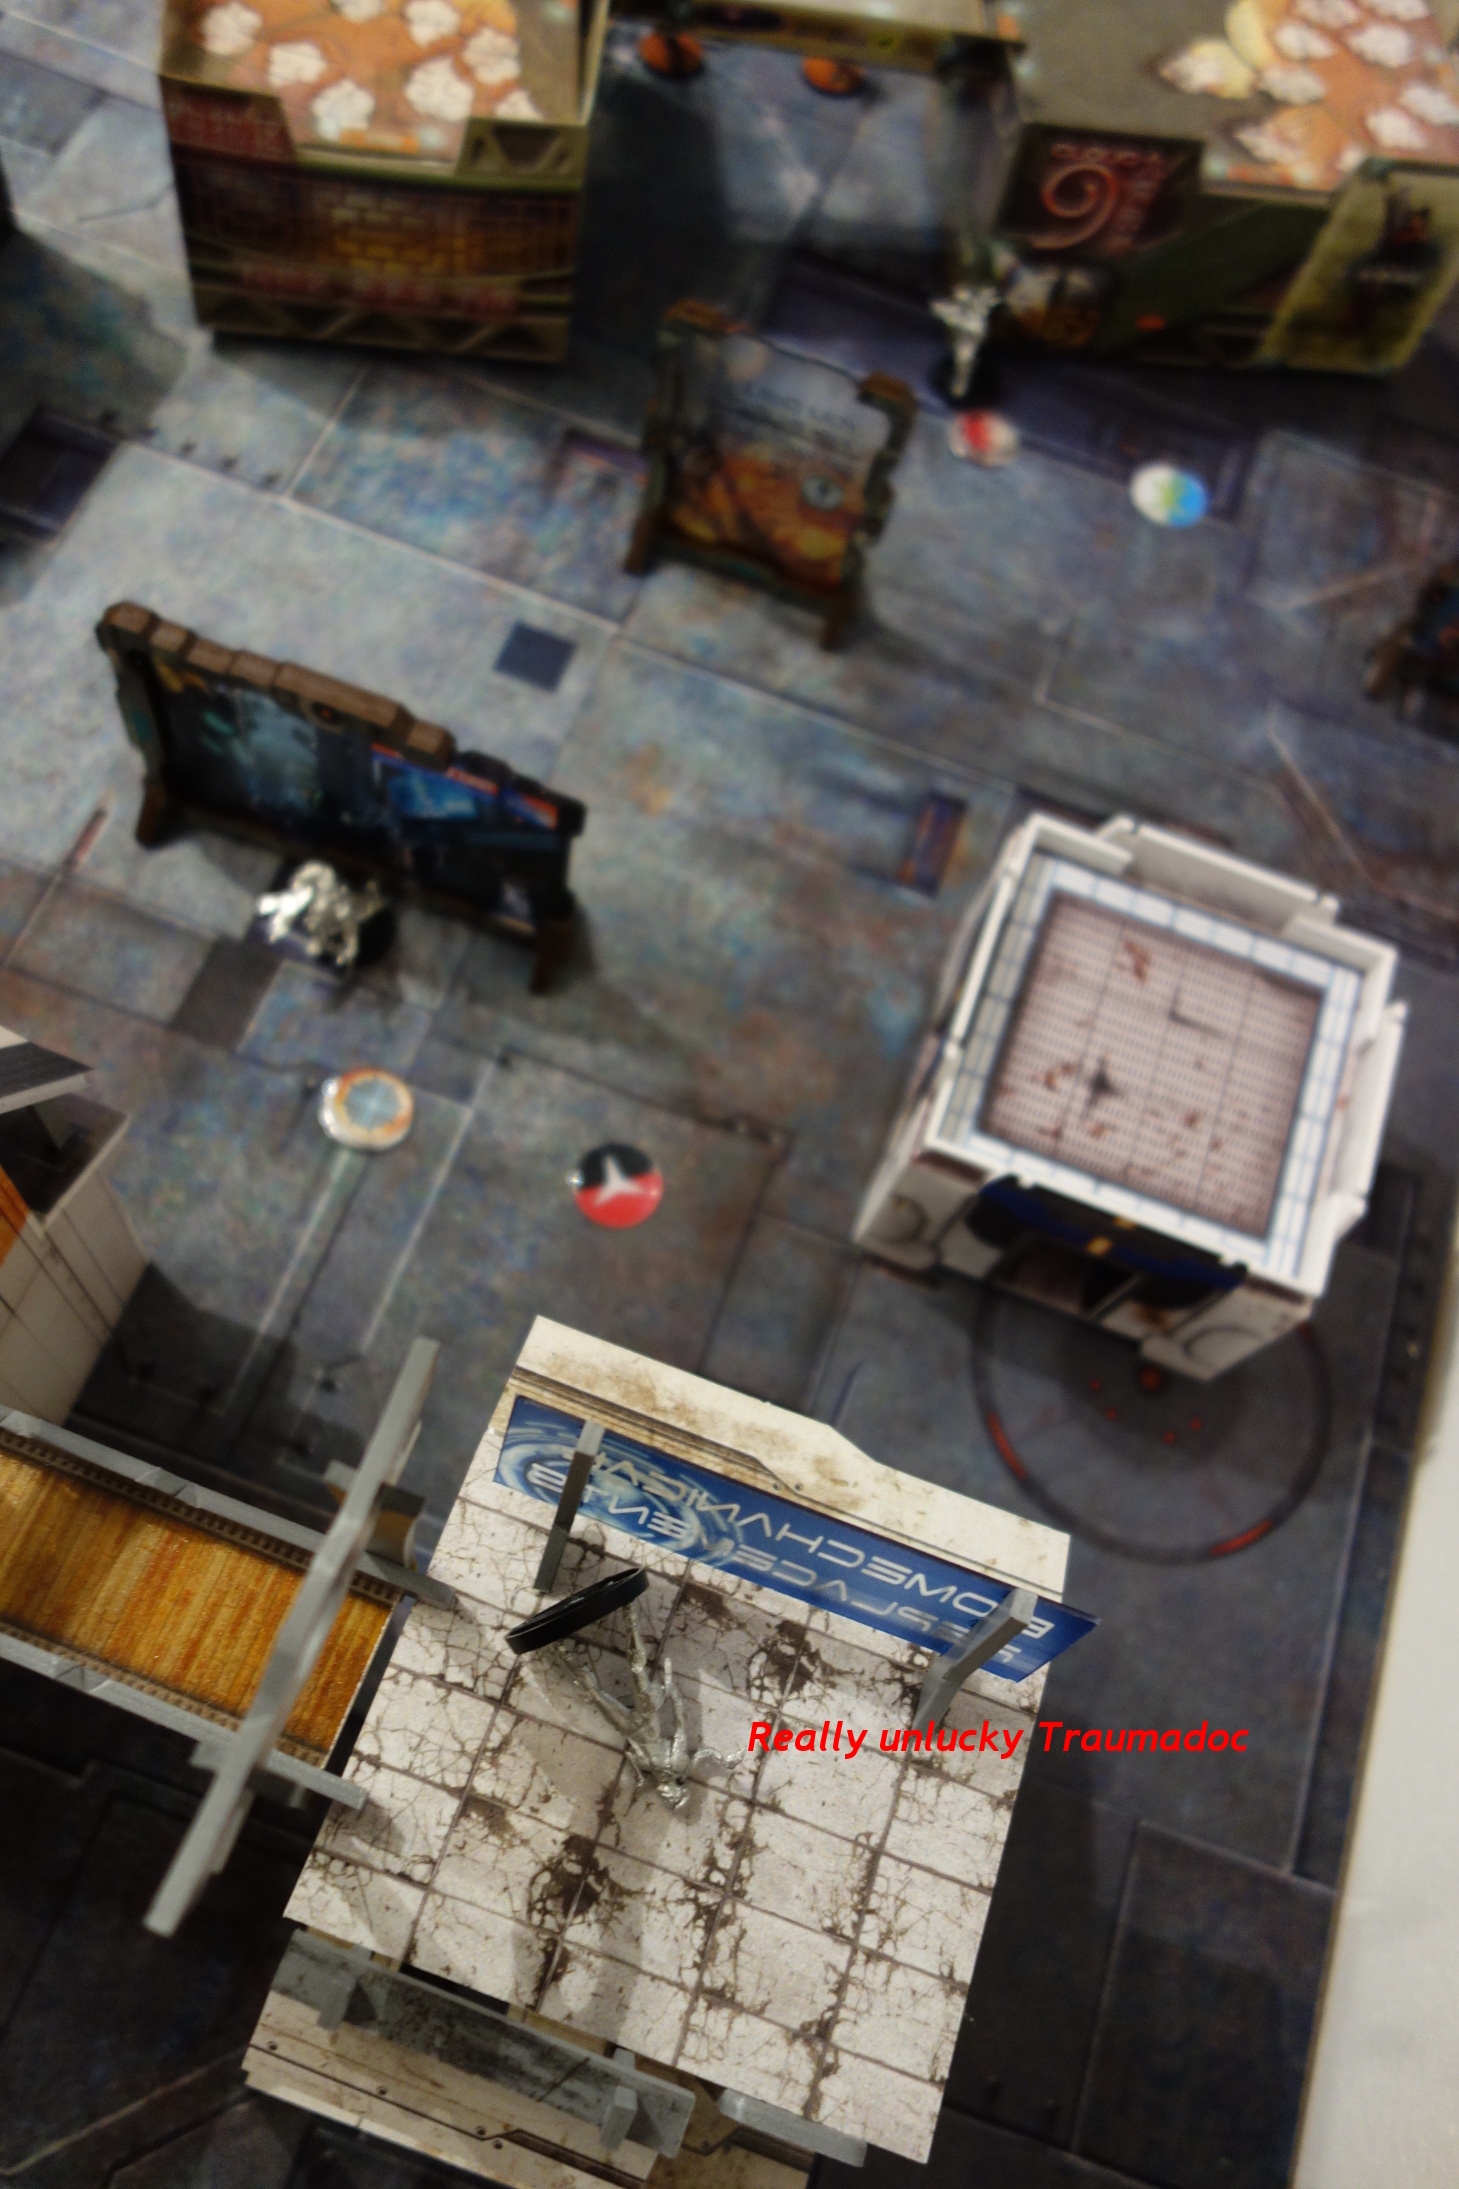
Combat Group 1 started moving the Gecko inside the middle buidling, so it would just be in a outermost edge of the Nomads Quadrant. It was assumed it would take 5 orders, but it only took 4, so there were three orders left to have some fun with the link team. The Link team moved out, and shot at the Doc on the roof. First shot was saved, but the second dropped the Trauma Doc.
Afterwards the Link team moved back to its original position and while doing so shot the Croc Man, to get rid of the unconsious corpse.
With only around 5 orders left, PanO first used the Uhlans to shoot the Hellcat, which went unconscious. But still the hero of the game, dropping two troopers and killing the Data Tracker.
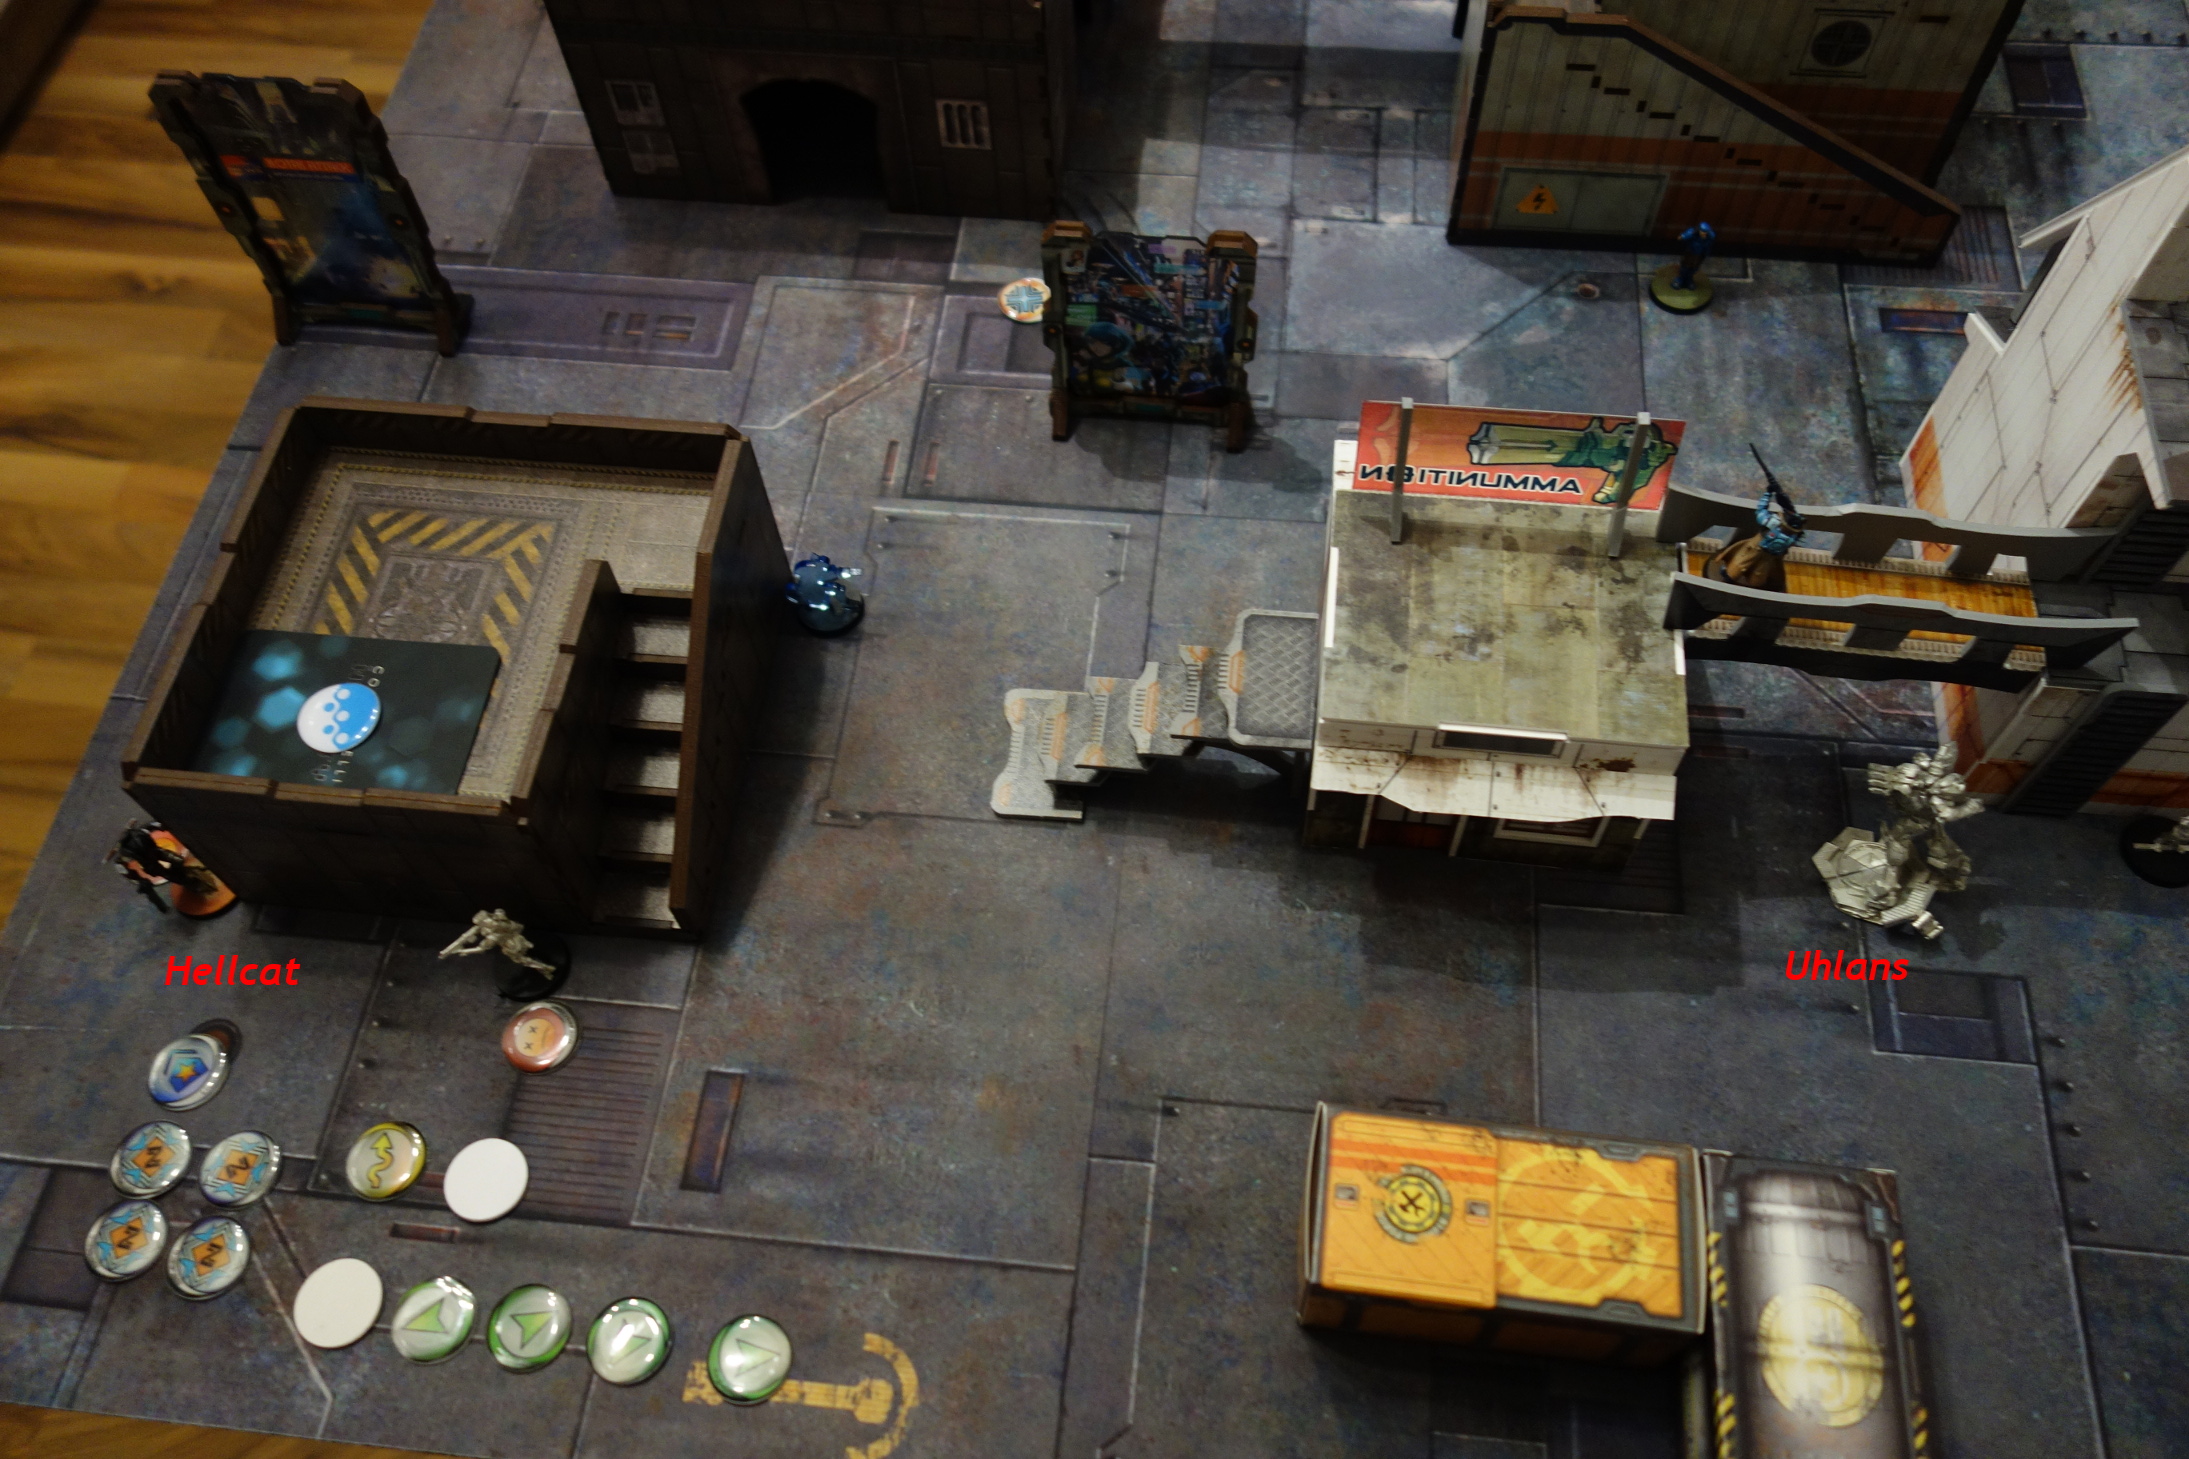
Next PanO went forward, staying in cover. The Uhlans was positioned in the PanO Quadrant, some other Troopers, including the "Warcors" which turned out to be a Holy Knight of the whatever. With this move PanO controlled its Quadrant and contested the Nomads Quadrant.
The Uhlans recamoed again.
This would become a mixed turn.
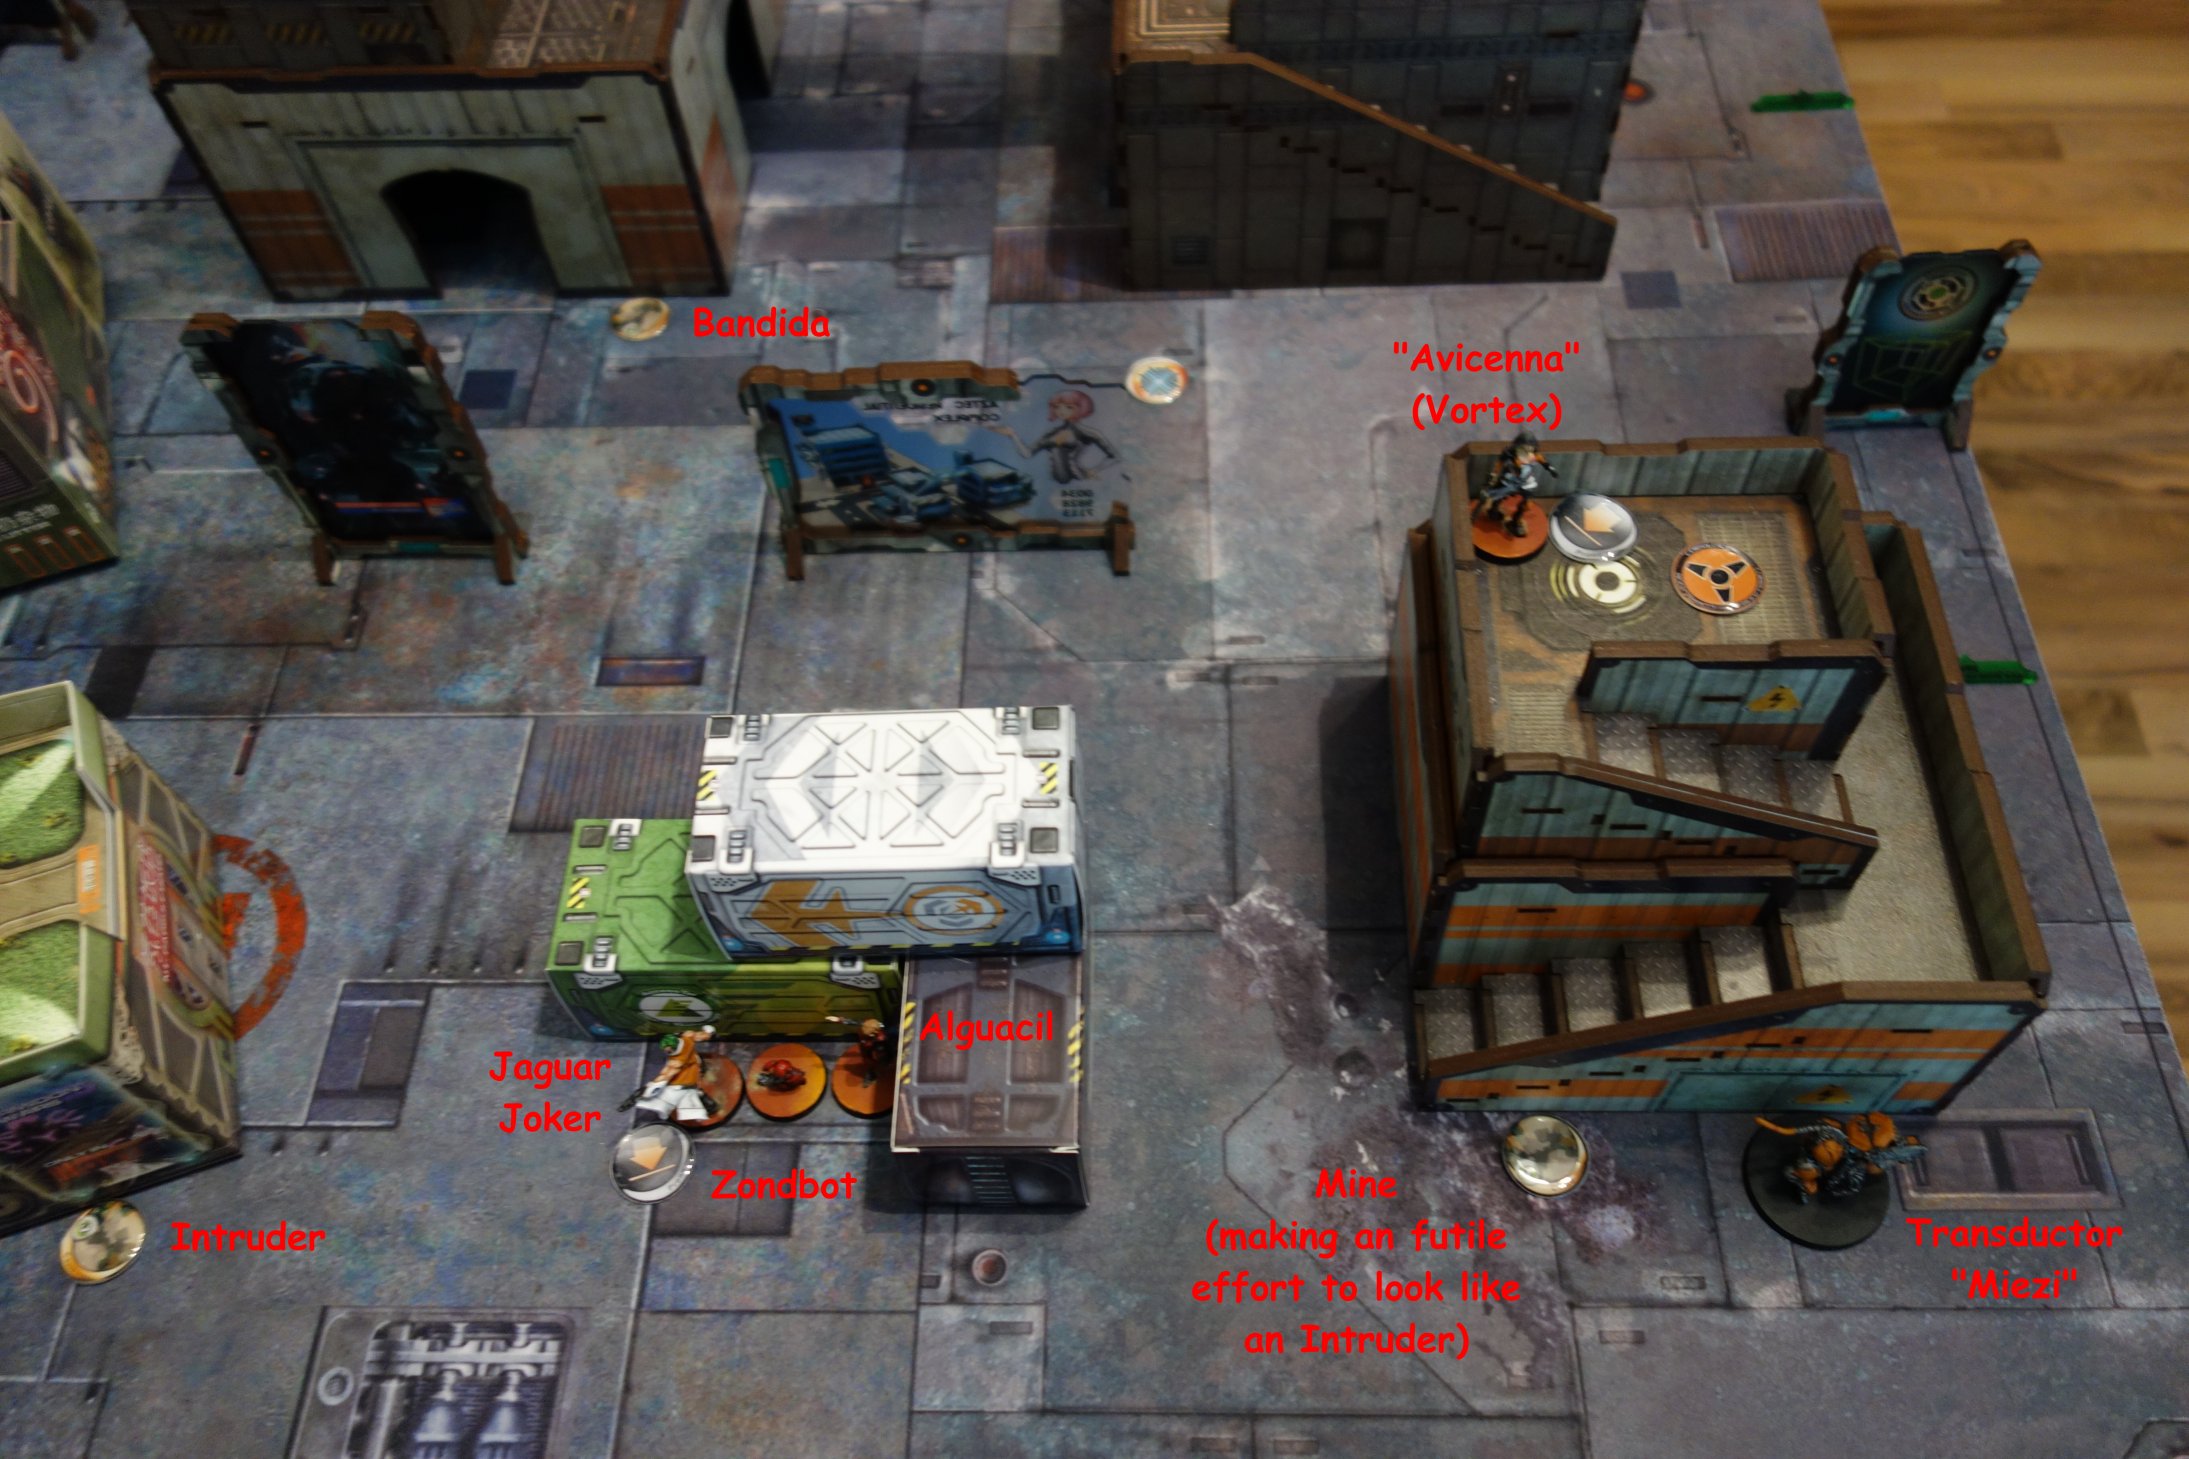
Using another Command Token the Transcutor was moved to Combat Group 1 to have Group 2 exclusively for the Intruder. So first the remote went forward trying to discover the TAG. First order failed and the TAG did not shoot. And second order the TAG again didn't shoot but this time, the Transductor succeeded. So the TAG was discovered and ready to be possessed or killed. Using its irregular order the Bandit tried to possess the TAG, but failed. So Corregidor pondered what wold be better. Killing the TAG or trying to possess the TAG. Since we're Corregidor and not some russian Tunguska Elite Hackers or Bakunin Hacker Nuns, it was deceided to drop the TAG. Dead is dead.
Joker, the Jaguar dropped some smoke in front of the Intruder and the Intruder went forward to shoot the TAG. The TAG dodged to get into cover but failed. After the first salvo the TAG suffered two wounds, since it hadn't reached the wall and so had no cover bonus (I assumed it was in cover, but my opponent told me that it was not). After the next salvo the TAG was unconscious Level 2. Trying to finish it of completely the Intruder shot at the TAG again, but this time all shots were saved.

Next the Wildcats went forward so that the HRL Wildcat could shoot the Mulebot. This succeeded, although the Machinist dodged the Blast. But ... Mulebot down.
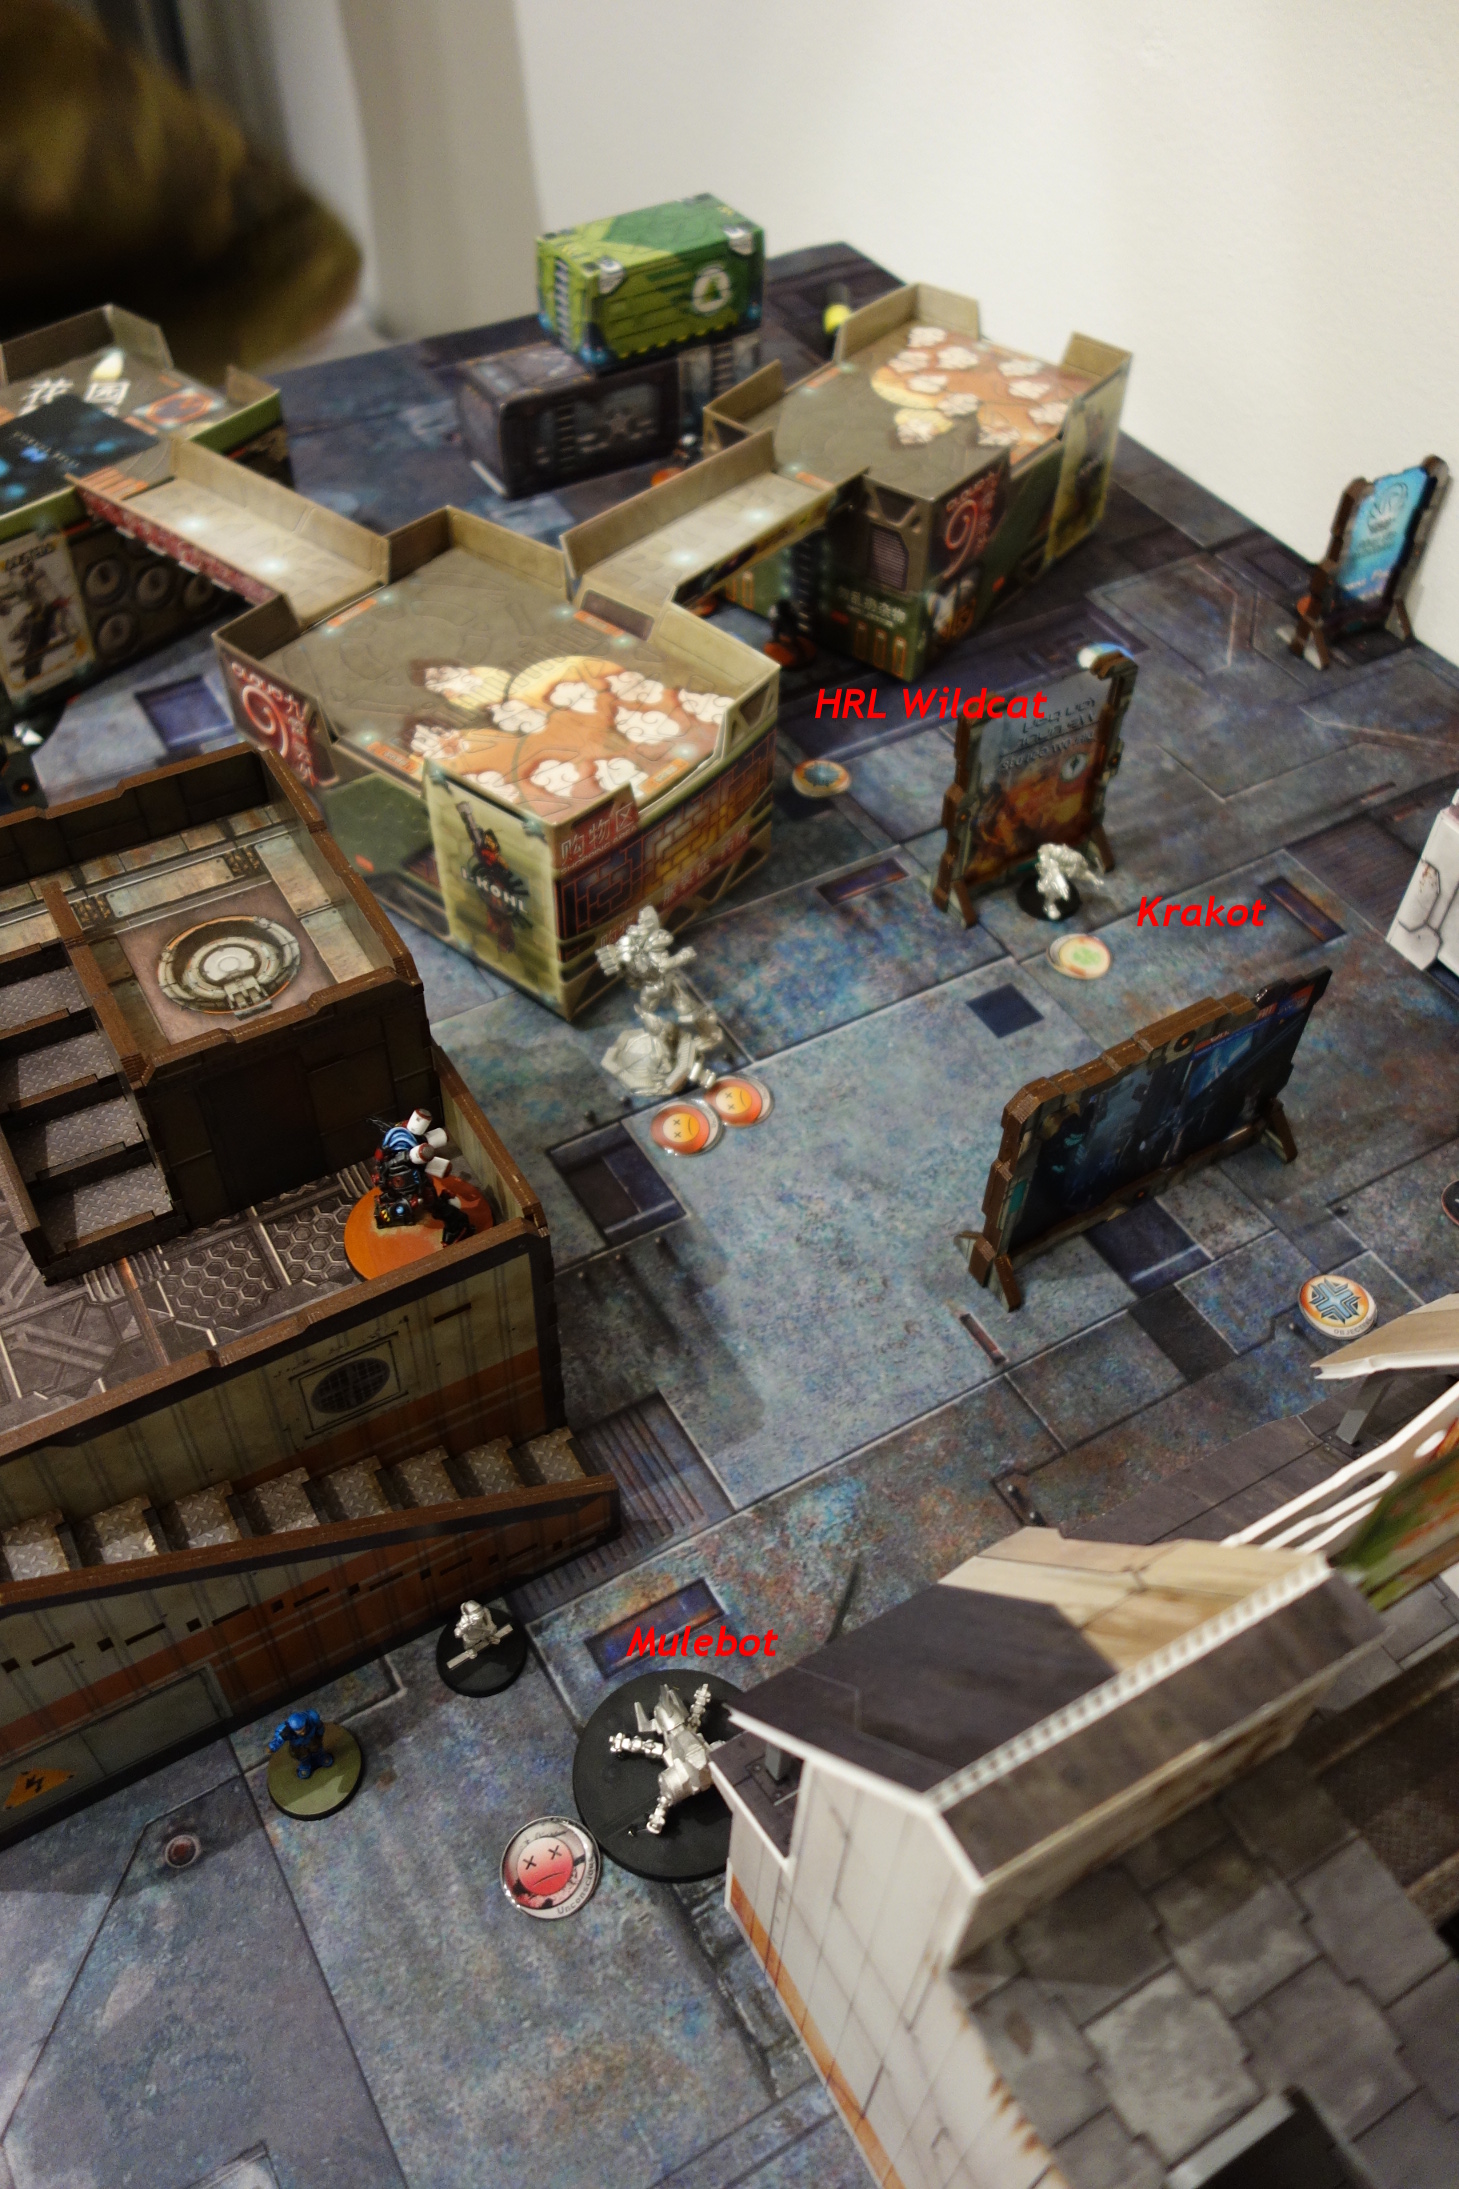
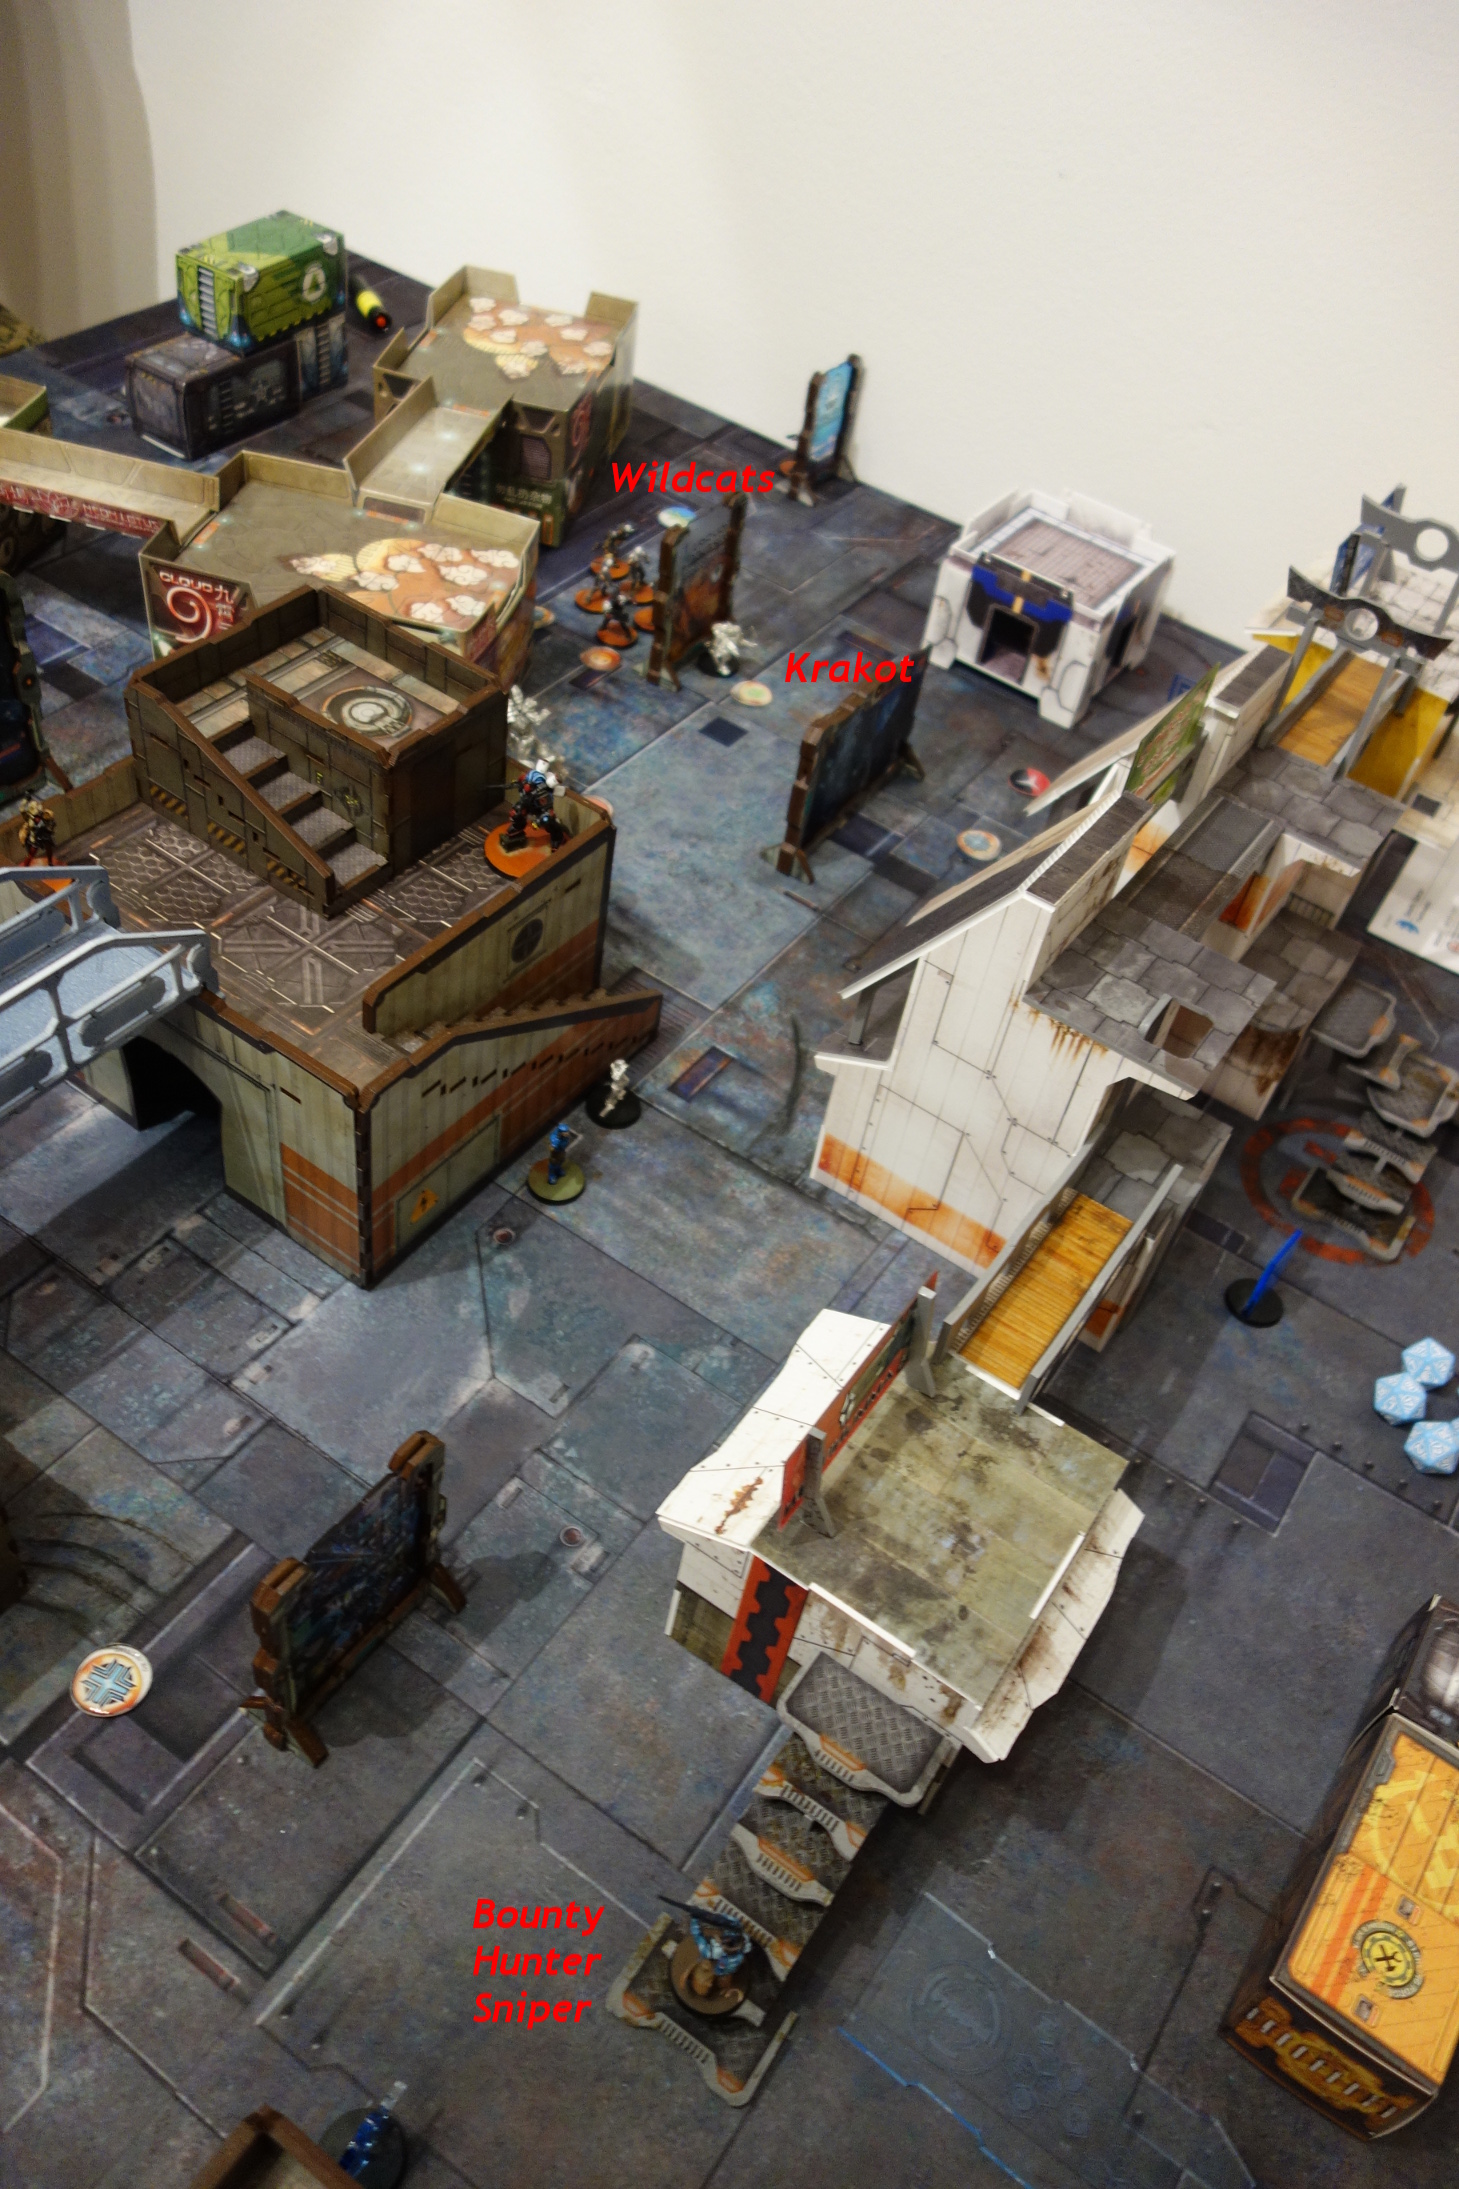
After this it became messy, because Corregidor tried to not only take the Quadrant from PanO away, but instead secure it's own Quadrant again. I should have first used the Gecko to get rid of the Sniper, since the Gecko could take one or two bad rolls and the use the Wildcat Link to drop the Krakot.
Instead I used the Wildcat Link to go for the Sniper and move through it's LoF to reach the Krakot. And here the Dice hit, because the Sniper scored a Crit and dropped the HRL Wildcat.
Then the remaining 4 Wildcats tried for the Krakot, moving out of LoF of the Sniper and getting the BSG Wildcat in range. The Sniper went for the Hacker and dropped it and the Krakot used one of its Chest Mines. The BSG Wildcat passed the armour save and inflicted a wound on the Krakot in return, who went dogged.
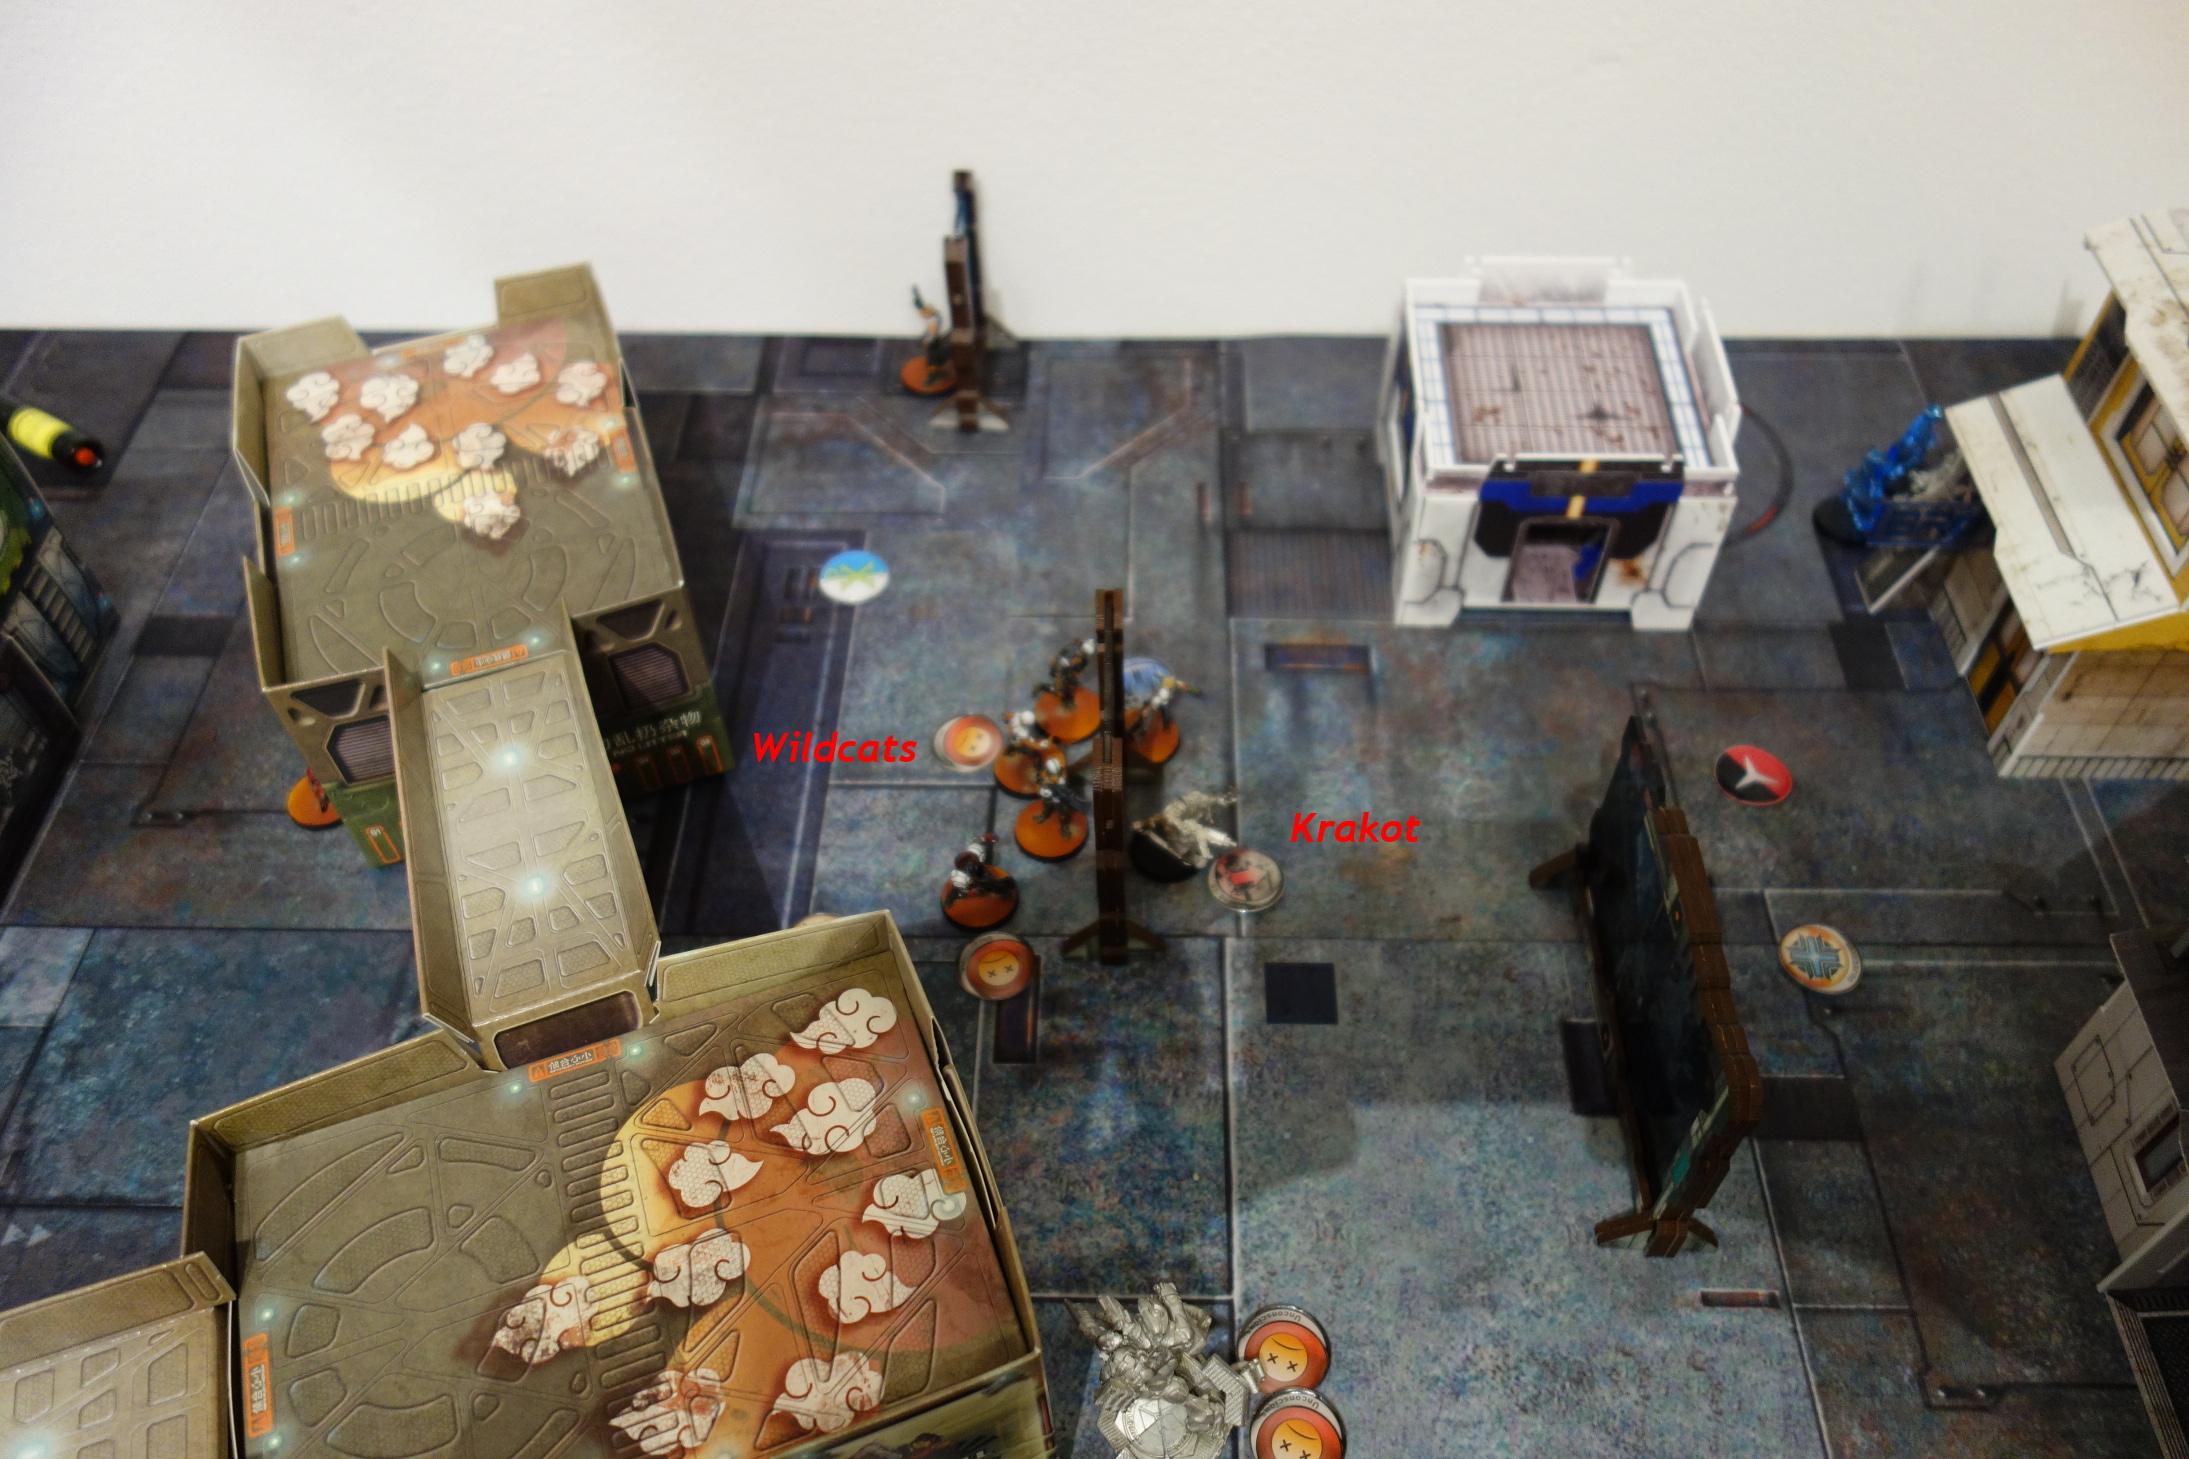
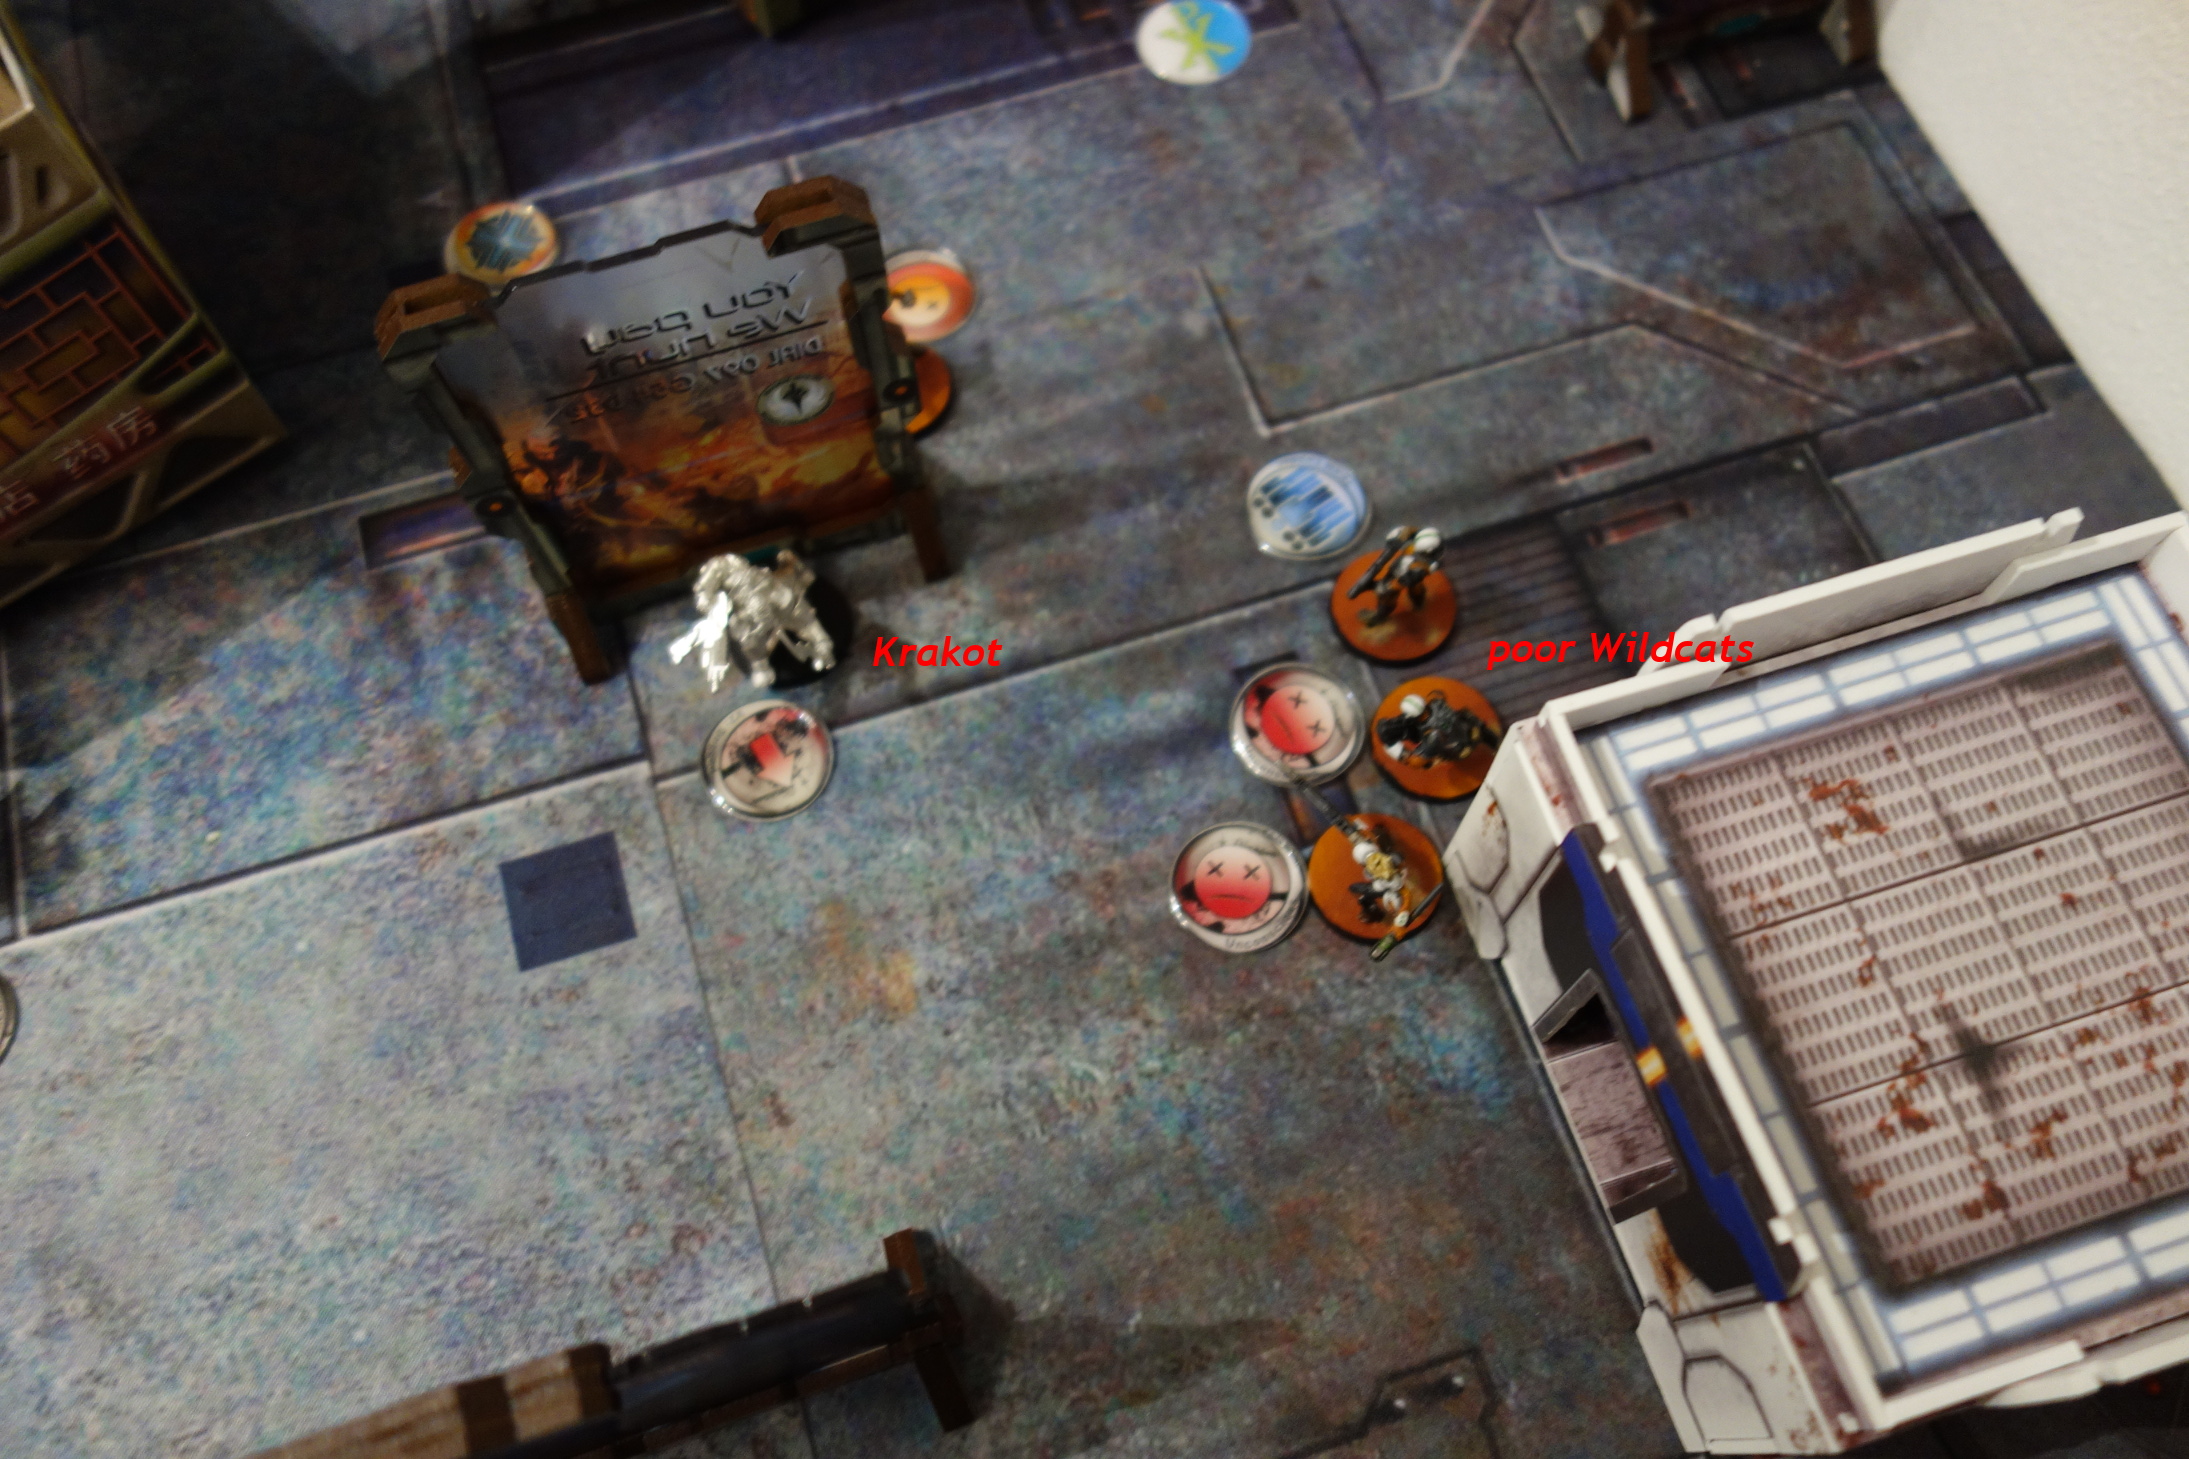
And then the worst move, the Wildcats moved further forward. But I somehow imagined an impact teardrop template from the Krakot, not a direct template, so all the wildcats were under the template. The Number 2-one dodged, the other two missed their dodge and went unconscious. So four Wildcats down and the Quadrants not controlled. Stupid move.
Luckily PanO was already down to three orders and was realistically not even able to score a Draw.
The Data Tacker was save and even if the Data Tracker somehow could be reached the Quadrants would be open.
No points scored
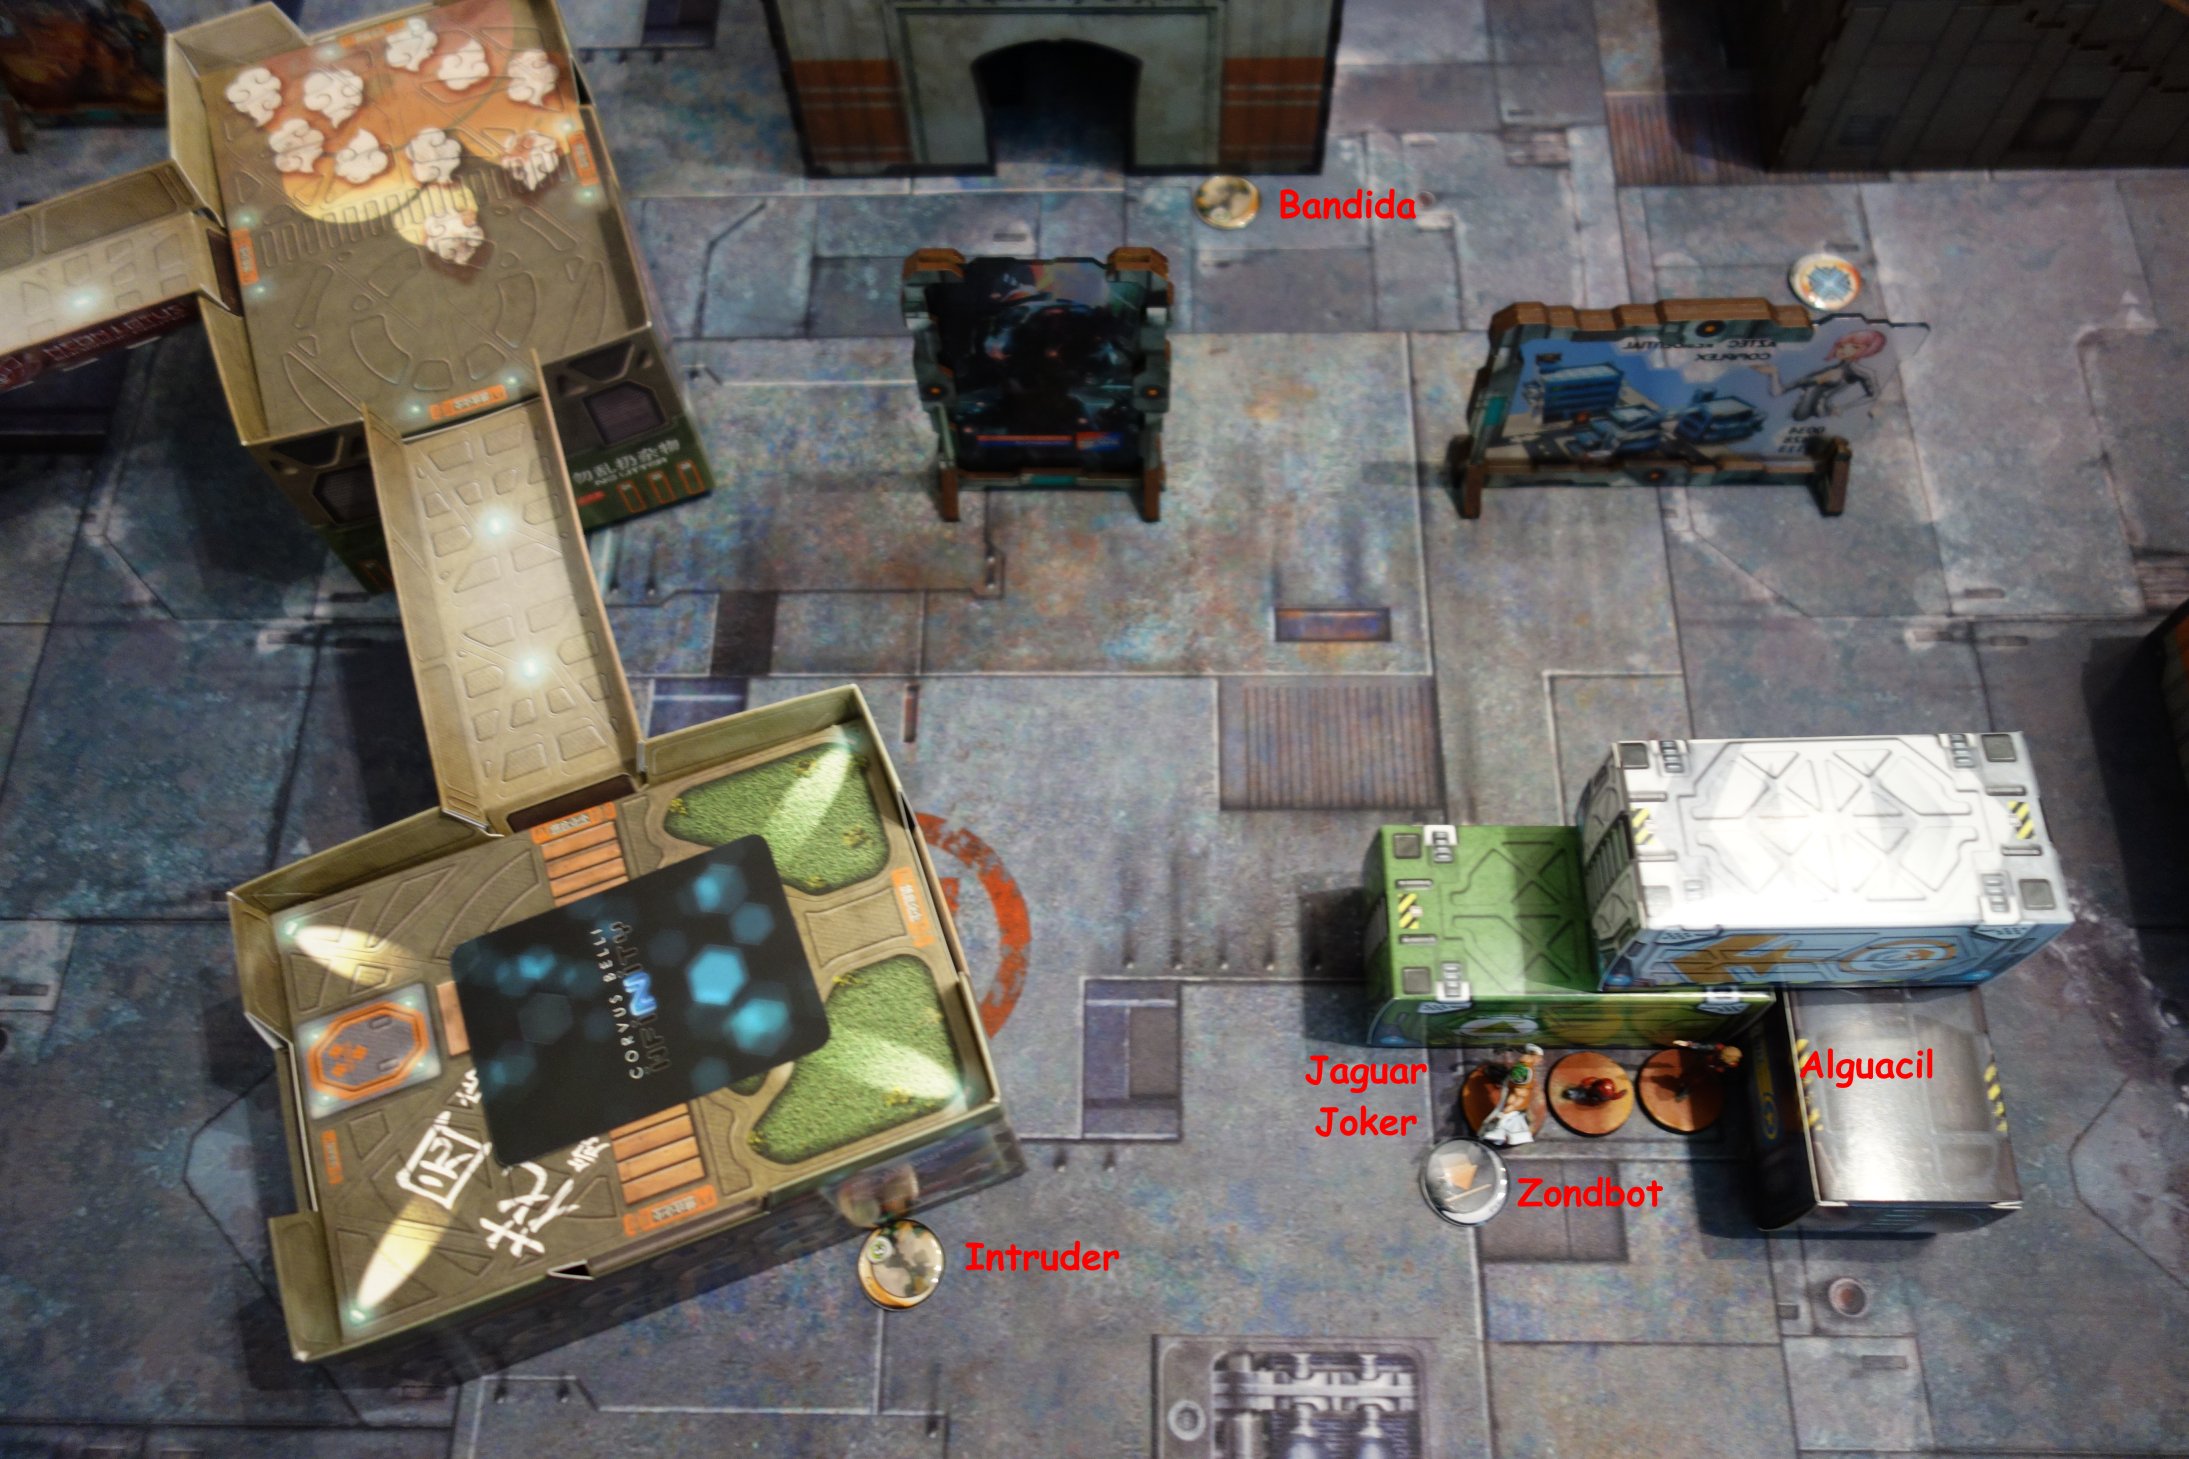
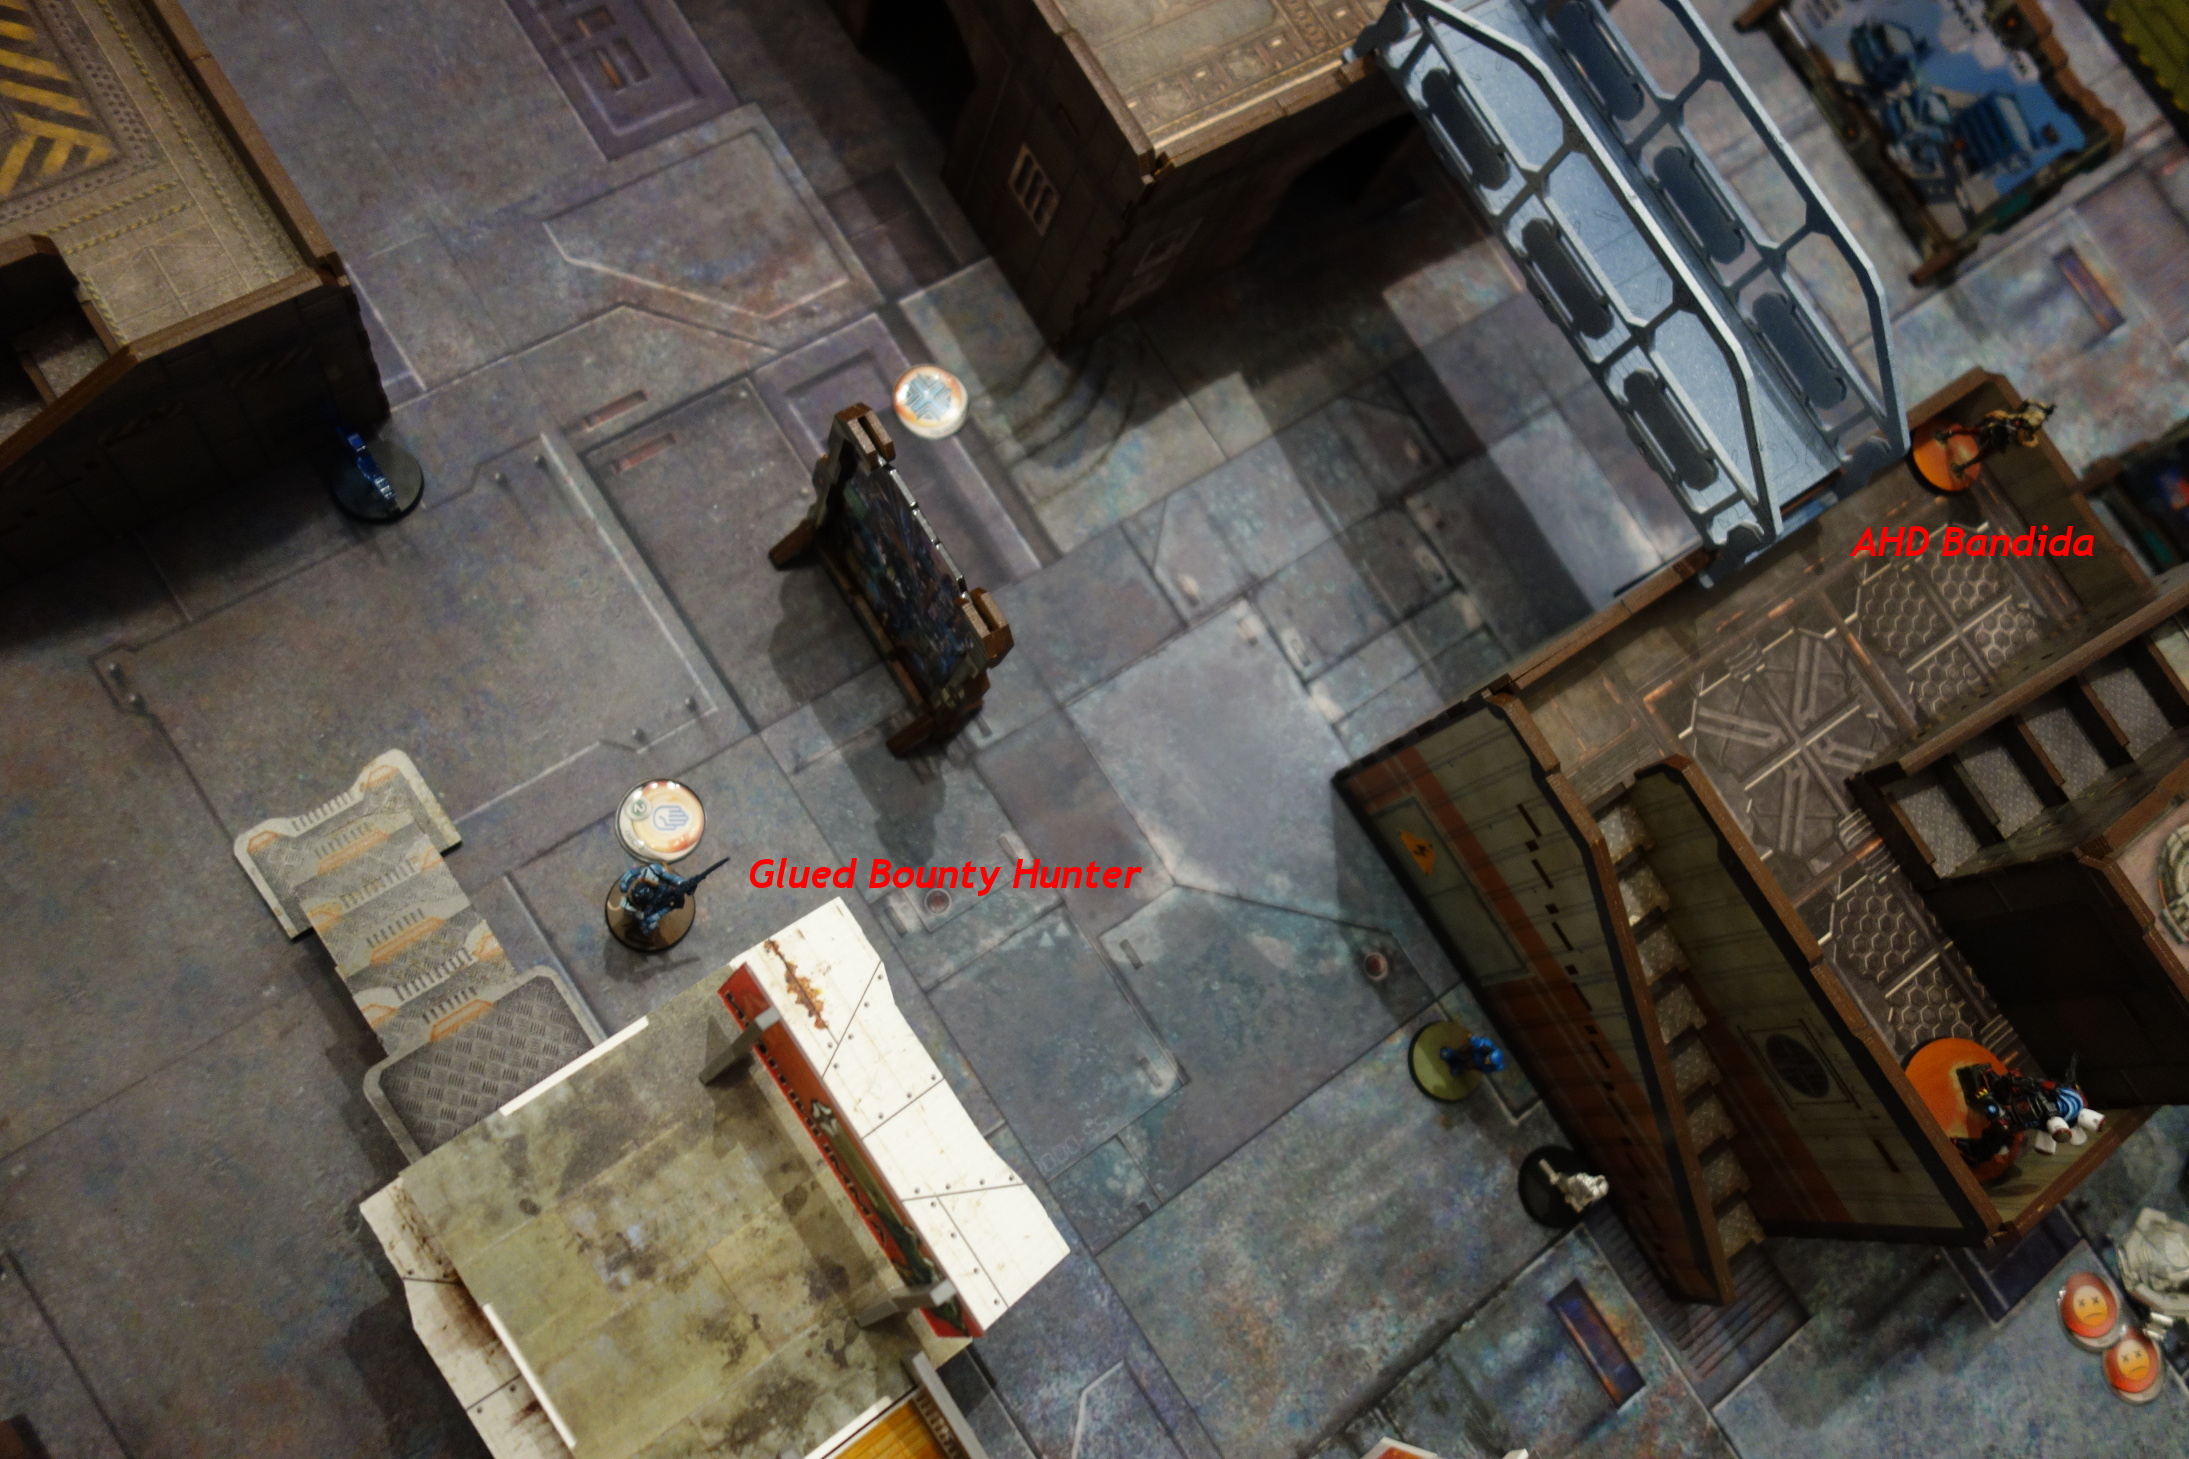
The Bounty Hunter went forward to try to go for the Bandit in the building. The Bandit used its ADHL and glued the Sniper in place. I think I'm in love with the AHD Bandida.
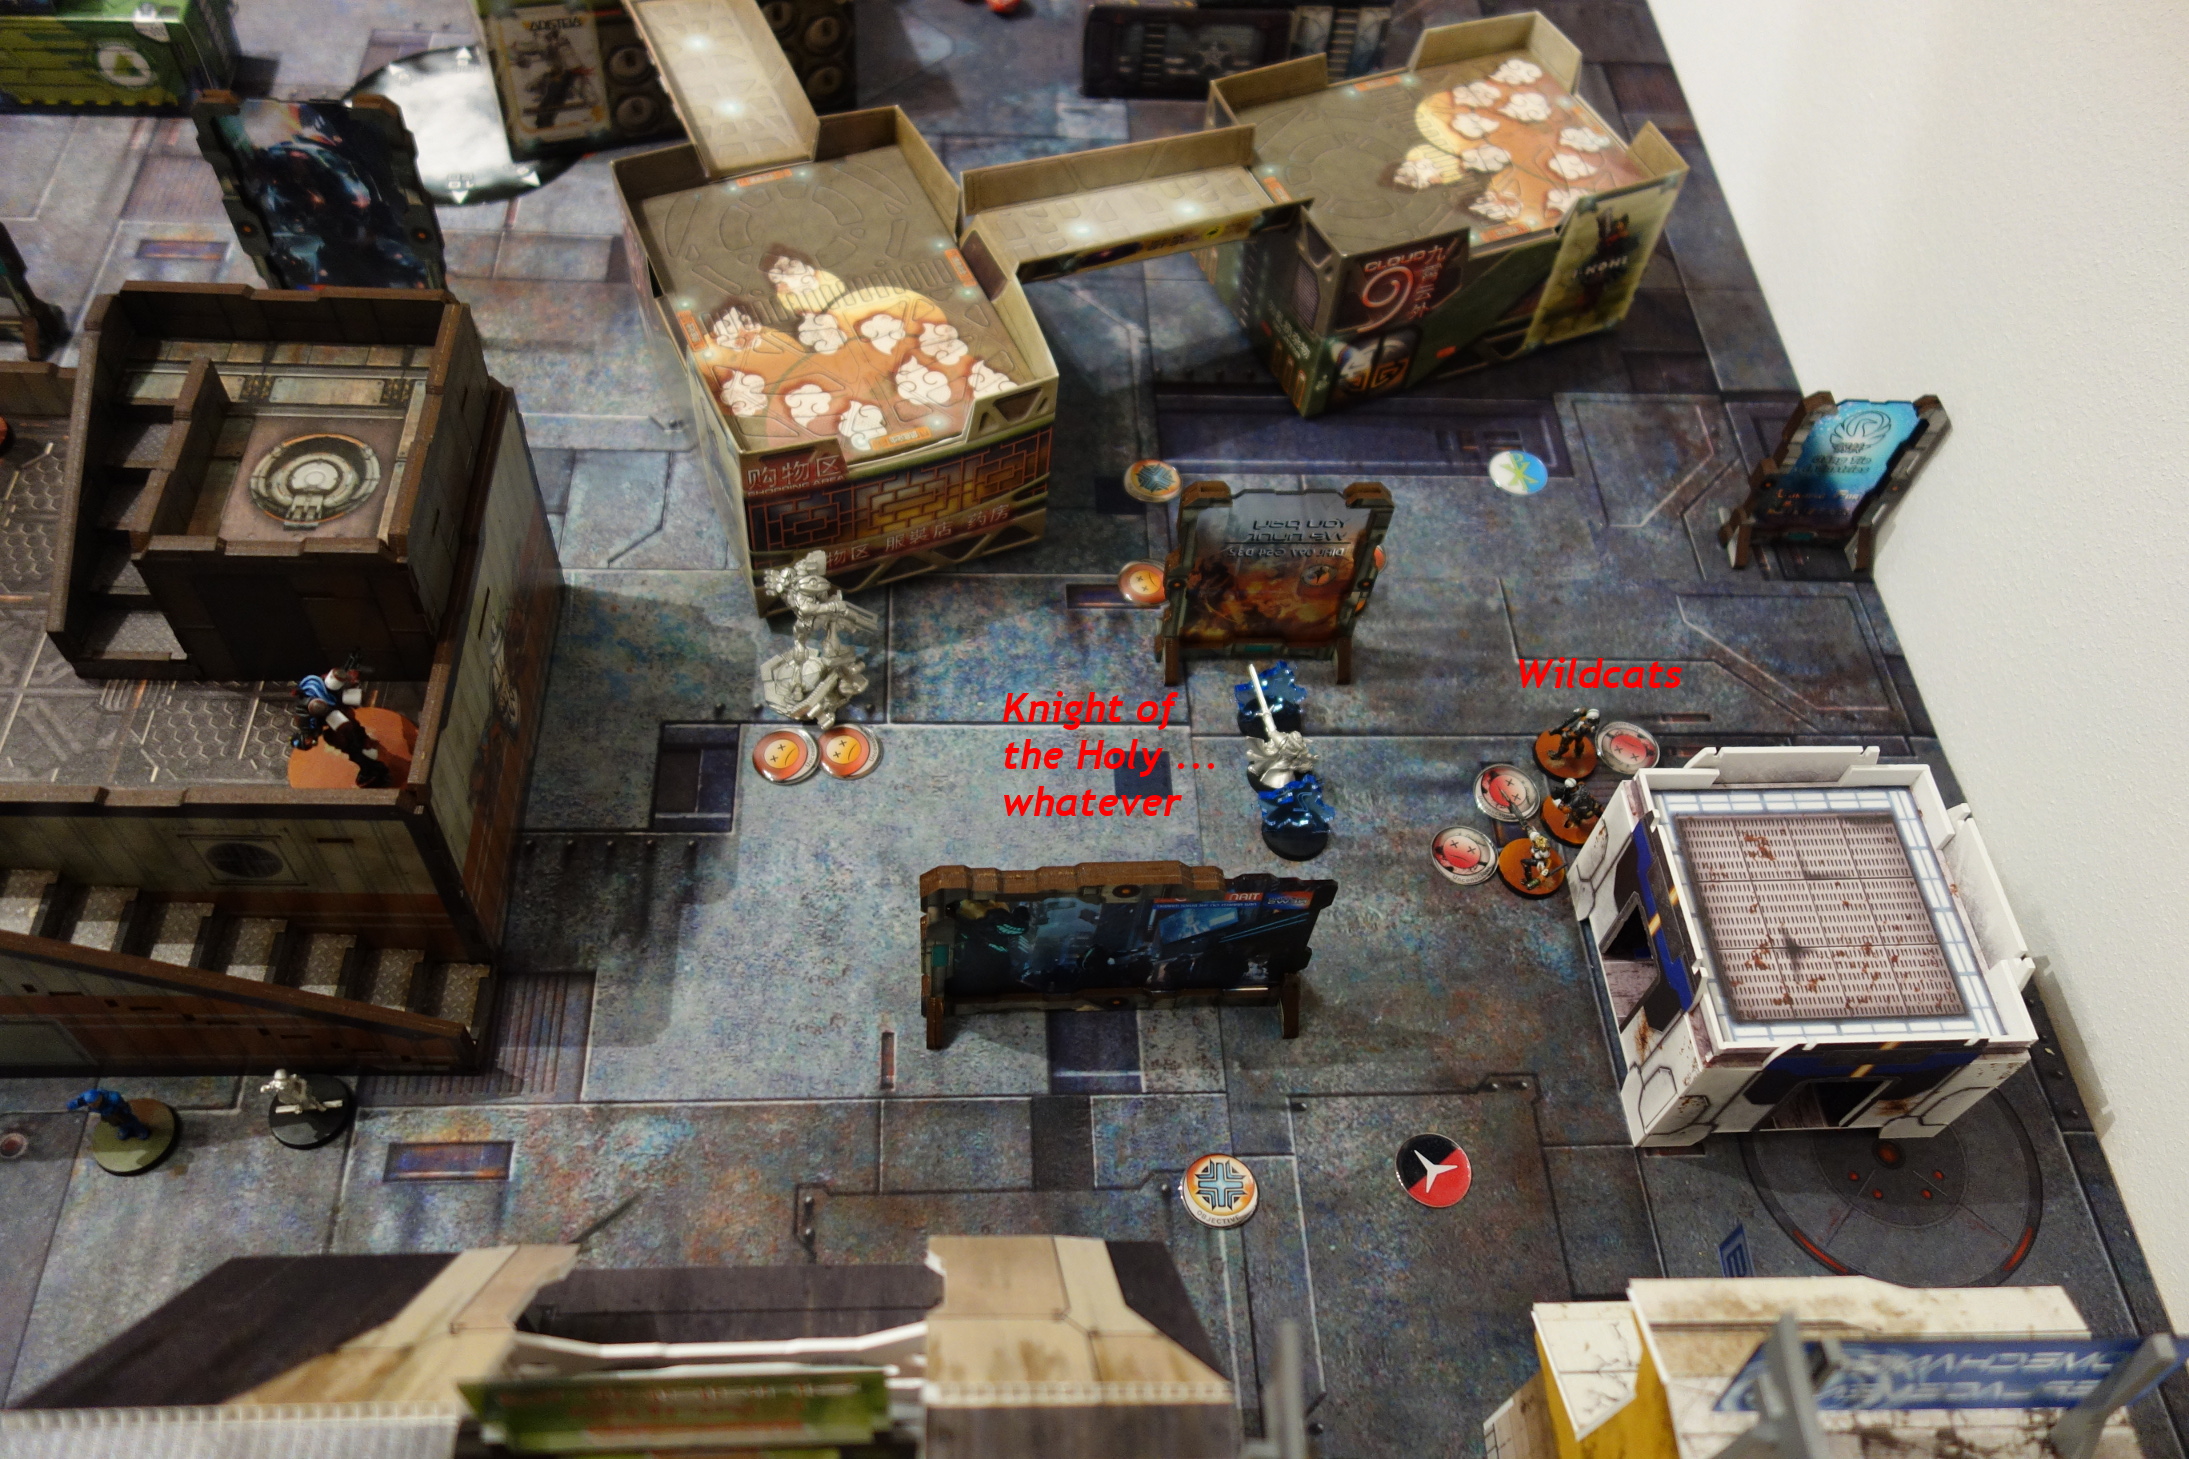
Nomads used its remaining orders to position enough points in the Quadrants and going second this wasn't too hard. The Holy Knight was cancelled using the Intruder, Jaguar Joker and Miezi. And the Bandida joined the Gecko, just in case the Holy Knight, who spread its Holoechos over both Quadrants, were in the Nomads Quadrant.
So that was it.
Nomads scored 3 more points for controlling its sector using a TAG and to control more quadrants at the end of the game.
Final Result: a convincing 7:0
Battle Report Author

Recommend Commander For Commendation
Share this battle with friends
Spitfire_TheCatWins

Nicely done.
Why choose to use Holoecho for stuff that is, like, gonna be obviously not true?
Do you have the PanO list? Or at least courtesy list?
Great work, show the hyperpower what freedom really is.
Pano s…. jajajaja. Well done bromad! Secure the zone and clean it from every enemy we found!
Nice report! And good victory
<.< need to see the opponent.
Surrender your weapons and bow to the law.
You are surrounded.
#DEUSVULT