Fought At Main Strip: Main Strip
1673 days 15 hours 40 minutes ago
Big trouble in Little China
View Linked Report - CLICK HERE 300 POINTSApologies in advance if I got any details wrong, I’m not very familiar with Tohaa and their units.
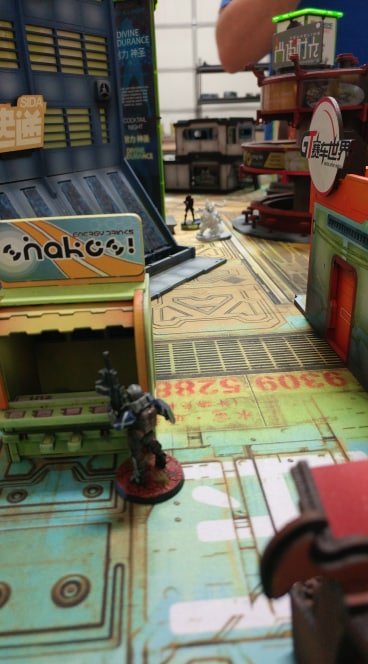
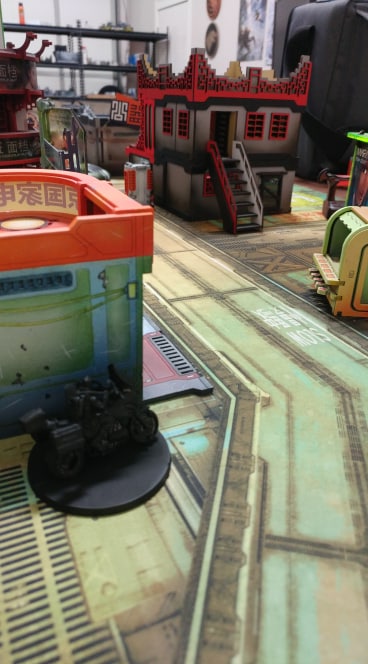
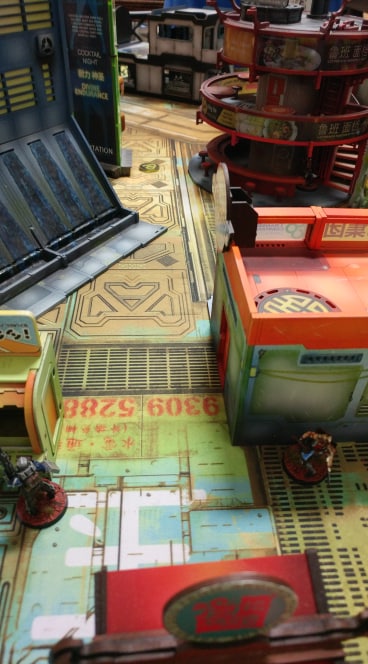
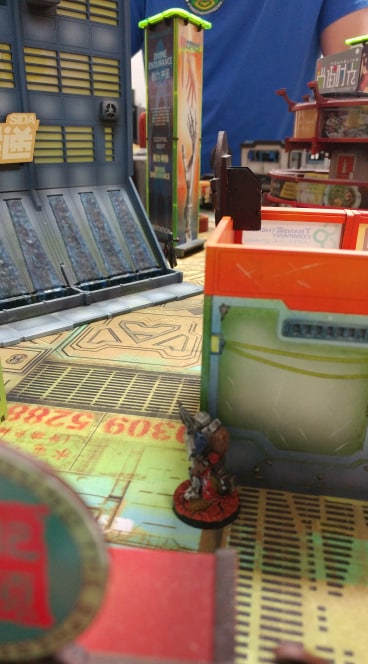
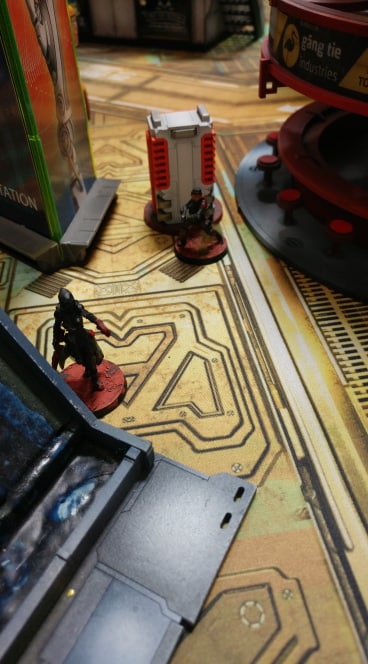
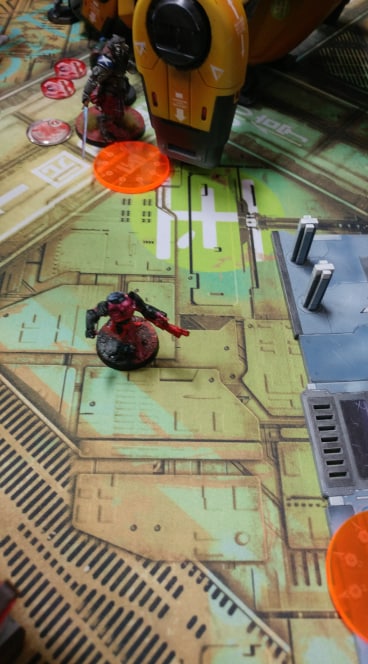
There was some big trouble in little China the other day involving the savage Caledonian Highlander Army against the perfidious Tohaa aliens. Brock and I decided to play a game on the Main Strip using the amazing-looking Yu-Jing table at Shiv Games. I’ve been having a lot of fun playing limited insertion with my Caledonians because I’m a masochist, and Brock was gracious enough to run a LI list as well. The table we used has three main fire lanes leading to each deployment zone, and as we set up the tech-coffins I noticed that all three of them were right in the goddamn middle of each fire lane, so this was gonna get bloody.
I have my full list linked, but to give a quick rundown, I had:
– Wallace LT
– Highlander Grey w/ T2 Boarding shotgun, D-charges (proxied w/ Valkyrie)
– Mormaer w/ T2 rifle & X-visor
– Mormaer w/ AP HMG & Fireteam:Haris
– Uxia McNeill (Covert Action)
– Scot (2nd battalion) w/ Molotok
– McMurrough
– Cateran w/ T2 Sniper
– 112 on bike
– SAS (FO)
I don’t entirely remember what Brock brought, but his main players were:
– Gorgos w/ Chaksa
– Clipso (FO)
– Gao’Rael w/ MSV2 & Spitfire
– Sukeul w/ K1 Sniper
– Kumotail(?)
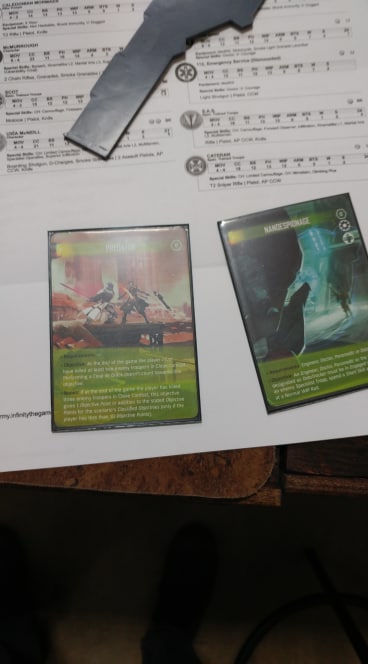
Drawing my classified objectives I got Predator and Nanoespionage, the former I believed I could get pretty easily with McMurrough in my list, but the latter I threw to the wayside and would plan on securing his HVT if I needed the points. I won the LT roll and, being limited insertion AND Caledonia, there really wasn’t another option but to take first turn. Deploying first, I made sure the far left fire lane and tech-coffin were covered by my Cateran in camo, along with my camouflaged Scots guard on the ground to ready to push enemies out of that lane during my next active turns, and I placed my SAS hiding behind a billboard as close to the tech-coffin as possible, ready to grab it as soon as he gets a chance. The middle lane was locked down by my Grey & 2 Mormaers in a special (any my personal favourite) Fireteam: Haris; with the HMG ready to shoot any models that would try to push for the middle tech-coffin, along with Uxia in camouflage nearby ready to run in and open it. Next to my HMG I had my 112 ready to revive any members of the link team brought down by a lucky bullet, and positioned to lay down a smokescreen with his launcher and grab the box on the far right. Finally I had Wallace hide behind a building towards the right side of the board, just trying to stay hidden, and held back McMurrough as I usually do in order to position him for maximum carnage.
Brock focused on positioning his troops towards the left and center lanes. To the left he had his Gorgos and Chaksa covering the left tech-coffin and preventing my SAS from immediately running up and grabbing it, he positioned his MSV2 Gao’Rael close to the Gorgos covering the middle lane, and put his K1 sniper in a 2nd floor window effectively covering both the left and center tech-coffins, preventing me from immediately running up and grabbing them with my camo units. He also placed a Chaksa with a Smart HRL on top of a building covering the far right box. The rest of his troops he placed out of sight for the time being. This was going to be very bloody indeed.
I placed McMurrough on the far left flank, closest to where his Gorgos and Gao’Rael were, as taking both of those out early would be important to securing safe passage for my box grabbers. In turn, Brock put down a preceptor and symbiobeast on the right side of the board from his reserve, and I kicked myself for leaving that flank so weak, but there was nothing left to be done and we started the game.
Turn 1 Sam
I spent McMurrough’s impetuous order to try and move and smoke my way up toward his side of the board, but I rolled low and he took a Flammenspeer right out of the gate, failing his armour save and putting him down a wound. After trying to decide whether I should try and shoot his sniper with my HMG I decided that my troops were all in a secure enough position and that I should use McMurrough to kill as much of his shit as I could. He made it the rest of the way up the field without incident behind a building right next to his Chaksa and Gorgos. He successfully spec fired two smoke grenades so to not catch any stray AROs; one in the way of his Chaksa, but not covering it, and the other covering his TAG. After some guesswork with my templates I decided that he couldn’t get into base contact with the Chaksa without leaving smoke and taking some AROs, so I decided to run right past him and into the next smoke template, dodging as I went to avoid the pulzar he fired. I realize now that I could have just cautious moved and not risked the roll, but he passed easily on PH 16 and went on his merry way toward where the big target was. As expected, on my next order he got into base contact with his TAG and proceeded to make it his bitch, deactivating his symbiote armour and leaving the pilot naked and afraid. I didn’t use berserk because I really didn’t want to have to try and tank a punch from a TAG while he only had 1 wound left. With 2 orders remaining, I used one to perform a tombstone piledriver on the TAG pilot, reducing it to a chunky paste. On my last order, I left smoke to get into base with his Gao’Rael, triggering 3 different AROs, 2 of which were part of a Triad, so I decided “fuck it” and went berserk on the poor bastard, critting once and taking it out of symbiote armour, but he tanked the 2nd save and stayed concious while McMurrough was brought down by the resulting storm of bullets.
Turn 1 Brock
With his TAG dead and his Gao’Rael temporarily weakened, Brock decided to reveal a TO marker he had hidden next to the central supply box and moved it to see my Mormaer as well as my Uxia camo marker, which could see as soon as it revealed itself. I held with both of them before he revealed a Clipso FO and tried to forward observe my HMG, who tried to dodge in place while Uxia took a clear, up close shot with her boarding shotgun. Thankfully, the Mormaer won the resulting face-to-face roll and Uxia hit with her shot, but the Clipso passed his armour save and shrugged it off. On his next order, he activated his Sukeul sniper in the building and started taking shots at the Mormaer, who, paired with Uxia, now posed a significant threat to his Clipso’s bodily integrity. The Mormaer shot back but got hit with the sniper and was brought unconscious, his armour of 5 being completely ignored by K1 ammo. Oh well, at least I have a doctor right next to him. Now that my HMG was out of the way, he activated his Clipso and moved closer to the box, but also closer to Uxia, who decided to try and engage and break his neck while the Clipso shot a combi rifle at her. We both failed our rolls and the order ended. On his next order, I decided I didn’t want to get combi’d again so when he activated I threw down a smoke grenade, passed the roll and immediately wished I hadn’t. The Clipso proceeded to walk right past Uxia and open the supply box. After the large console was gone, Brock used his last order to activate his Gao’Rael, who now had a clear shot at Uxia through the smoke and took her down in a single burst.
Turn 2 Sam
My first order was spent on my 112 to bring up my unconscious Mormaer, which thankfully succeeded as I don’t have cubes on any of my guys to provide those sweet command token rerolls. Next, I activated said Mormaer and immediately opened fire on his sniper, his clipso had turned its back on him while grabbing the box, and upon close inspection, his silhouette was also JUST blocking line of sight to the Gao’Rael, so it was a one-on-one match for now. Even with a burst of 5 in his Haris team, it took him around 4 orders of shooting before he took a lucky crit. Instead of going unconscious like I should have and just eaten an order to bring him back up with my doctor, I went dogged instead. He was now fucking pissed, and was going to bring down everyone who wronged him this game, and now he was going to die trying. On the next order I rolled a crit of my own and a couple extra hits that finally brought his sniper unconscious. Next on his shit list was the clipso holding the box, whom he easily dropped in a hail of righteous, tesium coated fury. His final opponent was the Gao’Rael that had killed Uxia, and he didn’t waste any time sending a stream of fire down his way, hitting him four times. When Brock rolled his armour saves however, he got two 19’s, a 17 and a 14 plus cover… Fuck. Brock was smart and decided not to tangle with a Mormaer with nothing left to lose, and failed his GUTS to move out of sight. With no one left to shoot at with my HMG and only one more order left to spend, I moved my Grey up beside the HMG to move her into a better position to run and grab the box next turn now that it was exposed, and to console the Mormaer in his dying moments. It was quite touching really.
Turn 2 Brock
At the bottom of turn 2, Brock was still in a fairly good spot, he may have been missing a TAG, but aside from that, there was still a lot he could do. All the orders he spent this turn went towards his Kumotail doctor/engineer, who ran across most of his backline like an absolute fucking mad lad. First, he ran to the Gao’Rael and repaired his symbiote armour, taking a shot from my cateran, who revealed himself and hit with his T2 sniper only to have his hopes crushed by yet another lucky save. With his kumotail now safely out of sight from any of my remaining ARO pieces, he proceeded to go all the way around the building his sniper was hiding in, coordinating one with a command token to also move the Gao’Rael back into sight of the middle lane, go up the stairs, and with his final regular order, brought the Sukeul back to the realm of the living, accomplishing one of his classified objectives, Experimental Drug. Finally deciding to spend his lieutenant order, he activated another Sukeul which had a spitfire, and moved it to see down the far left lane that still had my camouflaged SAS waiting to take the box.
Turn 3 Sam
This was my final turn and it was time to get ballsy. I started by using Wallace’s inspiring leadership to use his lieutenant order as a coordinated order with him, my 112, my SAS, and Highlander Grey, with the 112 as the spearhead. The first short skill used was to move everyone but Wallace out into the open closer to their designated supply boxes, with only the 112 spearhead needing to worry about an ARO from a Chaksa wielding a Heavy Rocket Launcher. The second skill I declared reminded me why a 112 bike isn’t really worth 1 SWC, he launched smoke to cover the box and obscure himself from the Chaksa, needing to roll a 14, Brock won the face-to-face and the 112 unceremoniously burned to death. A smoke grenade launched from a launcher at base BS 11 isn’t very good in an army with half a dozen superior smoke users, but the bike is neat to use. With that plan having been a complete failure, I focused my efforts on the center supply box, which was hopefully going to be grabbed by my Grey. Though she had smoke grenades to cover her normally, the Gao Rael and his MSV2 didn’t care about that, so I spent my first order with her making a mad dash towards the box, relying on her armour 3 and dogged to get her at least to the box and back to where someone else could grab it from her. She took two hits that first order and only passed 1 save and went dogged. On the second order, she grabbed the box but took another two bullets and again, failed one save, killing her and leaving it right where it was, at this point probably drenched in blood and entrails. The only lane I had left to try was the left side, which had a Gao’Rael and Sukeul lieutenant both with spitfires covering it, but an SAS an order away and a Scots guard in camo ready to clear shit out. First thing to do was move my Scot to see his lieutenant and start shooting to try and take it out. After rolling and scoring some hits on the Sukeul, Brock again managed to pass all of his armour saves, his lieutenant staying right where it was. By this point I was running out of orders and getting desperate, so for the second time this game, decided “fuck it”, and tried to run my SAS up to grab the box, taking an ARO from the Sukeul and getting himself immediately killed, but not before successfully opening the tech-coffin and grabbing the objective inside, making it available to be taken by anyone. I had two orders left with only one goal in mind: keep Brock away from the boxes. I used my second to last order to shoot at his Sukeul again, which thankfully failed its saves and died, putting him in loss of lieutenant. I spent my final order to move the final member of my link team, the T2 Mormaer, into line of sight of the center tech-coffin.
Turn 3 Brock
At this point, Brock had beaten me, I wasn’t holding any boxes and hadn’t accomplished any of my classified objectives, but I had both previously-opened boxes firmly locked down, and his only specialists were too far away from the right side to be able to grab it, so we decided to have a bit of fun with a snipe-off. He used an order to stand his Sukeul sniper up to see my cateran, and with a brief exchange of fire, the cateran came out on top, sending a T2 round careening right through his skull and out the other side, killing it all the way this time. His success was short lived however, and Brock sent his Gao’Rael around and blasted my sniper apart with his spitfire. His final orders and command tokens were spent getting his preceptor and symbiobeast to the center box to try and grab it. But on the last order, at the last possible second, when the preceptor had just grabbed the box, after dodging all the ARO’s thrown at him by the opposing Mormaer, a major victory hanging in front of his face, the Mormaer, with a cry of “Fuck you”, critted him in the face with a T2 rifle. And with that, the game was over.
Counting up points, I had 99 remaining, with Brock had 107 left. Very bloody indeed. As for victory points, they were scored like so:
Sam
Your adversary has no Controlled Supply Boxes at the end of the game (2 points)
Total: 2
Brock
Your adversary has no Controlled Supply Boxes at the end of the game (2 points)
Classified Objective (1 point each)
Total: 3
My MVP I would have to say was my T2 Mormaer, he single handedly kept a minor victory for Brock turn into a major.
As for Brock, I would say his MVP was his Gao’Rael, he successfully managed to keep the center fire lane covered, took McMurrough’s sword straight to the face and survived, killed Uxia, one Mormaer, a Highlander Grey, and a Cateran. That’s as good a game for one model as I’ve ever seen.


Battle Report Author

Army Lists Used In This Battle
Recommend Commander For Commendation
Share this battle with friends
DabombdiggityWins

May have lost the battle but you win with that name!
Tohaa strong!!
Tnx for great report! Good luck for next time)
Crackin good batrep.
ʕ•ૅૄ•ʔ Nice Report, good luck for next time
〈( ^.^)ノ Tohaa Win, well done brohaa
Awesome report. You’ll get those artichokes next time.