Fought At Xaraks Battery: Fire Control Module
1660 days 20 hours 48 minutes ago
OSS vs O-12 - Xarax Battery Ammunition and Supplies Module (Armory)
300 POINTSTLDR:
Phase 1 match, O-12 scores 8 / OSS scores 0.
LEARNING POINT: Yadu Troopers are veteran and ignore the effects of Loss of Lieutenant. Game unfortunately ends in a bit of a gag play rather than a climactic shootout, but still fun had by all.


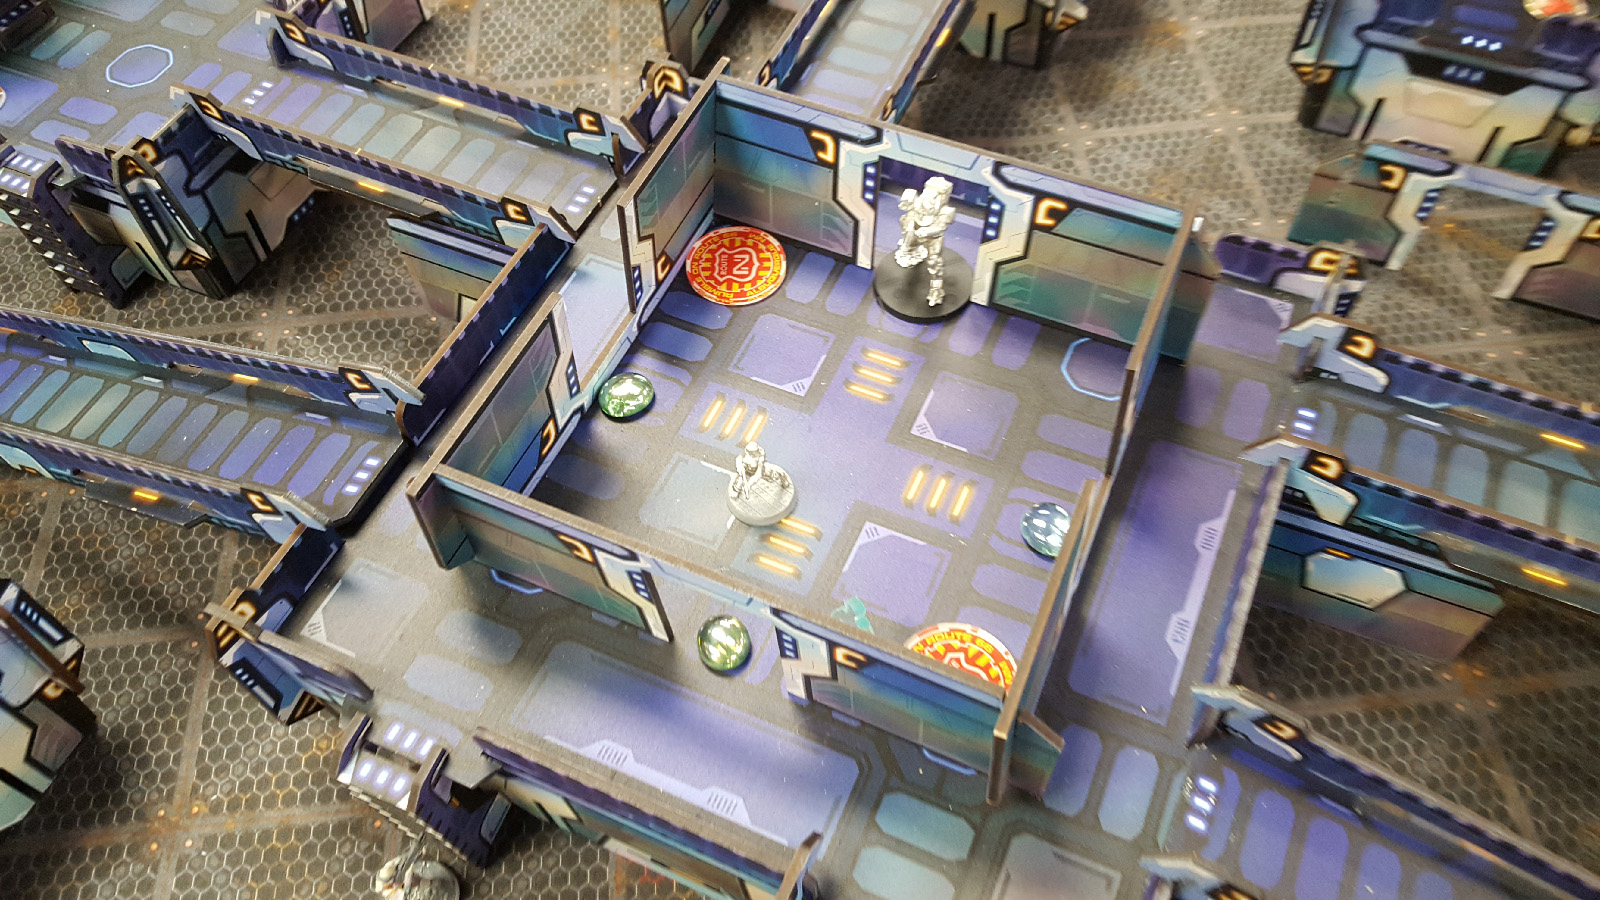


 O-12 wins lieutenant roll and opts for table side, OSS opts for second turn. OSS deploys picture right, O-12 deploys picture left.
 OSS deploys Dakini HMG in 5-man fireteam on OSS left flank, Mk. 2 Sniper on upper OSS right flank, and Asura/Yadu link in upper central area. The CSU rolls Super Jump for her meta-chemistry so she deploys on the upper level since she'll be able to move down via jumping later.
 O-12 deploys hidden Lynx sniper upper O-12 left flank, Gamma unit with view of Asura, and Lynx plasma just left of Gamma unit.
 O-12 opens with a coordinated order to move both gangbusters, left Sirius team, and plasma Lynx towards central board area.
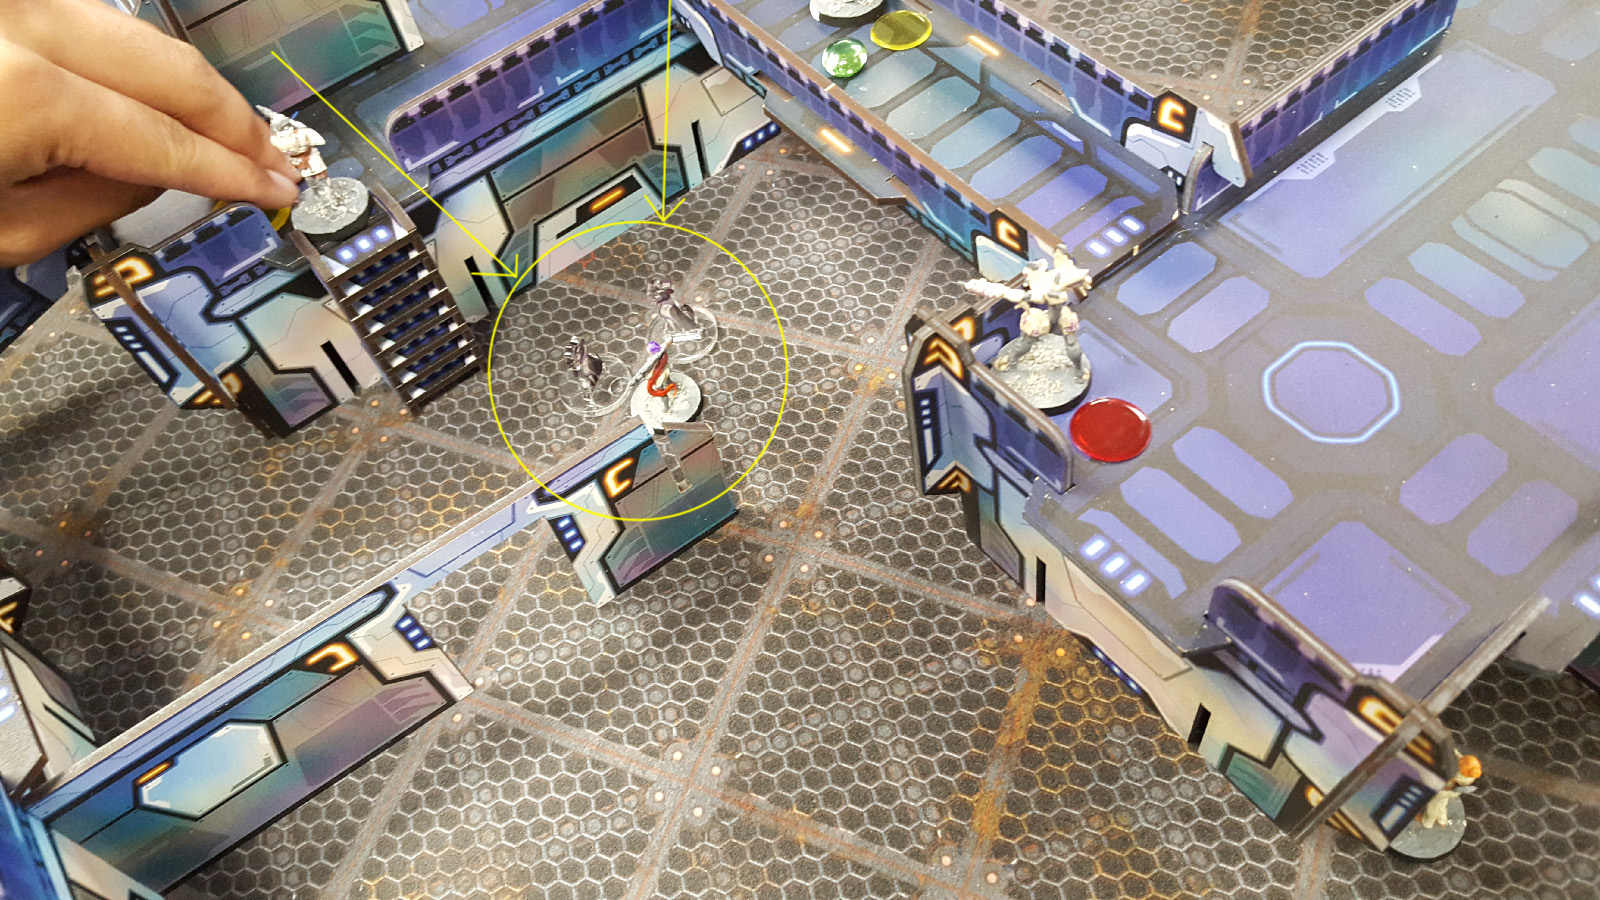
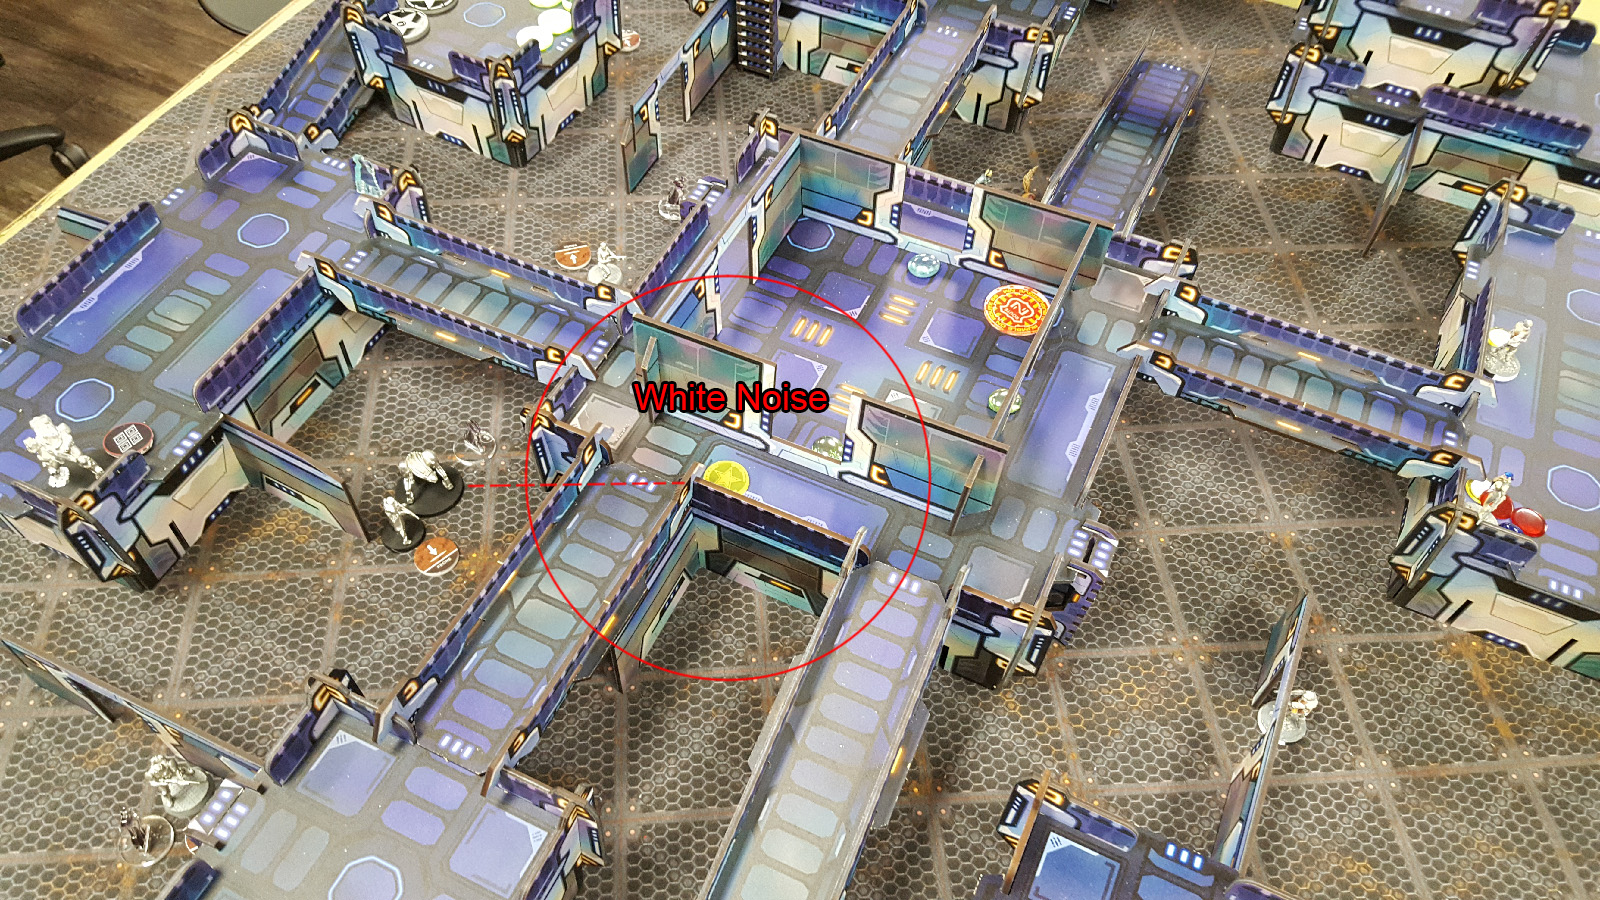
 O-12 uses Cyberghosts Hacker through the Siriusbot repeater to create white noise field directly between the Gamma and Asura. Gamma proceeds to open fire on Asura who fails her dodge roll, but manages to only take 2 wounds out of the exchange. The Asura drops prone to get out of the fire lines.
 O-12 sends Siriusbot on their left flank around the lower area to attempt to get it into positions to hack the Asura unit, but the Dakini HMG draws line of fire and eliminates the bot as it finishes its movement.
 O-12 uses another command token to move up the Gamma, Gangbusters, and Plasma Lynx towards the center of the table, managing to get a couple members into the armory after hacking the door on their side. The Gangbuster is able to gain 3 armor from the panoply along the way.
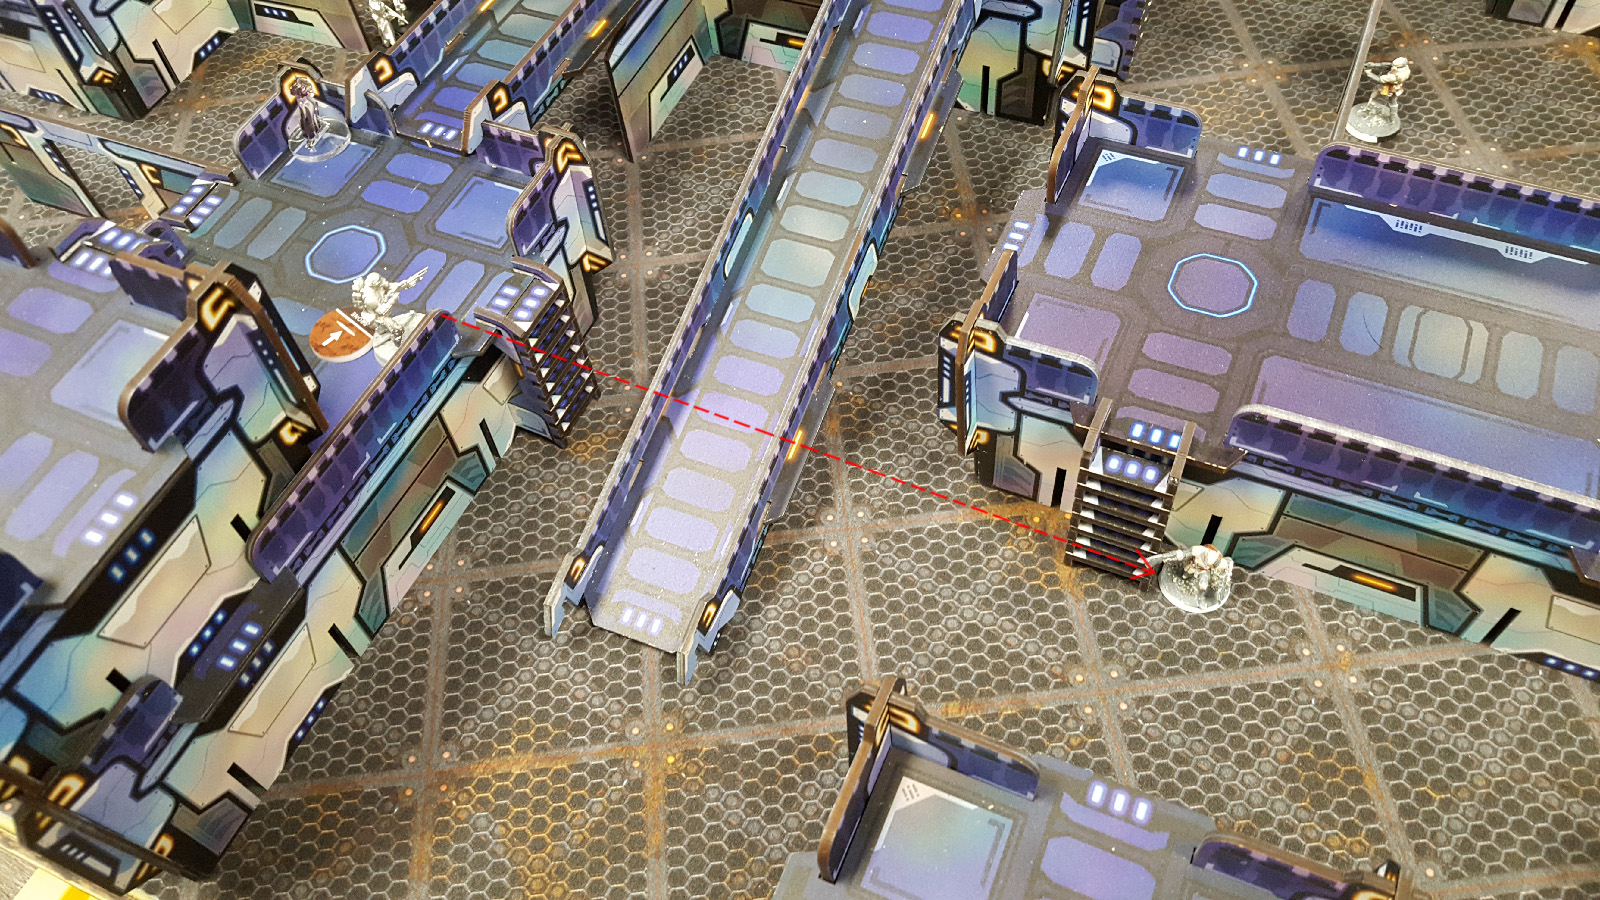 Gangbuster on O-12 right flank attempts quick takedown of the Post-human Mk. 5 with final orders of the turn, but the Post-human successfully tanks an armor save after negating a couple shots with his dodge.
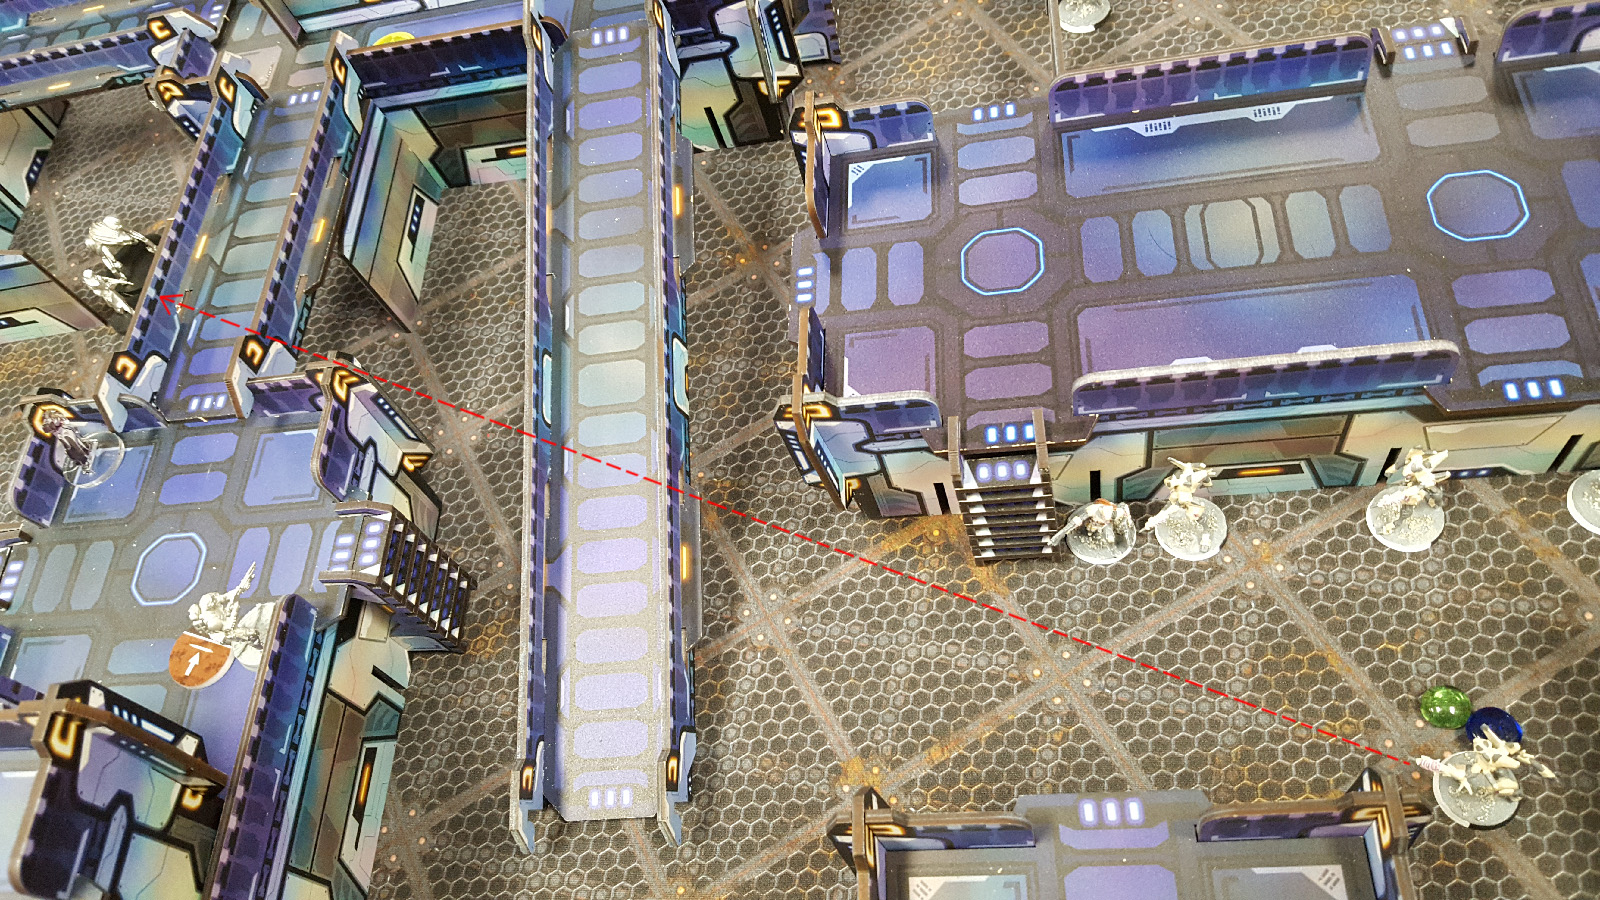 Post-human Mk. 1 hacker applies Assisted Fire onto the Dakini HMG in the fire team and the team gets to work. First target in theirs sights is the Siriusbot team on OSS left flank. The bot team attempts the dodge, but the 5 shots manage to take out both the repeater and its handler.
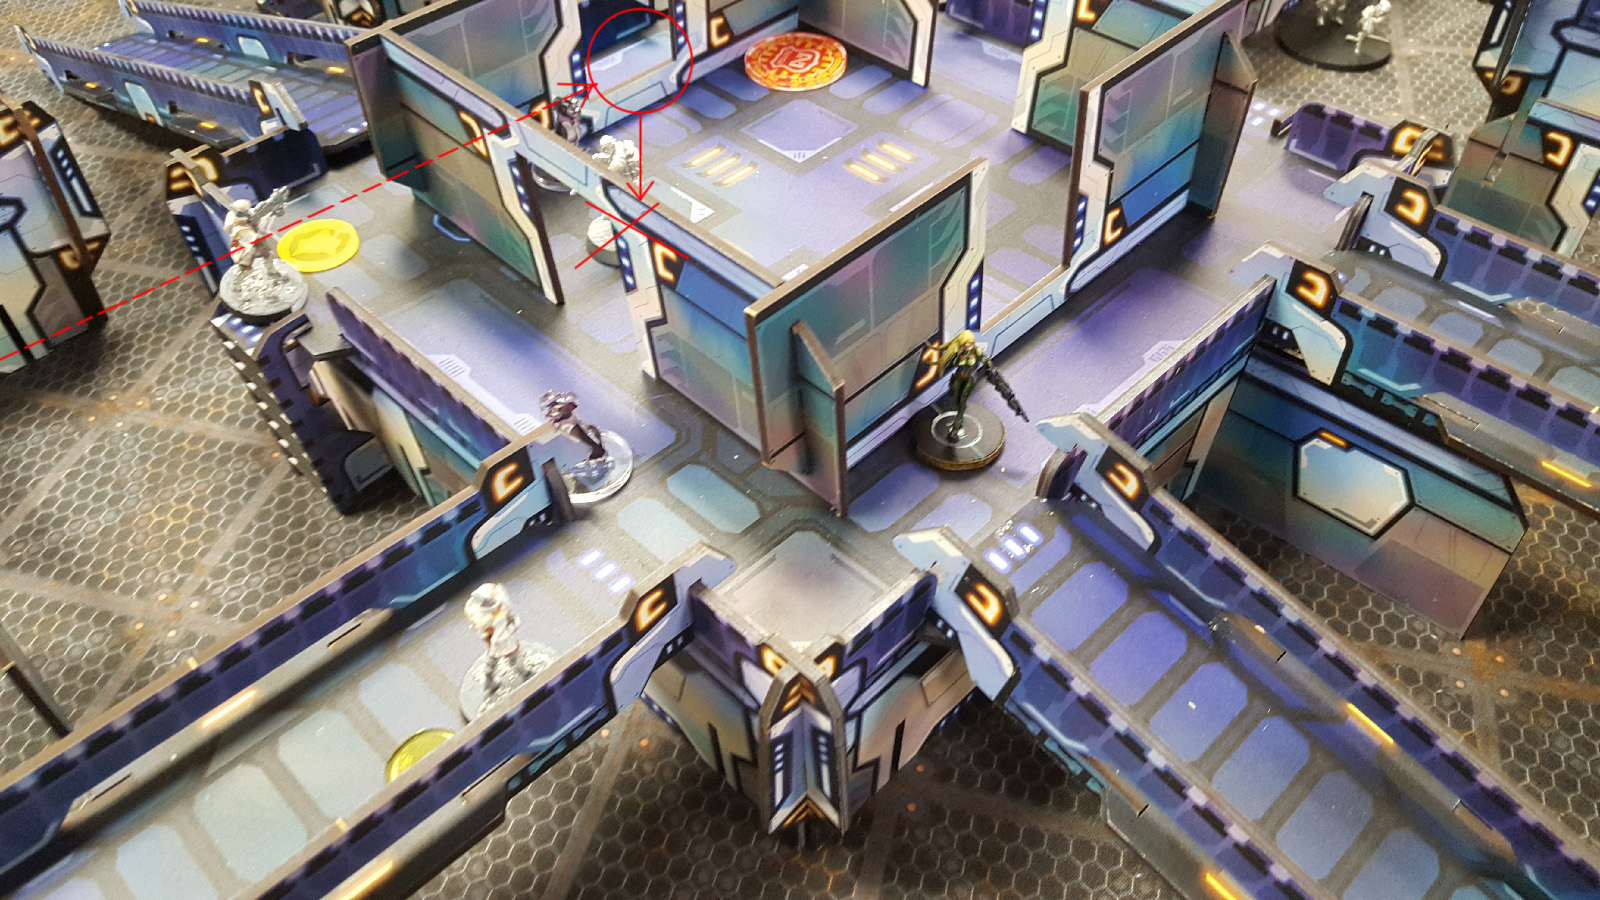
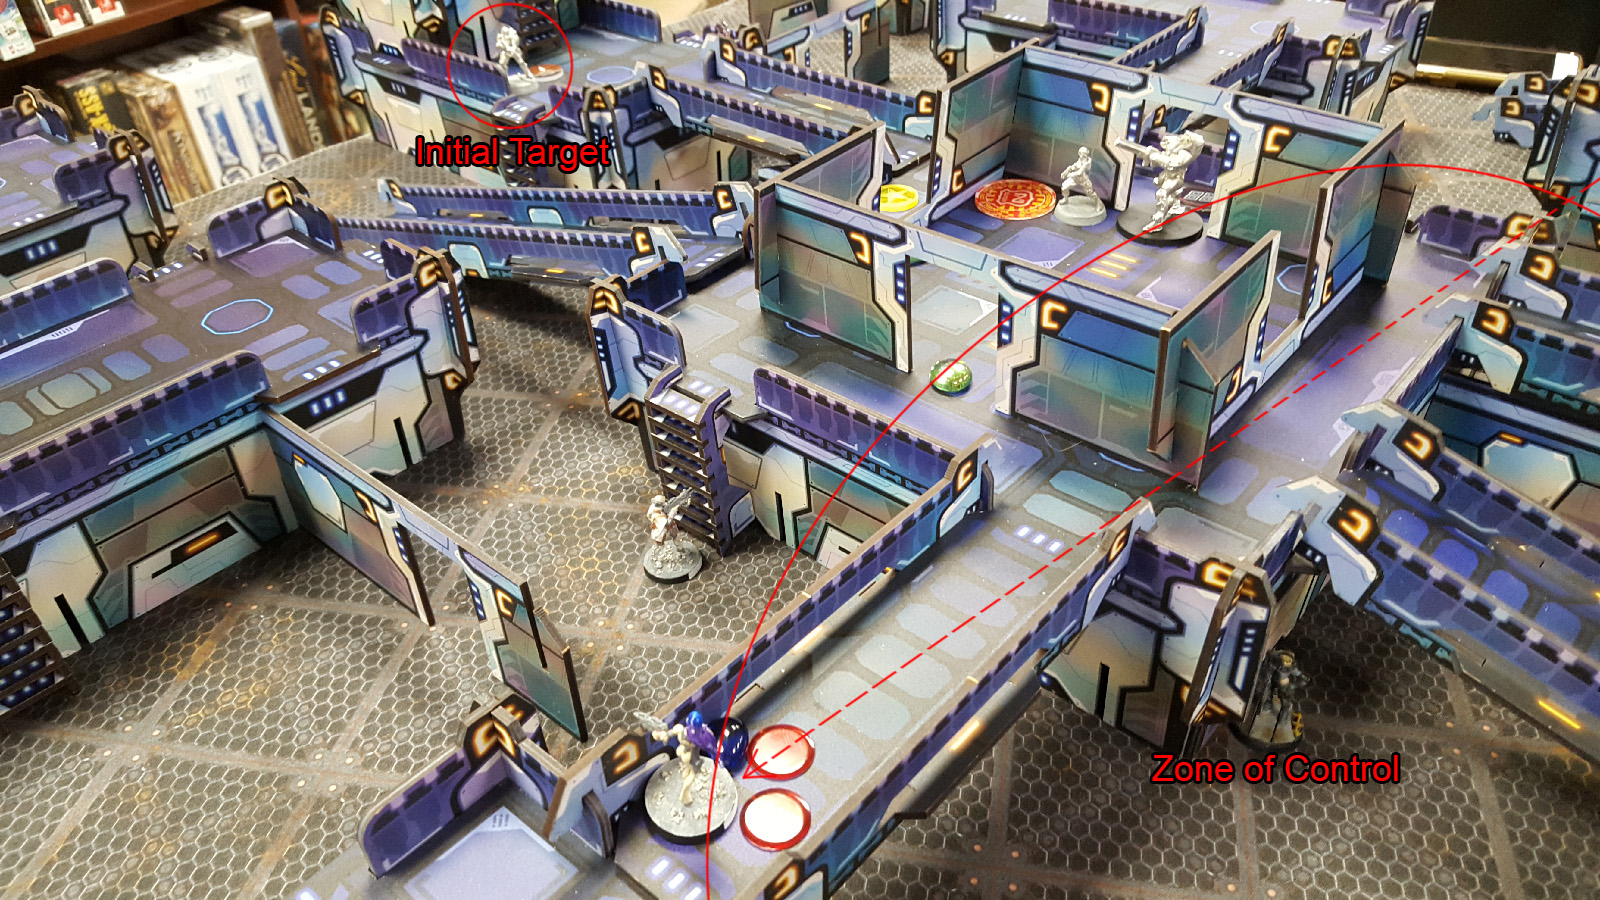 The Asura moves up along the upper bridge to get line of sight to the Gangbuster on OSS left flank, but misjudges the zone of control for the Sirius hacker below. On top of that the Lynx sniper springs from hidden deployment to catch the Asura in the open in the process! The Asura opts to dodge the shots from the sniper and attempt to tank the hack. The play results in the Asura dodging the snipe, but hacked by Basilisk to become IMM-1 for now.
 Dakini fire team resumes their hunt and sets out to save the Asura from her plight. The Dakini HMG manages to get line of sight on the Sirius Hacker and take her out as the team loops back along the back of the OSS right flank to attempt to setup shots on the now revealed Lynx sniper.
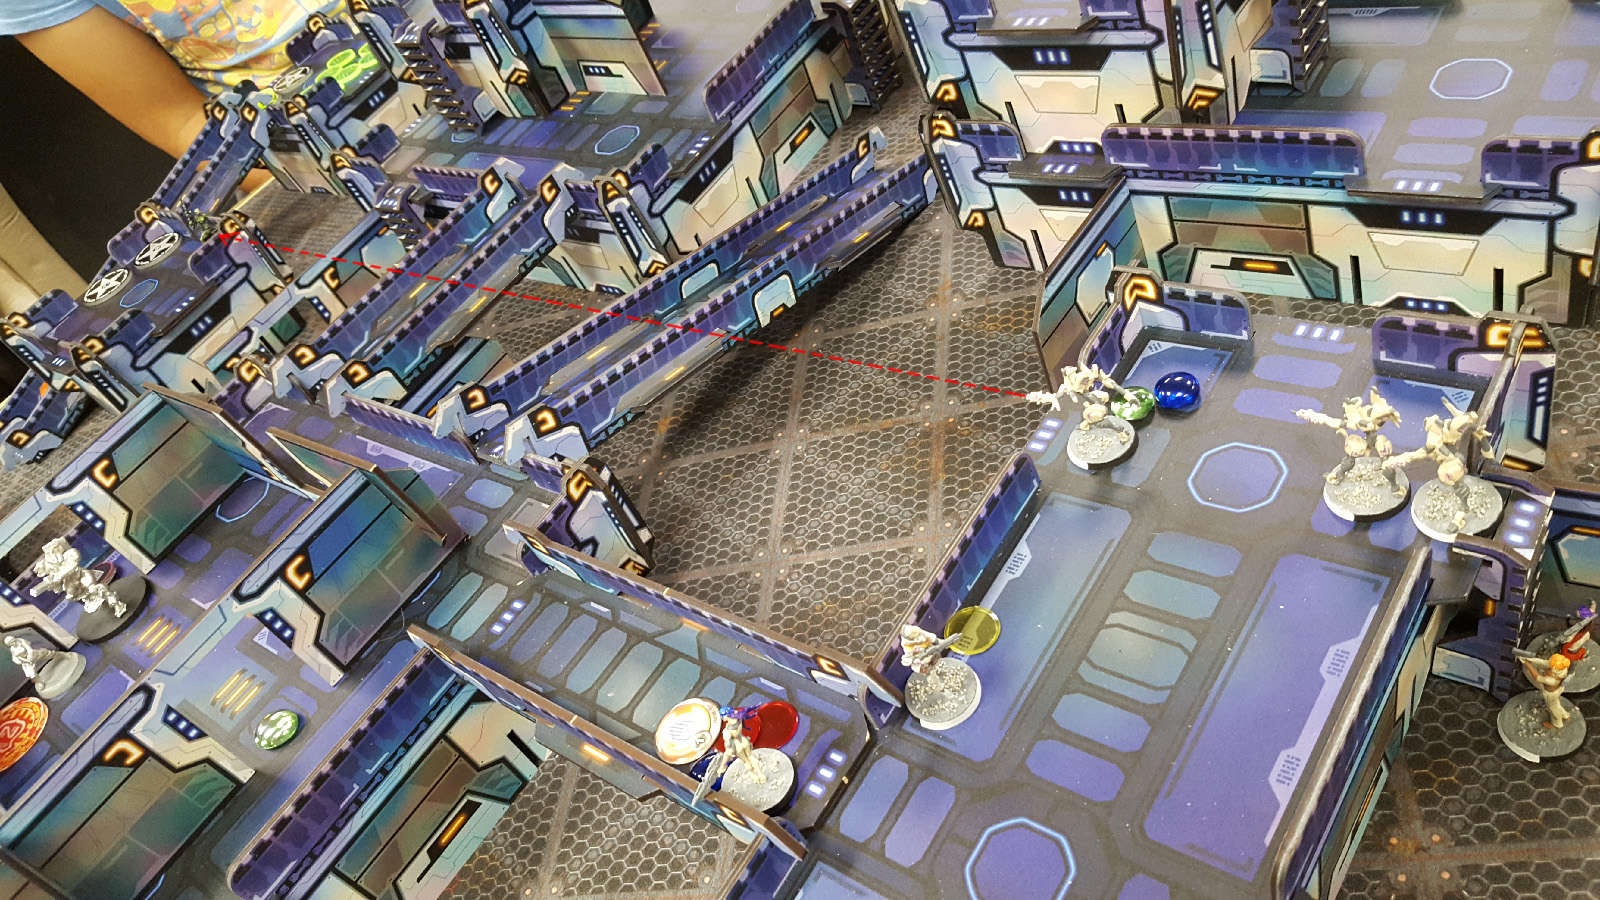 Dakini HMG bravely climbs the ladder to face off against the Lynx sniper. Shots fired both ways, Dakini HMG throwing 5 dice looking for 11's while the Lynx sniper rolling one die looking for a 13. Lynx Sniper rolls a 3 and thinks this is certain doom, but Dakini HMG rolls a 2 on 3 different dice and 2 misses. Dakini HMG then fails both armor saves to go to unconscious level 2.
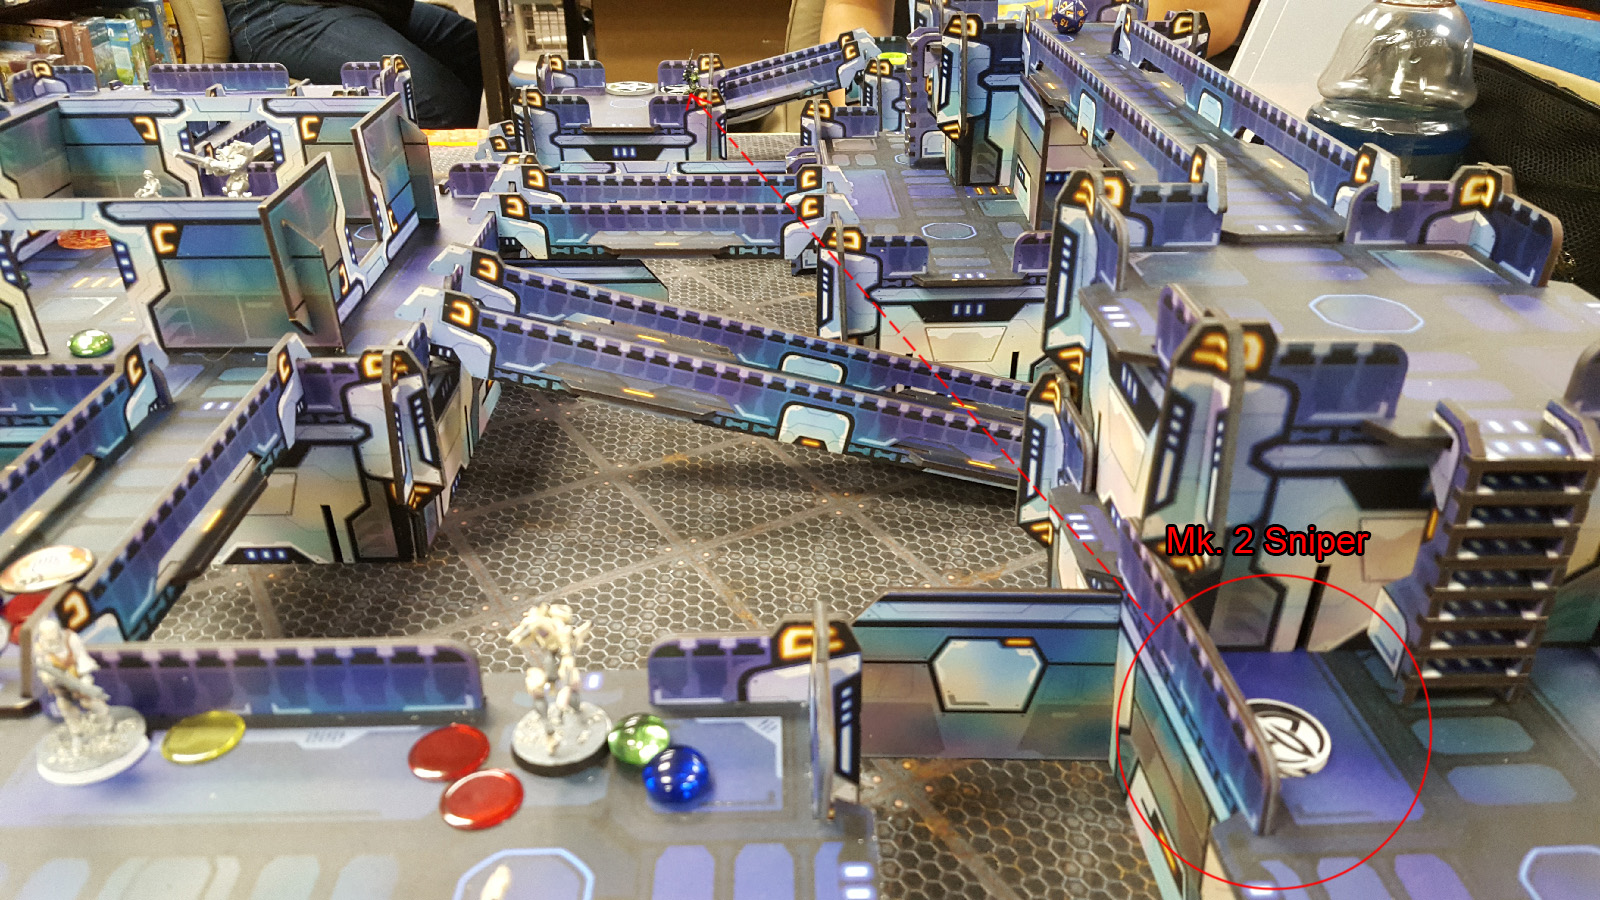
 Attempting to salvage the situation, OSS reveals Post-human Mk. 2 sniper in marker state with view of the Lynx sniper. The Lynx sniper decides that the humans should show no fear and teach the AI who's the true shots of this force. Post-human wins the subsequent shootout with one of its shots, but the Lynx sniper manages to tank one of the double-action saves and goes unconscious.
 With the final orders of the turn OSS spreads out the members of the Dakini link team, hoping to weather the storm of the next O-12 turn so that any progress can be made towards the objective. (1 point scored to O-12 at the end of the round for control of the armory room).
 O-12 opens their second turn with another coordinated order to get the Gangbuster hacker up to the door near OSS, the Gamma well into the room, and the plasma Lynx up against the wall near the Dakini fire team. The Asura uses zone of control to perform a reset and succeeds at removing IMM-1 state.
 O-12 succeeds at a WIP roll against the door to completely open the armory up. Then the plasma Lynx moves out in marker state in full view of the Asura, two Dakinis, and Post-human Mk. 2 to attempt an advance on the group. The Asura and Post-human delay to protect the bigger guns, but the Dakinis attempt discover rolls and one is successful. The Plasma Lynx opts to move for the second half of the order, but is now revealed prone on the bridge.
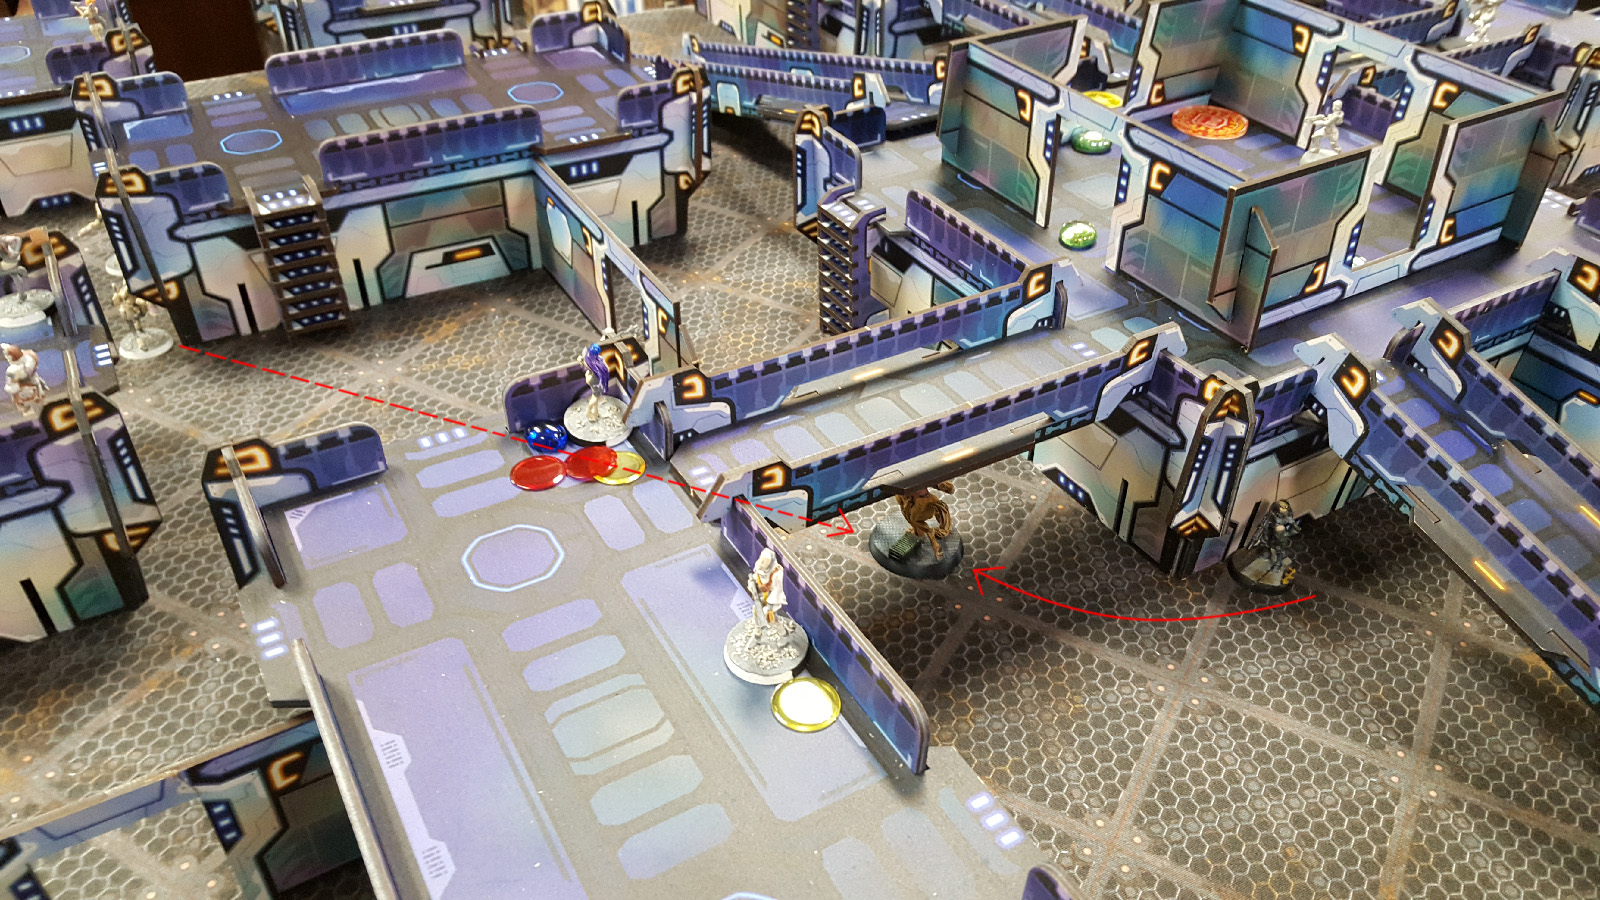
 Now that all doors of the armory are open the Gamma has full view of the Asura on her bridge. He moves back out of the room to attempt to creep along the O-12 right flank, taking shots at the Asura as he leaves. The Asura opts to fire back, still using her Harris fire team bonus and manages to negate any shots fired in either direction.
 Gamma moves along the O-12 right flank of the armory room to attempt a double-door shot against a Dakini that only has a combi-rifle to defend. Knowing how terrible remotes are at dodging OSS decides to fire back and manages to score a wound on the Gamma unit in the process.
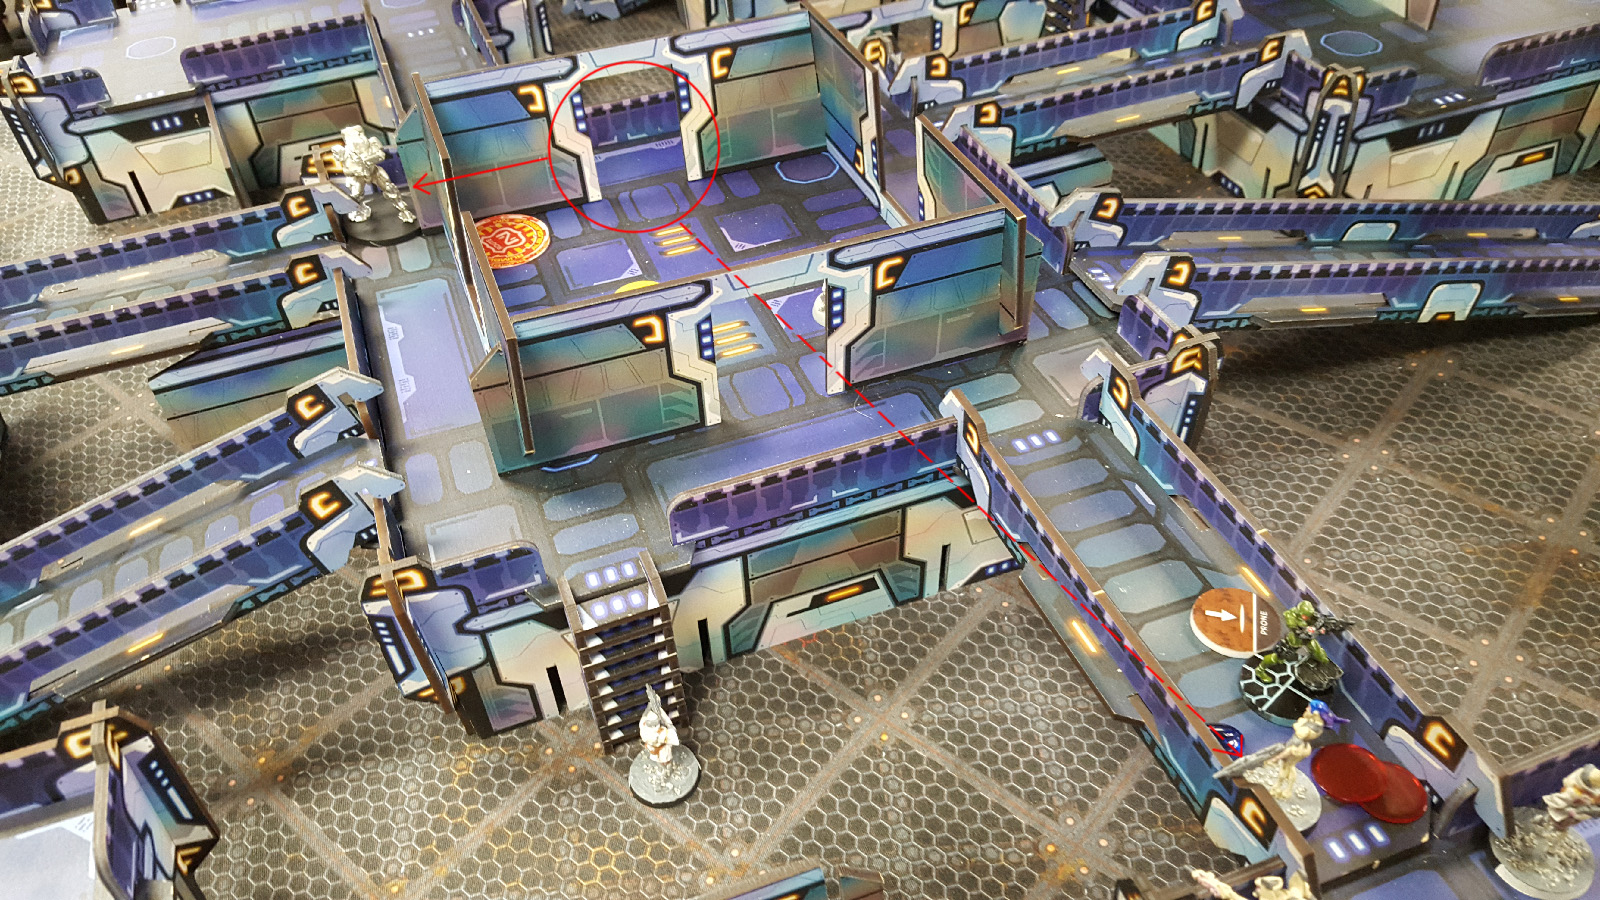
 The time for the Gamma to finally shine has come as he loops around the O-12 right flank to open fire at the Asura again, this time with cover on his side. The Asura continues her stand, but unfortunately fails and doesn't tank the AP/Double-Action rounds of the Gamma so she is removed from the board. The Gamma then proceeds to acquire vengeance for his wound against the Dakini from before and eliminates him completely as well.
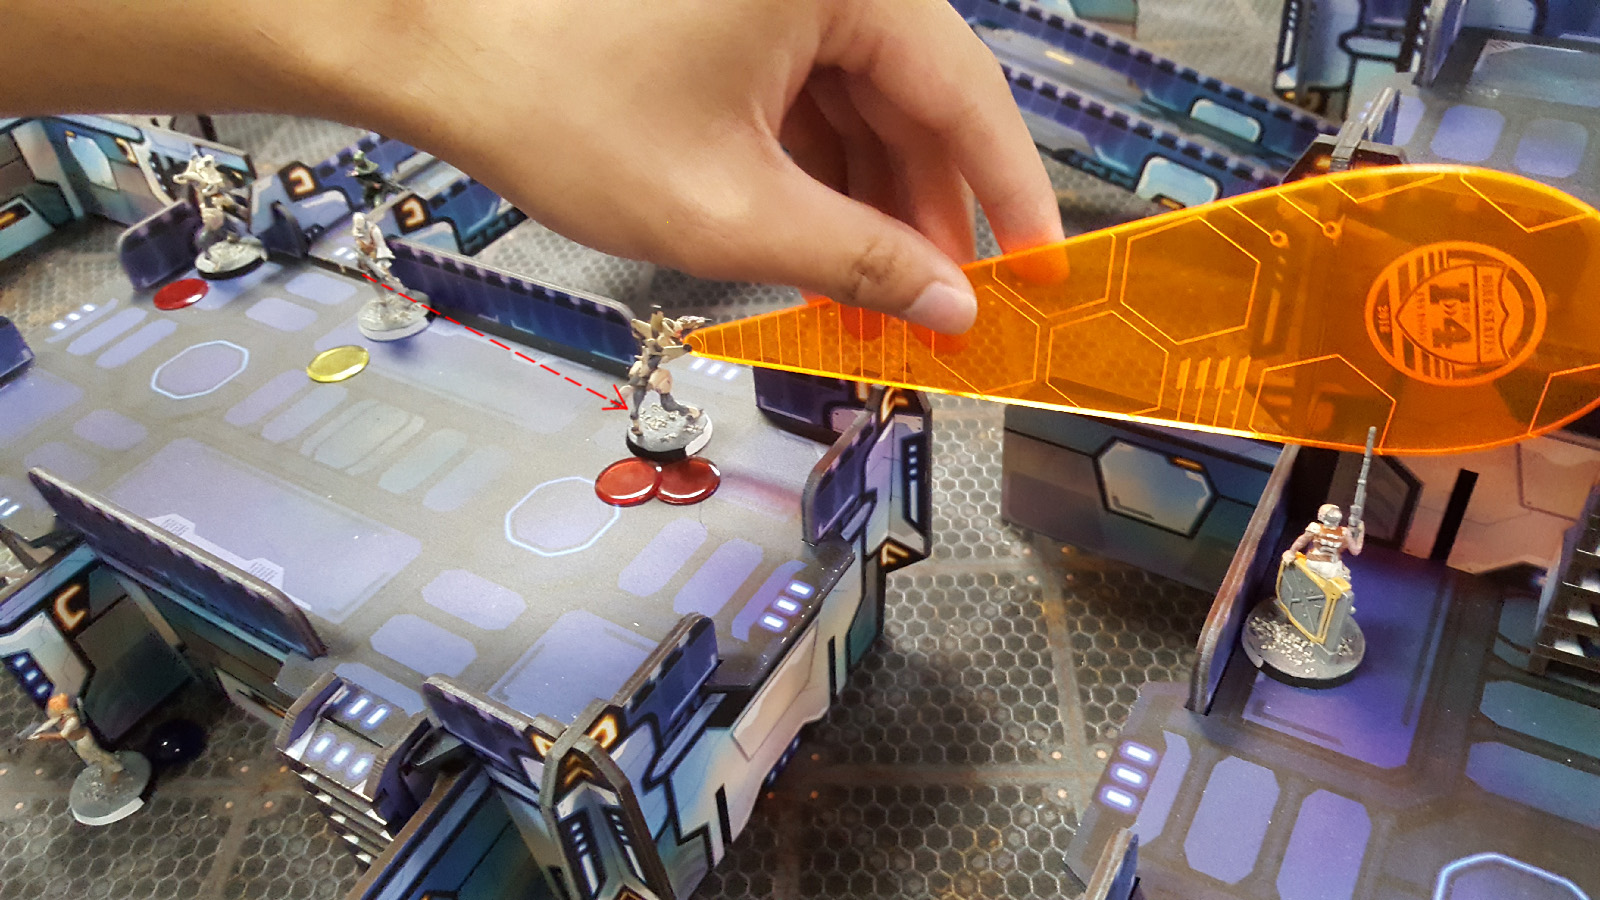 With all ARO pieces removed from the Plasma Lynx's path he uses the final O-12 order to sneak around the corner of the bridge into the back arc of the Yadu Trooper and fire plasma rounds into the smoking corpse of the HMG Dakini. This puts the plasma template onto the Post-human Mk. 2 sniper who fails the subsequent dodge and armor/bts saves to be completely eliminated as well.
 First things first: the Lynx needs to die. The Yadu Trooper slides around the corner of the bridge to face off with him using her AP rounds of her multi-rifle and removes him from the table.
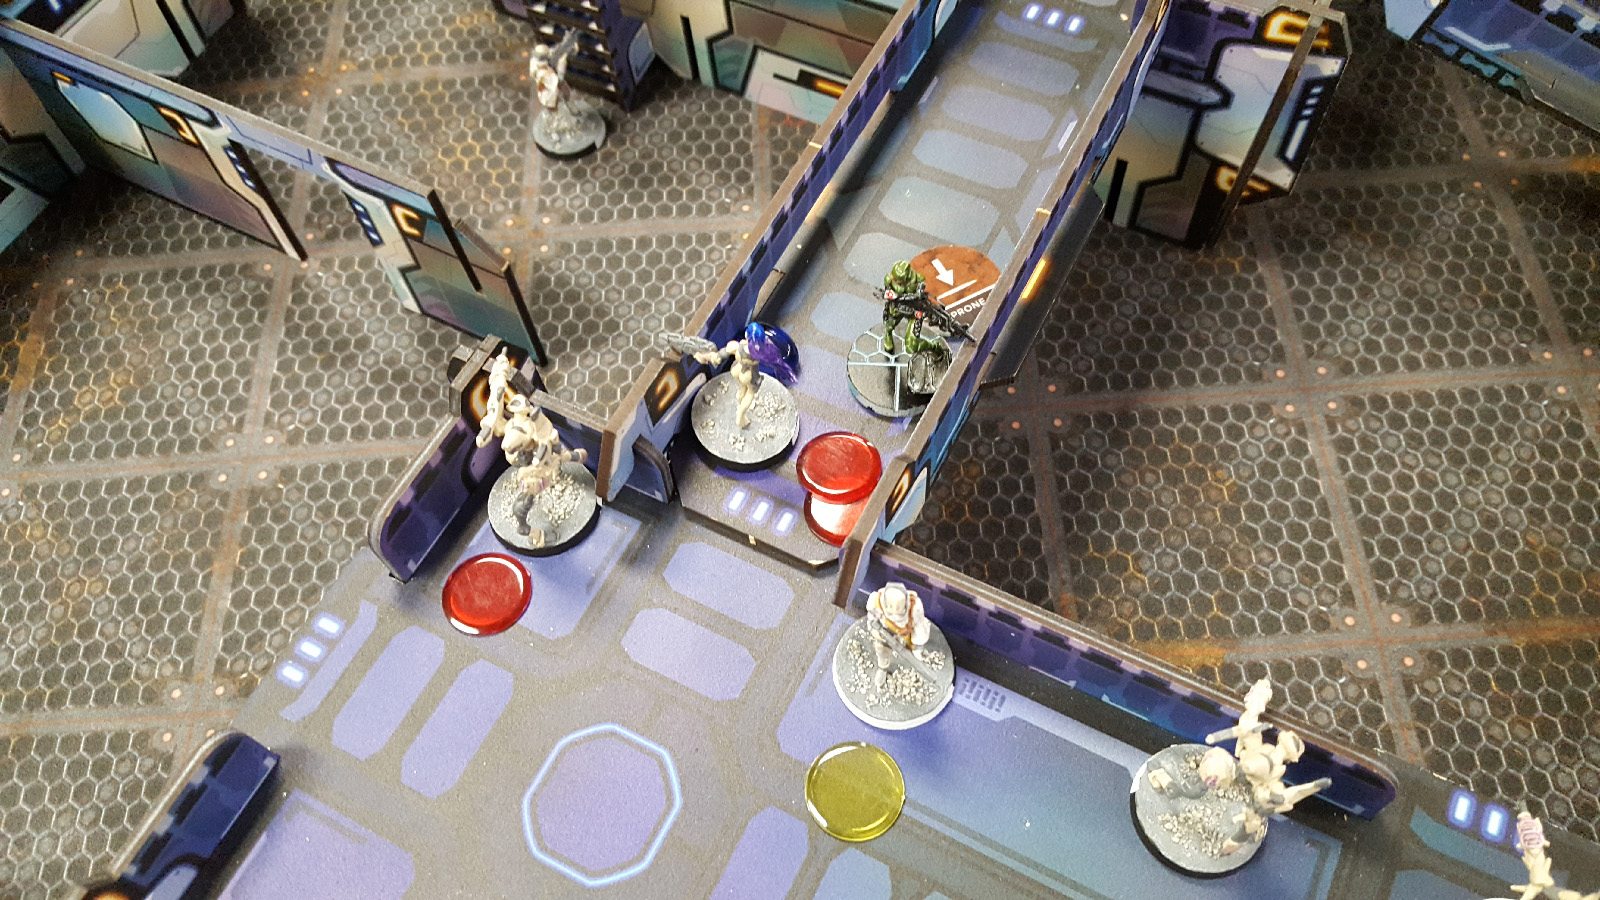
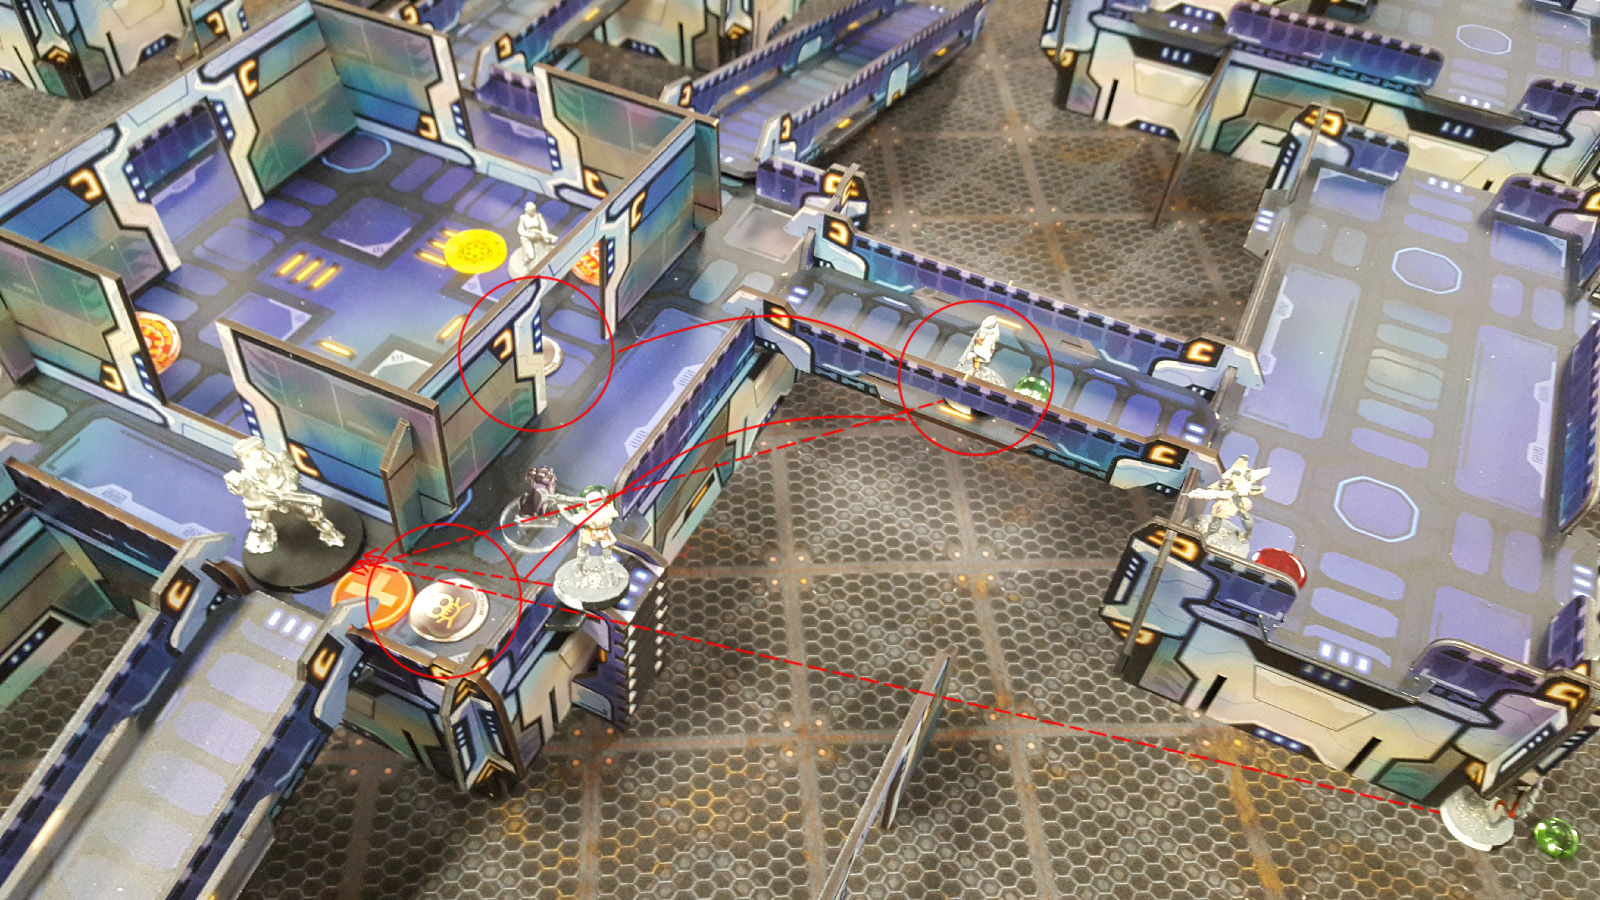 Now there's just a room to take and a gargantuan Gamma unit to deal with. The Yadu Trooper moves up the bridge in her prone state until the Gamma won't be able to see her. She then throws dropbear mines into the room and in front of the Gamma unit to setup the next play. OSS then uses a coordinated order, breaking the Deva out of what's left of the Dakini link and joining her with both Yadu Troopers to give three lines of fire on the Gamma unit. O-12 opts to fire a riot-stopper at the Yadu Trooper on the ladder with the Gangbuster that's in the room and attempt to fire back at the other Yadu Trooper with the Gamma to reduce damage from the spearhead of the order. Both mines go off and the Gangbuster is killed, but the Gamma is uninjured by the other mine. The riot-stopper sticks the Yadu Trooper onto the top of the ladder, but no damage is dealt from all the lethal attacks.
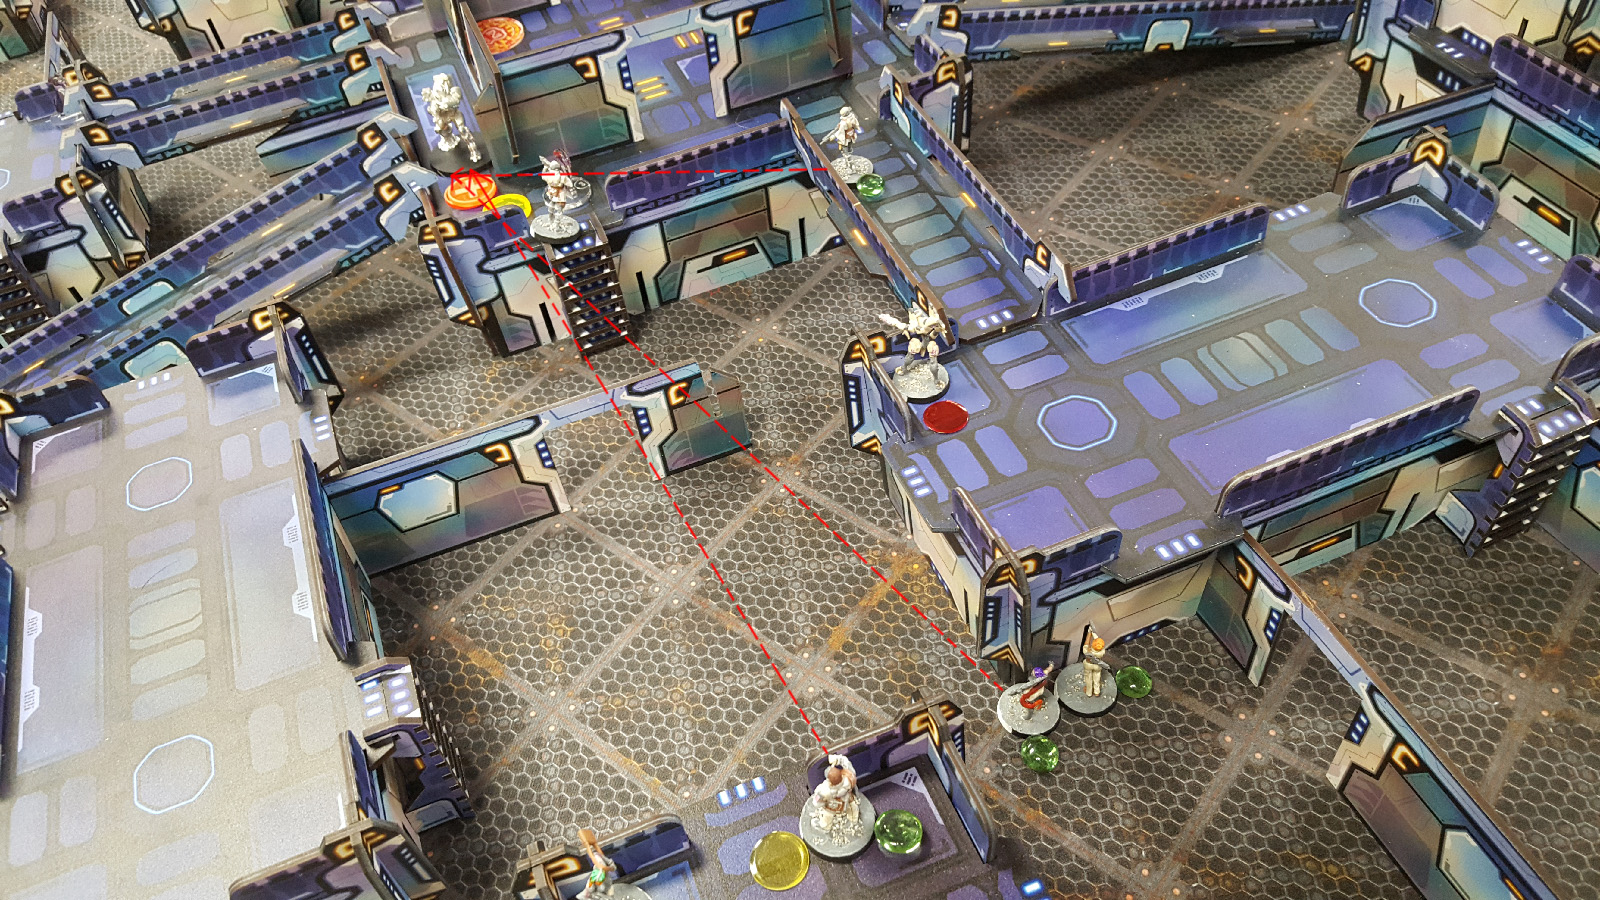 With options running low and a Gamma still shining a smirk across the way, OSS uses another coordinated order to attempt another mass shootout. This time the coordinated troops include the remaining Yadu Trooper, the Deva, and the Shukra Consultant who spearheads the order with two shots from his multi-rifle. The Gamma can't pass on the opportunity to knock out the lieutenant of the OSS force and opt to fire back at the Shukra consultant to put the nail in the coffin. The shot from the Gamma fully misses and the Shukra alone manages to land two AP rounds into the Gamma. The Gamma fails both armor saves and is removed from the board as a result, but the Shukra is left slightly exposed from his cover vantage point.
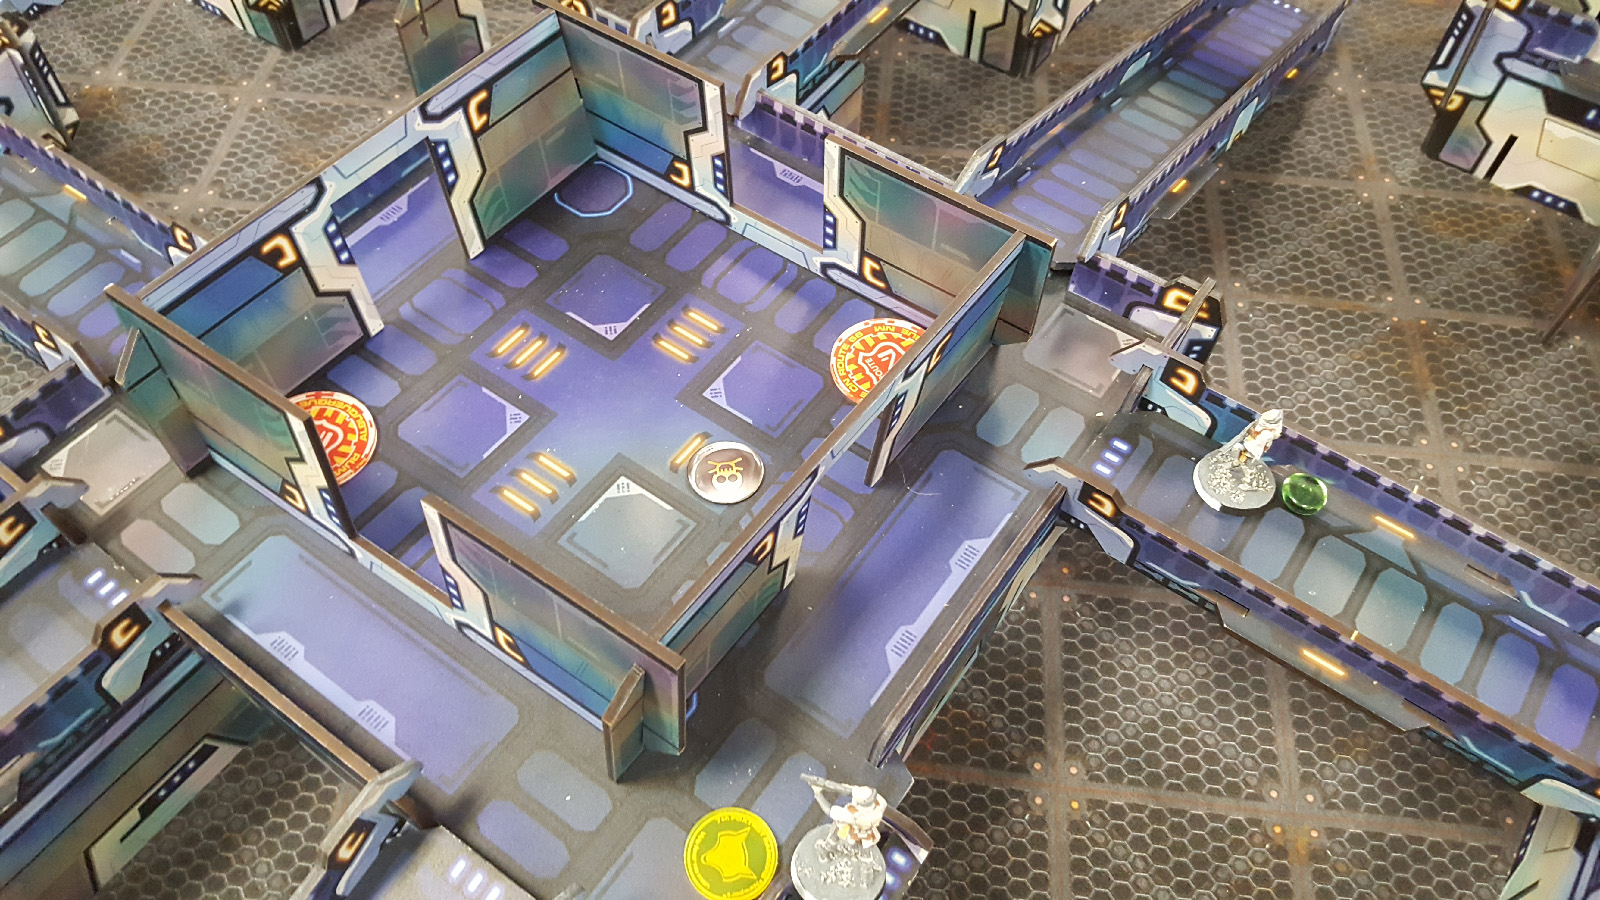 With only 1 order left and mad traps guarding the OSS right flank of the objective room the remaining Yadu Trooper decides to throw her final dropbear mine into the room and make reclaiming it any more difficult for O-12 in their final turn. She unfortunately also fails a save roll against a madtrap in the process and is put into IMM-1 at the end of the bridge in the process.
 With only a few orders left in the game, O-12 uses their final coordinated order to move their last Gangbuster into the armory room along with his madtraps while also advancing their Beta unit up along the upper O-12 left flank. The Beta fails to dodge the resulting attack from the mine, but tanks the armor save. The Gangbuster is caught out by the Shukra consultant as he moves into the room and fails to make an armor save against the shock ammo so he is removed from the board.
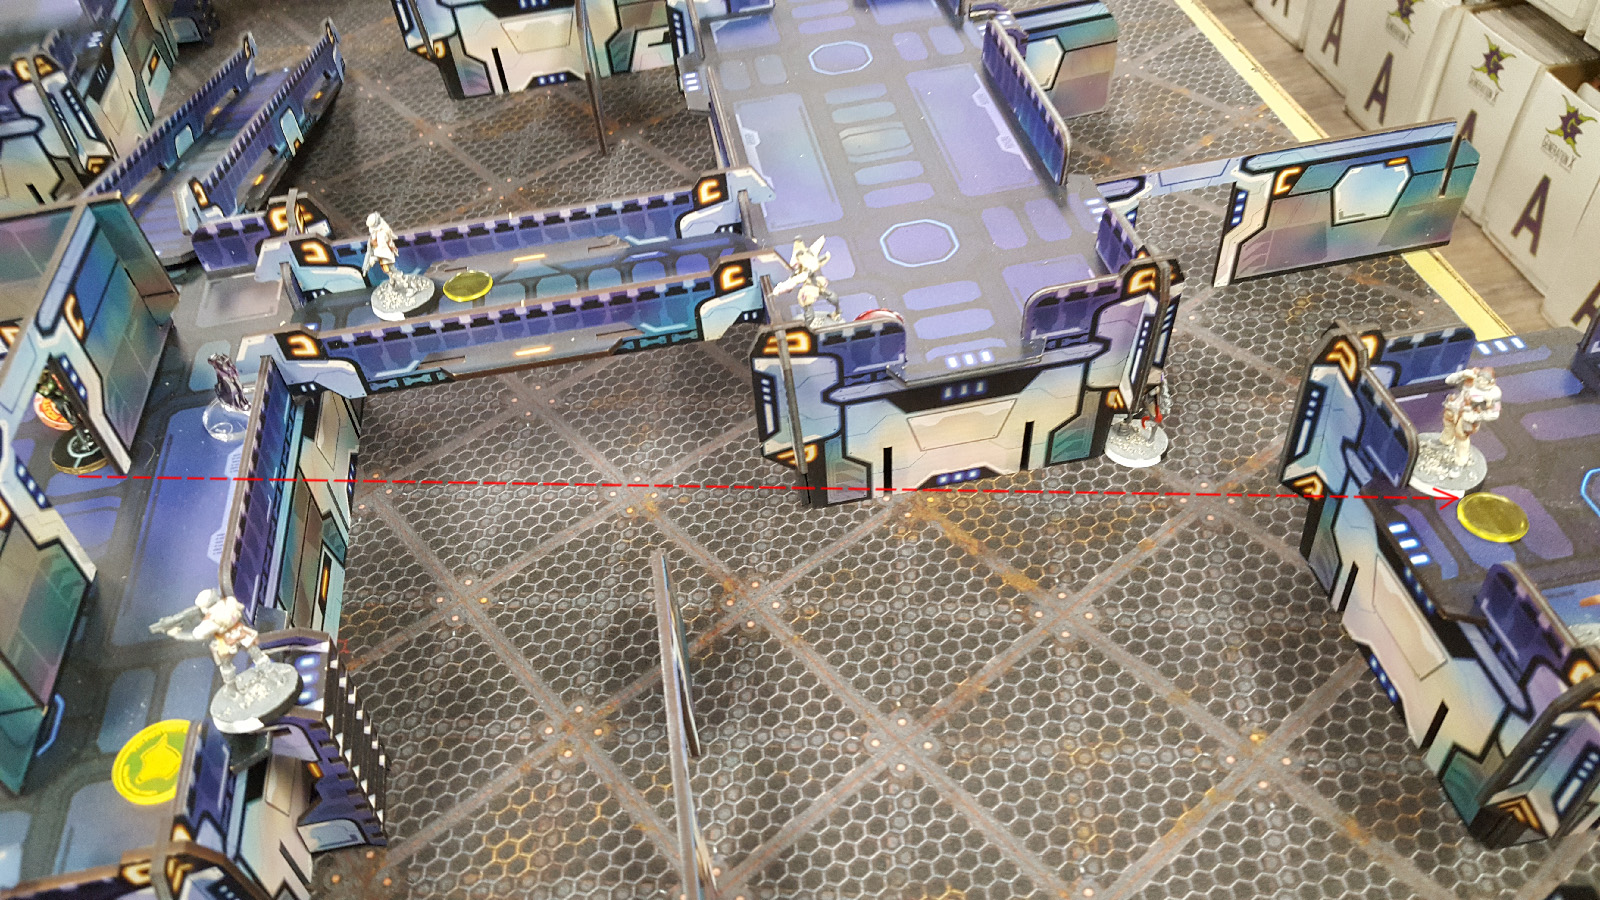 With the final order of O-12 turn 3 the Beta trooper moves into the armory room, sets up against the door near the OSS side of the table, and takes shots with her SMG at the exposed Shukra Consultant. Drunk off of success he's had so far the Shukra decides to fire back instead of attempting a dodge and fails two subsequent armor saves against shock SMG rounds to be removed from the table, putting OSS in loss of lieutenant.
It's worth noting at this point that OSS did not realize that both Yadu Troopers are still alive and have the veteran skill so they would still provide regular orders. OSS also had a command token available, which they used to convert one irregular order into a regular order at the beginning of the turn.
The final turn should have allowed OSS 3 regular orders and 2 irregular orders to make any final plays, but as the game was played OSS only took 1 regular order and 4 irregular orders (two of which were the Yadu Troopers who had been put into IMM-1 in previous turns).
 The Deva unit uses her irregular order to fully move up at ground level to approach the armory room and is locked in place by the only madtraps remaining. This clears the way for OSS to possibly move into the room without worry of any more IMM-1 state.
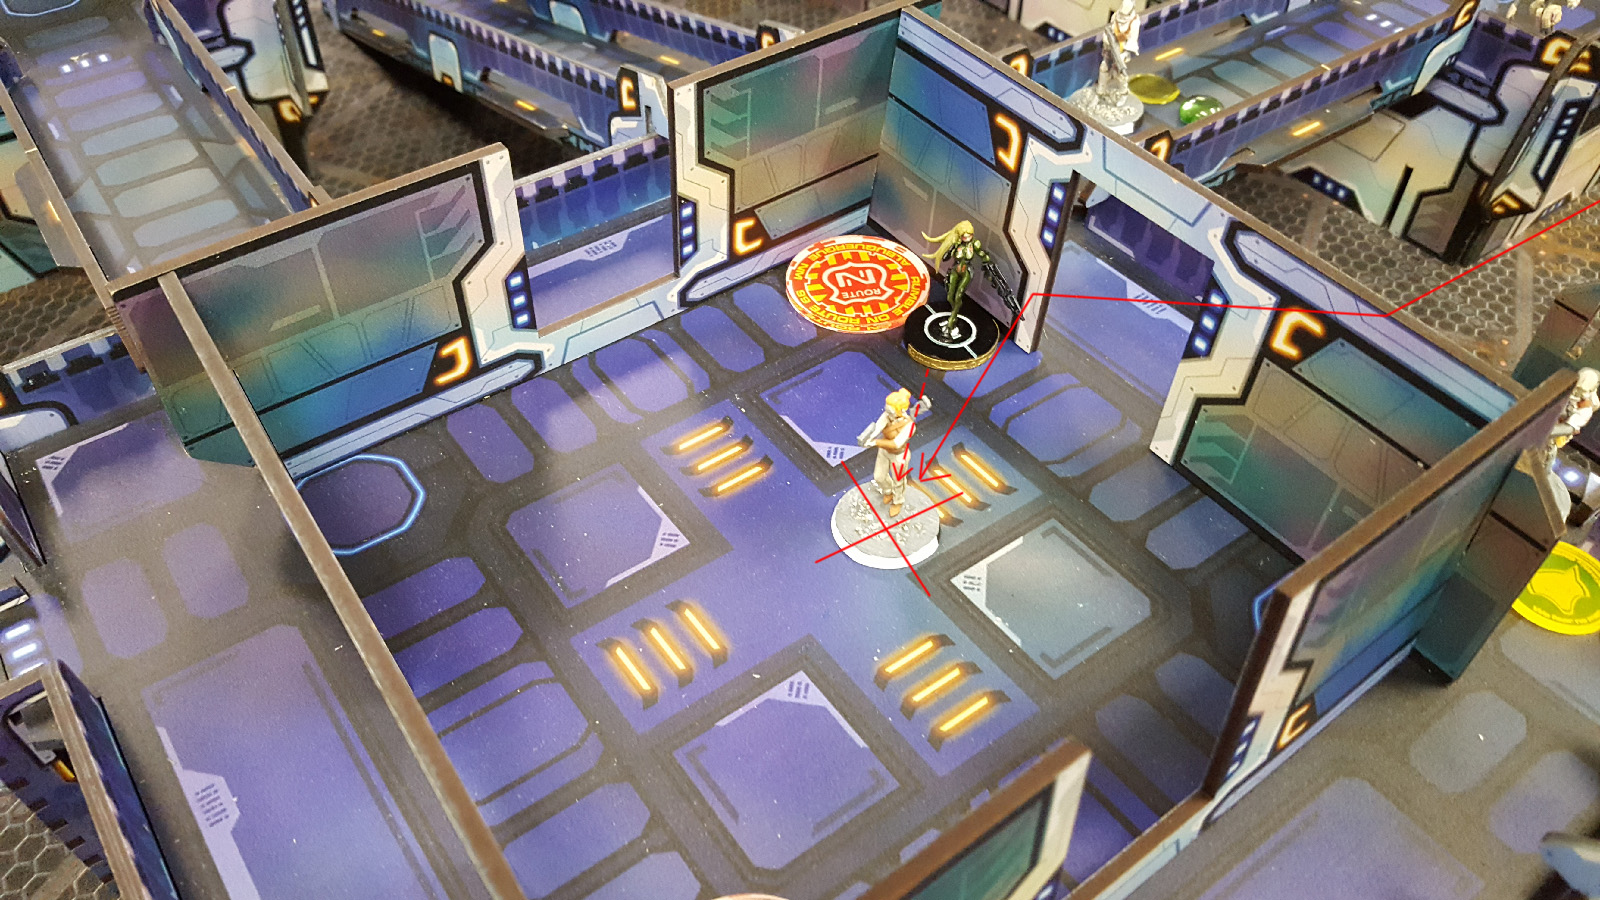 The CSU follows the lead of the Deva and uses her irregular order to get near the base of the objective room. The CSU then uses the full range of her super-jump to prove her worth to the O-12 and show that she deserves a promotion onto the team instead of this corporate security gig. Unfortunately this means that she's fully exposed to the Beta during the jump and is shot in the back with shock rounds to completely remove her from the board and the turn is over. Final score for O-12 is 8 (2 rounds with room, final round with room, took an item from panoply) and final score for OSS is 0.
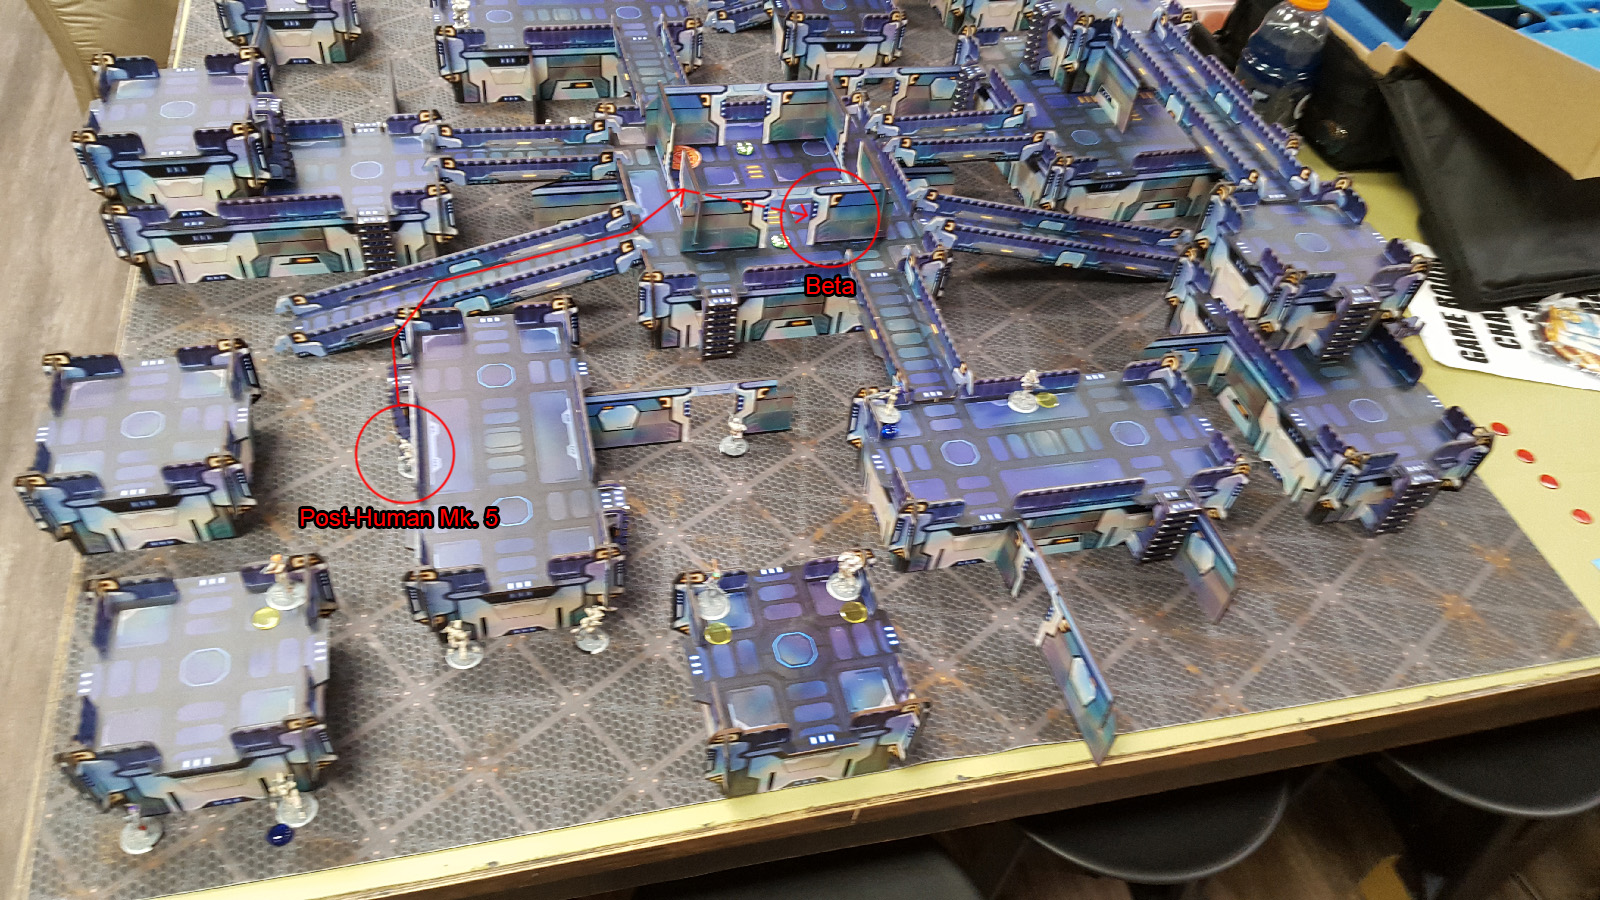 The Deva unit would still use her irregular order to clear both madtraps at the beginning of the turn. The remaining irregular and 3 regular orders could be spent on the Post-human Mk. 5 to advance up the ramp from the OSS left flank to enter the armory room from the side and catch the Beta out of cover with his double-SMG. O-12 did have the ramp partially covered with an ARO from their Cyberghost wielding a combi-rifle, but the Mk. 5 has NWI and cover from the ramp once he's on it. After reaching the room the final shootout would be 4 shots on 13's from the Mk. 5 against 1 die on a 16 from the Beta trooper for complete control of the room. If the Mk. 5 won that shootout then the final score would be O-12 scoring 3 points (1 round with the room and 1 item from panoply) and OSS scoring 5 points (1 round with the room and the room at the end of the game). The purpose of this final note is not to downplay the victory of O-12, but to provide a learning experience for those interested and hopefully provide a more climactic ending than what actually happened in the game. All in all it was well played by O-12 and the victory is well earned and deserved.
Battle Report Author

Army Lists Used In This Battle
Recommend Commander For Commendation
Share this battle with friends
Claudius SolWins

amazing terrain set! better luck next time
Gorgeous terrain, makes for a really crisp report
Which company makes those terrains?
Father Knight Luisjoey of Santiago de Leon
#DEUSVULT
Sad loss but great report! Also… I’ve played on that table before!
Terrific batrep, keen to see a rematch.
“Regrettable loss” was what I was trying to write, but tiny virtual phone keyboards are difficult.
Keep up the great work, Commander!
A regrettable let as, but an excellent report! Great write-up and pictures, Commander!
Really great report! Jeez!
The terrain wasn’t mine so I had to ask my opponent about it before responding to anyone.
Manufactured by Hexagon Mill: http://hexagonmill.com/
Very sturdy and nicely modular for creating a good variety of layouts.
Fantastically-written report! Excellent job. Also seconding the question of the terrain.
Great report! Taking notes!
Nice good structured report!
Really well done report! Terrain looks great!
Good report and beautiful buildings 🙂
Very nice Report, good Pics and very detailed. Who is the manufacturer of the Terrain? Is it Cardboard?
THX!
Nice report. Too bad on the loss, but hey losing a remaining exercise versus our allies ain’t bad.
Tons of impressive pics, nicely done! Better luck next time
Really impressively detailed, well done