Fought At The Gallery Maze: The Passageways
1661 days 8 hours 19 minutes ago
Gallery Maze Clean Up with the Bakunin Expeditionary Force
300 POINTSOnce again we set up for our local game night. This week DoodleKing and I agreed to play Looting and Sabotaging from the Asteroid Blues phase 2 packet. After we arrived for the night and selected our table, rolled some WIP and got started.
Wip Roll
Jurisdictional Command of Bakunin – 11
Shasvasti Expeditionary Force – 2
Decision: Jhokalups
Deployment: DoodleKing
Initiative: Jhokalups
1st Turn: Jhokalups
1st Deploy: Jhokalups
Shasvasti Expeditionary Force List:
https://army.infinitythegame.com/index.html?l=GwBgzAPmIhAiB7BATANgUwNIEsB2BzAAgBkBqAZQgCYBWAUgEYqBOMOgFgA4qQ6BCAOx0awIT1r8GwYQOk8aDSbxoDe7AZ2l8Gy1Rw1bpIuTGb8jwEyDN9Ow4HfUChfKu0YtFXEItfumzF6cIEIAAlRCAUJcYC4RHszRnLGSdip28mzaaRp0mXShoUA=
Jurisdictional Command of Bakunin List:
https://army.infinitythegame.com/index.html?l=KwBgzAPmIhAyBqAygAgG4CYoFIAsA2AdmwEZ8AOYbAQlzwtIvJozD3OIwE4N8XnC5DNm5gq1DHVzlmJQmJpc880oRBLqS3CrnrFyttwwgWJ6XTkZm1EmcIXCJYQAFbyh05pvtH4TfpUZGrYzs5AA
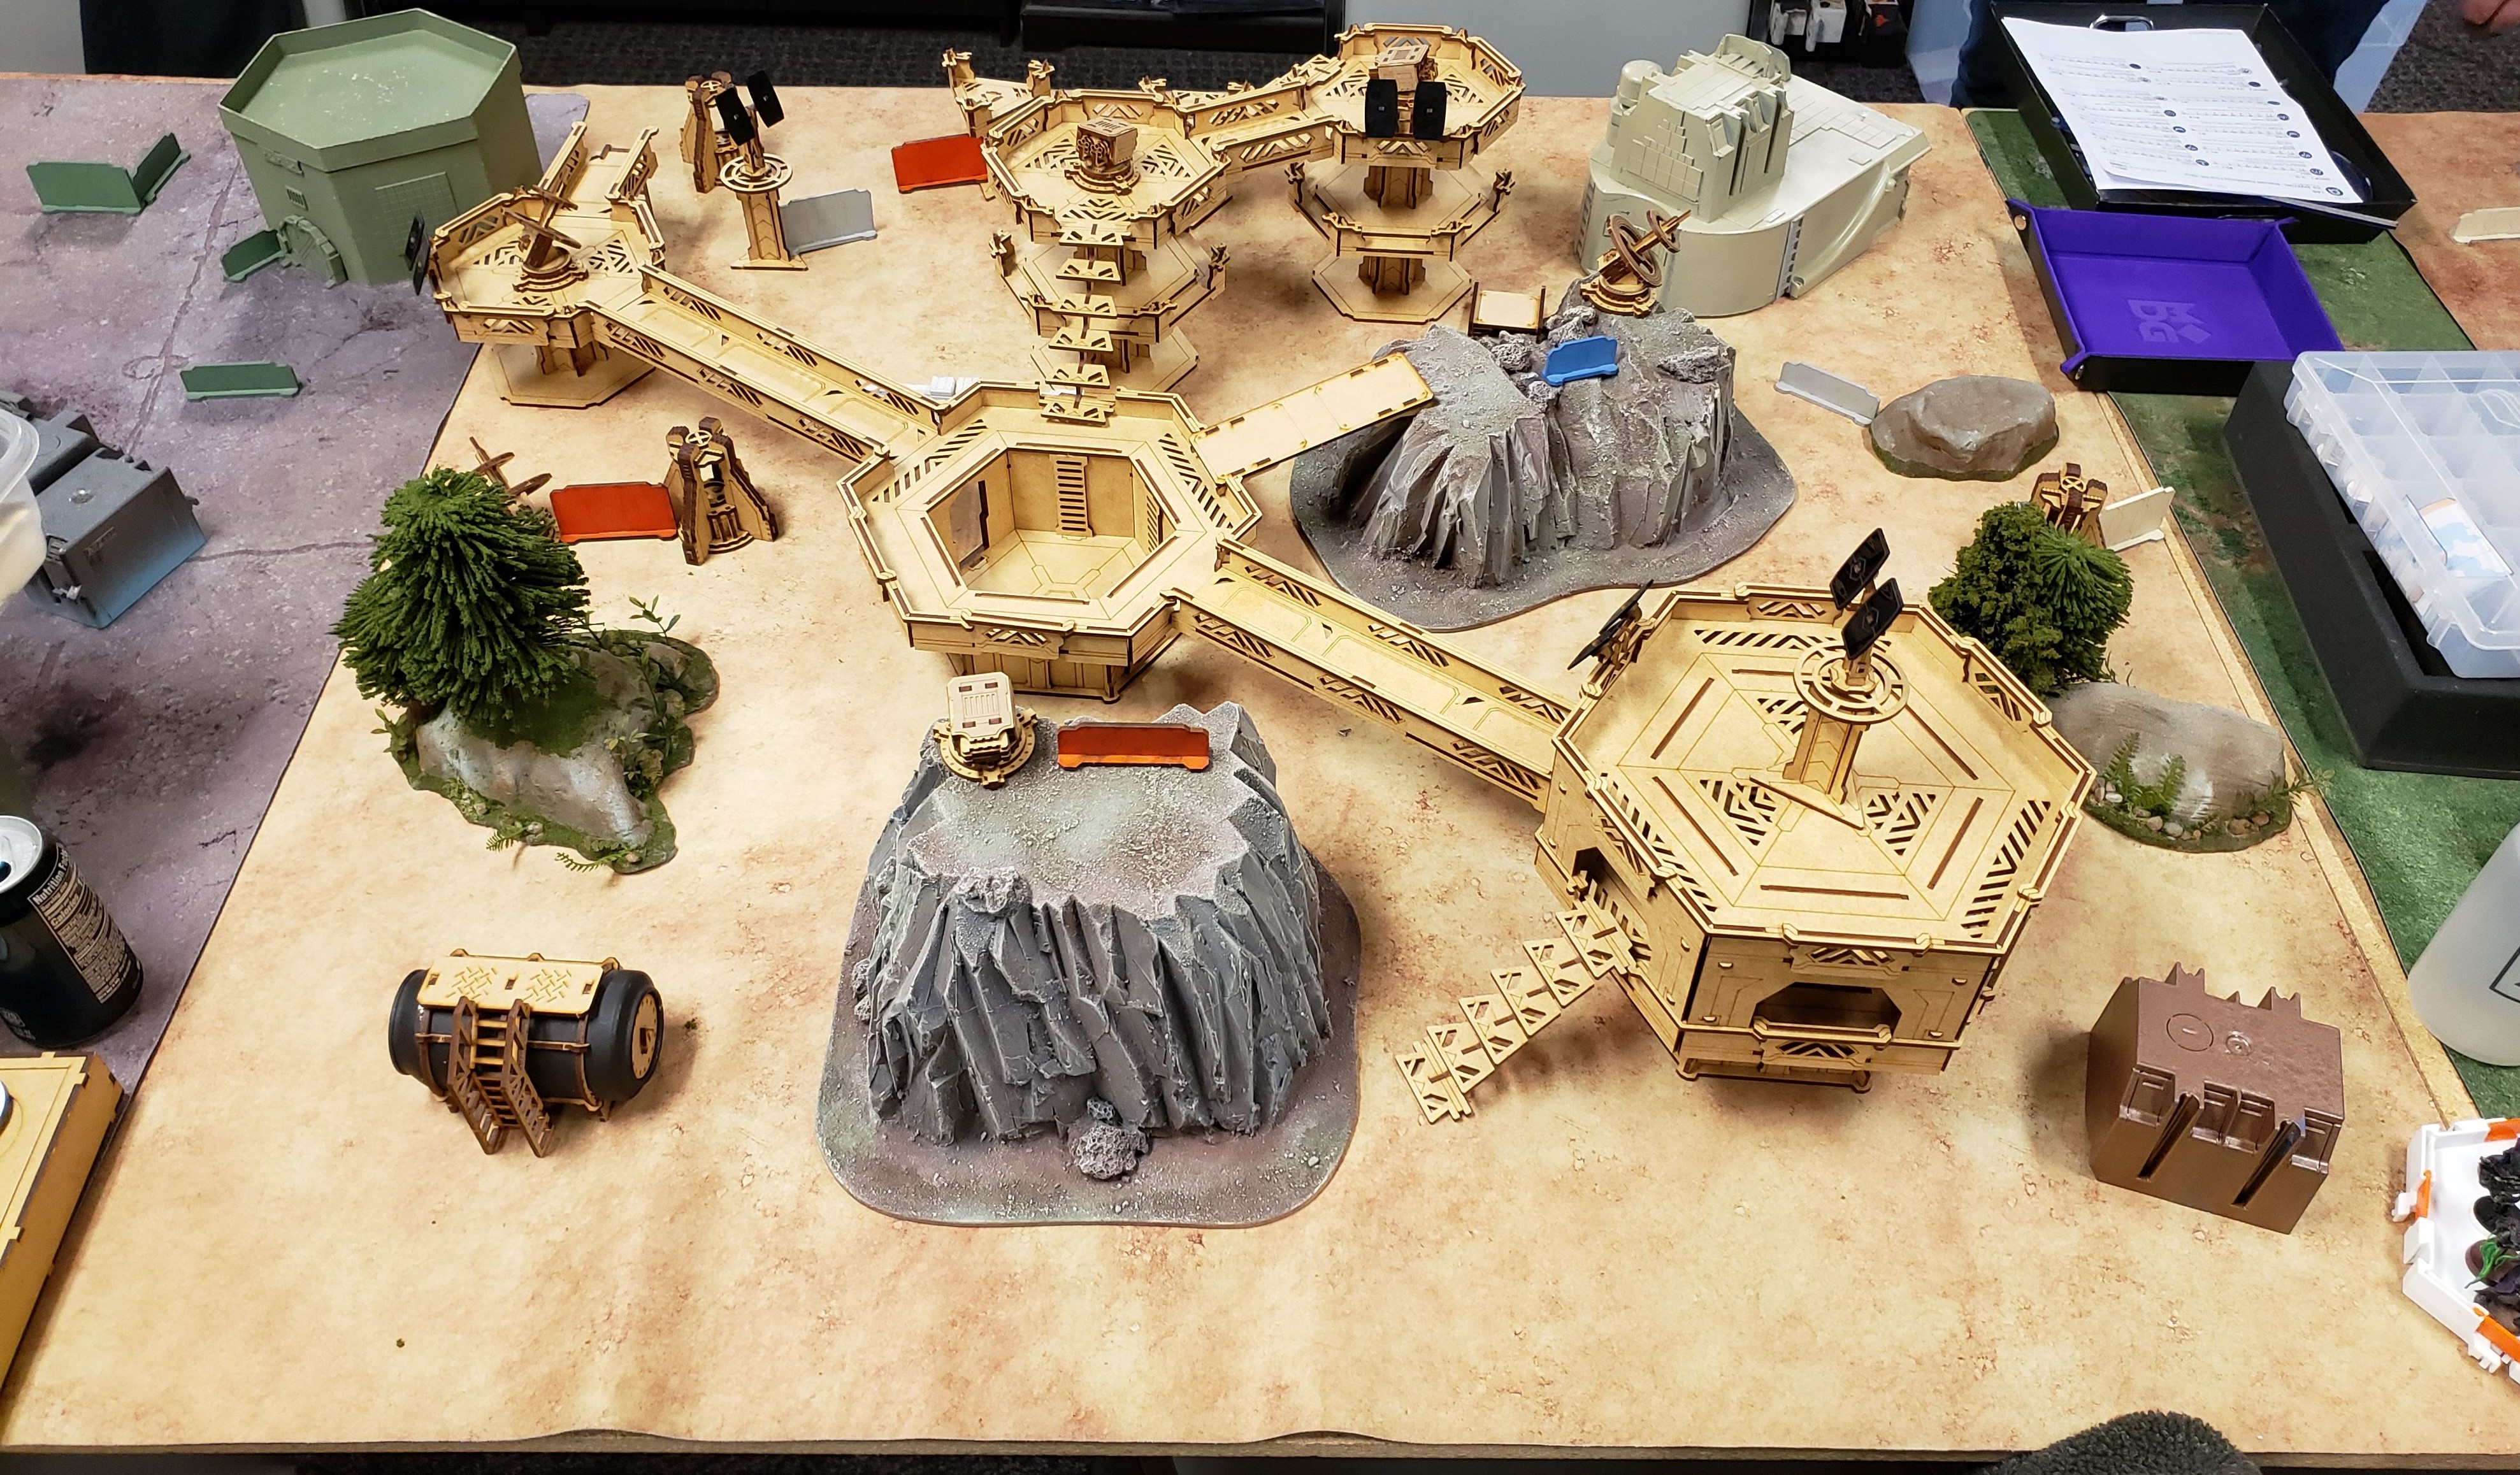
I’ve really enjoyed some of the terrain our store has for it’s games. The mix of rocks and catwalks gives a nice feel that this could be the inside of an asteroid. The three level set up we had provided some nice tactical layering to think about. Unfortunately I didn’t have any hollow men to make the most of mobility between levels. I chose to go first and was assigned the side at the bottom of this picture.
Deployment:
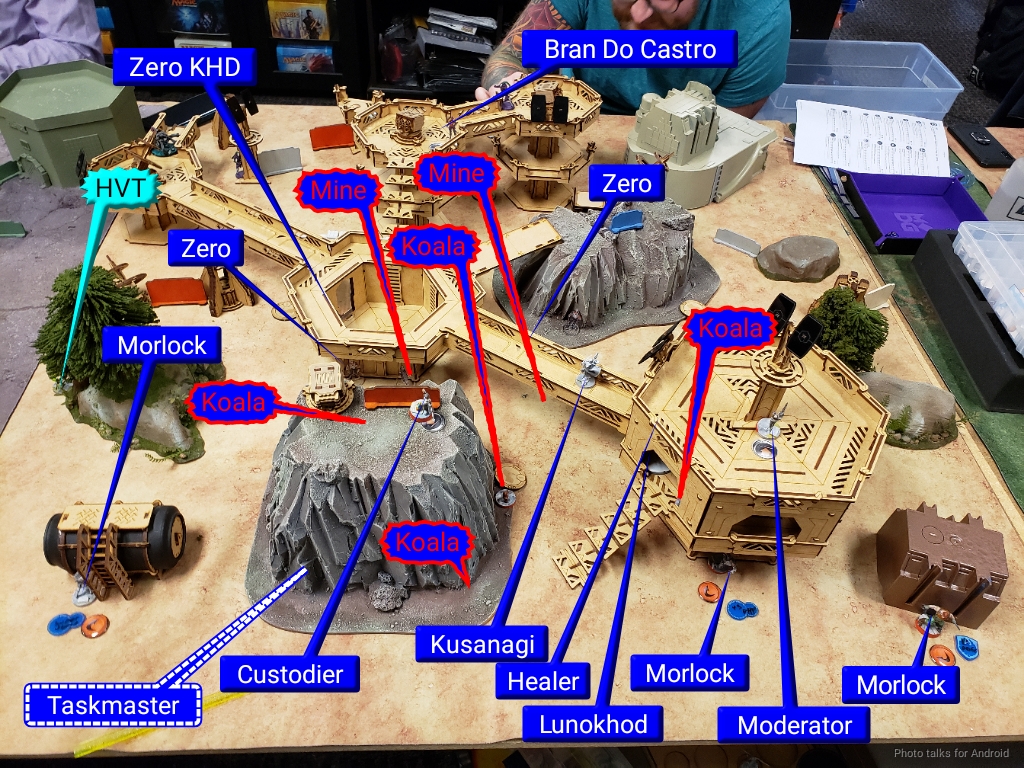
The first thing I did was over infiltrate Bran to threaten the AC2. My Reverend Haris was on the middle level with the Custodier prime behind cover. Kusanagi was set up to start attacking right away. My Morlocks were on the left right and middle. My zero minelayers were set up to cover the AC2 approach. The lunokhod was up high with the koalas covering the AC2 as well. My moderator was up on level 3 prone. Finally, my taskmaster was my reserve and covered my left flank.
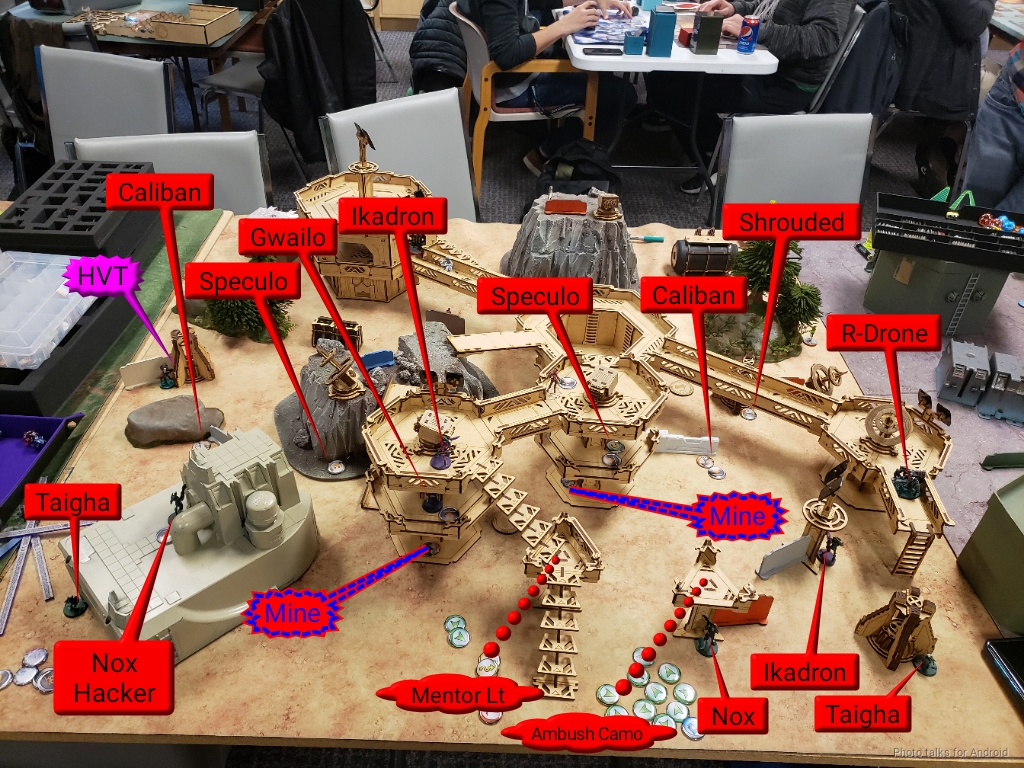
DoodleKing set up his deployment to try and deal with a over-infiltrated camo marker. The Speculos set up nearby with their mines covering the AC2. The Gwailo set up on the second level centrally. On the left and right a Nox covered a Taigha. The R-Drone was far right on the second level, watching where Kusanagi would stand up. The Calibans were forward on the left and right. With a Shrouded further up on the right. The Ikadrons were right and central. With the central one looking towards my Bran in Camo. Finally the Mentor Lt and its ambush camo marker went on the central back.
Top of 1: Jhokalups Bakunin
To start this party off the Morlocks all run forward. I can then use their irregular orders to run them all forward again. Then I activate Kusanagi and the Haris to take out the R-Drone and the Ikadron up high. Next Kusanagi discovers and takes out one of the mines covering the AC2. I have my Taskmaster put his Koalas into Stand-by before walking around the corner to shoot the other Ikadron. I spend a couple orders on Bran to try and get him by the AC2, but I forgot about a mine and so he is forced to dodge. Out of orders I end my turn.
Bottom of 1: DoodleKing Shasvasti
The Taighas run forward and safely dodge the AROs. The Gwailo then peaks out to start taking shots at Kusanagi. After a couple shots Kusanagi goes down. Running the odds on this exchange, it looks like this was not a favorable exchange for the Gwailo. Fortunately for DoodleKing the Gwailo makes it out unscathed.
After taking down Kusanagi the Taigha on the right comes around and Chain Colts down Bran. Then the Gwailos takes a shot at the Lunokhod and destroys it, taking out two of my Koalas and the Reverend healer with it. That done, DoodleKing ends his turn.
Top of 2: Jhokalups Bakunin
With Plan “A” (Bran) out the window. We are on to Plans “B”, “C”, and “D” (the morlocks). In running my Morlocks up I took out the Taigha on my right and performed a coup de gras do get my classified done. I then pull something out of the panoply before hunkering down. I lose one morlock to a shooting fight as I try to walk it forward more to try and set up a smoke screen to cover getting to the AC2. My last Morlock baits out a shrouded before going down to that same shrouded. I bring up my task master, taking out the Nox trooper on my left, clearing a mine and refilling Koalas from the second Panoply. After moving him a bit more forward to bring the Koalas way up, I end my turn.
Bottom of 2: DoodleKing Shasvasti
The main focus of DoodleKing’s turn was on advancing up a Camo marker that turned out to be a Chain of Command Caliban. After making it all the way up to my AC2, avoiding mines and fire from my Zeros the Caliban finally goes down. The shrouded then completes it’s classified against my unconscious Morlock. The Mentor lt reveals itself to fire at the Taskmaster, does a wound but fails to kill. After all this he ends his turn.
Top of 3: Jhokalups Bakunin
I start by attempting to have the last Morlock make it forward to the AC2, but it goes down to a combination of a mine and shock marksman rifle. The shock was unfortunate as this Morlock rolled V: Dogged for its metachemistry. The Taskmaster didn’t have enough orders to make it to the AC2, so I had my Zero come out to surprise shot down the Mentor Lt.
Bottom of 3: DoodleKing Shasvasti
Here we had a bit rules fumble, one of the remaining Camo markers was a Caliban with Chain of Command, so we played this turn as loss of lieutenant. So, in loss of lieutenant DoodleKing didn’t have enough points to get to the AC2, so he focused on maximizing points. He managed to take out my Taskmaster before ending his turn. With both AC2s undamaged and a classified each it came down to who had more things from the panoplies. With the two things I got them I got that point, making it a:
Final Score: 5 – 4 Bakunin Minor Victory

Battle Report Author

Army Lists Used In This Battle
Recommend Commander For Commendation
Share this battle with friends
JhokalupsWins

Nice game!! Congratulations Bakunin Bromad!!!
That’s rough with the CoC, but lesson learned I hope. Congrats on the win and keep up the good work!
Thanks Nazroth, Bakunin was where I started Infinity and is my happy place. It’s good to come back to the sectorial.
Kudos for taking points with Bakunin! Good job.